WANT TO SAVE THIS RECIPE?
Are you craving a quick, tasty meal? Chicken onigiri is the perfect choice! This simple dish brings flavors and comfort together in one easy-to-make package. In this post, I’ll share the ingredients, step-by-step instructions, and tips to create perfect chicken onigiri at home. Whether you’re a beginner or a pro, you’ll enjoy making this yummy dish that’s sure to impress! Let’s dive in!
Why I Love This Recipe
- Easy to Make: This recipe provides a straightforward approach to creating delicious onigiri, making it perfect for both beginners and seasoned cooks alike.
- Customizable Filling: You can easily swap out the chicken for your favorite protein or even a vegetarian option, allowing for endless variations.
- Perfect for Meal Prep: These onigiri are great for making ahead of time and can be enjoyed as a snack, lunch, or picnic treat.
- Flavorful and Fun: The combination of savory chicken, sesame oil, and furikake creates a delightful taste experience that is both satisfying and enjoyable to eat.
Ingredients
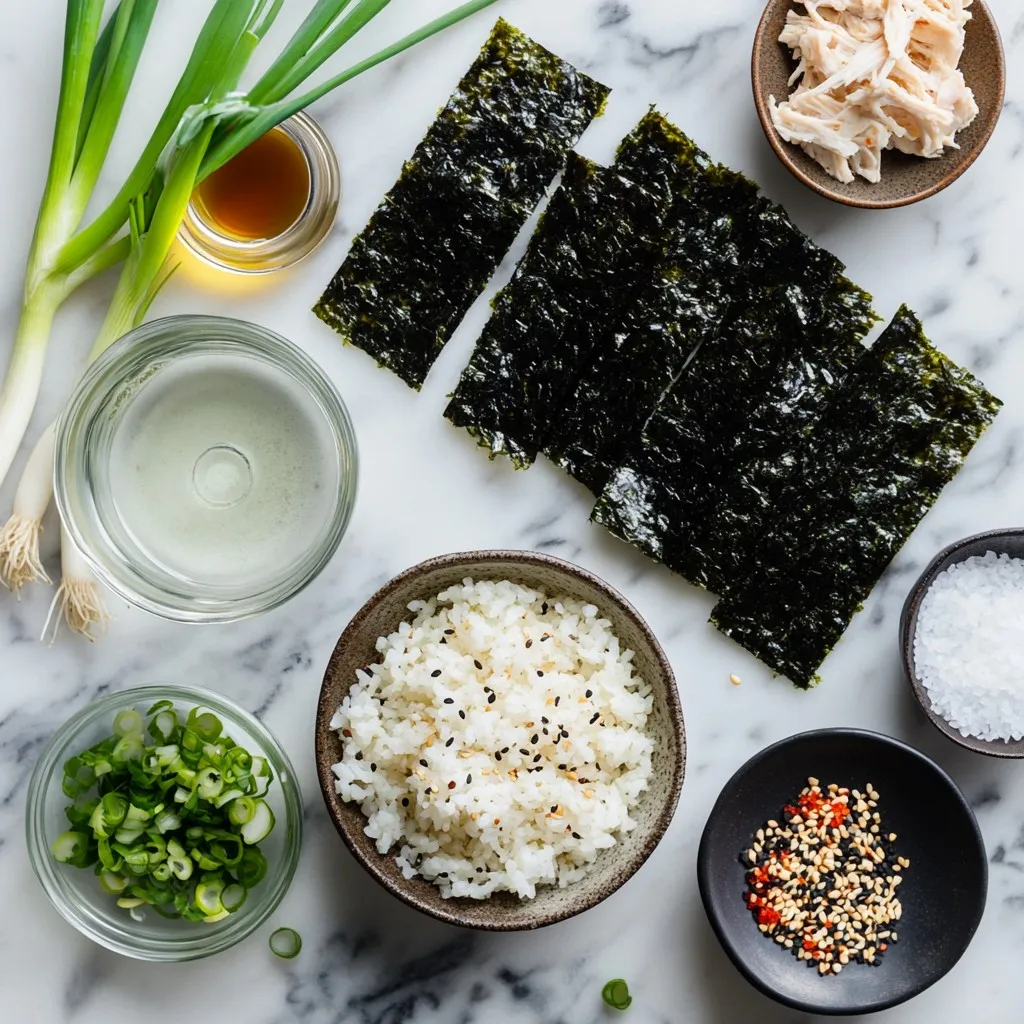
List of Ingredients
– 2 cups sushi rice
– 2 ½ cups water
– 1 cup cooked chicken breast, shredded
– 2 tablespoons soy sauce
– 1 tablespoon sesame oil
– 1 tablespoon mirin (optional)
– 1 teaspoon salt
– 4 sheets of nori (seaweed), cut into strips
– 1 tablespoon furikake (Japanese rice seasoning)
– 1 green onion, finely chopped
Substitutions and Modifications
You can swap sushi rice for short-grain rice. This still gives you a nice texture. If you don’t have chicken, try cooked shrimp or tofu instead. For a vegan option, use soy sauce with no animal products. You can leave out mirin if you want a simpler taste. Substitute the nori with lettuce leaves for a lighter wrap.
Nutritional Information
One serving of chicken onigiri has about:
– Calories: 350
– Protein: 20g
– Carbohydrates: 50g
– Fat: 10g
– Fiber: 2g
– Sodium: 400mg
This meal is a great source of protein and carbs. It gives you energy for the day. Plus, it includes healthy fats from sesame oil. It’s balanced and tasty!
Step-by-Step Instructions
Preparation of Sushi Rice
First, rinse the sushi rice. Place it in a fine mesh strainer. Run cold water over it. Stir gently with your hand until the water is clear. This step removes extra starch. It helps make the rice fluffy.
Next, cook the rice. Combine it with 2 ½ cups of water in a rice cooker. You can also use a pot on the stove. Follow the package instructions for cooking time. Once done, let the rice cool a bit. It should still feel warm.
Making the Chicken Filling
While the rice cools, prepare the chicken filling. In a medium-sized bowl, mix shredded cooked chicken with soy sauce, sesame oil, and salt. If you want, add mirin for extra flavor. Blend these well and let them sit for about 10 minutes. This time allows the flavors to mix better.
Forming and Shaping Onigiri
Once the rice has cooled, dampen your hands with water. This step helps keep the rice from sticking. Take about 1/3 cup of rice and shape it into a ball. Use your fingers to create a small indentation in the center. Spoon a good amount of the chicken mixture into this space.
Now, carefully mold the rice around the filling. Shape it into a triangle. Press the rice together gently but firmly to hold the filling inside. Repeat this until all rice and chicken are used.
After shaping, sprinkle furikake on each onigiri. This adds a nice burst of flavor. Wrap a strip of nori around the bottom of each triangle. This makes it easy to eat and adds a tasty contrast. Finally, sprinkle chopped green onion on top. It makes the dish look and taste great.
Tips & Tricks
Common Mistakes to Avoid
When making chicken onigiri, some mistakes can ruin your dish. First, don’t skip rinsing the sushi rice. This step removes excess starch, leading to fluffier rice. Another mistake is packing the rice too tightly. You want a firm shape, but not too tight. This helps keep the onigiri light and airy. Lastly, ensure your chicken filling is seasoned well. A bland filling can make your onigiri boring.
Pro Tips for Fluffy Rice
To get the best fluffy rice, start with quality sushi rice. Rinse it until the water runs clear. This helps achieve that perfect texture. Use a rice cooker if you have one. It cooks the rice evenly and makes things easy. Let the rice cool a bit before shaping. If it’s too hot, it will stick to your hands. Dampen your hands with water for easy shaping. This keeps the rice from sticking to your fingers.
Storage Tips for Leftover Onigiri
If you have leftover onigiri, store them correctly. Wrap each one in plastic wrap to keep them fresh. Place them in an airtight container. You can keep them in the fridge for up to two days. For longer storage, freeze them. Make sure to wrap them well to prevent freezer burn. To reheat, let them thaw in the fridge overnight. Then, warm them gently in a microwave or steamer. Enjoy your tasty onigiri later!
Pro Tips
- Rinse the Rice: Always rinse sushi rice until the water runs clear to remove excess starch, which helps achieve a fluffy texture.
- Keep Rice Warm: Shape the onigiri while the rice is still warm for easier molding and better flavor absorption from the filling.
- Use Wet Hands: Dampen your hands with water while shaping the rice. This prevents the rice from sticking and makes it easier to handle.
- Experiment with Fillings: Feel free to customize the chicken filling with other ingredients like avocado, pickled vegetables, or tofu for a personal twist.

Variations
Alternative Fillings
You can change the filling in onigiri to match your taste. Try using tuna or salmon mixed with mayonnaise for a creamy bite. You can also use vegetables like cucumber or avocado for a fresh taste. For a spicy kick, add sriracha or kimchi to your chicken. If you prefer a vegetarian option, use tofu marinated in soy sauce or a mix of mushrooms. This way, everyone can enjoy onigiri.
Different Seasoning Options
You can switch up the flavors by changing the seasonings. Instead of soy sauce, try teriyaki sauce for a sweeter flavor. You can also add a bit of garlic or ginger for extra zest. Use miso paste for a rich taste or add a splash of citrus juice like lime or lemon for brightness. Experimenting with different seasonings helps you find your favorite flavor combination.
Creative Serving Ideas
How you serve your onigiri can make it even more fun. Place them on a colorful plate and sprinkle sesame seeds or chopped herbs on top. Serve with small bowls of soy sauce or pickled ginger for dipping. You can also make a fun bento box by adding fruits, nuts, or other snacks alongside your onigiri. This adds variety and makes your meal look appealing.
Storage Info
Best Practices for Storing Onigiri
When you make chicken onigiri, you want to keep it fresh. First, let the onigiri cool to room temperature. Place them in an airtight container. This helps keep them from drying out. You can store them in the fridge for up to two days. If you plan to keep them longer, freezing is a better option.
Refrigeration and Freezing Advice
In the fridge, onigiri will stay fresh for about two days. Wrap each onigiri in plastic wrap for extra protection. This helps keep the rice soft. For freezing, place the wrapped onigiri in a freezer bag. You can freeze them for up to a month. When you’re ready to eat, just take them out and thaw.
Reheating Instructions
To reheat onigiri, you can use a microwave. Unwrap them and place them on a microwave-safe plate. Heat for about 30 seconds. Check if they are warm enough. If they need more time, heat in 10-second bursts. Avoid overheating, or the rice may become dry. Enjoy your tasty chicken onigiri again!
FAQs
How can I make onigiri without sushi rice?
You can use short-grain rice instead. Short-grain rice gets sticky, which helps the onigiri hold its shape. Just follow the same steps for rinsing and cooking.
Can I use other types of meat?
Yes! You can use cooked beef, pork, or shrimp. Just make sure to season it well. For a vegetarian option, try using tofu or mushrooms.
Where can I find chicken onigiri in restaurants?
Look for Japanese restaurants or sushi bars. Many places offer onigiri on their menu. You might also find them in Asian grocery stores.
In this blog post, we explored how to make onigiri, focusing on ingredients, step-by-step instructions, and helpful tips. I shared how to prepare the rice and create tasty chicken fillings. We also discussed common mistakes and fun variations. Remember to store your onigiri correctly for the best taste. With these insights, you’re ready to make delicious onigiri at home. Enjoy your cooking adventure and impress your family and friends with this tasty trea
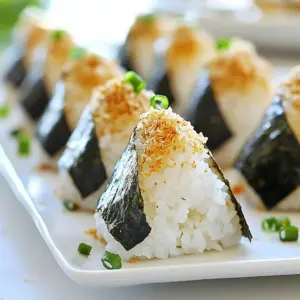
Fluffy Chicken Onigiri
Delicious rice balls filled with marinated chicken and wrapped in nori.
Course Main Course
Cuisine Japanese
Servings 4
Calories 250 kcal
- 2 cups sushi rice
- 2.5 cups water
- 1 cup cooked chicken breast, shredded
- 2 tablespoons soy sauce
- 1 tablespoon sesame oil
- 1 tablespoon mirin (optional)
- 1 teaspoon salt
- 4 sheets nori (seaweed), cut into strips
- 1 tablespoon furikake (Japanese rice seasoning)
- 1 piece green onion, finely chopped
Begin by rinsing the sushi rice: Place it in a fine mesh strainer and run cold water over it, gently stirring with your hand until the water runs clear.
Cook the rice by combining it with 2 ½ cups of water in a rice cooker. Alternatively, you can use a pot on the stove, following the package instructions. Once cooked, let the rice cool slightly.
While the rice is cooling, prepare the chicken filling: In a medium-sized bowl, combine the shredded cooked chicken with soy sauce, sesame oil, mirin (if using), and salt. Mix well and set aside to allow the flavors to meld for about 10 minutes.
After the rice has cooled to a manageable temperature, dampen your hands with water to prevent sticking. Take approximately 1/3 cup of rice and shape it into a ball.
Using your fingers, create a small indentation in the center of the rice ball. Spoon a generous amount of the marinated chicken mixture into this indentation.
Carefully mold the rice around the filling, shaping it into a triangle. Be sure to press the rice together gently but firmly to secure the filling. Repeat this process until all of the rice and chicken mixture has been used.
Once shaped, sprinkle furikake over each onigiri for an added burst of flavor. Wrap a strip of nori around the bottom of each triangle for easy handling and a delightful taste contrast.
For a finishing touch, sprinkle chopped green onion over the top of the onigiri to enhance the presentation and flavor.
Showcase the onigiri on a vibrant plate with extra nori strips or sesame seeds for a pop of color.
Keyword chicken, Japanese cuisine, onigiri, rice balls
WANT TO SAVE THIS RECIPE?