WANT TO SAVE THIS RECIPE?
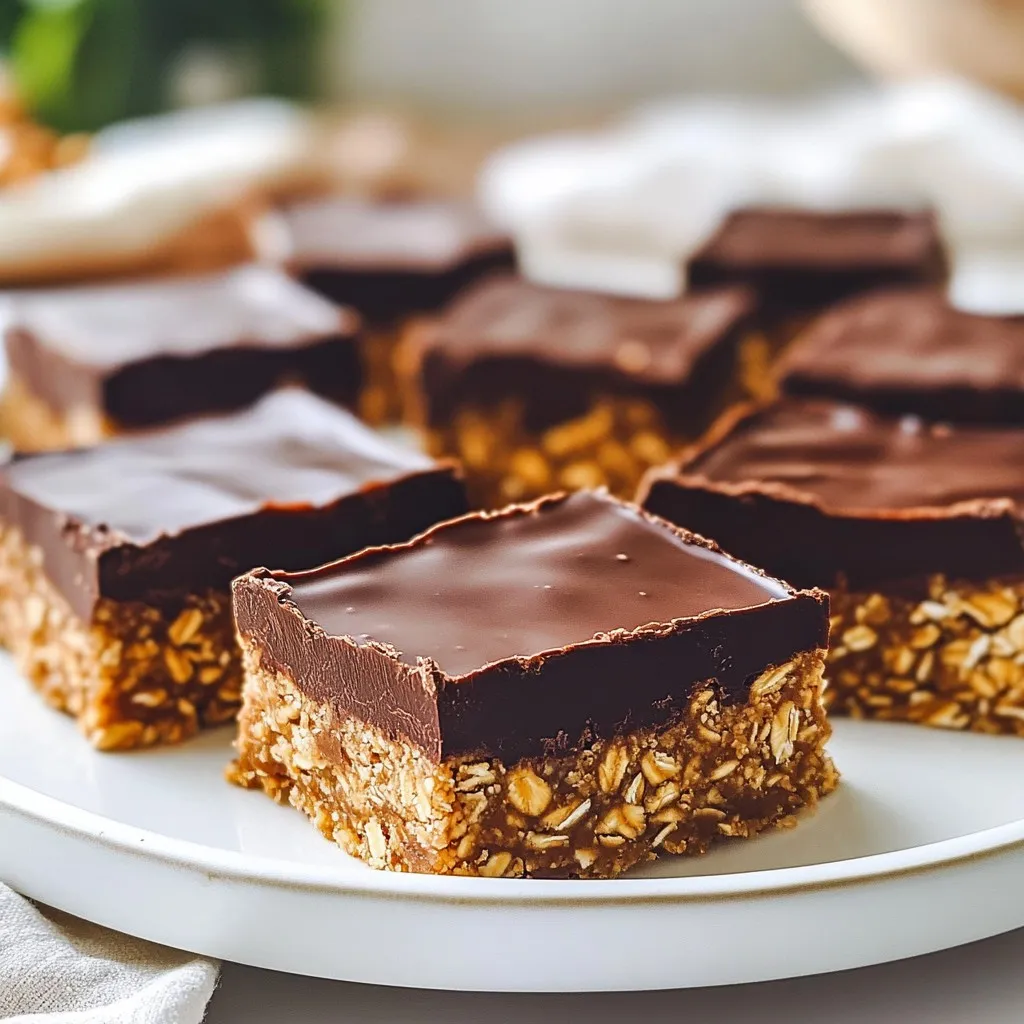
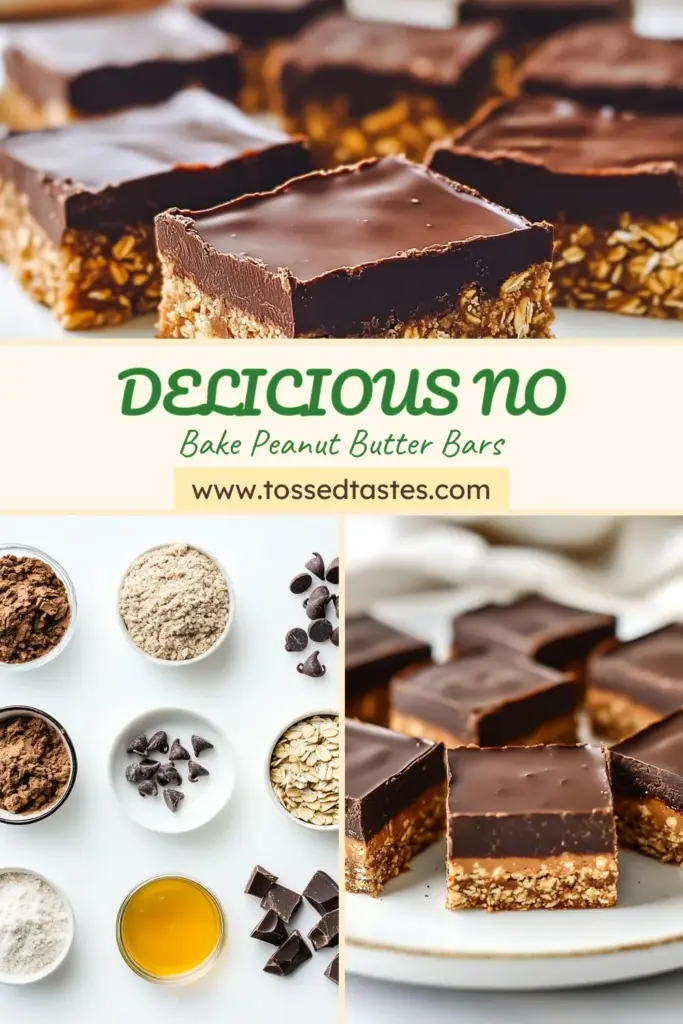
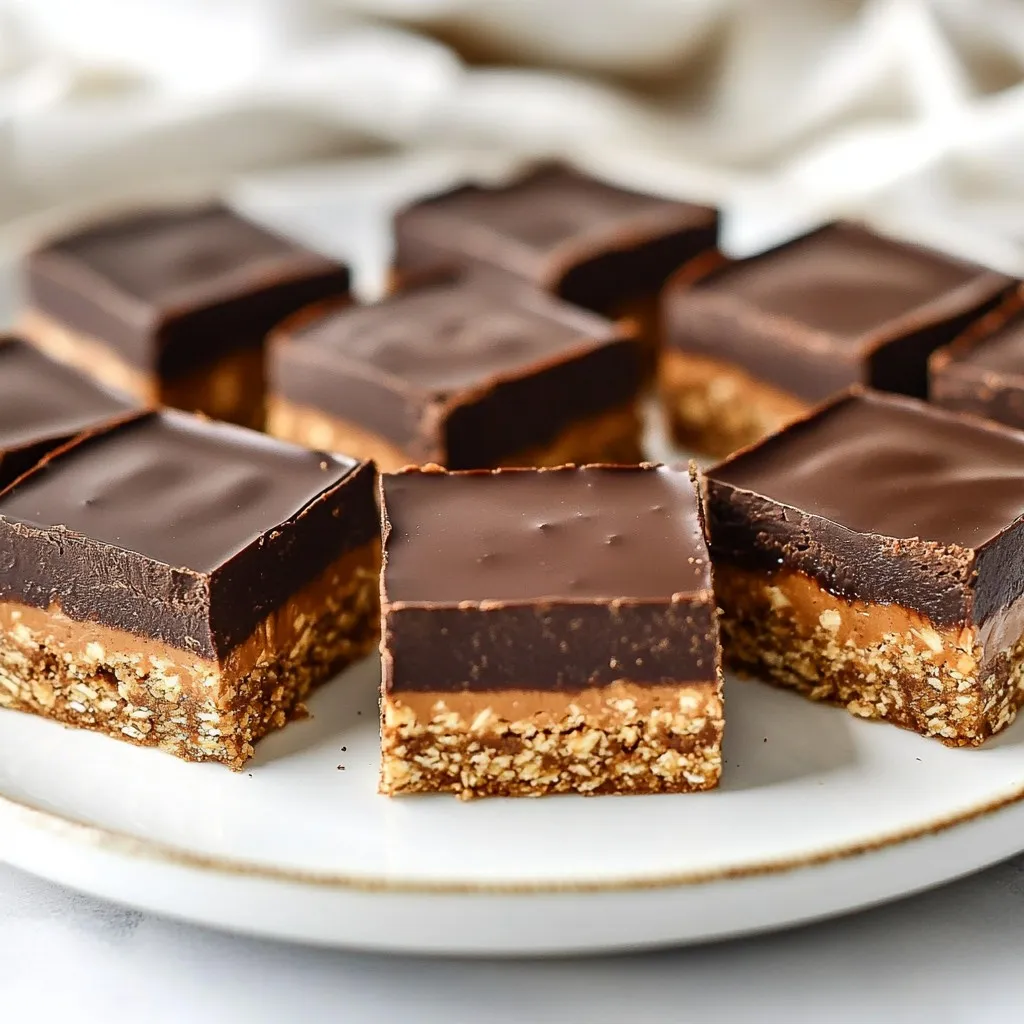
Craving something sweet but short on time? These No Bake Chocolate Peanut Butter Bars are the answer! With simple ingredients and easy steps, you can whip up a delicious treat that satisfies both your sweet tooth and your busy schedule. I’ll guide you through the entire process, ensuring you enjoy every bite without the hassle of baking. Let’s dive into this easy recipe that’s sure to impress!
Why I Love This Recipe
- Easy to Make: This no-bake recipe requires minimal effort and time, making it perfect for busy days or spontaneous cravings.
- Nutritious Ingredients: Packed with wholesome ingredients like almond flour and rolled oats, these bars offer a satisfying treat without the guilt.
- Customizable: Feel free to swap out ingredients or add extras like nuts or dried fruit to suit your taste preferences.
- Perfect for Meal Prep: These bars can be made ahead of time, stored in the fridge, and enjoyed throughout the week as a quick snack or dessert.
Ingredients
Dry Ingredients
– 1 cup almond flour
– 1 cup rolled oats
– 1/4 cup cocoa powder
– 1/4 teaspoon salt
Wet Ingredients
– 1/2 cup natural peanut butter
– 1/4 cup honey or maple syrup
– 2 tablespoons coconut oil
Toppings
– 1/2 cup dark chocolate chips
To make no bake chocolate peanut butter bars, you need simple ingredients. First, gather your dry ingredients. Almond flour and rolled oats give a strong base. Cocoa powder adds a rich chocolate taste. Salt helps balance the sweetness.
Next, you need your wet ingredients. Natural peanut butter brings creaminess and flavor. Honey or maple syrup adds sweetness. Coconut oil helps bind the mix and adds a slight taste.
Finally, for the topping, use dark chocolate chips. They melt easily and create a nice finish on top. This mix of ingredients brings together a sweet treat that’s both tasty and healthy.

Step-by-Step Instructions
Preparation
Mixing dry ingredients
Start by taking a large mixing bowl. Add 1 cup of almond flour, 1 cup of rolled oats, 1/4 cup of cocoa powder, and 1/4 teaspoon of salt. Use a whisk or spoon to mix these dry ingredients well. Make sure there are no clumps. This step is key for even flavor.
Combining wet ingredients
In a separate bowl, mix 1/2 cup of natural peanut butter with 1/4 cup of honey or maple syrup. Stir until smooth. You can warm this mixture in the microwave for about 10-15 seconds if needed. This helps it blend easier with the dry mix.
Assembling the Bars
Blending mixtures
Once your wet mix is ready, pour it into the bowl with the dry ingredients. Use a spatula or your hands to blend everything together. Keep mixing until it feels sticky and well combined. This is the base of your bars.
Pressing into the baking dish
Line an 8×8 inch baking dish with parchment paper. Leave some paper hanging over the edges. This helps you lift the bars out later. Transfer the mixture into the dish. Use the back of a spatula or your fingers to press it down evenly. Make it firm and flat.
Melting the Chocolate
Microwave melting technique
In a small bowl, combine 1/2 cup of dark chocolate chips and 2 tablespoons of coconut oil. Microwave this mixture in 30-second intervals. Stir in between to avoid burning. Keep melting until it is smooth and shiny.
Pouring and spreading chocolate
Once melted, pour the chocolate over the pressed mixture in the baking dish. Use a spatula to spread it evenly over the top. This adds a delicious layer and a nice finish to your bars.
After this, place the dish in the fridge for 1-2 hours until it sets. Once firm, lift the bars out using the parchment paper and cut them into squares or rectangles. Enjoy your no-bake chocolate peanut butter bars!
Tips & Tricks
Making it Easier
To make mixing easier, warm your peanut butter. Just heat it in the microwave for about 10-15 seconds. This helps it combine well with the other ingredients. Use a spatula for pressing the mixture into the dish. It helps to spread it evenly and avoids sticking to your fingers.
Presentation Ideas
For a lovely display, arrange the bars on a serving platter. You can dust them with cocoa powder for a rich look. Drizzle some melted chocolate on top for extra flair. This simple touch makes your bars look gourmet.
Making Ahead
I recommend chilling the bars for 1-2 hours. This time helps them set properly. Store any leftovers in the refrigerator. They stay fresh and tasty for up to a week. Enjoy them as a quick snack or dessert!
Pro Tips
- Storage: Keep the bars in an airtight container in the refrigerator for up to a week for optimal freshness.
- Substitutions: You can replace almond flour with oat flour or any nut flour you prefer if you have nut allergies.
- Flavor Boost: Add a pinch of cinnamon or vanilla extract to the peanut butter mixture for an extra layer of flavor.
- Serving Suggestions: Serve with fresh fruit or a dollop of yogurt for a balanced snack.
Variations
Flavor Additions
You can add nuts or seeds for crunch. Try chopped walnuts or sunflower seeds. These will give your bars more texture and taste. You can also switch up the nut butter. Use almond butter or cashew butter instead of peanut butter. Each nut butter brings its own flavor.
Dietary Substitutes
If you need gluten-free bars, use gluten-free oats. This makes the recipe safe for those with gluten issues. For vegan bars, use maple syrup instead of honey. Both sweeteners work well and keep the bars tasty.
Additional Toppings
Sprinkles can add a fun touch. Use colorful ones to make the bars pop. You can also add shredded coconut for a tropical twist. If you love chocolate, try using white chocolate or milk chocolate instead of dark chocolate. Each choice changes the taste a bit.
Storage Info
Best Practices
Store your no bake chocolate peanut butter bars in the fridge. Use an airtight container. This keeps them fresh and tasty. You can also wrap them in plastic wrap. Make sure they are tightly sealed.
For longer storage, freeze the bars. Cut them into pieces first. Wrap each piece in plastic wrap. Then, place them in a freezer-safe bag. This helps avoid freezer burn.
Shelf Life
In the fridge, the bars last about one week. If you freeze them, they can last up to three months. Just remember to let them thaw in the fridge overnight before eating.
Signs of Freshness
To check if the bars are still good, look for discoloration. If they smell off or have a strange texture, it’s best to toss them. Fresh bars should feel firm and look chocolatey. Enjoy your treats while they are at their best!
FAQs
Can I substitute almond flour with another flour?
Yes, you can use other flours. Oat flour works well. You can also try coconut flour. Just remember, different flours may change the texture.
How can I make these bars vegan?
To make these bars vegan, use maple syrup instead of honey. Make sure your chocolate chips are dairy-free. This simple swap keeps the bars tasty and plant-based.
How long do these no-bake bars take to set?
The bars need about 1-2 hours in the fridge to set. Check them after an hour. They should feel firm to the touch when ready.
Can I use crunchy peanut butter instead of smooth?
Yes, crunchy peanut butter adds fun texture. It will still blend well with the other ingredients. Just mix it in as you would with smooth peanut butter.
What can I use instead of cocoa powder?
If you lack cocoa powder, try carob powder. It has a similar flavor, though it may taste sweeter. You could also use melted dark chocolate for a rich twist.
You now have a simple guide to make no-bake bars. We covered the key ingredients, mixing methods, and smart tips to help you succeed. Feel free to try different toppings and flavors to match your taste. Remember to store the bars in the fridge or freezer to keep them fresh. These treats are easy to make and fun to share. Enjoy your homemade snack and get creative with every batc
No Bake Chocolate Peanut Butter Bars
Delicious and easy-to-make no-bake bars with chocolate and peanut butter.
Course Dessert
Cuisine American
Servings 12
Calories 200 kcal
- 1 cup almond flour
- 1 cup rolled oats
- 1/2 cup natural peanut butter
- 1/4 cup honey or maple syrup
- 1/4 cup cocoa powder
- 1/4 teaspoon salt
- 1/2 cup dark chocolate chips
- 2 tablespoons coconut oil
In a large mixing bowl, combine the almond flour, rolled oats, cocoa powder, and salt. Stir well to distribute the dry ingredients evenly.
In a separate bowl, mix the peanut butter and honey (or maple syrup) until smooth. If desired, slightly warm the mixture in the microwave for about 10-15 seconds to make it easier to combine.
Pour the peanut butter and honey mixture into the dry ingredients, and blend together using a spatula or your hands until the mixture is well combined and sticky.
Line an 8x8 inch baking dish with parchment paper, leaving some overhang for easy removal later.
Transfer the mixture to the lined baking dish and press it down firmly using the back of a spatula or your fingers, spreading it evenly.
In a small microwave-safe bowl, melt the dark chocolate chips and coconut oil together in the microwave in 30-second intervals, stirring in between until smooth.
Pour the melted chocolate over the pressed mixture in the baking dish, spreading it out evenly with a spatula.
Place the baking dish in the refrigerator for about 1-2 hours, or until the bars are firm to the touch.
Once set, carefully lift the bars out of the dish using the overhanging parchment paper and cut them into squares or rectangles.
Arrange the bars on a serving platter, dust with a light sprinkle of cocoa powder, or drizzle with extra melted chocolate for an elegant touch.
Keyword bars, chocolate, no-bake, peanut butter
WANT TO SAVE THIS RECIPE?