Get ready for a delicious twist on dessert with my best recipe for apple cheesecake tacos! These sweet treats combine creamy cheesecake filling and fresh apples in a crunchy taco shell. Perfect for any occasion, they’re simple to make, fun to eat, and sure to please everyone. Let’s dive into the key ingredients and step-by-step instructions for your next delightful treat!
Ingredients
List of Key Ingredients
– Taco Shells
– Cream Cheese Filling
– Apple Mixture
Optional Ingredients
– Granola
– Caramel Sauce
– Whipped Cream for topping
Measurement Details
For this recipe, you will need:
– 1 package of soft taco shells (approximately 8-10)
– 2 cups cream cheese, softened to room temperature
– 1/2 cup powdered sugar
– 1 teaspoon pure vanilla extract
– 2 cups apples, peeled and diced into small cubes
– 1 tablespoon fresh lemon juice
– 1 teaspoon ground cinnamon
– 1/4 cup packed brown sugar
– 1/2 cup granola (for added texture)
– Caramel sauce (for drizzling)
– Whipped cream (optional, for topping)
These ingredients come together to create a unique dessert that blends the classic flavors of cheesecake and apple pie. The soft taco shells serve as a delightful vessel to hold the creamy filling and sweet apple mixture. Using fresh, diced apples adds a crispy and juicy bite that balances the creaminess of the cheese. The optional toppings, like granola and caramel sauce, add extra texture and sweetness, elevating this treat to a whole new level. If you want to make it even more fun, don’t forget to check the Full Recipe for all the steps!
Step-by-Step Instructions
Preparation of the Cream Cheese Filling
To start, grab a large mixing bowl. Add 2 cups of softened cream cheese, 1/2 cup of powdered sugar, and 1 teaspoon of pure vanilla extract. Use a hand mixer to beat this mixture until it becomes smooth and creamy. This step creates a rich filling that is the star of your tacos. Once it’s ready, set it aside to focus on the apple filling.
Preparing the Apple Filling
Now, take 2 cups of peeled and diced apples. Place them in a separate bowl. Squeeze 1 tablespoon of fresh lemon juice over the apples. Then, sprinkle in 1 teaspoon of ground cinnamon and 1/4 cup of packed brown sugar. Gently toss the apples to coat them evenly. This mixture will bring out the apples’ natural sweetness and add a delightful zing.
Cooking & Assembling the Tacos
Next, heat a non-stick skillet over medium heat. Once hot, pour in the apple mixture. Sauté the apples for about 5-7 minutes. Keep stirring until the apples soften and get a nice caramel color. When done, remove the skillet from heat and let the apples cool slightly.
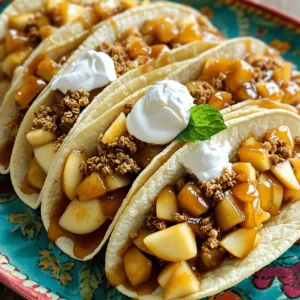
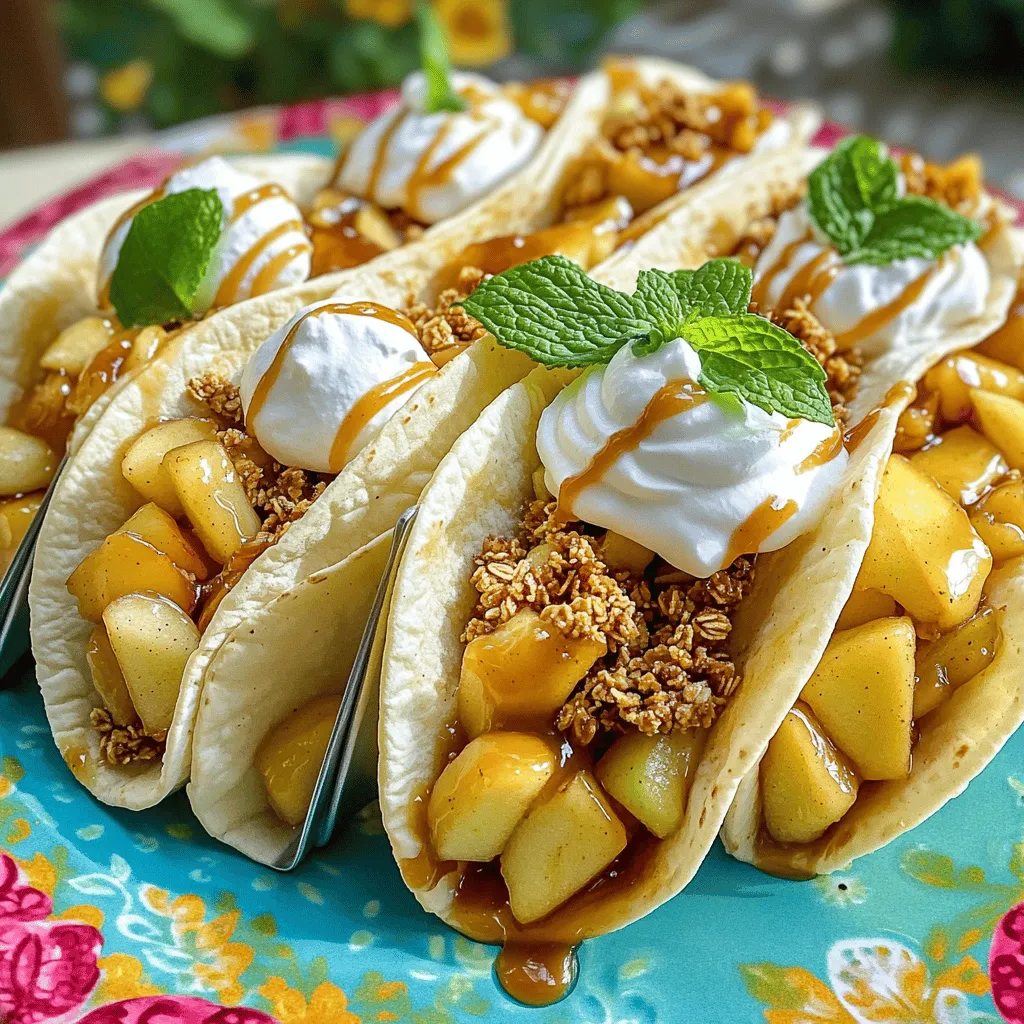
Now, it’s time to assemble the tacos! Take a soft taco shell and spread a generous layer of the cream cheese filling. Then, spoon the warm sautéed apples on top. Don’t forget to sprinkle some granola for that extra crunch. Finally, drizzle caramel sauce over the finished tacos. If you like, add a fluffy dollop of whipped cream for an indulgent touch. Serve these apple cheesecake tacos right away. Enjoy the warm, sweet mix of flavors! For the complete details, check the Full Recipe.
Tips & Tricks
Perfecting the Cream Cheese Mixture
To get the right texture for your cream cheese filling, start with room temperature cream cheese. Cold cream cheese can be lumpy and hard to mix. Use a hand mixer or a whisk to blend in the powdered sugar and vanilla extract until it is smooth. This step is key for a delightful filling that spreads easily on your taco shells.
Apple Preparation Tips
When choosing apples, pick sweet and crisp varieties. Honeycrisp, Fuji, and Gala apples work best. They hold their shape and add great flavor. Peel and chop them into small cubes for easy cooking. Toss them with lemon juice right away to keep them fresh and bright. This helps prevent browning and adds a nice zing.
Serving Recommendations
Presentation matters! For serving, arrange your tacos on a bright platter. Drizzle extra caramel sauce around the plate for a fancy touch. You can add granola on top for crunch, which contrasts with the creamy filling. For a pop of color, place fresh mint leaves next to your tacos. This makes your dish look as good as it tastes. Enjoy immediately for the best texture and flavor. Check out the Full Recipe for all the steps and details!
Variations
Flavor Enhancements
You can boost the taste of your apple cheesecake tacos with spices. Try adding nutmeg or ginger for a warm kick. Mixing in a pinch of cardamom can also add a unique flavor. For a twist, use flavored cream cheese, like cinnamon or caramel. This small change can make a big difference.
Dietary Adjustments
If you need gluten-free tacos, use corn tortillas instead of soft taco shells. For a dairy-free option, substitute cream cheese with a plant-based alternative. You can also use coconut cream to keep it rich and creamy. These changes make the recipe friendly for various diets while keeping the taste great.
Ingredient Substitutions
If you run out of brown sugar, use white sugar mixed with a bit of molasses. For a crunch, swap granola with crushed nuts or seeds. To keep it simple, if you don’t have fresh apples, canned apples work too. Just ensure they are drained well. These swaps help you create a delicious dish with what you have on hand.
For the full recipe, refer to the detailed instructions provided above.
Storage Info
Storing Leftovers
To keep your apple cheesecake tacos fresh, store them in an airtight container. Place a layer of parchment paper between tacos to prevent sticking. This way, they stay neat and tasty. Refrigerate the container for up to three days. If you don’t have an airtight container, wrap each taco in plastic wrap. This method also works well but may not keep them as fresh.
Reheating Instructions
To reheat the tacos, use a microwave or a skillet. If using a microwave, place the taco on a plate and cover it with a damp paper towel. Heat for about 30-45 seconds. This keeps the shell soft. For a skillet method, warm it on low heat for a few minutes. This will crisp up the shell slightly while warming the filling, keeping the texture just right.
Freezing Options
Yes, you can freeze apple cheesecake tacos! To do this, wrap each taco in plastic wrap and then place them in a freezer-safe bag. They can last up to two months in the freezer. When you’re ready to eat them, thaw in the fridge overnight. Reheat as mentioned earlier for the best results. Enjoy the delightful flavors even after freezing!
FAQs
How do I make the apple cheesecake filling?
To make the apple cheesecake filling, you need three simple ingredients. First, take 2 cups of softened cream cheese. Add 1/2 cup of powdered sugar and 1 teaspoon of pure vanilla extract. Mix them in a large bowl until smooth and creamy. This filling is rich and sweet, perfect for your tacos. You can check the Full Recipe for more details.
Can I use different fruits in these tacos?
Yes, you can use many fruits in these tacos. Try pears, berries, or peaches for a fun twist. Each fruit brings a unique flavor and texture. Just remember to adjust the sugar based on the fruit’s sweetness. For example, strawberries may need less sugar than apples. This way, you can make a fresh and exciting dessert every time!
How long do these tacos last in the fridge?
These tacos stay fresh in the fridge for about 2-3 days. Make sure to store them in an airtight container. If you separate the cream cheese filling from the taco shells, they will stay fresher longer. When ready to enjoy, just assemble and serve. The apples may lose some crispness, but they will still taste great!
In this post, I shared how to make delicious apple cheesecake tacos. We talked about key ingredients like taco shells, cream cheese filling, and an apple mixture. I also explained steps for preparation and cooking, along with helpful tips to perfect your dish. Remember, you can adjust ingredients for gluten-free or dairy-free diets. With the right storage, these tacos can stay fresh and tasty. I hope you enjoy making and sharing these fun tacos with others.