![- 4 chicken thighs, skin-on (bone-in for flavor or boneless for easy eating) - 1 cup buttermilk - 1 cup all-purpose flour - 1 tablespoon garlic powder - 1 tablespoon onion powder - 1 teaspoon smoked paprika - 1 teaspoon dried thyme - 1 teaspoon dried rosemary - 1 teaspoon freshly ground black pepper - 1 teaspoon salt - ½ teaspoon cayenne pepper (optional, for heat) - 2 tablespoons extra virgin olive oil - Fresh herbs like parsley or chives for garnish - Lemon zest for a bright touch - Hot sauce in the marinade for extra kick - Medium-sized mixing bowl - Shallow dish for coating - Whisk or fork for mixing - Baking sheet - Aluminum foil for easy cleanup - Wire rack to elevate chicken - Tongs for handling chicken - Meat thermometer to check doneness This list of ingredients sets the stage for a flavorful, crispy dish. Each ingredient plays a key role in building taste and texture. You'll enjoy the process of bringing it all together. You can find the full recipe [here]. First, gather your chicken thighs. You can use bone-in for flavor or boneless for ease. In a medium bowl, mix 1 cup of buttermilk with 1 teaspoon of salt. Whisk it well. Now, place the chicken thighs in the buttermilk, ensuring they are fully covered. Cover your bowl with plastic wrap. Refrigerate for at least 2 hours or overnight for the best flavor. This marinating step makes the chicken juicy and tender. Next, let’s prepare the coating. In a shallow dish, mix 1 cup of all-purpose flour with garlic powder, onion powder, smoked paprika, thyme, rosemary, black pepper, and cayenne pepper. Use a fork to blend these well. After marinating, take the chicken out of the buttermilk. Let the excess drip off. Dredge each piece in the flour mix. Press gently for an even coat and shake off any extra flour. This step is key for a crispy finish. Preheat your oven to 425°F (220°C). Line a baking sheet with aluminum foil. Place a wire rack on top to allow air to flow. This helps the chicken crisp up. Arrange the coated chicken on the rack. Drizzle 2 tablespoons of olive oil over each piece. This adds flavor and crunch. Bake for 30-35 minutes until golden brown and juices run clear. Use a meat thermometer to check that the chicken reaches 165°F (75°C). After baking, let the chicken rest for 5 minutes before serving. This makes every bite juicy and tasty! For the full recipe, you can refer to the detailed instructions above. To get the crispiest oven fried chicken, follow these tips: - Use a Wire Rack: Place the chicken on a wire rack above the baking sheet. This lets hot air circulate around the chicken, making it crispier. - Pat Dry Before Coating: After marinating, pat the chicken dry with paper towels. This removes excess moisture, helping the coating stick better. - Use Olive Oil Generously: Drizzle enough olive oil on the chicken. The oil helps the coating turn golden and crispy while baking. Here are some common mistakes that can lead to less-than-perfect chicken: - Skipping the Marinade: Don’t skip the buttermilk marinade. It adds flavor and keeps the chicken juicy. - Overcrowding the Pan: Avoid placing too many pieces of chicken together. This can trap steam and make chicken soggy. - Not Preheating the Oven: Always preheat your oven. This ensures even cooking and better browning. Want to amp up the flavor of your chicken? Here are some ideas: - Add Fresh Herbs: Mix fresh herbs like parsley or dill into the flour mixture for extra flavor. - Try Different Spices: Experiment with spices like cumin or coriander for new tastes. Just remember to keep balance. - Use Flavored Salt: Swap regular salt for garlic or herb-infused salt for a tasty twist. For the full recipe, check out the Crispy Herb-Infused Oven Fried Chicken! {{image_4}} You can play with flavors in your oven fried chicken. Instead of the herbs I used, try a mix of chili powder and cumin for a spicy kick. You could also use lemon zest and dill for a fresh twist. If you love Italian flavors, add oregano, basil, and Parmesan cheese to the coating. Each mix will give you a new taste experience. You don’t have to stick to thighs. Drumsticks or chicken breasts work great, too. Drumsticks keep their moisture well, while breasts cook faster. If you want to go for something different, try using chicken wings. They crisp up nicely and make great finger food. Adjust the cooking time based on the cut you choose. If you’re gluten-free, swap all-purpose flour for a gluten-free blend. You can also use almond flour for a nutty flavor. For dairy-free options, substitute buttermilk with a plant-based milk mixed with lemon juice. This will give you a similar tang without the dairy. Adjust the seasonings as needed to fit your dietary needs. For more details on the full recipe, you can check the [Full Recipe]. After enjoying your oven fried chicken, let it cool completely. Place the chicken in an airtight container. You can keep it in the fridge for up to 4 days. This storage method helps retain its flavor and texture. To reheat your chicken, use the oven for the best taste. Preheat your oven to 350°F (175°C). Place the chicken on a baking sheet. Heat it for about 15-20 minutes or until warm. This will help restore its crispiness. If you prefer the microwave, use a lower power setting. Heat in short bursts to avoid sogginess. You can freeze leftover chicken if you want to save it for later. Wrap each piece tightly in plastic wrap, then place it in a freezer bag. Label the bag with the date. It will stay good for up to 3 months. To thaw, move it to the fridge overnight before reheating. Enjoy your crispy herb-infused oven fried chicken anytime! For the full recipe, check out the recipe link above. Yes, you can use skinless chicken. However, the skin adds flavor and crispiness. Without it, your chicken may not be as juicy. If you prefer skinless chicken, consider using more oil in the coating. This will help with moisture and crunch. To ensure your chicken is cooked through, use a meat thermometer. It should read 165°F (75°C) in the thickest part of the meat. This guarantees safety and juicy results. Also, let the chicken rest after baking. This will help keep the juices inside. To make this recipe gluten-free, swap all-purpose flour for a gluten-free flour blend. There are many options available, like almond flour or rice flour. Just be sure to check the labels for hidden gluten. The seasoning mix will still work great with gluten-free flour. You learned about making oven-fried chicken, from the ingredients to storage. Knowing how to prepare, coat, and bake gives you tasty results. Remember the tips to get it crispy and avoid common mistakes. You can also explore flavor variations and substitutes. Enjoy your delicious chicken now, and feel free to store or reheat leftovers for later. Cooking can be fun, and with these steps, you’ll impress everyone at the table!](https://tossedtastes.com/wp-content/uploads/2025/06/591ef219-178f-4ee0-99fc-a169b96f12c5.webp)
Are you ready to make juicy, crispy oven fried chicken? This simple guide gives you all the tips you need. You’ll find easy steps to prepare tasty chicken with a perfect crunch. I’ll share ingredients, handy tricks, and fun variations to suit every taste. Let’s dive into this easy meal that will have everyone asking for seconds! Your perfect chicken dinner starts right here.
Ingredients
Main Ingredients for Oven Fried Chicken
– 4 chicken thighs, skin-on (bone-in for flavor or boneless for easy eating)
– 1 cup buttermilk
– 1 cup all-purpose flour
– 1 tablespoon garlic powder
– 1 tablespoon onion powder
– 1 teaspoon smoked paprika
– 1 teaspoon dried thyme
– 1 teaspoon dried rosemary
– 1 teaspoon freshly ground black pepper
– 1 teaspoon salt
– ½ teaspoon cayenne pepper (optional, for heat)
– 2 tablespoons extra virgin olive oil
Optional Ingredients for Added Flavor
– Fresh herbs like parsley or chives for garnish
– Lemon zest for a bright touch
– Hot sauce in the marinade for extra kick
Equipment Needed
– Medium-sized mixing bowl
– Shallow dish for coating
– Whisk or fork for mixing
– Baking sheet
– Aluminum foil for easy cleanup
– Wire rack to elevate chicken
– Tongs for handling chicken
– Meat thermometer to check doneness
This list of ingredients sets the stage for a flavorful, crispy dish. Each ingredient plays a key role in building taste and texture. You’ll enjoy the process of bringing it all together. You can find the full recipe [here].
Step-by-Step Instructions
Preparing the Chicken and Marinade
First, gather your chicken thighs. You can use bone-in for flavor or boneless for ease. In a medium bowl, mix 1 cup of buttermilk with 1 teaspoon of salt. Whisk it well. Now, place the chicken thighs in the buttermilk, ensuring they are fully covered. Cover your bowl with plastic wrap. Refrigerate for at least 2 hours or overnight for the best flavor. This marinating step makes the chicken juicy and tender.
Coating the Chicken
Next, let’s prepare the coating. In a shallow dish, mix 1 cup of all-purpose flour with garlic powder, onion powder, smoked paprika, thyme, rosemary, black pepper, and cayenne pepper. Use a fork to blend these well. After marinating, take the chicken out of the buttermilk. Let the excess drip off. Dredge each piece in the flour mix. Press gently for an even coat and shake off any extra flour. This step is key for a crispy finish.
Baking Instructions
Preheat your oven to 425°F (220°C). Line a baking sheet with aluminum foil. Place a wire rack on top to allow air to flow. This helps the chicken crisp up. Arrange the coated chicken on the rack. Drizzle 2 tablespoons of olive oil over each piece. This adds flavor and crunch. Bake for 30-35 minutes until golden brown and juices run clear. Use a meat thermometer to check that the chicken reaches 165°F (75°C). After baking, let the chicken rest for 5 minutes before serving. This makes every bite juicy and tasty!
For the full recipe, you can refer to the detailed instructions above.
Tips & Tricks
Achieving Maximum Crispiness
To get the crispiest oven fried chicken, follow these tips:
– Use a Wire Rack: Place the chicken on a wire rack above the baking sheet. This lets hot air circulate around the chicken, making it crispier.
– Pat Dry Before Coating: After marinating, pat the chicken dry with paper towels. This removes excess moisture, helping the coating stick better.
– Use Olive Oil Generously: Drizzle enough olive oil on the chicken. The oil helps the coating turn golden and crispy while baking.
Common Mistakes to Avoid
Here are some common mistakes that can lead to less-than-perfect chicken:
– Skipping the Marinade: Don’t skip the buttermilk marinade. It adds flavor and keeps the chicken juicy.
– Overcrowding the Pan: Avoid placing too many pieces of chicken together. This can trap steam and make chicken soggy.
– Not Preheating the Oven: Always preheat your oven. This ensures even cooking and better browning.
Flavor Enhancements
Want to amp up the flavor of your chicken? Here are some ideas:
– Add Fresh Herbs: Mix fresh herbs like parsley or dill into the flour mixture for extra flavor.
– Try Different Spices: Experiment with spices like cumin or coriander for new tastes. Just remember to keep balance.
– Use Flavored Salt: Swap regular salt for garlic or herb-infused salt for a tasty twist.
For the full recipe, check out the Crispy Herb-Infused Oven Fried Chicken!
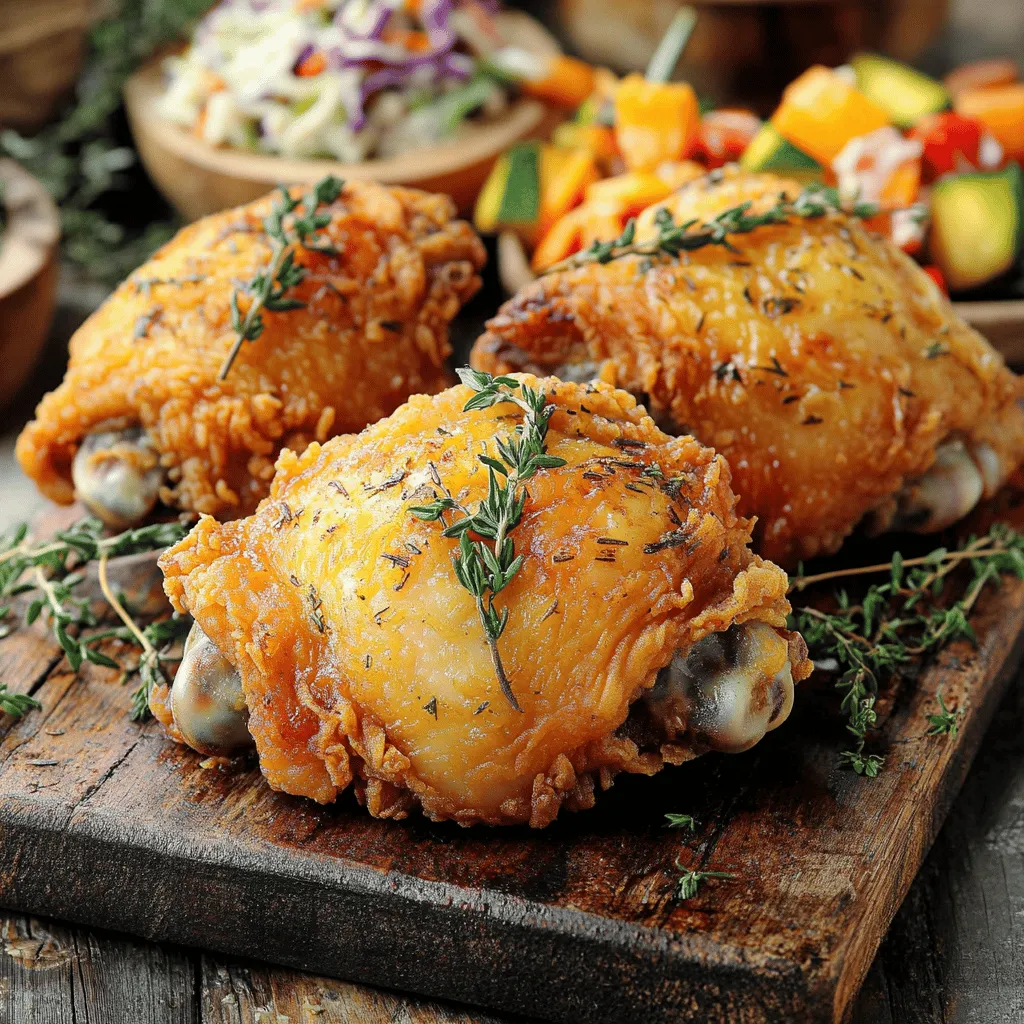
Variations
Different Seasoning Combinations
You can play with flavors in your oven fried chicken. Instead of the herbs I used, try a mix of chili powder and cumin for a spicy kick. You could also use lemon zest and dill for a fresh twist. If you love Italian flavors, add oregano, basil, and Parmesan cheese to the coating. Each mix will give you a new taste experience.
Alternative Chicken Cuts
You don’t have to stick to thighs. Drumsticks or chicken breasts work great, too. Drumsticks keep their moisture well, while breasts cook faster. If you want to go for something different, try using chicken wings. They crisp up nicely and make great finger food. Adjust the cooking time based on the cut you choose.
Substitutions for Dietary Restrictions
If you’re gluten-free, swap all-purpose flour for a gluten-free blend. You can also use almond flour for a nutty flavor. For dairy-free options, substitute buttermilk with a plant-based milk mixed with lemon juice. This will give you a similar tang without the dairy. Adjust the seasonings as needed to fit your dietary needs.
For more details on the full recipe, you can check the [Full Recipe].
Storage Info
How to Store Leftovers
After enjoying your oven fried chicken, let it cool completely. Place the chicken in an airtight container. You can keep it in the fridge for up to 4 days. This storage method helps retain its flavor and texture.
Reheating Tips for Best Results
To reheat your chicken, use the oven for the best taste. Preheat your oven to 350°F (175°C). Place the chicken on a baking sheet. Heat it for about 15-20 minutes or until warm. This will help restore its crispiness. If you prefer the microwave, use a lower power setting. Heat in short bursts to avoid sogginess.
Freezing Guidelines
You can freeze leftover chicken if you want to save it for later. Wrap each piece tightly in plastic wrap, then place it in a freezer bag. Label the bag with the date. It will stay good for up to 3 months. To thaw, move it to the fridge overnight before reheating. Enjoy your crispy herb-infused oven fried chicken anytime! For the full recipe, check out the recipe link above.
FAQs
Can I use skinless chicken for this recipe?
Yes, you can use skinless chicken. However, the skin adds flavor and crispiness. Without it, your chicken may not be as juicy. If you prefer skinless chicken, consider using more oil in the coating. This will help with moisture and crunch.
What is the best way to ensure the chicken is cooked through?
To ensure your chicken is cooked through, use a meat thermometer. It should read 165°F (75°C) in the thickest part of the meat. This guarantees safety and juicy results. Also, let the chicken rest after baking. This will help keep the juices inside.
How can I make this recipe gluten-free?
To make this recipe gluten-free, swap all-purpose flour for a gluten-free flour blend. There are many options available, like almond flour or rice flour. Just be sure to check the labels for hidden gluten. The seasoning mix will still work great with gluten-free flour.
You learned about making oven-fried chicken, from the ingredients to storage. Knowing how to prepare, coat, and bake gives you tasty results. Remember the tips to get it crispy and avoid common mistakes. You can also explore flavor variations and substitutes. Enjoy your delicious chicken now, and feel free to store or reheat leftovers for later. Cooking can be fun, and with these steps, you’ll impress everyone at the table!
![- 4 chicken thighs, skin-on (bone-in for flavor or boneless for easy eating) - 1 cup buttermilk - 1 cup all-purpose flour - 1 tablespoon garlic powder - 1 tablespoon onion powder - 1 teaspoon smoked paprika - 1 teaspoon dried thyme - 1 teaspoon dried rosemary - 1 teaspoon freshly ground black pepper - 1 teaspoon salt - ½ teaspoon cayenne pepper (optional, for heat) - 2 tablespoons extra virgin olive oil - Fresh herbs like parsley or chives for garnish - Lemon zest for a bright touch - Hot sauce in the marinade for extra kick - Medium-sized mixing bowl - Shallow dish for coating - Whisk or fork for mixing - Baking sheet - Aluminum foil for easy cleanup - Wire rack to elevate chicken - Tongs for handling chicken - Meat thermometer to check doneness This list of ingredients sets the stage for a flavorful, crispy dish. Each ingredient plays a key role in building taste and texture. You'll enjoy the process of bringing it all together. You can find the full recipe [here]. First, gather your chicken thighs. You can use bone-in for flavor or boneless for ease. In a medium bowl, mix 1 cup of buttermilk with 1 teaspoon of salt. Whisk it well. Now, place the chicken thighs in the buttermilk, ensuring they are fully covered. Cover your bowl with plastic wrap. Refrigerate for at least 2 hours or overnight for the best flavor. This marinating step makes the chicken juicy and tender. Next, let’s prepare the coating. In a shallow dish, mix 1 cup of all-purpose flour with garlic powder, onion powder, smoked paprika, thyme, rosemary, black pepper, and cayenne pepper. Use a fork to blend these well. After marinating, take the chicken out of the buttermilk. Let the excess drip off. Dredge each piece in the flour mix. Press gently for an even coat and shake off any extra flour. This step is key for a crispy finish. Preheat your oven to 425°F (220°C). Line a baking sheet with aluminum foil. Place a wire rack on top to allow air to flow. This helps the chicken crisp up. Arrange the coated chicken on the rack. Drizzle 2 tablespoons of olive oil over each piece. This adds flavor and crunch. Bake for 30-35 minutes until golden brown and juices run clear. Use a meat thermometer to check that the chicken reaches 165°F (75°C). After baking, let the chicken rest for 5 minutes before serving. This makes every bite juicy and tasty! For the full recipe, you can refer to the detailed instructions above. To get the crispiest oven fried chicken, follow these tips: - Use a Wire Rack: Place the chicken on a wire rack above the baking sheet. This lets hot air circulate around the chicken, making it crispier. - Pat Dry Before Coating: After marinating, pat the chicken dry with paper towels. This removes excess moisture, helping the coating stick better. - Use Olive Oil Generously: Drizzle enough olive oil on the chicken. The oil helps the coating turn golden and crispy while baking. Here are some common mistakes that can lead to less-than-perfect chicken: - Skipping the Marinade: Don’t skip the buttermilk marinade. It adds flavor and keeps the chicken juicy. - Overcrowding the Pan: Avoid placing too many pieces of chicken together. This can trap steam and make chicken soggy. - Not Preheating the Oven: Always preheat your oven. This ensures even cooking and better browning. Want to amp up the flavor of your chicken? Here are some ideas: - Add Fresh Herbs: Mix fresh herbs like parsley or dill into the flour mixture for extra flavor. - Try Different Spices: Experiment with spices like cumin or coriander for new tastes. Just remember to keep balance. - Use Flavored Salt: Swap regular salt for garlic or herb-infused salt for a tasty twist. For the full recipe, check out the Crispy Herb-Infused Oven Fried Chicken! {{image_4}} You can play with flavors in your oven fried chicken. Instead of the herbs I used, try a mix of chili powder and cumin for a spicy kick. You could also use lemon zest and dill for a fresh twist. If you love Italian flavors, add oregano, basil, and Parmesan cheese to the coating. Each mix will give you a new taste experience. You don’t have to stick to thighs. Drumsticks or chicken breasts work great, too. Drumsticks keep their moisture well, while breasts cook faster. If you want to go for something different, try using chicken wings. They crisp up nicely and make great finger food. Adjust the cooking time based on the cut you choose. If you’re gluten-free, swap all-purpose flour for a gluten-free blend. You can also use almond flour for a nutty flavor. For dairy-free options, substitute buttermilk with a plant-based milk mixed with lemon juice. This will give you a similar tang without the dairy. Adjust the seasonings as needed to fit your dietary needs. For more details on the full recipe, you can check the [Full Recipe]. After enjoying your oven fried chicken, let it cool completely. Place the chicken in an airtight container. You can keep it in the fridge for up to 4 days. This storage method helps retain its flavor and texture. To reheat your chicken, use the oven for the best taste. Preheat your oven to 350°F (175°C). Place the chicken on a baking sheet. Heat it for about 15-20 minutes or until warm. This will help restore its crispiness. If you prefer the microwave, use a lower power setting. Heat in short bursts to avoid sogginess. You can freeze leftover chicken if you want to save it for later. Wrap each piece tightly in plastic wrap, then place it in a freezer bag. Label the bag with the date. It will stay good for up to 3 months. To thaw, move it to the fridge overnight before reheating. Enjoy your crispy herb-infused oven fried chicken anytime! For the full recipe, check out the recipe link above. Yes, you can use skinless chicken. However, the skin adds flavor and crispiness. Without it, your chicken may not be as juicy. If you prefer skinless chicken, consider using more oil in the coating. This will help with moisture and crunch. To ensure your chicken is cooked through, use a meat thermometer. It should read 165°F (75°C) in the thickest part of the meat. This guarantees safety and juicy results. Also, let the chicken rest after baking. This will help keep the juices inside. To make this recipe gluten-free, swap all-purpose flour for a gluten-free flour blend. There are many options available, like almond flour or rice flour. Just be sure to check the labels for hidden gluten. The seasoning mix will still work great with gluten-free flour. You learned about making oven-fried chicken, from the ingredients to storage. Knowing how to prepare, coat, and bake gives you tasty results. Remember the tips to get it crispy and avoid common mistakes. You can also explore flavor variations and substitutes. Enjoy your delicious chicken now, and feel free to store or reheat leftovers for later. Cooking can be fun, and with these steps, you’ll impress everyone at the table!](https://tossedtastes.com/wp-content/uploads/2025/06/591ef219-178f-4ee0-99fc-a169b96f12c5-300x300.webp)