Are you ready to dive into the tasty world of homemade dill pickles? I’ve crafted an easy recipe guide that makes pickling a breeze. With fresh cucumbers, simple spices, and step-by-step instructions, you’ll create crunchy, flavorful pickles that beat store-bought every time. Whether you crave classic, spicy, or sweet variations, I’ve got you covered. Let’s get started and transform your cucumbers into something amazing!
Ingredients
Essential Ingredients for Homemade Dill Pickles
To make homemade dill pickles, you need some key ingredients. Here’s what you need:
– 4 medium cucumbers, sliced into spears or rounds
– 2 cups water
– 1 cup distilled white vinegar
– 2 tablespoons sea salt
– 2 tablespoons granulated sugar
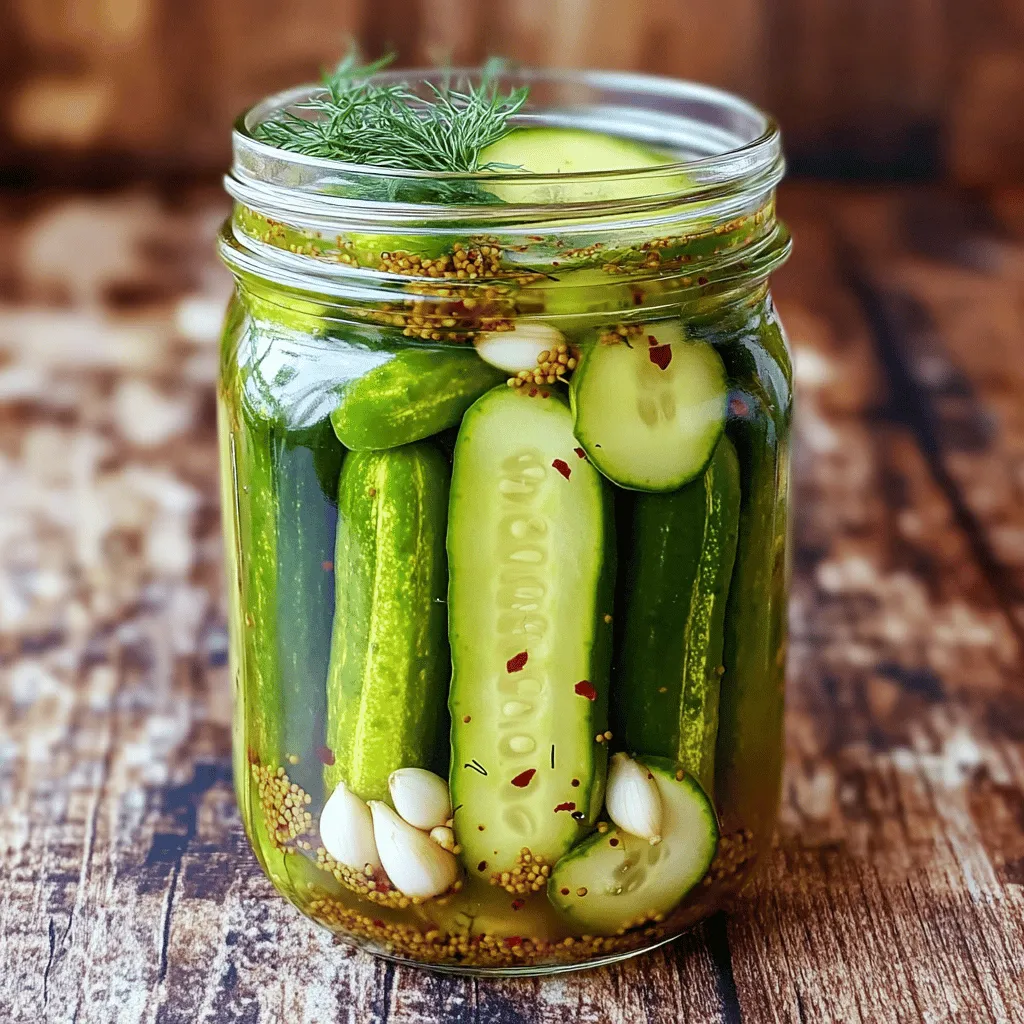
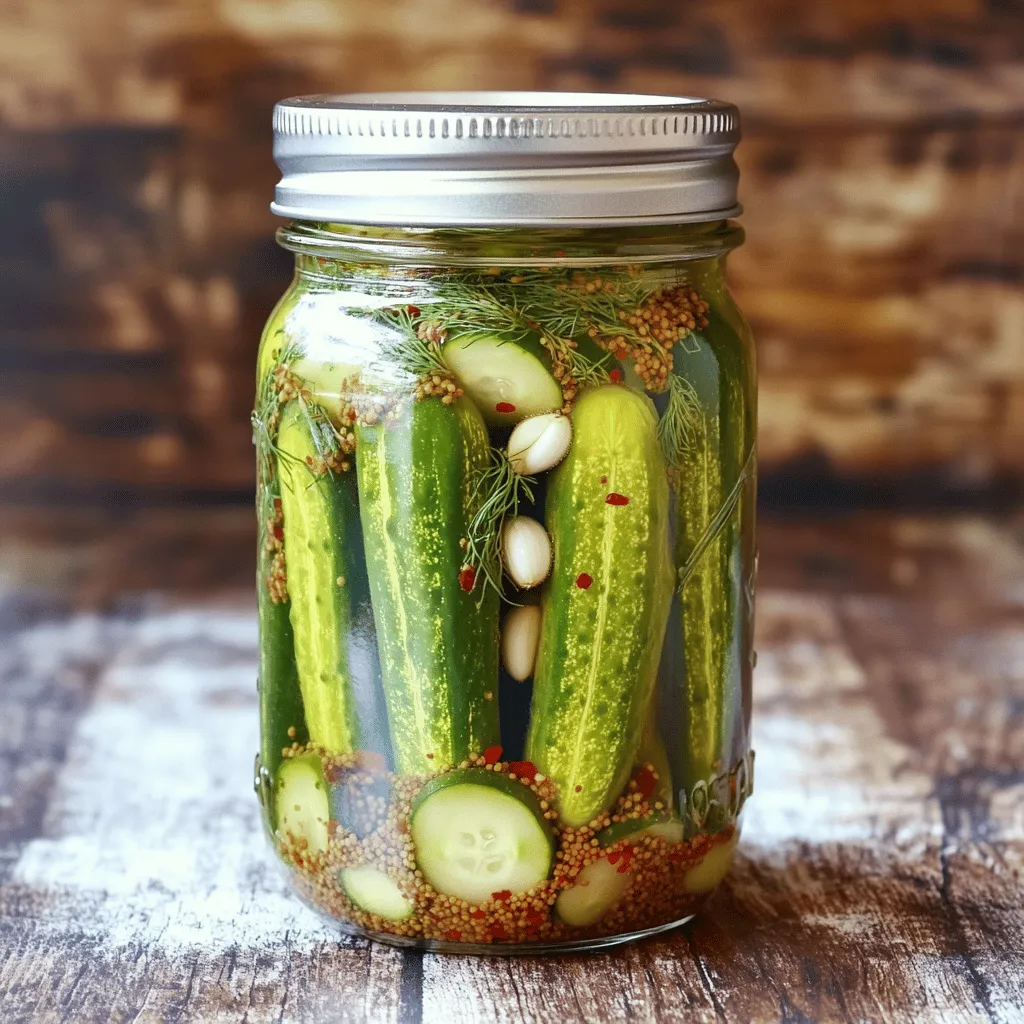
– 4 cloves garlic, peeled and smashed
– 1 tablespoon dill seeds
– 1 teaspoon mustard seeds
– 1 teaspoon black peppercorns
– ½ teaspoon red pepper flakes (optional for heat)
– Fresh dill sprigs (about 4-6 sprigs)
Each ingredient plays a role in flavor and texture. The cucumbers give that crunchy base. The vinegar adds tang, while garlic and dill pack in that classic pickle taste.
Recommended Tools and Equipment
When making dill pickles, having the right tools is key. Use these items for best results:
– A clean mason jar or multiple jars
– A medium-sized saucepan
– A cutting board and knife
– A spoon for stirring
– A measuring cup and spoons
These tools help you prepare, cook, and store your pickles with ease.
Tips for Selecting Fresh Cucumbers
Choosing the right cucumbers makes a big difference. Here are some tips to select fresh ones:
– Look for firm cucumbers with smooth skin.
– Avoid cucumbers with soft spots or wrinkles.
– Choose smaller cucumbers for crunchier pickles.
– Check for bright green color; it shows freshness.
Fresh cucumbers will give your pickles the best taste and texture. Always remember, using fresh ingredients leads to better results in the kitchen.
Step-by-Step Instructions
Preparing the Cucumbers
Start by washing the cucumbers under cold water. This step is key to clean pickles. You can slice them into spears or rounds. Aim for even sizes. This helps them pickle uniformly. If you prefer crunchier pickles, leave the skin on.
Making the Pickling Brine
In a medium saucepan, mix water and distilled white vinegar. Add sea salt and sugar next. Heat the mixture on medium. Stir until the salt and sugar dissolve fully. Once dissolved, bring it to a gentle boil. Then, remove it from the heat. Let it cool for about 15-20 minutes.
Packing the Jars with Spices and Cucumbers
Take a clean mason jar. Place smashed garlic cloves at the bottom. Next, add dill seeds, mustard seeds, and black peppercorns. If you like spice, add red pepper flakes. Now, layer your cucumber spears tightly into the jar. Make sure there are no large gaps. This helps the flavors mix well.
Sealing and Refrigerating the Pickles
Add fresh dill sprigs among the cucumbers for added flavor. After that, pour the cooled brine over the cucumbers. Ensure they are fully covered. If needed, press them down with a spoon. Seal the jar tightly with a lid. Put the jar in the fridge for at least 24 hours. For the best taste, let them sit for 3 to 5 days. Turn them occasionally, if you can.
Now you have a simple guide to making crunchy homemade dill pickles. Enjoy this fun and tasty project! For the full recipe, check the earlier section.
Tips & Tricks
Achieving the Perfect Texture and Flavor
To get the best texture and flavor in your pickles, start with fresh cucumbers. Look for firm cucumbers without soft spots. I often pick pickling cucumbers since they have a nice crunch. When slicing, keep pieces uniform. This helps them pickle evenly. After packing your jars, make sure the brine covers all cucumbers. This keeps them flavorful and crisp. If you want more crunch, consider soaking the cucumbers in ice water for an hour before pickling.
How to Adjust Spice Levels
Adjusting spice levels is simple. If you like heat, add more red pepper flakes. For less spice, skip them altogether. You can also tweak the mustard seeds or black peppercorns to change the flavor. Taste your brine before pouring it over the cucumbers. This way, you can add more salt or sugar if needed. Always remember, you can control the heat to suit your taste.
Common Mistakes to Avoid
Avoid using waxed cucumbers. Wax can hinder the pickling process. Always wash your cucumbers well. Another mistake is not letting the pickles sit long enough. For the best taste, give them at least three days in the fridge. Also, don’t forget to check the seal on your jars. A loose lid can let air in and spoil your pickles. Follow these tips, and you’ll have tasty, crunchy dill pickles every time. For a detailed recipe, check the Full Recipe.
Variations
Sweet Dill Pickles
Sweet dill pickles add a fun twist to the classic recipe. Start by adding more sugar to the brine. Use about 1/4 cup of sugar instead of 2 tablespoons. This change gives the pickles a nice sweetness. You can also add a pinch of cinnamon for extra flavor. Let these sit for at least 48 hours to develop that sweet taste. Sweet dill pickles are perfect for cheese trays or as a snack.
Spicy Dill Pickles
If you like heat, spicy dill pickles are for you! To make them, just add more red pepper flakes. Use 1 teaspoon or more based on your taste. You can also add sliced jalapeños or serrano peppers to the jars. This will give your pickles a nice kick. Just remember to adjust the brine if you add more ingredients. Let them sit for 3 to 5 days for the best flavor.
Garlic Dill Pickles
Garlic lovers will enjoy garlic dill pickles. Add more garlic cloves to your recipe for a stronger taste. Use 6 to 8 cloves instead of 4. You can also crush them for more flavor release. For a twist, try adding roasted garlic for a deeper taste. These pickles are great in sandwiches or as a side dish. Just like the others, let them sit for 3 to 5 days for peak flavor.
Explore these variations to find your favorite kind of pickle! For the full recipe, check the section above.
Storage Info
Best Practices for Refrigeration
Store your homemade dill pickles in the fridge. Always use clean, airtight jars. Keep the pickles submerged in brine to maintain their crunch. Avoid opening the jars too often, as this can introduce air. If you notice the brine level dropping, just add more vinegar and water.
Shelf Life of Homemade Dill Pickles
Homemade dill pickles can last up to two months in the fridge. They taste best within the first few weeks. After that, the flavor may start to fade. Make sure to check for signs of spoilage as time goes on.
Signs of Spoilage to Watch For
Always look for changes in color or texture. If the pickles become slimy or develop an off smell, it’s time to toss them. Bubbles in the jar can also indicate spoilage. If you see any mold, discard the pickles immediately. Enjoy your pickles while they’re fresh for the best taste!
FAQs
How long does it take for homemade dill pickles to be ready?
Homemade dill pickles need at least 24 hours to soak in the brine. For the best flavor, let them sit for 3 to 5 days. This time allows the cucumbers to absorb the brine and spices. The longer they sit, the more flavor they gain. I suggest checking them after a day to see how they taste. It’s a fun way to track their progress!
Can I use different types of cucumbers?
Yes, you can use different types of cucumbers. While regular pickling cucumbers are best, you can try English cucumbers or even Kirby cucumbers. Just make sure they are firm and fresh. Avoid large cucumbers, as they may be too watery. Smaller cucumbers give a crunchier pickle. Feel free to experiment and find your favorite type!
Can I can homemade dill pickles for long-term storage?
You can can homemade dill pickles for long-term storage, but this recipe is for quick pickles. To can them, you need to use a hot water bath method. Fill sterilized jars with pickles and hot brine, then process them in boiling water. Make sure to follow safe canning practices. This lets you enjoy your pickles throughout the year! For more details, check the Full Recipe.
Making homemade dill pickles is easy and fun. I shared essential ingredients and tools you’ll need. We covered how to prepare cucumbers and make the brine. Tips helped you avoid common mistakes, ensuring great texture and flavor.
In the end, you can enjoy sweet, spicy, or garlic variations. Storing your pickles is simple, too, with easy shelf life tips. Homemade pickles bring fresh, zesty taste to your meals. Start your pickling adventure today and enjoy delicious results!
