Are you ready to bring a taste of fall into your kitchen? Pumpkin Pie Cake Pops are not only delightful but also easy to make! With just a few simple ingredients, you’ll create a sweet treat that captures the flavors of the season. In this post, I’ll guide you through each step to ensure your cake pops turn out perfect every time. Let’s dive into this fun baking adventure!
Ingredients
Essential Ingredients for Pumpkin Pie Cake Pops
To make delicious pumpkin pie cake pops, you need a few key ingredients:
– 1 box yellow cake mix
– 1 cup canned pumpkin puree
– 3 large eggs
– 1/3 cup vegetable oil
– 1 tablespoon pumpkin pie spice
– 1 teaspoon vanilla extract
– 1 cup cream cheese frosting
– 1 cup white chocolate chips
– 1 tablespoon coconut oil
– Sprinkles or crushed graham crackers, for decoration
Using high-quality ingredients is important. Choose pure pumpkin puree for the best flavor. Fresh eggs and good vanilla extract can also enhance the taste.
Optional Ingredients for Customization
You can change things up with fun variations. Here are some ideas:
– Instead of yellow cake mix, try spice cake mix for extra flavor.
– Use dark chocolate or milk chocolate chips instead of white chocolate.
– Add nuts or mini chocolate chips to the cake mix for crunch.
If you have dietary needs, consider these swaps:
– For gluten-free options, use a gluten-free cake mix.
– Replace cream cheese frosting with a dairy-free or vegan frosting.
– You can use applesauce instead of eggs for a vegan version.
Feel free to mix and match these ideas to create your perfect pumpkin pie cake pops! For more details, check the Full Recipe.
Step-by-Step Instructions
Preparation of the Cake
First, preheat your oven to 350°F (175°C). Take a 9×13-inch baking pan and grease it. You can use non-stick spray or line it with parchment paper. This helps with easy removal after baking.
Next, grab a large mixing bowl. In this bowl, combine the yellow cake mix, canned pumpkin puree, eggs, vegetable oil, pumpkin pie spice, and vanilla extract. Mix everything until it’s smooth. Make sure there are no lumps left in the batter.
Baking and Cooling
Now, pour the cake batter into the prepared baking pan. Spread it evenly, so it bakes uniformly. Bake for about 25-30 minutes. To check if it’s done, insert a toothpick into the center. It should come out clean when the cake is ready.
Once baked, let the cake cool in the pan. After a few minutes, transfer it to a wire rack. Allow it to cool completely before crumbling.
Forming Cake Pops
After the cake has cooled, crumble it into fine pieces in a large mixing bowl. Gradually mix in the cream cheese frosting. You can use your hands or a spatula for this. The mixture should be moist and hold its shape when pressed.
Now, take small portions of this mixture and roll them into balls. Aim for about 1 inch in diameter. Place the formed cake pops on a lined baking sheet.
Once all the balls are rolled, refrigerate them for about 30 minutes. This makes them firm and easier to dip.
Coating the Cake Pops
While the cake pops chill, melt the white chocolate chips and coconut oil in a microwave-safe bowl. Heat in 30-second intervals and stir well after each. Be careful not to overheat it.
After chilling, take the cake pops from the fridge. To help the sticks stick better, dip the tip of each stick into the melted white chocolate. Then, carefully insert it into the center of each cake pop.
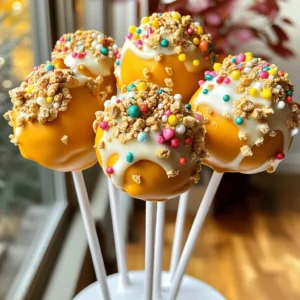
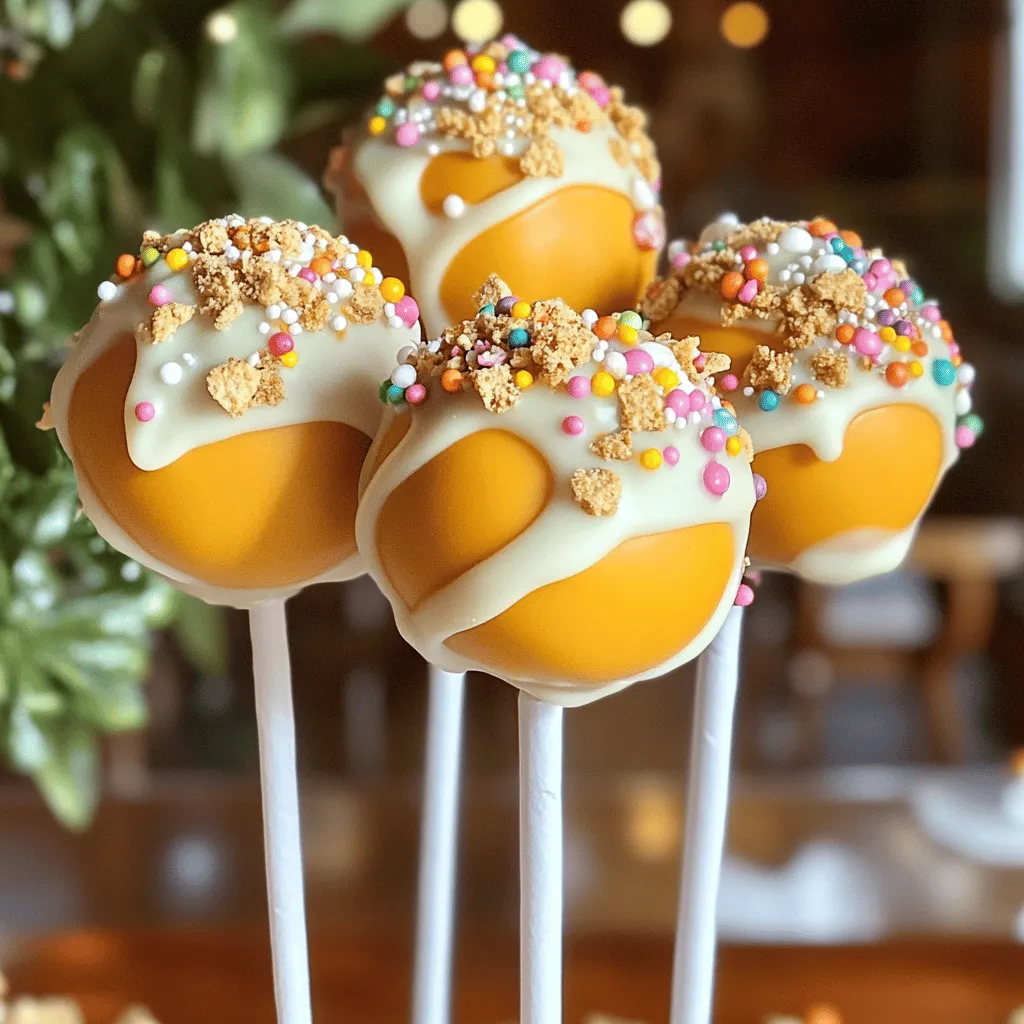
Next, dip each cake pop into the melted white chocolate. Allow excess chocolate to drip back into the bowl. While the chocolate is still wet, roll the cake pops in sprinkles or crushed graham crackers. This adds a fun touch!
To keep the cake pops upright while the chocolate sets, use a styrofoam block or a container filled with rice. Allow the chocolate to harden at room temperature for about 10-15 minutes. If you want to speed it up, place them in the fridge.
For the complete recipe, check the Full Recipe section!
Tips & Tricks
Achieving the Perfect Cake Texture
To make moist cake pops, keep these tips in mind:
– Use a box of yellow cake mix.
– Add one cup of canned pumpkin puree.
– Mix in eggs, oil, and spices well.
– Avoid overbaking; check for doneness at 25 minutes.
Fully cooling the cake is vital. If you skip this step, the cake may crumble too much. Wait until it’s room temperature before mixing it with frosting.
Decorating Ideas
Get creative with your cake pop toppings! Here are some fun ideas:
– Roll in crushed graham crackers for a pie crust flavor.
– Use festive sprinkles for a pop of color.
– Drizzle extra melted chocolate on top for flair.
For decoration, consider these tools:
– A small cookie scoop for even shapes.
– Parchment paper for easy cleanup.
– A styrofoam block to hold cake pops upright as they set.
Common Mistakes to Avoid
Watch out for these issues:
– Chocolate can crack if overheated. Melt slowly, stirring often.
– Cake pops may fall apart if too warm or not chilled. Always chill before dipping.
If you face these problems, here are some solutions:
– If chocolate cracks, try adding a bit of coconut oil while melting.
– If cake pops fall apart, chill them longer before dipping.
With these tips, you’re set for success with your pumpkin pie cake pops! Check out the Full Recipe for all the details.
Variations
Flavor Variations
You can change the flavor of your cake pops to suit your taste. Here are some ideas:
– Chocolate Cake: Swap out the yellow cake mix for chocolate cake mix. This gives a rich and sweet twist.
– Spice Cake: Use a spice cake mix to add warmth and depth. The spices will blend nicely with the pumpkin flavor.
– Frosting Choices: Instead of cream cheese frosting, try vanilla or chocolate frosting. Each type brings a new layer of taste.
Dietary Adjustments
You can also modify this recipe for different diets. Here are some suggestions:
– Gluten-Free: Use a gluten-free cake mix. It works well and keeps the cake pops soft.
– Vegan Options: Substitute eggs with flax eggs. Mix one tablespoon of flaxseed meal with three tablespoons of water for each egg.
– Low-Sugar: Use a sugar alternative like erythritol or stevia. These options help reduce sugar without losing sweetness.
For the full recipe, check out the detailed steps and enjoy making these delightful treats!
Storage Info
Best Practices for Storing Cake Pops
To store your cake pops, keep them at room temperature for short periods. Place them in a cool, dry space. Use a cake pop stand or a box to avoid touching. If you want to store them longer, refrigerate them. Wrap each pop in plastic wrap or place them in an airtight container. This keeps them fresh and moist.
If you have leftover cake pops, freezing is a great option. Simply arrange them in a single layer on a baking sheet. Once frozen, transfer them to a sealed bag or container. This way, they stay fresh for up to three months.
Shelf Life of Pumpkin Pie Cake Pops
Pumpkin pie cake pops can last up to one week at room temperature. If stored in the fridge, they can last longer, up to two weeks. Always check for signs of spoilage. If you see any mold or if they smell off, it’s best to throw them away. These simple checks will help keep your treats safe and tasty.
FAQs
How long do cake pops last?
Cake pops can last about 1 week at room temperature. If you store them in the fridge, they can stay fresh for 2 weeks. Make sure to keep them in an airtight container. This helps prevent them from drying out or absorbing strong smells from the fridge.
Can I make pumpkin pie cake pops ahead of time?
Yes, you can! Prepare the cake pops and chill them. Store them in the fridge for up to 2 days before serving. If you want to make them even earlier, freeze the uncoated cake balls. Just remember to let them thaw before dipping in chocolate.
What can I use instead of sticks for cake pops?
If you don’t have cake pop sticks, you can use pretzel sticks or even forks! You can also serve them in mini cups or on a plate. This makes them easy to grab and eat. Get creative with how you display them!
How to ensure white chocolate doesn’t seize up?
To avoid seizing, melt your white chocolate slowly. Use a microwave on low power, heating in 30-second bursts. Stir well between each burst. If it looks thick, add a teaspoon of coconut oil to thin it out. This keeps the chocolate smooth and easy to dip.
In this article, we explored how to make delicious pumpkin pie cake pops. We covered key ingredients, essential steps for baking, and creative decorating tips. Customization options allow you to cater to various tastes and dietary needs. Remember to store your cake pops properly for the best flavor and freshness. With these tips, you can enjoy tasty treats that impress friends and family. Dive in and enjoy making these fun and festive desserts!