![- Puff pastry sheets: These are light and flaky. They make your pies crispy and delicious. - Apples: Use 3 medium apples. Granny Smith or Honeycrisp works best. They are tart and sweet. - Sugar and spices for flavor: - 1/4 cup packed brown sugar adds sweetness. - 1 teaspoon ground cinnamon gives warmth. - 1/4 teaspoon ground nutmeg adds depth. - 1 tablespoon fresh lemon juice brightens the flavor. - 1 tablespoon cornstarch thickens the filling. - For egg wash: Use 1 beaten egg to help the pies get golden. - Optional: Dust with powdered sugar for a sweet finish. These ingredients come together to make your mini apple pies tasty and fun to eat. You can find the full recipe above for step-by-step guidance on how to make these treats. First, preheat your oven to 375°F (190°C). This step is key for even baking. While the oven heats, take a baking sheet and line it with parchment paper. This prevents the pies from sticking and makes cleanup easy. In a large mixing bowl, combine diced apples with brown sugar, ground cinnamon, ground nutmeg, lemon juice, and cornstarch. Stir well until each apple piece is coated. Coating the apples helps them stay juicy while baking. It also blends all the flavors together nicely. On a lightly floured surface, roll out each sheet of puff pastry. This helps to smooth it out. Use a sharp knife or pizza cutter to cut each sheet into four squares. This gives you eight total pastry squares. Place about 2 tablespoons of the apple mixture in the center of each square. Be careful not to overfill; it can lead to messy pies. To form the pouches, fold the corners of each pastry square over the apple filling. Press the edges tightly to seal. Use a fork to crimp the edges. This adds a nice touch while also sealing the filling inside. Ensure the edges are sealed well to prevent spillage. Put the prepared pouches on the lined baking sheet. Bake in your preheated oven for 20-25 minutes. Keep an eye on them as they bake. You want the pastry to puff and turn a lovely golden brown. Once baked, take the mini apple pies out of the oven. Allow them to cool slightly on a wire rack. Just before serving, dust the tops with powdered sugar. This adds a sweet touch and makes them look great. For the complete recipe, check out the [Full Recipe]. To make sure your puff pastry puffs well, keep it cold. Warm pastry does not rise well. When you roll out the dough, try to work quickly. This helps keep the butter layers intact. If you see melting butter, chill the pastry for a few minutes before baking. Common mistakes include overworking the dough and not sealing it properly. If you stretch the pastry too much, it can become tough. Also, ensure you crimp the edges well. This keeps the apple mixture from leaking out. A good seal makes for a neat pie. To boost flavor, add spices like ginger or allspice. These can give your mini pies a warm note. You might also use vanilla extract for a sweet touch. For a unique twist, try adding raisins or nuts to the apple filling. Choosing the right apples is key too. Granny Smith adds tartness, while Honeycrisp gives sweetness. You can mix different apples for a tasty blend. Experimenting with apple types can change the whole pie. Pair your mini apple pies with vanilla ice cream. The cold ice cream contrasts beautifully with the warm pie. You can also drizzle caramel or chocolate sauce on top for extra flavor. Presentation matters! Arrange the pies on a nice plate. Dust them with powdered sugar for a lovely finish. You can even add a few mint leaves for color. This simple touch makes your treat look gourmet. For the full recipe, check the detailed instructions above. {{image_4}} You can swap out apples for other fruits. Try pears, peaches, or cherries. Each fruit brings a unique flavor. Adjust the spices to match. For pears, use less cinnamon and add a pinch of ginger. For cherries, add a bit of almond extract. Each change creates a new treat. If you need gluten-free options, look for gluten-free puff pastry. Many brands make tasty versions. For egg-free pies, use a milk wash instead of egg wash. You can mix a bit of almond milk with a splash of vanilla. This gives a nice finish, too. Get creative with the shapes! Instead of pouches, use cookie cutters for fun designs. Stars and hearts look cute and festive. You can also make mini hand pies by folding the pastry over the filling. This makes each pie unique and fun to eat. To keep your mini apple pies fresh, store them in the fridge. Place them in an airtight container. They stay good for about 3 days. If you want the best taste, eat them within 1 day. The longer they sit, the softer the pastry gets. If you have leftover filling, you can keep it too. Store it in the fridge for up to 3 days. Use it for more pies or add it to yogurt for a tasty snack. You can freeze mini apple pies to enjoy later. If you freeze them before baking, wrap each pie in plastic wrap tightly. Then, place them in a freezer bag. They last up to 3 months this way. To bake them, no need to thaw first! Just bake them straight from the freezer. Add about 5 minutes to the baking time. If you freeze them after baking, let them cool first. Wrap them well and place them in a freezer bag. When you want to eat one, thaw it in the fridge overnight. Reheat in the oven at 350°F (175°C) for about 10-15 minutes. This keeps the pastry crispy. For the full recipe, check out the Mini Apple Pies With Puff Pastry section. Yes, store-bought puff pastry works great. It saves time and effort. Just make sure to thaw it properly before use. This way, it will puff up nicely when baked. Look for a golden brown color on the pastry. The edges should be crisp, and the filling may bubble a bit. Bake them for about 20-25 minutes at 375°F (190°C). Keep an eye on them to avoid overbaking. Absolutely! You can mix the apple filling a day ahead. Just store it in the fridge. When you're ready, fill the puff pastry and bake. This makes it easy to whip up the mini pies quickly. Granny Smith and Honeycrisp apples are my top picks. They hold their shape well and balance sweetness with tartness. This makes them perfect for baking mini apple pies. You can skip the egg wash entirely. Instead, brush the tops with milk or cream. This still gives a nice finish and helps with browning. Enjoy your pastry without any eggs if needed! This blog post guides you through making tasty mini apple pies. You learned about the key ingredients, steps for preparing and filling puff pastry, and baking tips. Remember, sealing pouches well stops fillings from leaking. You can also try different fruits and flavors for variety. Store extras in the fridge or freeze them for later. With these tips, you can bake perfect mini apple pies every time. Enjoy the process, and share your creations with friends and family!](https://tossedtastes.com/wp-content/uploads/2025/07/b3860924-2104-4921-8bcf-e6d7beff71ce.webp)
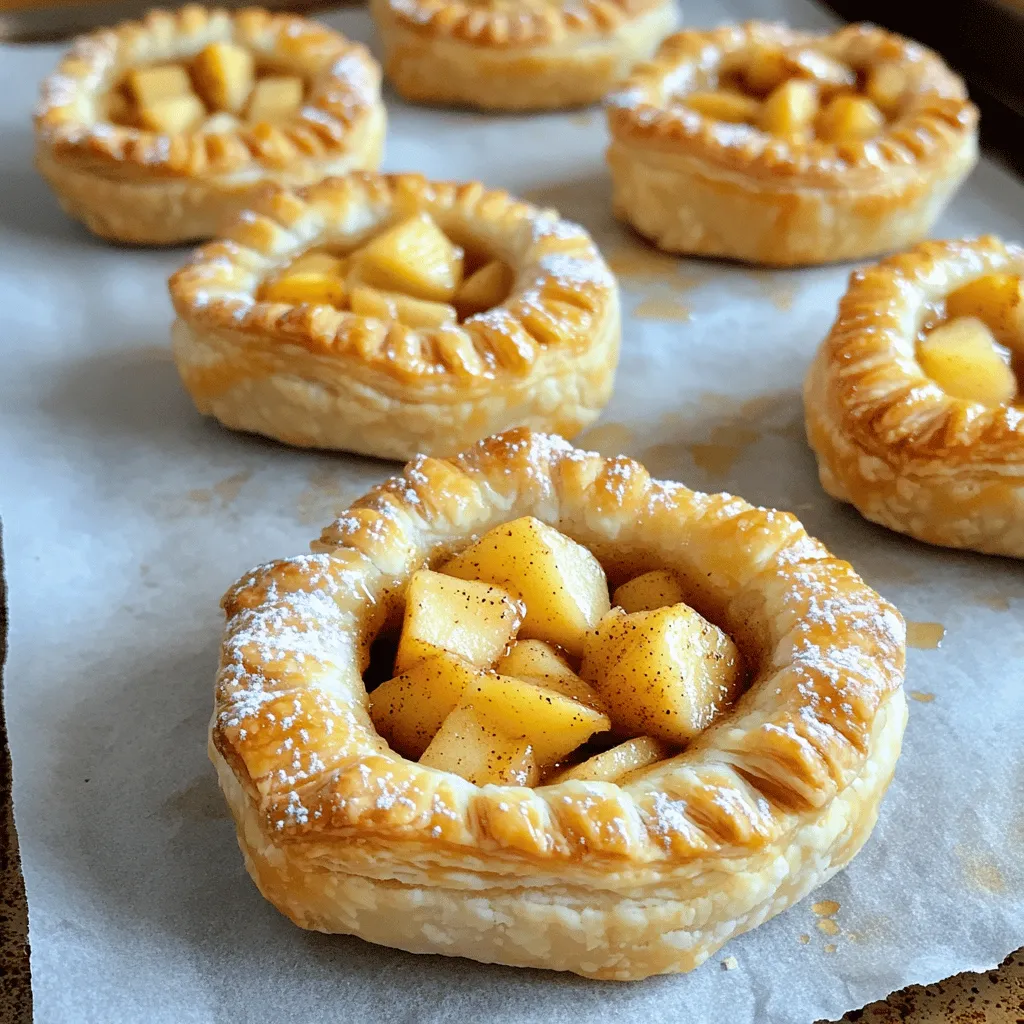
If you love sweet treats, you’ll adore these Mini Apple Pies with Puff Pastry! They are quick to make and bursting with flavor. Whether you’re baking for a gathering or treating yourself, these miniature delights are a hit. I’ll guide you through each step, from preparing the apple filling to achieving the perfect puff. Let’s get baking and create something delicious together!
Ingredients
List of Ingredients
– Puff pastry sheets: These are light and flaky. They make your pies crispy and delicious.
– Apples: Use 3 medium apples. Granny Smith or Honeycrisp works best. They are tart and sweet.
– Sugar and spices for flavor:
– 1/4 cup packed brown sugar adds sweetness.
– 1 teaspoon ground cinnamon gives warmth.
– 1/4 teaspoon ground nutmeg adds depth.
– 1 tablespoon fresh lemon juice brightens the flavor.
– 1 tablespoon cornstarch thickens the filling.
– For egg wash: Use 1 beaten egg to help the pies get golden.
– Optional: Dust with powdered sugar for a sweet finish.
These ingredients come together to make your mini apple pies tasty and fun to eat. You can find the full recipe above for step-by-step guidance on how to make these treats.
Step-by-Step Instructions
Preparing the Oven and Baking Sheet
First, preheat your oven to 375°F (190°C). This step is key for even baking. While the oven heats, take a baking sheet and line it with parchment paper. This prevents the pies from sticking and makes cleanup easy.
Making the Apple Filling
In a large mixing bowl, combine diced apples with brown sugar, ground cinnamon, ground nutmeg, lemon juice, and cornstarch. Stir well until each apple piece is coated. Coating the apples helps them stay juicy while baking. It also blends all the flavors together nicely.
Preparing and Filling the Puff Pastry
On a lightly floured surface, roll out each sheet of puff pastry. This helps to smooth it out. Use a sharp knife or pizza cutter to cut each sheet into four squares. This gives you eight total pastry squares. Place about 2 tablespoons of the apple mixture in the center of each square. Be careful not to overfill; it can lead to messy pies.
Sealing the Pouches
To form the pouches, fold the corners of each pastry square over the apple filling. Press the edges tightly to seal. Use a fork to crimp the edges. This adds a nice touch while also sealing the filling inside. Ensure the edges are sealed well to prevent spillage.
Baking the Mini Apple Pies
Put the prepared pouches on the lined baking sheet. Bake in your preheated oven for 20-25 minutes. Keep an eye on them as they bake. You want the pastry to puff and turn a lovely golden brown.
Final Touches Before Serving
Once baked, take the mini apple pies out of the oven. Allow them to cool slightly on a wire rack. Just before serving, dust the tops with powdered sugar. This adds a sweet touch and makes them look great.
For the complete recipe, check out the [Full Recipe].
Tips & Tricks
Achieving the Perfect Puff
To make sure your puff pastry puffs well, keep it cold. Warm pastry does not rise well. When you roll out the dough, try to work quickly. This helps keep the butter layers intact. If you see melting butter, chill the pastry for a few minutes before baking.
Common mistakes include overworking the dough and not sealing it properly. If you stretch the pastry too much, it can become tough. Also, ensure you crimp the edges well. This keeps the apple mixture from leaking out. A good seal makes for a neat pie.
Flavor Enhancements
To boost flavor, add spices like ginger or allspice. These can give your mini pies a warm note. You might also use vanilla extract for a sweet touch. For a unique twist, try adding raisins or nuts to the apple filling.
Choosing the right apples is key too. Granny Smith adds tartness, while Honeycrisp gives sweetness. You can mix different apples for a tasty blend. Experimenting with apple types can change the whole pie.
Serving Suggestions
Pair your mini apple pies with vanilla ice cream. The cold ice cream contrasts beautifully with the warm pie. You can also drizzle caramel or chocolate sauce on top for extra flavor.
Presentation matters! Arrange the pies on a nice plate. Dust them with powdered sugar for a lovely finish. You can even add a few mint leaves for color. This simple touch makes your treat look gourmet. For the full recipe, check the detailed instructions above.
Variations
Different Fruit Fillings
You can swap out apples for other fruits. Try pears, peaches, or cherries. Each fruit brings a unique flavor. Adjust the spices to match. For pears, use less cinnamon and add a pinch of ginger. For cherries, add a bit of almond extract. Each change creates a new treat.
Dietary Adjustments
If you need gluten-free options, look for gluten-free puff pastry. Many brands make tasty versions. For egg-free pies, use a milk wash instead of egg wash. You can mix a bit of almond milk with a splash of vanilla. This gives a nice finish, too.
Mini Apple Pie Shapes
Get creative with the shapes! Instead of pouches, use cookie cutters for fun designs. Stars and hearts look cute and festive. You can also make mini hand pies by folding the pastry over the filling. This makes each pie unique and fun to eat.
Storage Info
Storing Leftovers
To keep your mini apple pies fresh, store them in the fridge. Place them in an airtight container. They stay good for about 3 days. If you want the best taste, eat them within 1 day. The longer they sit, the softer the pastry gets.
If you have leftover filling, you can keep it too. Store it in the fridge for up to 3 days. Use it for more pies or add it to yogurt for a tasty snack.
Freezing Mini Apple Pies
You can freeze mini apple pies to enjoy later. If you freeze them before baking, wrap each pie in plastic wrap tightly. Then, place them in a freezer bag. They last up to 3 months this way.
To bake them, no need to thaw first! Just bake them straight from the freezer. Add about 5 minutes to the baking time.
If you freeze them after baking, let them cool first. Wrap them well and place them in a freezer bag. When you want to eat one, thaw it in the fridge overnight. Reheat in the oven at 350°F (175°C) for about 10-15 minutes. This keeps the pastry crispy.
For the full recipe, check out the Mini Apple Pies With Puff Pastry section.
FAQs
Can I use store-bought puff pastry?
Yes, store-bought puff pastry works great. It saves time and effort. Just make sure to thaw it properly before use. This way, it will puff up nicely when baked.
How do I know when the mini apple pies are done?
Look for a golden brown color on the pastry. The edges should be crisp, and the filling may bubble a bit. Bake them for about 20-25 minutes at 375°F (190°C). Keep an eye on them to avoid overbaking.
Can I make the filling ahead of time?
Absolutely! You can mix the apple filling a day ahead. Just store it in the fridge. When you’re ready, fill the puff pastry and bake. This makes it easy to whip up the mini pies quickly.
What is the best type of apple for baking?
Granny Smith and Honeycrisp apples are my top picks. They hold their shape well and balance sweetness with tartness. This makes them perfect for baking mini apple pies.
How do I make mini apple pies without an egg wash?
You can skip the egg wash entirely. Instead, brush the tops with milk or cream. This still gives a nice finish and helps with browning. Enjoy your pastry without any eggs if needed!
This blog post guides you through making tasty mini apple pies. You learned about the key ingredients, steps for preparing and filling puff pastry, and baking tips. Remember, sealing pouches well stops fillings from leaking. You can also try different fruits and flavors for variety. Store extras in the fridge or freeze them for later. With these tips, you can bake perfect mini apple pies every time. Enjoy the process, and share your creations with friends and family!
![- Puff pastry sheets: These are light and flaky. They make your pies crispy and delicious. - Apples: Use 3 medium apples. Granny Smith or Honeycrisp works best. They are tart and sweet. - Sugar and spices for flavor: - 1/4 cup packed brown sugar adds sweetness. - 1 teaspoon ground cinnamon gives warmth. - 1/4 teaspoon ground nutmeg adds depth. - 1 tablespoon fresh lemon juice brightens the flavor. - 1 tablespoon cornstarch thickens the filling. - For egg wash: Use 1 beaten egg to help the pies get golden. - Optional: Dust with powdered sugar for a sweet finish. These ingredients come together to make your mini apple pies tasty and fun to eat. You can find the full recipe above for step-by-step guidance on how to make these treats. First, preheat your oven to 375°F (190°C). This step is key for even baking. While the oven heats, take a baking sheet and line it with parchment paper. This prevents the pies from sticking and makes cleanup easy. In a large mixing bowl, combine diced apples with brown sugar, ground cinnamon, ground nutmeg, lemon juice, and cornstarch. Stir well until each apple piece is coated. Coating the apples helps them stay juicy while baking. It also blends all the flavors together nicely. On a lightly floured surface, roll out each sheet of puff pastry. This helps to smooth it out. Use a sharp knife or pizza cutter to cut each sheet into four squares. This gives you eight total pastry squares. Place about 2 tablespoons of the apple mixture in the center of each square. Be careful not to overfill; it can lead to messy pies. To form the pouches, fold the corners of each pastry square over the apple filling. Press the edges tightly to seal. Use a fork to crimp the edges. This adds a nice touch while also sealing the filling inside. Ensure the edges are sealed well to prevent spillage. Put the prepared pouches on the lined baking sheet. Bake in your preheated oven for 20-25 minutes. Keep an eye on them as they bake. You want the pastry to puff and turn a lovely golden brown. Once baked, take the mini apple pies out of the oven. Allow them to cool slightly on a wire rack. Just before serving, dust the tops with powdered sugar. This adds a sweet touch and makes them look great. For the complete recipe, check out the [Full Recipe]. To make sure your puff pastry puffs well, keep it cold. Warm pastry does not rise well. When you roll out the dough, try to work quickly. This helps keep the butter layers intact. If you see melting butter, chill the pastry for a few minutes before baking. Common mistakes include overworking the dough and not sealing it properly. If you stretch the pastry too much, it can become tough. Also, ensure you crimp the edges well. This keeps the apple mixture from leaking out. A good seal makes for a neat pie. To boost flavor, add spices like ginger or allspice. These can give your mini pies a warm note. You might also use vanilla extract for a sweet touch. For a unique twist, try adding raisins or nuts to the apple filling. Choosing the right apples is key too. Granny Smith adds tartness, while Honeycrisp gives sweetness. You can mix different apples for a tasty blend. Experimenting with apple types can change the whole pie. Pair your mini apple pies with vanilla ice cream. The cold ice cream contrasts beautifully with the warm pie. You can also drizzle caramel or chocolate sauce on top for extra flavor. Presentation matters! Arrange the pies on a nice plate. Dust them with powdered sugar for a lovely finish. You can even add a few mint leaves for color. This simple touch makes your treat look gourmet. For the full recipe, check the detailed instructions above. {{image_4}} You can swap out apples for other fruits. Try pears, peaches, or cherries. Each fruit brings a unique flavor. Adjust the spices to match. For pears, use less cinnamon and add a pinch of ginger. For cherries, add a bit of almond extract. Each change creates a new treat. If you need gluten-free options, look for gluten-free puff pastry. Many brands make tasty versions. For egg-free pies, use a milk wash instead of egg wash. You can mix a bit of almond milk with a splash of vanilla. This gives a nice finish, too. Get creative with the shapes! Instead of pouches, use cookie cutters for fun designs. Stars and hearts look cute and festive. You can also make mini hand pies by folding the pastry over the filling. This makes each pie unique and fun to eat. To keep your mini apple pies fresh, store them in the fridge. Place them in an airtight container. They stay good for about 3 days. If you want the best taste, eat them within 1 day. The longer they sit, the softer the pastry gets. If you have leftover filling, you can keep it too. Store it in the fridge for up to 3 days. Use it for more pies or add it to yogurt for a tasty snack. You can freeze mini apple pies to enjoy later. If you freeze them before baking, wrap each pie in plastic wrap tightly. Then, place them in a freezer bag. They last up to 3 months this way. To bake them, no need to thaw first! Just bake them straight from the freezer. Add about 5 minutes to the baking time. If you freeze them after baking, let them cool first. Wrap them well and place them in a freezer bag. When you want to eat one, thaw it in the fridge overnight. Reheat in the oven at 350°F (175°C) for about 10-15 minutes. This keeps the pastry crispy. For the full recipe, check out the Mini Apple Pies With Puff Pastry section. Yes, store-bought puff pastry works great. It saves time and effort. Just make sure to thaw it properly before use. This way, it will puff up nicely when baked. Look for a golden brown color on the pastry. The edges should be crisp, and the filling may bubble a bit. Bake them for about 20-25 minutes at 375°F (190°C). Keep an eye on them to avoid overbaking. Absolutely! You can mix the apple filling a day ahead. Just store it in the fridge. When you're ready, fill the puff pastry and bake. This makes it easy to whip up the mini pies quickly. Granny Smith and Honeycrisp apples are my top picks. They hold their shape well and balance sweetness with tartness. This makes them perfect for baking mini apple pies. You can skip the egg wash entirely. Instead, brush the tops with milk or cream. This still gives a nice finish and helps with browning. Enjoy your pastry without any eggs if needed! This blog post guides you through making tasty mini apple pies. You learned about the key ingredients, steps for preparing and filling puff pastry, and baking tips. Remember, sealing pouches well stops fillings from leaking. You can also try different fruits and flavors for variety. Store extras in the fridge or freeze them for later. With these tips, you can bake perfect mini apple pies every time. Enjoy the process, and share your creations with friends and family!](https://tossedtastes.com/wp-content/uploads/2025/07/b3860924-2104-4921-8bcf-e6d7beff71ce-300x300.webp)