![To make Chewy Apple Cider Cookies, gather these ingredients: - 2 cups all-purpose flour - 1 teaspoon baking soda - 1 teaspoon ground cinnamon - 1/2 teaspoon ground nutmeg - 1/2 teaspoon salt - 1 cup unsalted butter, softened - 1 cup packed brown sugar - 1/2 cup granulated sugar - 1 large egg - 1 tablespoon pure vanilla extract - 1/2 cup apple cider (fresh is best) - 1 cup chopped dried apples (or fresh apples, diced) - 1/2 cup chopped walnuts (optional) These ingredients blend to create soft and flavorful cookies that capture fall’s essence. You can customize your cookies with different ingredients. Here are some ideas: - Fresh apples: Replace dried apples for a juicier bite. - Pecans: Swap walnuts for pecans for a distinct crunch. - Oats: Add 1 cup of oats for a heartier texture. - Spices: Mix in ginger or cloves to enhance the autumn flavor. Feel free to experiment! Each option brings a new twist to your cookies. These cookies are a treat that brings joy. Here’s a quick look at their nutrition per cookie: - Calories: Approximately 150 - Protein: 2g - Fat: 7g - Carbohydrates: 21g - Fiber: 1g While they are not the healthiest snack, they are a delightful indulgence. Enjoy them in moderation as you savor the fall flavors. For the complete recipe, check the [Full Recipe]. To start, preheat your oven to 350°F (175°C). This is key for even baking. While that heats, line a baking sheet with parchment paper. This helps your cookies not stick. Set the sheet aside as you prepare your dough. Next, it’s time to mix your dry ingredients. In a medium bowl, whisk together the flour, baking soda, cinnamon, nutmeg, and salt. This step allows the spices to blend and adds flavor. Set this bowl aside for later. Now, take a large mixing bowl for the wet ingredients. Use an electric mixer to cream the softened butter with both sugars until it’s light and fluffy. This usually takes about 2-3 minutes. Make sure there are no lumps. Then, add the egg and vanilla extract. Mix until everything is smooth. Slowly pour in the apple cider while mixing. This keeps the dough moist and flavorful. Now, take your dry ingredient mixture and gently fold it into the wet mixture. Do this until just combined. Be careful not to overmix, as this can make the cookies tough. To make your cookies chewy, use softened butter, not melted. This helps create a nice texture. It’s also crucial to not overbake them. Look for lightly golden edges. The centers should be set but still soft. After baking, let the cookies sit on the sheet for 5 minutes. This helps them firm up without becoming hard. Then, transfer them to wire racks to cool completely. Enjoy the delightful taste of your Chewy Apple Cider Cookies! For the full recipe, check out the previous section. Many people make simple mistakes when baking cookies. A common error is overmixing the dough. This can make your cookies tough instead of chewy. Another mistake is not measuring ingredients correctly. Always use dry measuring cups for flour and sugar. Using too much flour will dry out your cookies. Ensure your butter is soft, not melted. Melted butter can change the cookie's texture. Lastly, remember to space your cookies on the sheet. Too close together can lead to one big cookie. To keep your Chewy Apple Cider Cookies fresh, store them in an airtight container. You can use a cookie jar or a plastic storage box. Place parchment paper between layers of cookies to avoid sticking. If you want to keep them longer, freeze them. Wrap each cookie in plastic wrap, then place them in a freezer-safe bag. They can last up to three months in the freezer. When ready to eat, thaw them at room temperature for a few hours. Baking your cookies correctly is key to their success. Always preheat your oven to 350°F (175°C) before baking. Use a reliable oven thermometer to ensure it’s accurate. Once baked, let your cookies cool on the baking sheet for five minutes. This helps them firm up a bit. After that, move them to wire racks to cool completely. Cooling them properly keeps them chewy and soft. Enjoy your warm cookies, or store them for later! For the complete recipe, check the Full Recipe. {{image_4}} You can change the flavor of Chewy Apple Cider Cookies with ease. Try adding spices like ginger or cloves for a warm twist. You can also swap out the apple cider for pumpkin spice or maple syrup. These options keep the flavors fresh and fun for fall. If you need a gluten-free version, use a gluten-free flour blend. Many blends work well as a one-to-one substitute. Ensure that your baking soda is also gluten-free. This way, you still enjoy those chewy cookies without gluten. Adding nuts, oats, or seeds can boost the texture of your cookies. Chopped walnuts give a nice crunch. You can also use pecans or almonds if you prefer. For a wholesome touch, mix in rolled oats or flaxseeds. Both add fiber and taste, making your cookies even better. For the full recipe, be sure to check out the detailed instructions. Enjoy experimenting with these variations! To keep your Chewy Apple Cider Cookies fresh, store them in an airtight container. This will help maintain their chewy texture. You can keep them at room temperature for up to a week. If you want them to last longer, consider these tips: - Separate layers with parchment paper to avoid sticking. - Do not refrigerate, as this can dry them out. Freezing your cookies is a great option if you want to enjoy them later. Here’s how to do it: - Allow the cookies to cool completely. - Place them in a single layer on a baking sheet. - Freeze for about an hour until firm. - Transfer them to a freezer-safe bag or container. - Label with the date and type of cookie. These cookies can last in the freezer for up to three months. When you crave a cookie, just thaw them at room temperature. Reheating your cookies can bring back their fresh-baked flavor. Here’s how to do it right: - Preheat your oven to 350°F (175°C). - Place cookies on a baking sheet. - Heat them for 5 to 7 minutes. This method warms them through and keeps them chewy. Avoid using the microwave, as it can make them tough. Enjoy your warm, flavorful cookies again! For the complete recipe, check out the Full Recipe. Chewy cookies have a soft center and a moist texture. This happens due to the right balance of ingredients. When you use more brown sugar than white sugar, it adds moisture. Eggs also play a big role. They help bind and create a softer dough. Baking time is key too. Pull cookies from the oven when they are just set. This keeps them soft and chewy. Yes, you can use fresh apples! Diced fresh apples add a crisp texture and fresh flavor. They do change the cookie's moisture. Adjust the apple cider in the recipe if needed. Fresh apples may make your dough wetter. If you prefer dried apples, they provide a chewy bite. Both options taste great in these cookies! If you overmix your cookie dough, it can become tough. To fix it, add a bit of flour. This can help with moisture. Mix gently just until combined. If the dough feels too thick, add a teaspoon of milk. This can help soften it. Remember, less mixing is better for soft cookies. In this blog post, we covered how to make Chewy Apple Cider Cookies. We looked at ingredients, detailed instructions, tips for success, and tasty variations. Each step helps you create the perfect cookie. Remember, the key to chewiness lies in mixing and baking techniques. By using proper storage methods, you can keep these cookies fresh. Enjoy experimenting with flavors and textures to make this recipe your own. Happy baking!](https://tossedtastes.com/wp-content/uploads/2025/07/289f5bd3-cd4b-463b-a4d9-559e6df0dc9d.webp)
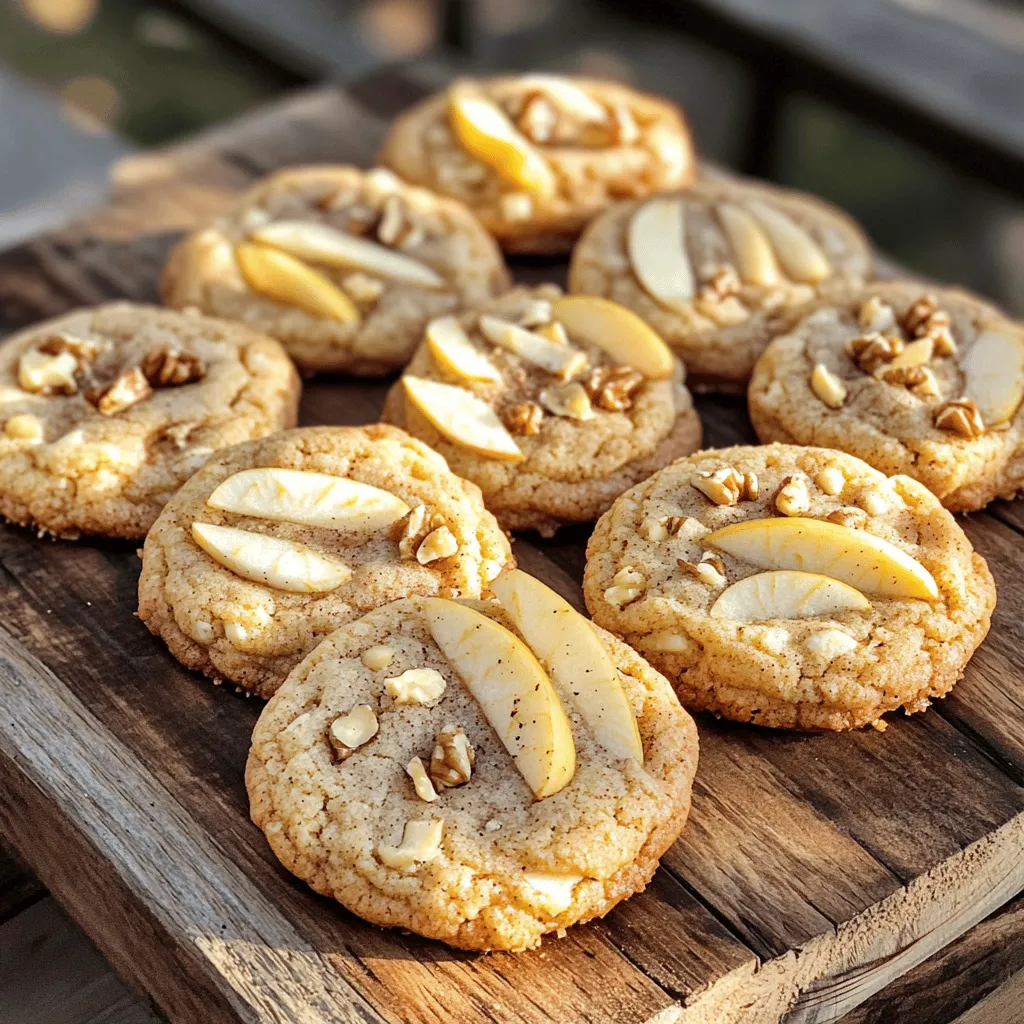
Fall is here, and so is the perfect treat: Chewy Apple Cider Cookies! These cookies are soft, sweet, and packed with autumn flavor. In this article, I’ll share easy steps to make these delightful treats and offer tips to get them just right. Whether you’re baking for family, friends, or a cozy night in, these cookies will steal the show. Let’s dive in and bring some fall magic to your kitchen!
Ingredients
Detailed ingredients list for Chewy Apple Cider Cookies
To make Chewy Apple Cider Cookies, gather these ingredients:
– 2 cups all-purpose flour
– 1 teaspoon baking soda
– 1 teaspoon ground cinnamon
– 1/2 teaspoon ground nutmeg
– 1/2 teaspoon salt
– 1 cup unsalted butter, softened
– 1 cup packed brown sugar
– 1/2 cup granulated sugar
– 1 large egg
– 1 tablespoon pure vanilla extract
– 1/2 cup apple cider (fresh is best)
– 1 cup chopped dried apples (or fresh apples, diced)
– 1/2 cup chopped walnuts (optional)
These ingredients blend to create soft and flavorful cookies that capture fall’s essence.
Optional additions and substitutions
You can customize your cookies with different ingredients. Here are some ideas:
– Fresh apples: Replace dried apples for a juicier bite.
– Pecans: Swap walnuts for pecans for a distinct crunch.
– Oats: Add 1 cup of oats for a heartier texture.
– Spices: Mix in ginger or cloves to enhance the autumn flavor.
Feel free to experiment! Each option brings a new twist to your cookies.
Nutritional information overview
These cookies are a treat that brings joy. Here’s a quick look at their nutrition per cookie:
– Calories: Approximately 150
– Protein: 2g
– Fat: 7g
– Carbohydrates: 21g
– Fiber: 1g
While they are not the healthiest snack, they are a delightful indulgence. Enjoy them in moderation as you savor the fall flavors.
For the complete recipe, check the [Full Recipe].
Step-by-Step Instructions
Preparation guide: From preheating to cooling
To start, preheat your oven to 350°F (175°C). This is key for even baking. While that heats, line a baking sheet with parchment paper. This helps your cookies not stick. Set the sheet aside as you prepare your dough.
Next, it’s time to mix your dry ingredients. In a medium bowl, whisk together the flour, baking soda, cinnamon, nutmeg, and salt. This step allows the spices to blend and adds flavor. Set this bowl aside for later.
Techniques for proper mixing and ingredient integration
Now, take a large mixing bowl for the wet ingredients. Use an electric mixer to cream the softened butter with both sugars until it’s light and fluffy. This usually takes about 2-3 minutes. Make sure there are no lumps. Then, add the egg and vanilla extract. Mix until everything is smooth.
Slowly pour in the apple cider while mixing. This keeps the dough moist and flavorful. Now, take your dry ingredient mixture and gently fold it into the wet mixture. Do this until just combined. Be careful not to overmix, as this can make the cookies tough.
Tips for achieving the perfect chewiness in cookies
To make your cookies chewy, use softened butter, not melted. This helps create a nice texture. It’s also crucial to not overbake them. Look for lightly golden edges. The centers should be set but still soft.
After baking, let the cookies sit on the sheet for 5 minutes. This helps them firm up without becoming hard. Then, transfer them to wire racks to cool completely. Enjoy the delightful taste of your Chewy Apple Cider Cookies! For the full recipe, check out the previous section.
Tips & Tricks
Common mistakes to avoid when making cookies
Many people make simple mistakes when baking cookies. A common error is overmixing the dough. This can make your cookies tough instead of chewy. Another mistake is not measuring ingredients correctly. Always use dry measuring cups for flour and sugar. Using too much flour will dry out your cookies. Ensure your butter is soft, not melted. Melted butter can change the cookie’s texture. Lastly, remember to space your cookies on the sheet. Too close together can lead to one big cookie.
How to store leftover cookies for maximum freshness
To keep your Chewy Apple Cider Cookies fresh, store them in an airtight container. You can use a cookie jar or a plastic storage box. Place parchment paper between layers of cookies to avoid sticking. If you want to keep them longer, freeze them. Wrap each cookie in plastic wrap, then place them in a freezer-safe bag. They can last up to three months in the freezer. When ready to eat, thaw them at room temperature for a few hours.
Best practices for baking and cooling
Baking your cookies correctly is key to their success. Always preheat your oven to 350°F (175°C) before baking. Use a reliable oven thermometer to ensure it’s accurate. Once baked, let your cookies cool on the baking sheet for five minutes. This helps them firm up a bit. After that, move them to wire racks to cool completely. Cooling them properly keeps them chewy and soft. Enjoy your warm cookies, or store them for later! For the complete recipe, check the Full Recipe.
Variations
Seasonal variations to try with different flavors
You can change the flavor of Chewy Apple Cider Cookies with ease. Try adding spices like ginger or cloves for a warm twist. You can also swap out the apple cider for pumpkin spice or maple syrup. These options keep the flavors fresh and fun for fall.
Gluten-free adaptations for Chewy Apple Cider Cookies
If you need a gluten-free version, use a gluten-free flour blend. Many blends work well as a one-to-one substitute. Ensure that your baking soda is also gluten-free. This way, you still enjoy those chewy cookies without gluten.
Adding extra textures: Incorporating nuts, oats, or seeds
Adding nuts, oats, or seeds can boost the texture of your cookies. Chopped walnuts give a nice crunch. You can also use pecans or almonds if you prefer. For a wholesome touch, mix in rolled oats or flaxseeds. Both add fiber and taste, making your cookies even better.
For the full recipe, be sure to check out the detailed instructions. Enjoy experimenting with these variations!
Storage Info
How to properly store Chewy Apple Cider Cookies
To keep your Chewy Apple Cider Cookies fresh, store them in an airtight container. This will help maintain their chewy texture. You can keep them at room temperature for up to a week. If you want them to last longer, consider these tips:
– Separate layers with parchment paper to avoid sticking.
– Do not refrigerate, as this can dry them out.
Freezing instructions for longer shelf life
Freezing your cookies is a great option if you want to enjoy them later. Here’s how to do it:
– Allow the cookies to cool completely.
– Place them in a single layer on a baking sheet.
– Freeze for about an hour until firm.
– Transfer them to a freezer-safe bag or container.
– Label with the date and type of cookie.
These cookies can last in the freezer for up to three months. When you crave a cookie, just thaw them at room temperature.
Best practices for reheating cookies
Reheating your cookies can bring back their fresh-baked flavor. Here’s how to do it right:
– Preheat your oven to 350°F (175°C).
– Place cookies on a baking sheet.
– Heat them for 5 to 7 minutes.
This method warms them through and keeps them chewy. Avoid using the microwave, as it can make them tough. Enjoy your warm, flavorful cookies again! For the complete recipe, check out the Full Recipe.
FAQs
What makes cookies chewy vs. crispy?
Chewy cookies have a soft center and a moist texture. This happens due to the right balance of ingredients. When you use more brown sugar than white sugar, it adds moisture. Eggs also play a big role. They help bind and create a softer dough. Baking time is key too. Pull cookies from the oven when they are just set. This keeps them soft and chewy.
Can I use fresh apples instead of dried apples?
Yes, you can use fresh apples! Diced fresh apples add a crisp texture and fresh flavor. They do change the cookie’s moisture. Adjust the apple cider in the recipe if needed. Fresh apples may make your dough wetter. If you prefer dried apples, they provide a chewy bite. Both options taste great in these cookies!
How do I fix overmixed cookie dough?
If you overmix your cookie dough, it can become tough. To fix it, add a bit of flour. This can help with moisture. Mix gently just until combined. If the dough feels too thick, add a teaspoon of milk. This can help soften it. Remember, less mixing is better for soft cookies.
In this blog post, we covered how to make Chewy Apple Cider Cookies. We looked at ingredients, detailed instructions, tips for success, and tasty variations. Each step helps you create the perfect cookie.
Remember, the key to chewiness lies in mixing and baking techniques. By using proper storage methods, you can keep these cookies fresh. Enjoy experimenting with flavors and textures to make this recipe your own. Happy baking!
![To make Chewy Apple Cider Cookies, gather these ingredients: - 2 cups all-purpose flour - 1 teaspoon baking soda - 1 teaspoon ground cinnamon - 1/2 teaspoon ground nutmeg - 1/2 teaspoon salt - 1 cup unsalted butter, softened - 1 cup packed brown sugar - 1/2 cup granulated sugar - 1 large egg - 1 tablespoon pure vanilla extract - 1/2 cup apple cider (fresh is best) - 1 cup chopped dried apples (or fresh apples, diced) - 1/2 cup chopped walnuts (optional) These ingredients blend to create soft and flavorful cookies that capture fall’s essence. You can customize your cookies with different ingredients. Here are some ideas: - Fresh apples: Replace dried apples for a juicier bite. - Pecans: Swap walnuts for pecans for a distinct crunch. - Oats: Add 1 cup of oats for a heartier texture. - Spices: Mix in ginger or cloves to enhance the autumn flavor. Feel free to experiment! Each option brings a new twist to your cookies. These cookies are a treat that brings joy. Here’s a quick look at their nutrition per cookie: - Calories: Approximately 150 - Protein: 2g - Fat: 7g - Carbohydrates: 21g - Fiber: 1g While they are not the healthiest snack, they are a delightful indulgence. Enjoy them in moderation as you savor the fall flavors. For the complete recipe, check the [Full Recipe]. To start, preheat your oven to 350°F (175°C). This is key for even baking. While that heats, line a baking sheet with parchment paper. This helps your cookies not stick. Set the sheet aside as you prepare your dough. Next, it’s time to mix your dry ingredients. In a medium bowl, whisk together the flour, baking soda, cinnamon, nutmeg, and salt. This step allows the spices to blend and adds flavor. Set this bowl aside for later. Now, take a large mixing bowl for the wet ingredients. Use an electric mixer to cream the softened butter with both sugars until it’s light and fluffy. This usually takes about 2-3 minutes. Make sure there are no lumps. Then, add the egg and vanilla extract. Mix until everything is smooth. Slowly pour in the apple cider while mixing. This keeps the dough moist and flavorful. Now, take your dry ingredient mixture and gently fold it into the wet mixture. Do this until just combined. Be careful not to overmix, as this can make the cookies tough. To make your cookies chewy, use softened butter, not melted. This helps create a nice texture. It’s also crucial to not overbake them. Look for lightly golden edges. The centers should be set but still soft. After baking, let the cookies sit on the sheet for 5 minutes. This helps them firm up without becoming hard. Then, transfer them to wire racks to cool completely. Enjoy the delightful taste of your Chewy Apple Cider Cookies! For the full recipe, check out the previous section. Many people make simple mistakes when baking cookies. A common error is overmixing the dough. This can make your cookies tough instead of chewy. Another mistake is not measuring ingredients correctly. Always use dry measuring cups for flour and sugar. Using too much flour will dry out your cookies. Ensure your butter is soft, not melted. Melted butter can change the cookie's texture. Lastly, remember to space your cookies on the sheet. Too close together can lead to one big cookie. To keep your Chewy Apple Cider Cookies fresh, store them in an airtight container. You can use a cookie jar or a plastic storage box. Place parchment paper between layers of cookies to avoid sticking. If you want to keep them longer, freeze them. Wrap each cookie in plastic wrap, then place them in a freezer-safe bag. They can last up to three months in the freezer. When ready to eat, thaw them at room temperature for a few hours. Baking your cookies correctly is key to their success. Always preheat your oven to 350°F (175°C) before baking. Use a reliable oven thermometer to ensure it’s accurate. Once baked, let your cookies cool on the baking sheet for five minutes. This helps them firm up a bit. After that, move them to wire racks to cool completely. Cooling them properly keeps them chewy and soft. Enjoy your warm cookies, or store them for later! For the complete recipe, check the Full Recipe. {{image_4}} You can change the flavor of Chewy Apple Cider Cookies with ease. Try adding spices like ginger or cloves for a warm twist. You can also swap out the apple cider for pumpkin spice or maple syrup. These options keep the flavors fresh and fun for fall. If you need a gluten-free version, use a gluten-free flour blend. Many blends work well as a one-to-one substitute. Ensure that your baking soda is also gluten-free. This way, you still enjoy those chewy cookies without gluten. Adding nuts, oats, or seeds can boost the texture of your cookies. Chopped walnuts give a nice crunch. You can also use pecans or almonds if you prefer. For a wholesome touch, mix in rolled oats or flaxseeds. Both add fiber and taste, making your cookies even better. For the full recipe, be sure to check out the detailed instructions. Enjoy experimenting with these variations! To keep your Chewy Apple Cider Cookies fresh, store them in an airtight container. This will help maintain their chewy texture. You can keep them at room temperature for up to a week. If you want them to last longer, consider these tips: - Separate layers with parchment paper to avoid sticking. - Do not refrigerate, as this can dry them out. Freezing your cookies is a great option if you want to enjoy them later. Here’s how to do it: - Allow the cookies to cool completely. - Place them in a single layer on a baking sheet. - Freeze for about an hour until firm. - Transfer them to a freezer-safe bag or container. - Label with the date and type of cookie. These cookies can last in the freezer for up to three months. When you crave a cookie, just thaw them at room temperature. Reheating your cookies can bring back their fresh-baked flavor. Here’s how to do it right: - Preheat your oven to 350°F (175°C). - Place cookies on a baking sheet. - Heat them for 5 to 7 minutes. This method warms them through and keeps them chewy. Avoid using the microwave, as it can make them tough. Enjoy your warm, flavorful cookies again! For the complete recipe, check out the Full Recipe. Chewy cookies have a soft center and a moist texture. This happens due to the right balance of ingredients. When you use more brown sugar than white sugar, it adds moisture. Eggs also play a big role. They help bind and create a softer dough. Baking time is key too. Pull cookies from the oven when they are just set. This keeps them soft and chewy. Yes, you can use fresh apples! Diced fresh apples add a crisp texture and fresh flavor. They do change the cookie's moisture. Adjust the apple cider in the recipe if needed. Fresh apples may make your dough wetter. If you prefer dried apples, they provide a chewy bite. Both options taste great in these cookies! If you overmix your cookie dough, it can become tough. To fix it, add a bit of flour. This can help with moisture. Mix gently just until combined. If the dough feels too thick, add a teaspoon of milk. This can help soften it. Remember, less mixing is better for soft cookies. In this blog post, we covered how to make Chewy Apple Cider Cookies. We looked at ingredients, detailed instructions, tips for success, and tasty variations. Each step helps you create the perfect cookie. Remember, the key to chewiness lies in mixing and baking techniques. By using proper storage methods, you can keep these cookies fresh. Enjoy experimenting with flavors and textures to make this recipe your own. Happy baking!](https://tossedtastes.com/wp-content/uploads/2025/07/289f5bd3-cd4b-463b-a4d9-559e6df0dc9d-300x300.webp)