Looking for a quick and tasty side dish? Honey Butter Skillet Corn is your answer! This simple recipe combines fresh corn with honey and butter for a sweet and savory delight. Perfect for any meal, I’ll guide you through easy steps to cook it just right. Get ready to impress your family and friends with this flavorful dish, packed with nutrition and versatility! Let’s dive in!
Ingredients
List of Ingredients
– 4 cups fresh corn kernels (approximately 6 ears of corn)
– 4 tablespoons unsalted butter
– 3 tablespoons honey (preferably wildflower or clover)
– 1/2 teaspoon sea salt
– 1/4 teaspoon freshly cracked black pepper
– 1/4 teaspoon smoked paprika
– 2 tablespoons fresh cilantro, chopped
– Juice of 1 fresh lime
To make Honey Butter Skillet Corn, start with fresh corn. Six ears will give you about four cups of kernels. If fresh corn is not available, frozen corn works too. Just thaw and drain it well.
Next, you need unsalted butter. This adds a rich flavor to the dish. Honey is key for sweetness. I suggest wildflower or clover honey for the best taste.
For seasoning, sea salt and freshly cracked black pepper bring balance. Smoked paprika adds a nice depth to the flavor. Fresh cilantro will brighten the dish. Finally, lime juice gives it a zesty twist.
Ingredient Substitutions
You can swap fresh corn for frozen corn if you want a quick option. Just make sure to thaw it first. For honey, try different types for unique flavors. You might choose orange blossom or tupelo honey.
If you need a dairy-free option, substitute unsalted butter with plant-based butter. This keeps the dish creamy while making it suitable for various diets.
Nutritional Information
Honey Butter Skillet Corn packs a punch in flavor and nutrients. It has about 180 calories per serving. Each serving provides healthy carbs from corn and fats from butter.
Corn is high in fiber and vitamins, especially B vitamins. Honey adds natural sweetness and antioxidants. Using lime juice boosts vitamin C, which is great for your immune system. Overall, this dish is not only tasty but also nutritious!
Step-by-Step Instructions
Preparation Steps
How to prepare fresh corn
To prepare fresh corn, start by shucking the ears. Remove the husks and silk. Hold the cob upright and slice off the kernels. Collect them in a bowl. This gives you about 4 cups of corn.
Thawing and draining frozen corn
If you use frozen corn, take it out ahead of time. Place the corn in a bowl to thaw. Once thawed, drain any excess water. This keeps your dish from getting soggy.
Cooking Process
Melting butter in a skillet
Grab a large skillet and set it on medium heat. Add 4 tablespoons of unsalted butter. Let it melt slowly. Swirl the pan to help it melt evenly. Once it foams and smells good, it’s ready.
Sautéing corn kernels
Add the corn to the melted butter. Sauté the kernels for about 5 to 7 minutes. Stir them often. You want them tender with a slight golden edge. This enhances the sweet flavor.
Finalizing the Dish
Incorporating honey and spices
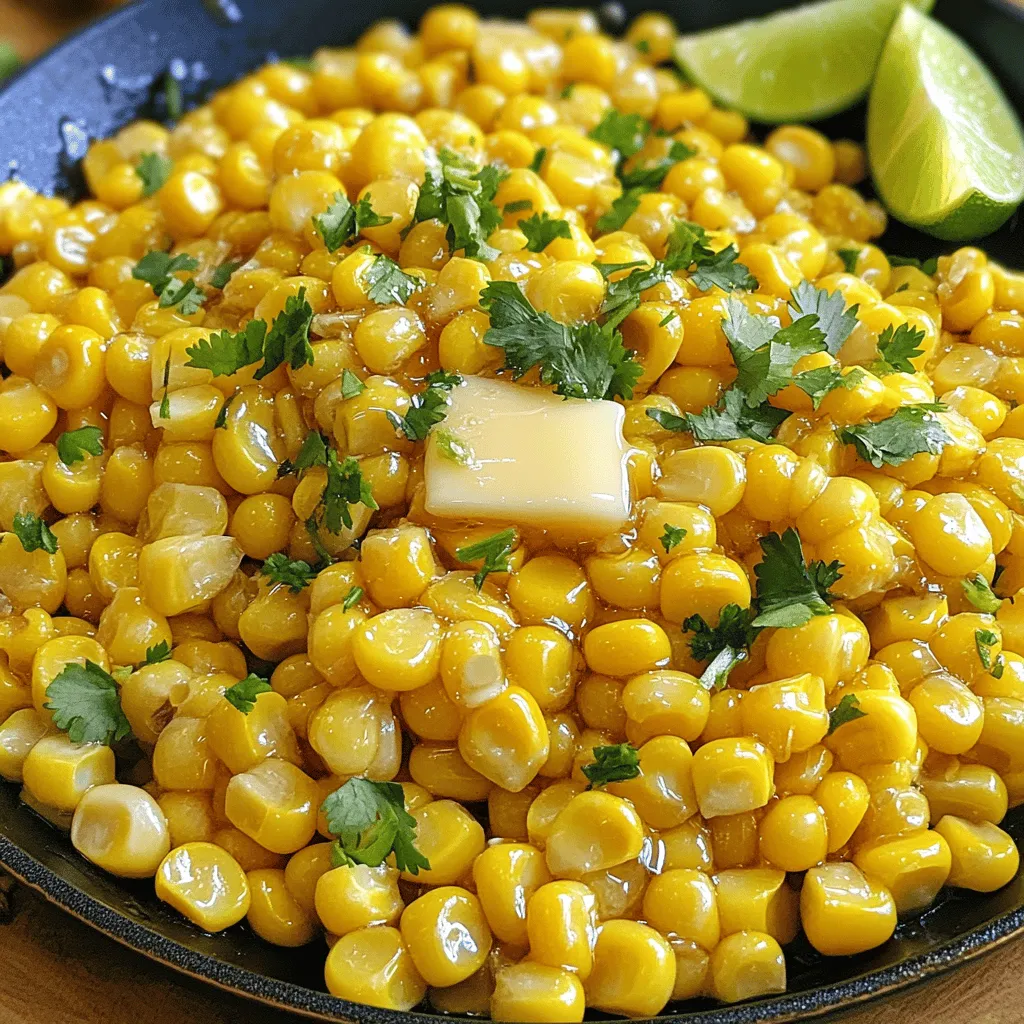
Drizzle 3 tablespoons of honey over the corn. Stir well so the corn is coated. Then, add 1/2 teaspoon of sea salt, 1/4 teaspoon of black pepper, and 1/4 teaspoon of smoked paprika. Mix well and let it cook for another 2 to 3 minutes. This allows the spices to blend in.
Adding lime juice and serving suggestions
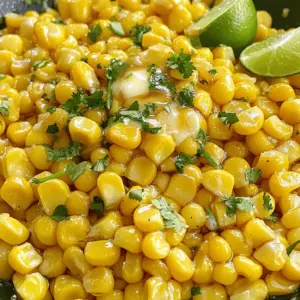
Take the skillet off the heat. Squeeze the juice of 1 fresh lime on top. Stir it in for a zesty kick. Taste it and adjust any seasonings as needed. Serve the corn in a nice dish and sprinkle chopped cilantro on top. You can also add lime wedges for extra flair.
Tips & Tricks
Cooking Tips
– Ensuring the right skillet temperature: Preheat your skillet on medium heat. This helps the butter melt without burning. If the butter foams and starts to brown, it’s too hot.
– Avoiding overcooking the corn: Cook the corn for just 5-7 minutes. You want it tender but still crisp. Keep stirring to prevent sticking.
Flavor Enhancement
– Options for adding more spice: If you like heat, add a pinch of cayenne pepper or some chili flakes. This adds a nice kick.
– Using fresh vs. dried herbs: Fresh cilantro gives a bright taste. Dried herbs are fine, but fresh herbs are always best for flavor and aroma.
Presentation Tips
– Serving suggestions for visual appeal: Use a rustic cast iron skillet for a cozy look. It keeps the dish warm and adds charm.
– Garnishing ideas with lime and cilantro: Squeeze lime juice over the corn right before serving. Add extra cilantro on top for color and taste. This makes the dish pop!
Variations
Flavor Variations
You can easily change the taste of honey butter skillet corn. Adding cheese gives it a creamy touch. Try sharp cheddar or crumbly feta for a rich flavor. Mixing in other veggies like bell peppers or zucchini can also add color and crunch. These small changes can make your dish unique and fun.
Dietary Variations
Want to make this dish vegan? Simply swap the butter for a plant-based option. Use coconut oil or vegan butter. For those who are gluten-free, this recipe is naturally safe. Just make sure the honey you choose is certified gluten-free. This way, everyone can enjoy this tasty treat.
Seasonality Variations
Seasonal herbs can brighten up your skillet corn. In spring, use fresh chives or dill for a fresh twist. In the fall, add warming spices like cinnamon or nutmeg for comfort. Adjust the sweetness to your taste, too. Some like it sweeter, while others prefer a savory touch. You can even add a dash of hot sauce for a kick!
Storage Info
Storing Leftovers
To keep your honey butter skillet corn fresh, place it in an airtight container. This helps lock in flavor and moisture. Store it in the fridge if you plan to eat it within the next few days. For longer storage, freezing is a great option. Just allow the corn to cool down, then transfer it to a freezer-safe bag or container. Make sure to remove as much air as possible to prevent freezer burn.
Reheating Guidelines
When reheating skillet corn, aim to preserve its sweet and tender texture. The best way is to use a skillet over medium heat. Add a splash of water or broth to help revive the moisture. Stir frequently until it’s heated through. You can also use the microwave. Place the corn in a bowl, cover it with a damp paper towel, and heat in short bursts, stirring in between.
Shelf Life
Honey butter skillet corn lasts about 3 to 5 days in the fridge. Always check for signs of spoilage, like an off smell or changes in color. If you see any mold or if it smells sour, it’s best to toss it. Proper storage helps ensure your delicious dish stays fresh longer.
FAQs
Can I use frozen corn instead of fresh?
Yes, you can use frozen corn! Just make sure to thaw and drain it first. This saves time and still gives you great flavor. Frozen corn is sweet and tender too. I often use it when fresh corn is out of season.
How do I make this recipe spicier?
To add some heat, try adding cayenne pepper or chili powder. Start with a small amount, then taste. You can also add diced jalapeños for a fresh kick. If you love spice, go for a spicy honey instead of regular honey.
What are some good meat pairings for this dish?
Honey butter skillet corn goes well with grilled chicken or pork chops. It also pairs nicely with steak or fish. The sweet and savory flavors balance rich meats. I recommend serving it alongside barbecued ribs for a tasty meal.
How can I make this dish ahead of time?
You can prepare the corn in advance. Just cook it, then cool it down. Store it in the fridge until ready to serve. When it’s time to eat, reheat it in a skillet. Add honey and spices just before serving to freshen the flavors.
Is Honey Butter Skillet Corn suitable for meal prep?
Absolutely! This dish works great for meal prep. You can make a big batch and store it in portions. It keeps well in the fridge and reheats nicely. Just remember to leave out the lime juice until you serve it. This keeps the flavors bright and fresh.
This blog shared all you need for making Honey Butter Skillet Corn. We covered key ingredients, cooking steps, and best practices for flavor and presentation. Consider using variations to fit your taste and dietary needs. Storing leftovers properly ensures you enjoy this dish later. With the right tips, you’ll impress everyone at the table. Enjoy the journey of cooking and customizing this tasty dish!