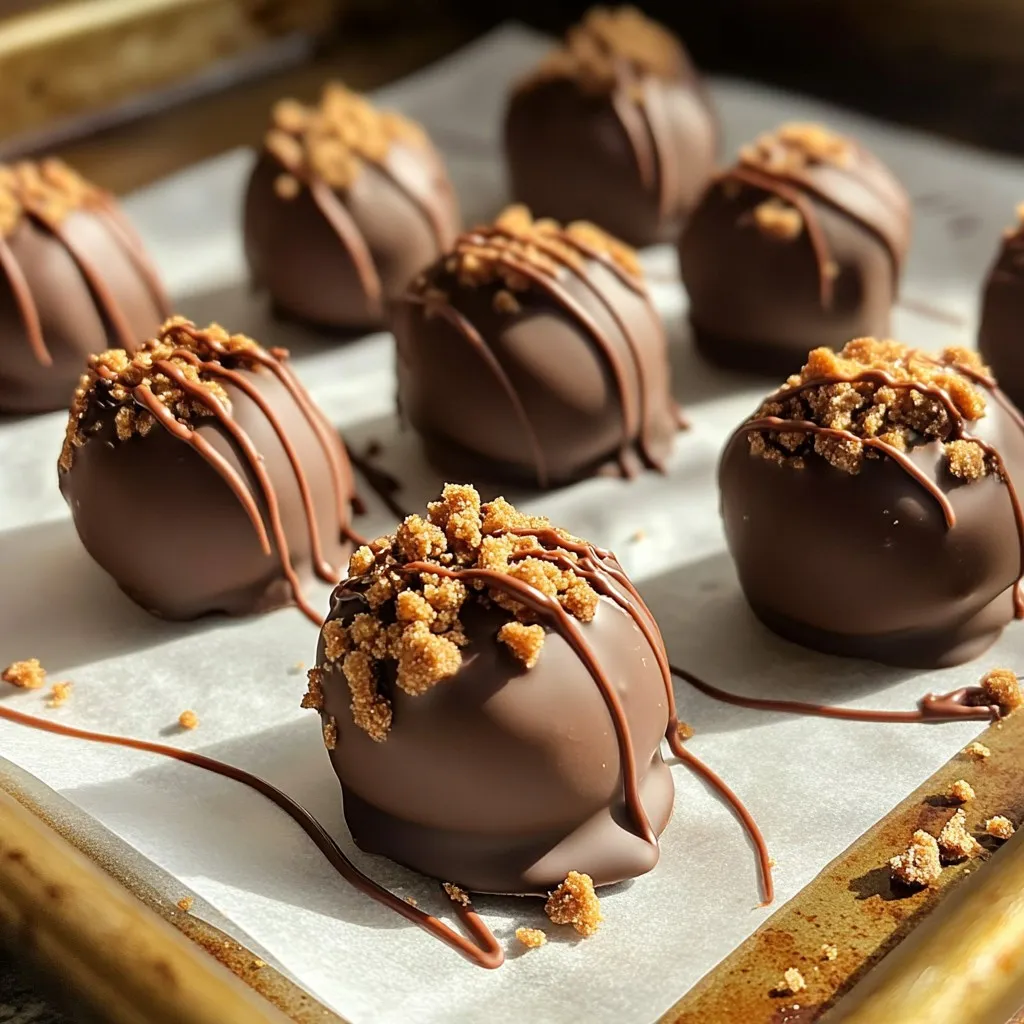
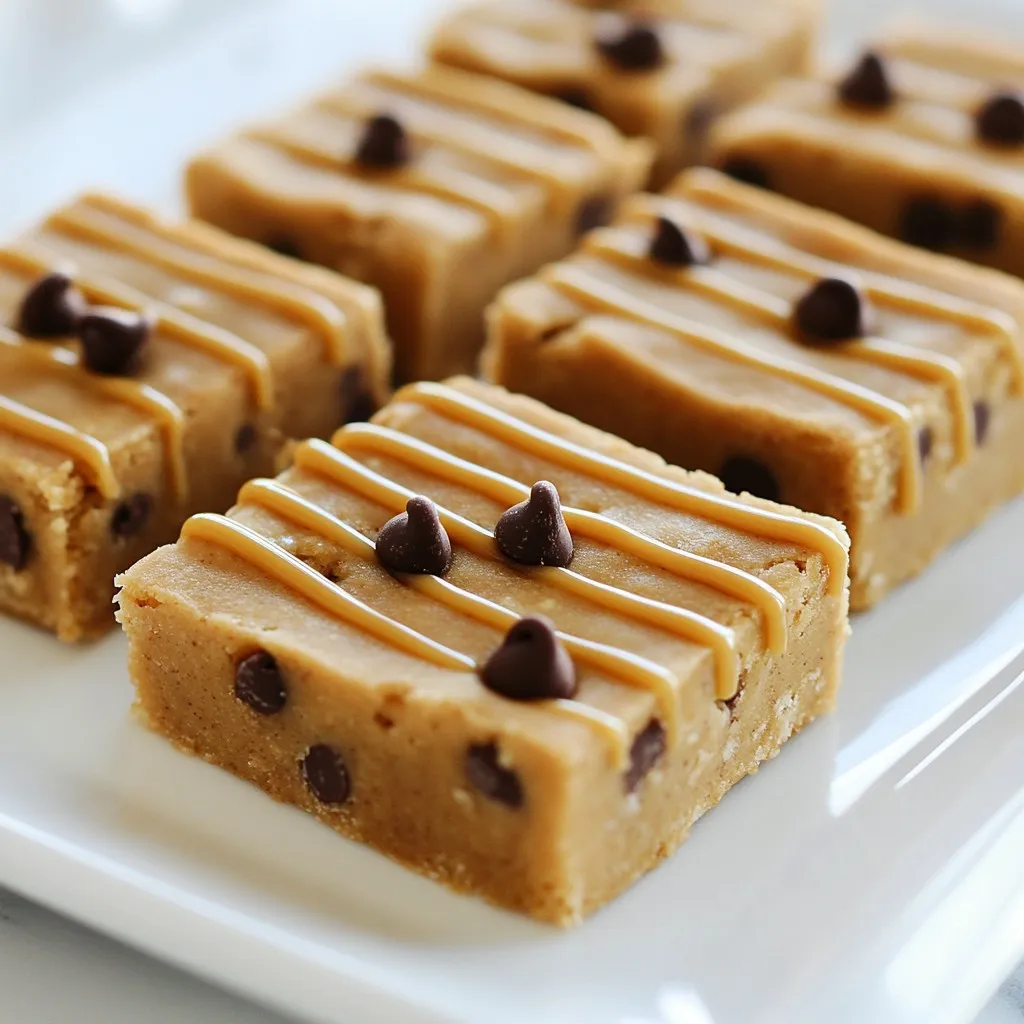
Skip to content
Tossed Tastes
  • Home
  • Appetizers
  • Desserts
  • Salads
  • Breakfast
  • Dinner
  • Privacy Policy
  • Contact
  • About

Chef Elliot

Cinnamon Apple Bread Irresistible and Simple Recipe

July 20, 2025 by Chef Elliot
- 2 cups all-purpose flour - 1 cup granulated sugar - 1 teaspoon baking powder - 1/2 teaspoon baking soda - 1/2 teaspoon salt - 1 tablespoon ground cinnamon - 1/2 cup unsalted butter, melted & slightly cooled - 2 large eggs, beaten - 1 teaspoon pure vanilla extract - 1/2 cup sour cream - 2 medium apples, peeled and diced (suggestions: Granny Smith or Honeycrisp) - 1/2 cup chopped walnuts or pecans (optional) - Topping: 1 tablespoon brown sugar, pinch of ground cinnamon You need a mix of wet and dry ingredients to make this bread. Start with the dry ones. Gather flour, sugar, baking powder, baking soda, salt, and cinnamon. Whisk them together in a bowl. This step helps create a light and fluffy bread. Next, you tackle the wet ingredients. In another bowl, combine melted butter, beaten eggs, vanilla, and sour cream. Mix well until smooth. This mixture adds richness to your bread. Now, for the fun part! Add your diced apples. I suggest using Granny Smith for tartness or Honeycrisp for sweetness. If you like, toss in chopped nuts for crunch. This mix makes the bread special. Don't forget the topping! A sprinkle of brown sugar and cinnamon gives a sweet crust. Finding the right mix of flavors in this recipe is key. You can find the full recipe to guide you through each step. Enjoy making this delightful treat! - Preheat the oven to 350°F (175°C). - Prepare a 9x5-inch loaf pan with grease or parchment paper. Start by getting your oven nice and hot. This helps the bread bake evenly. Greasing the loaf pan makes it easy to take the bread out later. You can also use parchment paper for easy cleanup. - Combine flour, sugar, baking powder, baking soda, salt, and cinnamon in a large mixing bowl. In a big bowl, mix the dry ingredients. Use a whisk to blend them well. This helps the baking powder and baking soda work better. You want every bite to taste just right. - Blend melted butter, eggs, vanilla extract, and sour cream until smooth. In another bowl, combine the wet ingredients. Make sure the butter is cooled before mixing. Stir until the mixture is nice and creamy. This gives the bread a rich flavor. - Gradually mix wet ingredients into dry ingredients, stirring gently. Now, pour the wet mix into the dry mix. Stir slowly so you don’t overmix. A few lumps are okay. This helps keep the bread soft and fluffy. - Fold in diced apples and optional nuts until evenly distributed. Next, add the diced apples. If you want, you can also add nuts for crunch. Gently fold them in so they spread out in the batter. This adds flavor and texture. - Pour the batter into the pan, add topping, and bake for 50-60 minutes. Pour the batter into your prepared pan. Spread it evenly with a spatula. For a sweet crust, mix brown sugar and cinnamon, then sprinkle it on top. Bake the bread for 50-60 minutes. Check with a toothpick to see if it’s done. If it comes out clean, your bread is ready! For the complete process, check out the Full Recipe. To get the best texture, avoid overmixing your batter. Mixing too much makes the bread dense. Use a gentle hand when blending wet and dry ingredients. You want a few lumps; they keep the loaf tender. For apples, I recommend Granny Smith or Honeycrisp. These apples give a nice balance of sweet and tart flavors. If you have dietary needs, you can make some easy swaps. Use gluten-free flour to make this bread gluten-free. You can also swap sour cream for a dairy-free yogurt. This will keep the bread moist without dairy. These substitutions work well without losing flavor. To add more flavor, consider extra spices. A pinch of nutmeg or allspice can elevate the taste. You might also try a splash of almond or maple extract. These small changes can make your bread even more special. {{image_4}} You can change the flavor of your cinnamon apple bread by adding different nuts or dried fruits. For a crunchy bite, try using chopped walnuts or pecans. These nuts add a rich flavor that pairs well with apples. If you love dried fruits, consider adding raisins or cranberries. They bring a nice sweetness and chewiness to the bread. Mix and match to find your favorite combo. Each choice brings a new twist to this classic recipe. Want to give your bread a fresh taste? Add some citrus zest! Grated lemon or orange peel can brighten the flavors. Just a little zest goes a long way. It adds a zing that cuts through the sweetness. This small change makes your bread feel special. It’s a fun way to surprise your taste buds. Try it next time you bake! A glaze can make your cinnamon apple bread even sweeter. A simple glaze can be made with powdered sugar and milk. Just mix them until smooth and drizzle it over the cooled bread. For a richer flavor, try a maple glaze. Mix maple syrup with powdered sugar for a tasty topping. You can also sprinkle some extra cinnamon on top for a lovely finish. Glazes are easy to make and add a nice touch to your bread. For the full recipe, check out the instructions above! To keep your cinnamon apple bread fresh for a few days, store it at room temperature. Wrap it in plastic wrap or place it in an airtight container. This helps keep the moisture in and prevents it from drying out. Enjoy it for breakfast or a snack without worrying about it going stale. If you want to save some for later, freezing is a great option. First, let the bread cool completely. Wrap it tightly in plastic wrap, then place it in a freezer bag. This keeps out air and prevents freezer burn. When you're ready to eat it, thaw it in the fridge overnight or at room temperature for a few hours. This way, your bread stays soft and tasty. To reheat your cinnamon apple bread, slice it and place it in a toaster oven or regular oven. Heat it at 350°F (175°C) for about 10-15 minutes. You can also microwave slices for 15-20 seconds. For a little extra flavor, add a pat of butter on top before reheating. This makes the bread warm and delightful. For the full recipe, check out the link! Cinnamon Apple Bread lasts about 3 to 5 days when you store it right. Keep it in an airtight container at room temperature. This helps keep it soft and fresh. If you want it to last longer, you can freeze it. Wrap it tightly in plastic wrap and then foil. It can last for up to 3 months in the freezer. Just remember to thaw it in the fridge before serving. For this recipe, I love using Granny Smith or Honeycrisp apples. Granny Smith apples give a nice tartness that balances the sweetness of the bread. Honeycrisp apples add a sweet crunch and juicy texture. You can also try Fuji or Jonagold apples for a sweeter taste. Yes, you can make this recipe ahead of time! You can mix the batter and pour it into the pan. Cover it tightly and keep it in the fridge for up to 24 hours. When you're ready, just bake it straight from the fridge. If you want to freeze it, bake the bread first, then let it cool completely. Wrap it well and freeze it. Just thaw it overnight in the fridge before you serve it. To check if your bread is done, insert a toothpick into the center. If it comes out clean, the bread is ready. The top should also be a nice golden brown. If the toothpick has wet batter on it, give it a few more minutes in the oven. Keep an eye on it to avoid overbaking. Enjoy that lovely scent filling your kitchen! This blog post covered all you need to bake delicious Cinnamon Apple Bread. We explored ingredients, mixing techniques, baking steps, and tips for success. Remember, use fresh apples like Granny Smith for the best flavor. Avoid overmixing to keep the bread tender. Whether you choose to add nuts or a glaze, there are endless variations to enjoy. By following these steps, you can create a tasty treat that’s perfect for any occasion. Happy baking, and enjoy every slice you make!

Welcome to your new favorite baking adventure: Cinnamon Apple Bread! This simple recipe blends sweet apples with warm cinnamon, creating a cozy treat that will fill your kitchen with mouthwatering …

Read more

Categories Desserts

Roasted Carrots with Candied Pecans and Goat Cheese Delight

July 20, 2025 by Chef Elliot
- 1 lb baby carrots - 2 tablespoons extra virgin olive oil - 1 teaspoon pure honey - 1/2 teaspoon fine sea salt - 1/4 teaspoon freshly ground black pepper - 1/2 cup chopped pecans - 2 tablespoons packed brown sugar - 1/2 teaspoon ground cinnamon - 4 oz creamy goat cheese - Fresh parsley for garnish - Regular carrots, sliced into sticks - Additional spices (like nutmeg or cumin) for variation To make this dish shine, I use fresh baby carrots. They are sweet and tender, which makes them perfect for roasting. The extra virgin olive oil gives them a rich flavor, while honey adds a touch of sweetness. Sea salt and black pepper balance all the tastes. Chopped pecans are key for the topping. I mix them with brown sugar and cinnamon for a sweet crunch. Crumbled goat cheese adds creaminess and tang, making the dish extra special. If you want to switch things up, you can use regular carrots cut into sticks. For even more flavor, try adding spices like nutmeg or cumin. This recipe truly highlights the beauty of simple ingredients. Each one plays a role in creating a delightful dish. You can find the full recipe above for all the steps to make this tasty treat. - Preheat the oven to 400°F (200°C). - Line a baking sheet with parchment paper. First, set that oven hot and ready. This step is key for getting the carrots nice and tender. The parchment paper will make cleanup easy, too. - Combine olive oil, honey, salt, and pepper. - Coat the baby carrots thoroughly. In a big bowl, mix olive oil, honey, salt, and pepper. Toss in the baby carrots and mix well. Every carrot should be coated. This mix adds flavor and a nice glaze when roasted. - Place carrots in a single layer on the baking sheet. - Prepare the pecan topping while carrots roast. Spread the carrots out in a single layer. This ensures they roast evenly. While they cook, you can start on the pecan topping. This will add crunch and sweetness. - Mix chopped pecans, brown sugar, and cinnamon. - Scatter the mixture over the carrots halfway through cooking. In a small bowl, combine chopped pecans, brown sugar, and cinnamon. Mix this well. After 15 minutes of roasting, sprinkle this mixture over the carrots. This helps create a sweet, crunchy topping. - Remove from oven and cool briefly. - Top with crumbled goat cheese and parsley before serving. Once done, take the baking sheet out of the oven. Let the carrots cool for a few minutes. This helps the flavors settle. Finish by adding crumbled goat cheese on top and a sprinkle of parsley. This dish is now ready to impress! For the full recipe, check out the details earlier in the article. To get the best flavor from your carrots, spread them in a single layer. This lets hot air cook them evenly. If they overlap, some may burn while others stay raw. Stir the carrots halfway through roasting. This step helps them caramelize nicely on all sides. You can make this dish even better by adding herbs or spices. Try thyme, rosemary, or even a pinch of nutmeg. Another great idea is to drizzle balsamic reduction on top. This adds a sweet and tangy kick that really brightens the dish. Serving is key to enjoying this dish. Use an elegant platter to show off the vibrant colors. For a finishing touch, add whole pecans and fresh parsley on top. This not only looks great but also adds extra texture and flavor. For the full recipe, check the details above. {{image_4}} You can easily make this dish even more delightful. Try these simple swaps: - Substitute brown sugar with maple syrup for a rich, natural sweetness. - Use feta cheese instead of goat cheese. Feta brings a salty tang and creamy texture. This recipe can fit many diets with a few changes: - For gluten-free options, ensure all ingredients are gluten-free. This dish is naturally gluten-free! - For vegan modifications, use dairy-free cheese. This will keep the creamy texture while making it plant-based. You can change up this dish to fit the season: - Incorporate seasonal vegetables like parsnips or sweet potatoes for variety. - Use different nuts based on what you have. Walnuts or almonds can add nice flavors and crunch. For the full recipe, check out the detailed steps to make these roasted carrots shine! After enjoying your roasted carrots, store the leftovers in an airtight container. This keeps them fresh and tasty. You should eat them within 3 days for the best flavor. If you wait too long, they may lose their crunch. To warm up your carrots, I suggest using the oven. This method helps regain their crispness. Preheat your oven to 350°F (175°C) and place the carrots on a baking sheet. Heat for about 10 minutes. If you need a quick option, use the microwave. Just heat them for 1-2 minutes, stirring halfway through. Can roasted carrots be frozen? Yes, but they may lose some texture. If you want to freeze them, let them cool completely first. Place the carrots in a freezer-safe bag. Remove as much air as possible before sealing. When you’re ready to eat them, thaw in the fridge overnight. Then, reheat in the oven for a better taste and texture. For the full recipe, check the recipe section above. Yes, you can use regular carrots. They will need more prep time. Slice them into sticks for even cooking. Regular carrots are larger and take longer to roast. Aim for similar thickness to baby carrots. This helps them cook evenly and become tender. If goat cheese is not your favorite, try feta cheese. It has a similar creamy texture. Cream cheese or ricotta can work too. For a bold flavor, try blue cheese. Each option gives a different taste to the dish. Check your carrots after 25 minutes. They should be fork-tender and slightly caramelized. Look for a golden-brown color on the edges. If they feel soft and sweet, they are done roasting. Yes, you can prepare the carrots and pecans in advance. Roast the carrots and let them cool. Store in the fridge for up to two days. When ready to serve, reheat and add goat cheese. This keeps the flavors fresh and vibrant. Yes, you can use walnuts, almonds, or pistachios. Each nut has its unique flavor. Walnuts add a rich, earthy taste. Almonds give a nice crunch, and pistachios offer a sweet note. Choose based on your preference for a different twist. This blog post guided you on how to roast baby carrots perfectly. You learned key ingredients and easy steps to take. We discussed tips for flavor and presentation, plus variations for dietary needs. Remember, a single layer ensures even roasting. Customize with spices or substitute cheese for new flavors. Enjoy your delicious dish, and don't forget to get creative. Your taste buds and guests will thank you!

Get ready to elevate your vegetable game with Roasted Carrots with Candied Pecans and Goat Cheese Delight. This dish combines sweet, tender carrots with crunchy, caramelized pecans and creamy goat …

Read more

Categories Dinner

Potato Gratin Savory and Creamy Comfort Dish

July 20, 2025 by Chef Elliot
For a perfect potato gratin, you need a few key ingredients. Here’s a simple list: - 4 large russet potatoes, thinly sliced - 2 cups heavy cream - 1 cup grated Gruyère cheese - 1 cup grated sharp cheddar cheese - 3 cloves garlic, minced - 1 tablespoon fresh thyme leaves - 1 tablespoon fresh rosemary, chopped - Salt and pepper to taste - 1 tablespoon butter (for greasing the baking dish) - ¼ cup fresh parsley, chopped (for garnish) These ingredients create a rich and creamy dish. They work together to give you that comforting flavor. Cheese adds a lot to the gratin. Gruyère is a classic choice. Its nutty taste pairs well with the potatoes. Sharp cheddar adds more flavor, too. If you want to mix it up, try these options: - Fontina - Mozzarella - Parmesan These cheeses melt well and give a nice texture. Sometimes, I like to get creative with my potato gratin. You can add extras for a twist. Here are some ideas: - Sautéed onions for sweetness - Cooked bacon for a smoky flavor - Spinach for a touch of green If you want a lighter version, you can use half-and-half instead of heavy cream. You can also choose lower-fat cheese options. These simple swaps can make the dish fit your taste or diet. For a full recipe, check out the Cheesy Herb Potato Gratin. First, I preheat the oven to 375°F (190°C). While that heats up, I take a 9x13-inch baking dish and grease it well with butter. This step is key to prevent sticking later. A good coat of butter makes sure the edges do not burn. Next, I grab a medium saucepan. I pour in 2 cups of heavy cream and set it over medium-low heat. I add 3 cloves of minced garlic, 1 tablespoon of fresh thyme, and 1 tablespoon of chopped rosemary. I also sprinkle in salt and pepper to taste. I stir occasionally for about 5 minutes. I want the cream warm but not boiling. This mix will add a rich flavor to the potatoes. Now comes the fun part: layering! I take half of the thinly sliced potatoes and spread them evenly in the greased dish. It is important that they are well-distributed. Then, I pour half of the warm cream mixture over the potatoes. I top it with half of the Gruyère and cheddar cheeses. I repeat this process with the other half of the potatoes. I pour the remaining cream mixture on top and finish with the rest of the cheese. This layering gives every bite a cheesy and creamy taste. Next, I cover the dish tightly with aluminum foil and place it in the oven. I bake it for 30 minutes. After that, I uncover it to let the top brown for another 25-30 minutes. I know it is done when the top is golden brown and bubbly. I test it with a knife; it should slide through easily. Once baked, I let it cool for about 10 minutes. This helps the gratin set. Just before serving, I sprinkle some fresh parsley on top for a nice finish. If you want the full recipe, check the link above. To get a creamy texture in your potato gratin, use heavy cream. This cream has a rich fat content that makes the dish smooth and luscious. Heat the cream gently with garlic, thyme, and rosemary. This step adds flavor and helps the cream absorb the herbs. Pour this warm mixture over your layered potatoes. It should cover them well but not drown them. This balance keeps everything creamy without being too runny. Even cooking is key for a great gratin. When you layer the potatoes, keep the slices even. Thin slices cook better and blend nicely with the cream. A sharp knife or mandoline can help with this. Cover the dish tightly with foil at first. This traps steam and helps cook the potatoes. After 30 minutes, remove the foil. This allows the top to crisp up, giving you that perfect texture contrast. A golden brown top makes your gratin look appetizing. To achieve this, watch your oven temperature. Baking at 375°F (190°C) is ideal for the right browning. You can also sprinkle extra cheese on top before baking. As it cooks, the cheese melts and browns beautifully. Keep an eye on it in the last few minutes. It can go from golden to burnt quickly. Once it’s golden, let it cool for about 10 minutes before serving. This resting time helps the layers stay intact. For a finishing touch, add fresh parsley on top. It not only looks great but adds a fresh taste as well. {{image_4}} Adding vegetables to potato gratin can boost flavor and nutrition. Try using spinach, broccoli, or mushrooms. These veggies pair well with the creamy texture. Slice them thinly and layer them between the potatoes. This not only adds taste but also a splash of color. For a fun twist, consider using roasted red peppers for a hint of sweetness. They can bring a new depth to your dish. Cheese is key in potato gratin. While Gruyère and cheddar are classic, you can mix it up. Try adding mozzarella for pull or blue cheese for a bold taste. Goat cheese can add a creamy tanginess that works well too. Mixing cheeses can create a rich, layered flavor. Experiment with different combinations to find your favorite! You can make potato gratin dairy-free or vegan without losing flavor. Use coconut milk or almond milk instead of cream. Nutritional yeast can add a cheesy taste without dairy. There are also many vegan cheese options available. Choose ones that melt well for the best results. This way, everyone can enjoy this comforting dish! After enjoying your creamy potato gratin, store leftovers in an airtight container. Let the dish cool to room temperature before sealing. This prevents moisture buildup and keeps the gratin tasty. You can keep it in the fridge for up to three days. If you want to eat it later, freezing is another option. To reheat your gratin, use the oven for the best taste. Preheat the oven to 350°F (175°C). Place the leftovers in an oven-safe dish. Cover it with foil to avoid drying out. Heat for about 20-25 minutes. If you prefer, you can also use the microwave. Place the portion in a microwave-safe bowl. Heat for 1-2 minutes, stirring halfway through. Be careful not to overheat, as this can make it rubbery. Yes, you can freeze potato gratin! To freeze, let it cool completely. Then, wrap it tightly in plastic wrap and foil. You can also use a freezer-safe container. This keeps it fresh for up to two months. When you're ready to eat, thaw it in the fridge overnight. Reheat as mentioned above for the best taste. I recommend using russet potatoes for gratin. They are starchy and create a creamy texture. Yukon Gold potatoes also work well. They have a buttery flavor and hold their shape nicely. Avoid waxy potatoes, like red or fingerling, as they do not soften properly. Potato gratin can sit out for about two hours. After that, bacteria can grow. It's important to keep it at room temperature for a short time. If you need to keep it longer, place it in the fridge. Just remember to reheat it well before serving again. Yes, you can prepare potato gratin in advance. You can assemble it and cover it tightly. Store it in the fridge for up to 24 hours before baking. Just add a few extra minutes to the baking time to ensure it cooks through. This makes it a great option for busy days! Potato gratin is a great dish that brings joy to any meal. We covered key ingredients, like potatoes, cheese, and add-ins. I shared how to prepare, cook, and layer for maximum flavor. Tips also help you get a creamy texture and a golden top. Plus, we explored fun variations to fit any diet. Lastly, I provided storage tips to keep leftovers tasty. Enjoy creating your own potato gratin masterpiece!

Welcome to my kitchen! Today, we’re diving into the creamy world of Potato Gratin, a perfect blend of comfort and flavor. This dish warms the heart and pairs well with …

Read more

Categories Dinner

This Is The Best Recipe For Funfetti Cake Delight

July 18, 2025 by Chef Elliot
- 2 ½ cups all-purpose flour - 1 ½ cups granulated sugar - 1 cup unsalted butter, softened - 4 large eggs - 1 cup buttermilk To create a funfetti cake, you need a few key ingredients. First, all-purpose flour gives the cake its structure. The sugar adds sweetness and helps it rise. Softened butter creates a rich flavor and tender texture. Eggs bind the ingredients and add moisture. Finally, buttermilk makes the cake light and fluffy. - 1 tablespoon baking powder - ½ teaspoon baking soda - ½ teaspoon salt Baking powder and baking soda are crucial for making the cake rise. They create air pockets while baking. Salt enhances the flavors and balances the sweetness. These simple ingredients are essential for a successful cake. - 1 tablespoon pure vanilla extract - ¾ cup rainbow sprinkles - 1 cup frosting of your choice Vanilla extract adds a lovely flavor that complements the cake. Rainbow sprinkles bring color and joy to each slice. Choose your favorite frosting to finish the cake and make it even more delicious. I recommend a buttercream frosting for that classic taste. For the full recipe, be sure to check the complete guide to making this delightful funfetti cake! - Preheat the oven to 350°F (175°C). - Grease and prepare two 9-inch round cake pans. Use butter and flour or line with parchment paper. - In a large bowl, sift together the flour, baking powder, baking soda, and salt. This makes sure they mix well. - Use an electric mixer to cream the softened butter and granulated sugar. Mix until it looks light and fluffy. This step takes about 3-4 minutes. - Add the eggs one by one. Mix well after each egg. Then add the vanilla extract and combine everything. - Gradually add the dry mix and buttermilk to the butter and sugar mix. Start with about one-third of the dry mix, then add half of the buttermilk. Repeat this until all ingredients are added. - Be gentle while mixing so the batter stays light. - Now, gently fold in ¾ cup of rainbow sprinkles. Use a spatula to avoid breaking the sprinkles. - Divide the batter evenly between the two prepared pans. Smooth the tops with a spatula and sprinkle extra rainbow sprinkles on top. - Place the pans in the oven and bake for 25-30 minutes. Check if it's done by inserting a toothpick in the center. It should come out clean or with a few moist crumbs. - After baking, let the cakes cool in the pans for about 10 minutes. Then move them to a wire rack to cool completely. - Once the cakes are cool, frost the top of one layer with your favorite frosting. You can use buttercream for a classic taste. - Sprinkle more rainbow sprinkles on top of the frosting before placing the second layer on. - Frost the top and sides of the whole cake, making it look festive with extra sprinkles. For the full recipe, check out the Funfetti Cake Extravaganza. For the best funfetti cake, use room temperature ingredients. When butter, eggs, and buttermilk are at room temperature, they mix better. This helps create a fluffy texture. Cold ingredients can make your cake dense and heavy. Also, avoid overmixing your batter. After adding flour and buttermilk, mix just until combined. Overmixing can lead to a tough cake. You want a light and airy feel, not a brick! To make your funfetti cake pop, think about fun decorations. Use festive cake toppers or colorful candles. You can even add fresh fruit or edible flowers for a fresh look. Sprinkles are a must! Use them not just in the batter but also on top. Try different shapes and sizes. You can mix small and large sprinkles for extra fun. When serving your cake, presentation matters. Place it on a bright cake stand to highlight its colors. Scatter extra sprinkles around the base for a playful touch. Pair your cake with a scoop of vanilla ice cream or a glass of milk. It also goes well with fruity drinks or coffee. These combos will make your dessert even more delightful! {{image_4}} You can switch up the funfetti cake in many ways. One way is to make a chocolate funfetti cake. Just add cocoa powder to the dry mix. This gives a rich, sweet flavor that pairs well with sprinkles. Another option is to add lemon zest. This gives a fresh citrus twist. The zest brightens the cake and makes it even more fun. Just mix in a tablespoon of zest with the wet ingredients. Frosting plays a big role in the cake's taste. You can use cream cheese frosting for a tangy flavor. It balances the sweetness of the cake nicely. Just whip together cream cheese, butter, and powdered sugar for a smooth spread. You might also try a ganache topping. Melt chocolate with heavy cream for a shiny finish. This adds a rich layer of chocolatey goodness that everyone will love. If you need gluten-free options, use a gluten-free flour blend. It works just as well in this recipe. You can also add a bit of xanthan gum for better texture. For vegan substitutions, replace eggs with flax eggs. Just mix one tablespoon of ground flaxseed with three tablespoons of water per egg. Use plant-based butter and non-dairy milk for the rest. These swaps help you enjoy funfetti cake without any animal products. For the full recipe, check out the Funfetti Cake Extravaganza 🧁. To keep your funfetti cake fresh, refrigerate any leftovers. Place the cake in an airtight container or cover it tightly with plastic wrap. This helps prevent the cake from drying out. If you want to freeze the cake, wrap each layer in plastic wrap, then aluminum foil. This ensures no freezer burn affects the taste. To thaw, move it to the fridge overnight before serving. Funfetti cake stays fresh for about 3 to 5 days in the fridge. If you freeze it, it can last for up to 3 months. Watch for signs of spoilage, such as a bad smell, dry texture, or mold. If you notice any of these, it's time to toss the cake. To avoid dryness, wrap your cake layers in plastic wrap while storing. This keeps moisture in and helps keep the cake soft. You can also use simple syrups to enhance flavor. Just brush a little syrup on the cake layers before frosting. This adds moisture and makes each bite even better. For the full recipe, check out the Funfetti Cake Extravaganza! What is the origin of Funfetti cake? Funfetti cake began in the 1980s. It became popular thanks to a box mix by a well-known brand. The cake is special because it has colorful sprinkles mixed into the batter. This adds joy and celebration to any occasion. Can I make this cake a day in advance? Yes, you can make this cake a day ahead. Just bake it and cool it completely. Then wrap the layers in plastic wrap to keep them fresh. Frost the cake the next day for best results. Why is my cake dense? A dense cake may come from overmixing the batter. Mixing too much can develop gluten, making the cake heavy. Always mix just until combined. Also, check if your baking powder is fresh. Old baking powder can prevent the cake from rising. Can I substitute buttermilk? Yes, you can. If you don't have buttermilk, mix one cup of milk with one tablespoon of vinegar or lemon juice. Let it sit for five minutes. This creates a similar acidity to buttermilk. How do I keep the cake from falling apart while frosting? To keep the cake sturdy, cool it completely. Make sure the layers are firm before frosting. Use a thin layer of frosting as a crumb coat first. Let it set in the fridge for 15 minutes before adding more frosting. What’s the best way to store decorated cake? Store your decorated cake in an airtight container. If it's not possible, use plastic wrap to cover it. Keep it in the fridge if your frosting has cream or dairy. For cakes with buttercream, it can stay at room temperature for a day. You learned all about making a delicious Funfetti cake. We covered the ingredients, mixing, baking, and storing. Remember, room temperature ingredients are key for the right texture. You can choose fun frostings and creative decorations for your cake. There are many ways to make this treat your own. Have fun with flavor twists and sharing it with friends. With these tips, your Funfetti cake will be a hit at any gathering! Enjoy baking and create sweet memories!

Get ready to bake the most delightful Funfetti Cake ever! This recipe is simple and perfect for any celebration. With vibrant sprinkles and a moist texture, it’s sure to impress …

Read more

Categories Desserts

Triple Chocolate Chip Zucchini Bread Rich and Moist Delight

July 18, 2025 by Chef Elliot
To make this yummy bread, you need the following main ingredients: - 1 medium zucchini, grated (about 1 cup) - 1 cup all-purpose flour - 1/2 cup whole wheat flour - 1/2 cup unsweetened cocoa powder - 1 teaspoon baking soda - 1/2 teaspoon baking powder - 1/4 teaspoon salt - 1/2 cup granulated sugar - 1/2 cup packed brown sugar - 1/2 cup vegetable oil - 2 large eggs - 1 teaspoon vanilla extract - 1/2 cup semi-sweet chocolate chips - 1/2 cup milk chocolate chips - 1/2 cup white chocolate chips These ingredients give your bread its rich chocolate flavor and moisture. The essential baking ingredients are key to the right texture. The flours provide structure. The cocoa powder adds deep chocolate taste. Baking soda and baking powder help the bread rise, making it soft. Salt balances the sweetness and enhances flavor. You can add some optional flavor enhancements. Try adding chopped nuts for crunch. Walnuts or pecans work great. You can also sprinkle in cinnamon for warmth. A touch of espresso powder can boost the chocolate flavor. These options let you personalize your bread and make it even more special. For the full recipe, check this link: [Full Recipe]. Start by preheating your oven to 350°F (175°C). This step is key for even baking. While the oven heats, grab your 9x5 inch loaf pan. Lightly grease it with butter or baking spray. This helps the bread come out easily. Next, dust the pan with flour to prevent sticking. This simple prep makes a big difference. In a medium bowl, combine the grated zucchini, granulated sugar, brown sugar, vegetable oil, eggs, and vanilla extract. Use a whisk or spatula to mix everything until smooth. The zucchini adds moisture and a nice texture. In a separate large bowl, whisk together the all-purpose flour, whole wheat flour, unsweetened cocoa powder, baking soda, baking powder, and salt. This ensures the dry ingredients blend well. Mixing well helps the flavor spread evenly. Pour the wet mixture into the bowl with dry ingredients. Using a spatula or wooden spoon, stir gently until combined. You want the mixture to be just mixed, with a few lumps. This keeps the bread soft. Now it's time for the fun part! Fold in the semi-sweet, milk chocolate, and white chocolate chips. Make sure they spread evenly throughout the batter. This adds rich chocolate flavor to each slice. Spoon the batter into the prepared loaf pan. Smooth the top for an even layer. Now, it's ready to bake! For the full recipe, check above. To make your Triple Chocolate Chip Zucchini Bread rich and moist, the key is in the zucchini. Grate it finely and squeeze out any excess water. This helps keep your bread from being too wet. Use a mix of all-purpose and whole wheat flour. This blend gives a nice texture and flavor. Also, don't overmix the batter. Stir just until combined. A few lumps are okay. Overmixing can make the bread dense. Lastly, baking time matters. Keep an eye on it. Every oven is different. Use a toothpick to test for doneness. If it comes out clean or with a few crumbs, it's ready. Many bakers make some common mistakes. One is not measuring ingredients correctly. Always use dry measuring cups for flour and cocoa powder. A kitchen scale can help too. Another mistake is skipping the greasing of the pan. This can lead to sticking. Use butter or baking spray, then dust with flour. Don't forget to check your oven temperature. An oven thermometer can help you avoid baking issues. Add-ins can elevate your zucchini bread. Consider mixing in chopped nuts like walnuts or pecans for crunch. Spices like cinnamon or nutmeg can add warmth and depth. You can also use flavored extracts, like almond or orange, for a twist. For a fun touch, try adding a swirl of peanut butter or Nutella. Just drop it in before baking, and use a knife to create a swirl. These little changes can make each slice unique. Enjoy the process of making this delightful treat! For the full recipe, check out the [Full Recipe]. {{image_4}} You can make your Triple Chocolate Chip Zucchini Bread lighter. One great option is to swap some oil for applesauce. It keeps the bread moist while cutting down on fat. You can try using half applesauce and half oil. This change keeps the taste rich but makes the bread a bit healthier for you. Add your personal touch by mixing in nuts, spices, or seeds. Chopped walnuts or pecans bring a nice crunch. You can also add a teaspoon of cinnamon or nutmeg for warmth. Want to try something different? Add a pinch of cayenne pepper for a spicy twist! Each choice adds new flavors and textures to your loaf. If you need a gluten-free version, it’s easy to adapt! Use gluten-free flour blends instead of regular flour. Check the label to ensure it has a good balance of starches and proteins. You can also add a teaspoon of xanthan gum to help with the structure. This way, everyone can enjoy this chocolatey treat without worry! For the full recipe, check out the detailed steps to create this delightful dish. Store your triple chocolate chip zucchini bread in an airtight container. This keeps it fresh and moist. You can also wrap it tightly in plastic wrap. Place it in a cool, dry spot. Avoid direct sunlight or heat. For the best taste, eat it within four days. If you want it to last longer, consider freezing it. To freeze your zucchini bread, let it cool completely first. Once cool, wrap it in plastic wrap. Then, place it in a freezer-safe bag or container. Be sure to label it with the date. Zucchini bread can last up to three months in the freezer. When you’re ready to enjoy it, just thaw it in the fridge overnight. To reheat, slice the bread as needed. Place the slices on a plate and cover them with a damp paper towel. Microwave for about 10-15 seconds. This keeps the bread moist. You can also warm it in the oven at 350°F (175°C) for about 10 minutes. Enjoy it warm for a fresh taste. For extra delight, add a pat of butter or a drizzle of chocolate sauce on top. Yes, you can use frozen zucchini. Just thaw it first and drain any extra water. This helps keep your bread moist and rich. Frozen zucchini works well, but fresh will give a better texture. To help your zucchini bread rise, make sure your baking soda and baking powder are fresh. Mix the wet and dry ingredients gently. Overmixing can make the bread dense. Also, let the batter rest for a few minutes before baking. This allows the leavening agents to activate fully. If you don't have all the chocolate types, don't worry! You can mix and match. Use any combination of dark, milk, or even extra cocoa powder. The key is to keep the total amount of chocolate chips about 1.5 cups. This keeps your bread rich and chocolatey. You can also try adding nuts or dried fruit for a fun twist. Check out the Full Recipe for more details on making this delicious treat! You learned how to make delicious triple chocolate chip zucchini bread. We covered the main ingredients, essential baking tips, and fun variations. Remember to prep your oven and pan carefully for the best results. Keep texture and moisture in check to avoid common mistakes. Consider healthier options or gluten-free variations for added enjoyment. Store your bread well, and you can even freeze it for later. With these tips, baking this treat is easy and fun. Enjoy your baking time and share your tasty creations!

Looking for a fun way to sneak veggies into dessert? Try my Triple Chocolate Chip Zucchini Bread! This rich and moist delight combines chocolate flavors with healthy zucchini. It’s simple …

Read more

Categories Desserts

Honey-Balsamic Glazed Carrots Simple and Tasty Recipe

July 18, 2025 by Chef Elliot
This honey-balsamic glazed carrots recipe is simple and delicious. You will enjoy a sweet and tangy flavor. Each bite brings a perfect balance of honey and balsamic vinegar. You can serve these carrots as a side dish for many meals. - 1 lb baby carrots, peeled - 2 tablespoons honey - 2 tablespoons balsamic vinegar - 1 tablespoon olive oil - 2 tablespoons unsalted butter - 1 teaspoon fresh thyme leaves (or ½ teaspoon dried thyme) - Salt and freshly ground black pepper to taste - Fresh parsley, chopped (for garnish) If you do not have baby carrots, you can use regular carrots. Just cut them into sticks. For a different flavor, try using maple syrup instead of honey. You can swap balsamic vinegar with apple cider vinegar too. If you want a dairy-free dish, skip the butter. Use vegan butter or extra olive oil instead. To start, gather your ingredients. You need: - 1 lb baby carrots, peeled - 2 tablespoons honey - 2 tablespoons balsamic vinegar - 1 tablespoon olive oil - 2 tablespoons unsalted butter - 1 teaspoon fresh thyme leaves (or ½ teaspoon dried thyme) - Salt and freshly ground black pepper to taste - Fresh parsley, chopped (for garnish) First, preheat your oven to 400°F (200°C). This step is vital for roasting. Next, grab a large mixing bowl. Place your peeled baby carrots in it. Add olive oil, honey, balsamic vinegar, and a sprinkle of salt and pepper. Toss the carrots well until they are coated evenly. Now, line a baking sheet with parchment paper. Spread the carrots in a single layer on the sheet. This helps them cook evenly. Roast the carrots in the preheated oven for 20-25 minutes. Halfway through, stir the carrots gently. This promotes even caramelization and helps them turn golden brown. While the carrots roast, melt the unsalted butter in a small saucepan over low heat. Add fresh thyme to the melted butter and stir. Let it simmer for about a minute. This step infuses the butter with thyme flavor. After roasting, transfer the carrots to a large serving bowl. Drizzle the thyme-infused butter over the warm carrots. Toss gently to coat the carrots with the butter. To achieve even roasting, make sure the carrots are in a single layer. This allows hot air to circulate around them. Stirring halfway through cooking is also key. It helps ensure each carrot gets that beautiful caramel color. For the best results, choose carrots that are uniform in size. This helps them cook at the same rate. If you have larger carrots, consider cutting them in half or quarters. Lastly, for a beautiful presentation, sprinkle freshly chopped parsley on top of the glazed carrots. It adds a pop of color that makes the dish even more appealing. For the full recipe, check out the earlier section. To get perfect caramelization on your carrots, follow a few simple steps. Start by cutting the carrots into even sizes. This helps them cook at the same rate. Make sure to coat them well with honey and balsamic vinegar. This mix not only adds flavor but also helps with browning. Arrange them in a single layer on the baking sheet. Crowding the carrots can lead to steaming instead of roasting. Stir them halfway through cooking. This ensures all sides get that nice golden color. Honey-balsamic glazed carrots taste great on their own, but they shine with other dishes. Pair them with roasted chicken or grilled steak for a hearty meal. They also work well with quinoa or rice for a vegetarian option. For a fresh touch, serve them alongside a green salad. Adding a sprinkle of feta cheese on top can also enhance the dish. One common mistake is not preheating the oven. A hot oven helps the carrots roast evenly. Another mistake is using cold ingredients. Always let honey and butter come to room temperature. This ensures they mix well with the carrots. Also, avoid overcooking the carrots. They should be tender but not mushy. If you're unsure, taste them as they cook. Following these tips can help you make the best honey-balsamic glazed carrots. For the full recipe, refer to the section above. {{image_4}} You can easily spice up your honey-balsamic glazed carrots. Try adding a pinch of cinnamon for warmth. A dash of cayenne pepper gives a nice kick. For a fresh twist, use ginger or nutmeg. These spices add depth and interest to the sweet and tangy glaze. If you want to change the sweetener, there are good options. Maple syrup works well in place of honey. It gives a rich flavor that pairs nicely with balsamic. Brown sugar can also be a tasty substitute. It adds a lovely caramel note to your dish. You can mix in different seasonal vegetables for variety. Root veggies like parsnips or turnips roast well with carrots. For spring, try asparagus or baby zucchini. In fall, add sweet potatoes for a hearty touch. These changes keep your dish fresh and exciting throughout the year. For the full recipe, check out the Honey-Balsamic Glazed Carrots recipe I shared earlier. After cooking, let the honey-balsamic glazed carrots cool down. Place them in an airtight container. Store them in the fridge for up to three days. This keeps them fresh and tasty. To reheat, you can use either the oven or the microwave. If using the oven, preheat it to 350°F (175°C). Spread the carrots on a baking sheet. Heat them for about 10 minutes until warm. For the microwave, place the carrots in a bowl. Cover them with a paper towel and heat for 1-2 minutes. Stir halfway through to warm them evenly. You can freeze honey-balsamic glazed carrots, but they may lose some texture. To freeze, let them cool completely. Transfer them to a freezer-safe bag or container. Remove as much air as possible. They will last up to three months in the freezer. When ready to eat, thaw them in the fridge overnight before reheating. For the full recipe and tips, check out the [Full Recipe]. Honey-balsamic glazed carrots last about 3 to 5 days in the fridge. Store them in an airtight container. Before serving again, check for any signs of spoilage. If they smell off or look slimy, it's time to toss them. To keep them fresh, eat them soon after making the dish. Yes, you can use other vegetables! Try using parsnips, sweet potatoes, or Brussels sprouts. Each veggie adds a unique taste and texture. Just adjust the cooking time based on the vegetable's size and type. For example, sweet potatoes may need a bit longer to cook than carrots. Honey-balsamic glazed carrots work great with many dishes. They complement roasted chicken or pork. You can also serve them with grilled fish or a hearty grain like quinoa or farro. They add color and flavor to any meal. For a complete feast, serve them alongside a fresh salad and a nice bread. This blog post covered all aspects of making honey-balsamic glazed carrots. We explored the ingredients, cooking steps, and expert tips. You learned how to avoid common mistakes and try fun variations. Remember, caramelization is key to great flavor. These carrots add a delicious touch to any meal. Now, you can enjoy a tasty side dish that fits your family's needs. Keep these tips in mind as you cook. The result will be satisfying and flavorful every time.

If you’re looking to add a sweet and tangy twist to your meals, I have just the recipe for you! Honey-balsamic glazed carrots are not only easy to make but …

Read more

Categories Dinner

Zucchini Chocolate Cake Delightful and Easy Recipe

July 18, 2025 by Chef Elliot
- 1 ½ cups grated zucchini (ensure it is squeezed dry) - 1 cup all-purpose flour - ½ cup unsweetened cocoa powder - ¾ cup granulated sugar - ½ cup tightly packed brown sugar - 2 large eggs - ½ cup vegetable oil - ½ cup semi-sweet chocolate chips To make this delightful Zucchini Chocolate Cake, you will start with the main ingredients. Grated zucchini adds moisture and nutrition. I always squeeze it dry to avoid a soggy cake. All-purpose flour gives the cake structure. Unsweetened cocoa powder provides that rich, chocolate flavor we all love. Next, we have the sweeteners. Granulated sugar gives a clean sweetness, while brown sugar adds a hint of caramel flavor. This blend makes the cake taste amazing. Finally, additional components like eggs bind everything together. Vegetable oil keeps the cake moist and soft. Semi-sweet chocolate chips add little bursts of chocolate in every bite. For the full recipe, check the details above. First, preheat your oven to 350°F (175°C). This step makes sure the cake cooks evenly. Next, prepare an 8-inch round cake pan. You can grease and flour it, or line it with parchment paper. This helps the cake come out easily after baking. In a medium bowl, combine the dry ingredients. You will need all-purpose flour, unsweetened cocoa powder, baking soda, baking powder, and salt. Whisk them together well. Once mixed, set this bowl aside for later use. In a large bowl, blend the sugars and oil. Use a hand mixer or a whisk to beat them until creamy. This step gives the cake a nice texture. Now, add the eggs one at a time. Beat well after each addition. Finally, mix in the vanilla extract for extra flavor. Gradually add the dry mixture into the wet mixture. Stir gently until just combined. Be careful not to overmix, as this can make the cake dense. Next, fold in the grated zucchini and semi-sweet chocolate chips. If you like, add chopped walnuts too. This adds a lovely crunch. Pour the batter into your prepared cake pan. Use a spatula to smooth the top. Place the pan in the preheated oven. Bake for 30-35 minutes. To check if it’s done, insert a toothpick into the center. If it comes out clean, the cake is ready. Once the cake is baked, remove it from the oven. Let it cool in the pan for about 10 minutes. After that, carefully transfer it to a wire rack. Allow it to cool completely before serving. This cooling step helps the flavors develop. Enjoy the process of baking this delightful zucchini chocolate cake! For the complete recipe, check out the [Full Recipe]. To get a light cake, avoid overmixing. Mix just until the ingredients blend. Overmixing makes the cake dense and tough. When you grate zucchini, use a box grater or food processor. Grate it fine for even mixing. After grating, squeeze out excess water. This step keeps the cake from being soggy. To check if your cake is done, use a toothpick. Insert it in the center. If it comes out clean, the cake is ready. If wet batter sticks, bake for a few more minutes. Each oven is different. You may need to adjust the baking time. Keep an eye on the cake as it bakes. For serving, slice the cake into wedges. A dusting of powdered sugar adds charm. You can also serve it with whipped cream. A sprinkle of cocoa powder gives a nice touch. For a creative finish, add chocolate shavings or a slice of fresh zucchini. This makes your cake look fancy and inviting. {{image_4}} You can easily change some ingredients in this cake. If you need gluten-free options, use almond flour or a gluten-free blend. This makes the recipe friendly for those with gluten sensitivities. For dairy-free adjustments, swap regular milk with almond or oat milk. You can also try coconut oil instead of vegetable oil for a rich taste. To boost the flavor, add spices like cinnamon or nutmeg. A teaspoon of cinnamon gives warmth and aroma. Nutmeg adds a hint of spice that pairs well with chocolate. For toppings, think outside the box. Try adding whipped cream or a simple chocolate glaze. Fresh fruit or nuts also make great toppings for a fun twist. You can adapt this recipe for smaller portions. To make mini cakes or muffins, use a muffin tin. Fill each cup about two-thirds full with batter. Bake for 18-20 minutes. This shorter time allows for a perfect bake. Plus, you get cute little treats that are easy to share! To keep your Zucchini Chocolate Cake fresh, follow these tips: - Room Temperature Storage: If you plan to eat the cake within two days, you can store it at room temperature. Just place it in an airtight container. This keeps the cake moist and tasty. - Refrigeration Tips: If you want to keep it longer, refrigerate the cake. Wrap it tightly in plastic wrap or foil. This prevents it from drying out. Make sure to consume it within a week for the best flavor. You can freeze your cake if you want to enjoy it later. Here is how: - How to Properly Freeze: First, let the cake cool completely. Then, slice it into pieces or keep it whole. Wrap each piece tightly in plastic wrap and then in aluminum foil. This helps avoid freezer burn. - Thawing Methods: To thaw, simply take the cake out of the freezer. Leave it wrapped and put it in the fridge overnight. For quicker results, you can let it sit at room temperature for about an hour. Keeping your cake fresh is easy with these steps: - Keeping the Cake Moist: Always store your cake in an airtight container. This keeps moisture locked in. You can also add a slice of bread inside the container. The bread helps keep the cake soft. - Signs the Cake Has Gone Bad: Check for any mold or an off smell. If the cake feels dry or hard, it’s best to toss it. Eating spoiled cake can upset your stomach, so always check before indulging! For the complete recipe, see [Full Recipe]. No, you can't taste the zucchini in this cake. The chocolate flavor is strong and rich. The zucchini adds moisture and helps keep the cake soft. You will only notice a light texture. You can make this cake healthier in a few ways. Use whole wheat flour instead of all-purpose flour. Replace some sugar with applesauce or mashed bananas. You can also add nuts or seeds for extra fiber and nutrients. To grate zucchini, use a box grater or a food processor. Cut off the ends first. Grate it on the largest holes for a nice texture. After grating, squeeze out excess water using a clean dish towel. This step is key for a perfect cake. Yes, you can use frozen zucchini. First, thaw it and squeeze out the water. This helps prevent a soggy cake. Frozen zucchini works well in baked goods like this cake. The cake will last about three days at room temperature. Store it in an airtight container to keep it fresh. If you want to enjoy it longer, consider refrigerating it. Absolutely! This recipe is simple and forgiving. It does not require special skills, and the steps are easy to follow. You can impress your family and friends with this delightful treat. Check the Full Recipe for detailed instructions. This blog post showed you how to make a tasty zucchini chocolate cake. We covered the key ingredients, step-by-step instructions, and helpful tips for perfecting your baking. I shared variations to fit your needs and ways to store leftovers. Zucchini in cake may seem odd, but it adds moisture and nutrition. Try this recipe and get creative with your own twists. Baking should be fun and easy. Enjoy every bite!

Looking for a fun and easy way to enjoy zucchini? This Zucchini Chocolate Cake is a winner! You’ll mix fresh grated zucchini with rich cocoa for a tasty treat. What’s …

Read more

Categories Desserts

Double Chocolate Zucchini Bread Moist and Tasty Recipe

July 18, 2025 by Chef Elliot
- 1 cup grated zucchini - 1 cup all-purpose flour - 1/2 cup unsweetened cocoa powder - 1/2 cup granulated sugar - 1/2 cup brown sugar - 1/2 cup vegetable or coconut oil - 1/4 cup chopped nuts (walnuts or pecans) - 1/2 cup semi-sweet chocolate chips When picking zucchini, look for firm ones. They should feel heavy for their size. Fresh zucchini has smooth skin and no bruises. You can use honey or maple syrup instead of sugar. For oil, try applesauce or Greek yogurt. These swaps can lower calories. Cocoa powder adds rich flavor and color. It is high in antioxidants, which are good for your health. Plus, it makes your bread extra tasty! For the full recipe, you can check the [Full Recipe]. 1. Preheat the oven: Start by preheating your oven to 350°F (175°C). This step is key for even baking. 2. Prepare the loaf pan: Grease a 9x5-inch loaf pan with cooking spray or oil. You can also line it with parchment paper. This helps with easy removal later. 1. Combine dry ingredients: In a medium-sized bowl, whisk together the all-purpose flour, cocoa powder, baking powder, baking soda, and salt. Make sure there are no lumps. 2. Mix wet ingredients thoroughly: In a large bowl, mix granulated sugar, brown sugar, and oil until smooth. Then, add the eggs and vanilla extract. Whisk until everything is well blended. 1. Incorporate zucchini and combine mixtures: Gently fold the grated zucchini into the wet mixture. Ensure it is evenly mixed. Gradually add the dry mix to the wet mix. Stir gently until just combined. 2. Fold in chocolate and nuts: Carefully add the chocolate chips and nuts, if using. Make sure they are evenly distributed throughout the batter. 3. Pour batter and bake to perfection: Pour the thick batter into the prepared loaf pan. Smooth the top with a spatula. Bake in the preheated oven for 50-60 minutes. To check for doneness, insert a toothpick into the center. It should come out clean or with a few moist crumbs. For the [Full Recipe], follow these steps closely to create a moist and tasty double chocolate zucchini bread. - Ensuring the right texture: The key to great double chocolate zucchini bread is moisture. Grate the zucchini finely and press it lightly to remove excess water. This helps the bread stay moist without being soggy. Mix the batter gently to keep air in, which gives a light texture. - Avoiding overmixing: Overmixing can lead to tough bread. Mix until just combined. You want a few lumps to remain in the batter. This helps the bread rise properly. Remember, less is more when mixing! - Presentation tips for serving: When serving, dust the top with powdered sugar for a charming touch. You can slice the bread thick and serve it warm. A sprinkle of chocolate chips on top adds a nice look, too. - Pairing with beverages: This bread pairs wonderfully with hot drinks. Serve it with coffee or tea. A glass of cold milk also complements the rich chocolate flavor. If you want something special, try a glass of sweet almond milk. - How to store leftovers: To keep your bread fresh, wrap it in plastic wrap or aluminum foil. Store it at room temperature for up to three days. If you want it to last longer, place it in an airtight container. - Best practices for freezing: If you have extra bread, freeze slices for future treats. Wrap each slice in plastic wrap, then place them in a freezer bag. They can last up to three months. When you’re ready to enjoy, simply thaw at room temperature or pop it in the toaster for a warm treat. {{image_4}} You can get creative with your double chocolate zucchini bread. Adding spices can bring new life to the dish. A pinch of cinnamon adds warmth, while nutmeg gives a cozy flavor. You can also switch up the chocolate. Try dark chocolate for a richer taste or white chocolate for a sweeter twist. If you want a healthier bread, consider using whole wheat flour. This option adds fiber and nutrients. You can also reduce the sugar without losing taste. Try cutting the sugar by a quarter. The zucchini keeps the bread moist, so you won't miss the extra sweetness. For a gluten-free version, use a gluten-free flour blend. Many blends work well in baking. Just make sure to check the package for the right amount to use. This way, everyone can enjoy the deliciousness of double chocolate zucchini bread. You can find the full recipe above. Each slice of this double chocolate zucchini bread contains about 200 calories. This tasty treat has around 30 grams of carbohydrates, 10 grams of fats, and 3 grams of protein. These numbers may vary based on your ingredient choices. Zucchini is low in calories and full of nutrients. It provides vitamin C, which helps your immune system. Zucchini also has fiber, which aids digestion. Dark chocolate brings benefits too. It has antioxidants that may improve heart health. Plus, it can boost your mood! This recipe fits many dietary needs. It is vegetarian and can be made gluten-free with the right flour. If you have nut allergies, you can skip the nuts. Always check labels to avoid any allergens in your ingredients. Can I use frozen zucchini? Yes, you can use frozen zucchini. Just thaw and drain it well. This helps remove excess water. Frozen zucchini works great in this recipe. How can I tell if the bread is done? You can check if the bread is done by inserting a toothpick into the center. If it comes out clean or with a few moist crumbs, it is ready. The top should also feel firm to the touch. How can I adjust the sweetness? To adjust sweetness, you can reduce the sugar by a quarter cup. You can also add more cocoa powder for a richer taste. Experiment to find your perfect balance. What to do if the bread is too dense? If your bread is too dense, check your mixing technique. Avoid overmixing the batter. You can also add a little more baking powder to help it rise better next time. What are the best toppings? The best toppings include a sprinkle of powdered sugar or a drizzle of melted chocolate. You can also serve it with whipped cream or a scoop of ice cream for a treat. Can it be made as muffins instead of a loaf? Yes, you can make muffins instead of a loaf. Just pour the batter into a muffin tin. Bake for about 20 to 25 minutes. Use the same toothpick test to check for doneness. In this blog post, we explored a delicious zucchini bread recipe. We covered main and optional ingredients, tips for success, and enticing variations. You learned how to bake, serve, and store your bread. You can enjoy it while making simple swaps for health. Remember, using fresh ingredients and following the steps leads to great results. Happy baking! Enjoy your tasty creation, and feel free to adjust the recipe to suit your taste.

Looking for a delicious way to sneak some veggies into your treats? This Double Chocolate Zucchini Bread recipe is both moist and rich, proving that healthy can be tasty! With …

Read more

Categories Desserts

Easy Balsamic Glaze Simple and Flavorful Recipe

July 18, 2025 by Chef Elliot
- 1 cup balsamic vinegar - 1/4 cup packed brown sugar - 1 tablespoon Dijon mustard - 1 teaspoon garlic powder - 1/2 teaspoon freshly ground black pepper - Pinch of sea salt - 1 tablespoon extra virgin olive oil (optional) To create a great balsamic glaze, I love using simple ingredients. Balsamic vinegar is the star here. This thick, dark vinegar gives the glaze its sweet and tangy flavor. Brown sugar adds a nice sweetness that balances the vinegar's bite. Dijon mustard gives the glaze a subtle kick. Garlic powder brings depth, while black pepper adds warmth. A pinch of sea salt enhances all these flavors. If you want a richer taste, you can add olive oil. This glaze is easy to make and uses items you likely have in your kitchen. You can find the full recipe above. Enjoy the simple and delicious flavors of this glaze! Pour balsamic vinegar and brown sugar into a saucepan. Stir gently until the brown sugar mostly dissolves. This creates a sweet and tangy base for the glaze. Add Dijon mustard, garlic powder, black pepper, and a pinch of sea salt. Whisk these ingredients together until the mixture is smooth. This step helps to enhance the flavor of your glaze. Place the saucepan over medium heat. Bring the mixture to a gentle boil, stirring occasionally. This keeps it from sticking to the pan and burning. Once it starts boiling, reduce the heat to low. Allow the mixture to simmer for 15-20 minutes. It will thicken to a syrupy consistency. Remember to stir it occasionally. If you want a richer flavor, stir in olive oil once the glaze thickens. This step adds depth and enhances the overall taste. Remove the saucepan from heat. Let the glaze cool slightly. Carefully transfer it to a clean jar or an airtight container for storage. You can find the full recipe here: [Full Recipe]. To check if your glaze is thick enough, use a spoon. Dip the spoon into the glaze, lift it out, and let it drip. If the glaze coats the back of the spoon and holds its shape, it’s ready. Remember, it will thicken more as it cools, so don’t overcook it. Aim for a syrupy texture that adds a rich touch to your dishes. You can easily boost the taste of your balsamic glaze. Try adding a pinch of red pepper flakes for heat or a tablespoon of honey for extra sweetness. Fresh herbs, like rosemary or thyme, can also add depth. Experiment with these additions to make the glaze your own. Just a small tweak can transform it into a unique flavor experience. When making balsamic glaze, avoid cooking it over high heat. This can cause it to burn or become too thick too fast. Also, don't skip the stirring. Stirring helps prevent sticking and burning. Lastly, don’t rush the simmering time. Allow it to reduce slowly to develop those rich flavors. Following these tips will help you create a perfect glaze every time. {{image_4}} You can make your balsamic glaze even better by adding fruits or herbs. Try mixing in fresh strawberries or raspberries during cooking. These fruits add a lovely sweetness and a pop of color. You can also use herbs like rosemary or thyme. Just toss in a few sprigs while the glaze simmers. They give a nice earthy flavor that pairs well with the balsamic. While balsamic vinegar is great, you can switch it up. Apple cider vinegar adds a fruity twist. Red wine vinegar gives a sharp taste. Each type of vinegar will change the glaze’s flavor. Feel free to experiment. Just keep the same amount of vinegar in the recipe for best results. If you like spice, try adding some heat to your glaze. A pinch of red pepper flakes can elevate the flavor. For a bolder kick, mix in a bit of sriracha or hot sauce. Start with a small amount and taste as you go. This way, you can control how spicy it gets. To keep your balsamic glaze fresh, use an airtight container. A glass jar works best. Make sure it is clean and dry before pouring in the glaze. Store it in the fridge. This keeps the flavors intact and prevents spoilage. Your homemade balsamic glaze can last up to two weeks in the refrigerator. After that, the flavor may fade. Always check for any off smells or changes in color. If it looks or smells strange, it's best to toss it. You can freeze balsamic glaze if you want to keep it longer. Pour it into ice cube trays for easy portions. Once frozen, transfer the cubes to a freezer bag. When ready to use, thaw cubes in the fridge overnight or warm them gently on the stove. This way, you can enjoy the rich flavors for months! To balance the sweetness, add more acidity. You can mix in a splash of lemon juice or a bit of apple cider vinegar. This will help cut through the sweetness. You might also try using less brown sugar in your recipe. Start with half the amount and taste as you go. Adjust until you find the right balance for your taste buds. Yes, balsamic glaze makes a great marinade! It adds flavor to meats and veggies. Try marinating chicken, beef, or even tofu for about an hour. The sweet and tangy notes work well with grilled or roasted dishes. Just remember to coat the food evenly for the best taste. Balsamic glaze pairs well with many dishes. Here are some ideas: - Drizzle over grilled chicken or steak for a tasty kick. - Use it on roasted vegetables like Brussels sprouts or carrots. - Add it to salads for a fresh burst of flavor. - It also works well on pizza or bruschetta, adding a gourmet touch. Explore these options to enhance your meals! For the full recipe, check out the section above. In this post, I guided you through making an easy balsamic glaze. We covered key ingredients, step-by-step instructions, and tips for perfecting the glaze. I shared variations and storage tips to help you customize and keep it fresh. Remember, creating your own glaze opens up endless flavor possibilities. With your new skills, you can enhance any dish. Enjoy the process and get creative in the kitchen!

Looking to elevate your meals? This Easy Balsamic Glaze is your answer! With just a few simple ingredients, you can create a sweet and tangy delight perfect for drizzling over …

Read more

Categories Appetizers

Keto One-Pan Chicken & Potatoes Simple and Tasty Meal

July 18, 2025 by Chef Elliot
For this dish, you will need: - 4 boneless, skinless chicken thighs - 2 cups baby potatoes, halved - 3 tablespoons olive oil (plus extra for potatoes) These chicken thighs give great flavor and stay juicy. Baby potatoes add a nice bite and are easy to prepare. The spice mix is key in this recipe. You will use: - 2 teaspoons garlic powder - 1 teaspoon onion powder - 1 teaspoon smoked paprika - 1 teaspoon dried oregano - 1 teaspoon dried thyme - Salt and freshly ground pepper to taste These spices bring warmth and depth. Smoked paprika gives a nice smoky touch that pairs well with the chicken. After cooking, you can add some fresh flavor with: - Fresh parsley, chopped, for garnish - Lemon wedges, for serving The parsley adds a pop of color. Squeezing lemon on the chicken and potatoes brightens the meal and enhances the flavors. For the full recipe, check out Keto One-Pan Zesty Chicken & Herb Potatoes. Start by turning your oven to 400°F (200°C). This ensures it is hot enough to cook the chicken and potatoes evenly. In a big bowl, add 3 tablespoons of olive oil. Then, mix in the garlic powder, onion powder, smoked paprika, dried oregano, dried thyme, and a pinch of salt and pepper. Whisk these until smooth and well combined. Next, take the chicken thighs and place them in the bowl with the marinade. Use your hands or a spatula to coat the chicken well. Make sure every bit of chicken is covered in the spices. In another bowl, add the halved baby potatoes. Drizzle with a little olive oil and sprinkle with salt and pepper. Toss them to coat evenly. Now, prepare a large oven-safe skillet. Lightly grease it with olive oil. Place the marinated chicken thighs in the center of the skillet. Scatter the baby potatoes around the chicken with the cut side facing up. Put the skillet in the preheated oven and bake for 25-30 minutes. Check the chicken's internal temperature; it should reach 165°F (75°C). The potatoes should be fork-tender. Once done, take the skillet out and let it sit for 5 minutes. Garnish with chopped parsley and serve with lemon wedges. For the full recipe, check out the details above. To get juicy chicken, start with thighs. They stay moist and tender. Marinate them well. This adds flavor and helps with cooking. Bake them at 400°F (200°C) for 25-30 minutes. Use a meat thermometer. Check for 165°F (75°C) to ensure they are done. Let the chicken rest for five minutes before serving. This helps keep the juices inside. A good marinade can make a big difference. Use simple ingredients like olive oil, garlic, and spices. Mix these well before adding the chicken. Let it soak for at least 15 minutes. If you have more time, marinate for a few hours. This allows the flavors to soak in. You can also try different herbs or citrus juice for a twist. For the best potatoes, use small baby potatoes. Their size helps them cook evenly. Halve them to help with roasting. Toss them in olive oil, salt, and pepper before baking. This gives them a nice crispy edge. Place them cut-side up in the pan for better roasting. They will absorb the chicken's juices, enhancing their flavor. For a fun twist, add some garlic cloves or herbs to the potatoes. For the full recipe, check the main article. {{image_4}} You can make this dish fun by adding different vegetables. Try bell peppers for crunch and color. Carrots give a sweet taste and a nice look. Broccoli adds a healthy green touch. Zucchini cooks fast and stays soft. Just chop them up and toss them with the potatoes. Keep in mind their cooking time to ensure they are tender. While chicken thighs are great, you can switch it up! Try chicken breasts for a leaner option. Pork chops also work well and add a different flavor. If you prefer beef, use small steaks cut into pieces. For a meatless meal, chickpeas or tofu are good choices. Each protein brings its own taste, so experiment to find your favorite! Seasoning is key to a tasty meal. You can change the spices to fit your taste. If you love heat, add cayenne pepper or chili flakes. Want a fresh twist? Use lemon zest or fresh herbs like basil or cilantro. For earthy flavors, consider cumin or coriander. Adjust the salt and pepper to your liking. Remember, each change can make your dish unique. Explore the full recipe to see how these variations fit into the dish! After you enjoy your meal, store any leftovers in an airtight container. Make sure to let the chicken and potatoes cool to room temperature first. This helps keep them fresh. Leftovers stay good in the fridge for about three to four days. Label the container with the date. This way, you won’t forget how long they’ve been there. To reheat, you can use the oven or the microwave. If using the oven, preheat it to 350°F (175°C). Place the leftovers in a baking dish. Cover it with foil to keep moisture in. Heat for about 15-20 minutes, or until hot. If you use the microwave, put the food in a microwave-safe bowl. Heat in short bursts of one minute, stirring in between. This ensures even warming. You can freeze leftovers for up to three months. Use freezer-safe containers or bags. Make sure to remove as much air as possible to prevent freezer burn. When you are ready to eat, thaw the chicken and potatoes in the fridge overnight. Reheat them as mentioned before. This keeps the taste and texture nice. For the best flavor, avoid refreezing once thawed. For the complete recipe, check out the [Full Recipe]. Yes, this recipe is keto-friendly. It uses chicken and baby potatoes, which are low in carbs. Each serving fits well into the keto diet. The olive oil adds healthy fats that support your keto goals. Yes, you can use different types of potatoes. Options like red potatoes or Yukon Gold work well. Keep in mind that the carb count may change. If you want to stay strict on keto, use fewer potatoes or try cauliflower for a low-carb swap. To add spice, increase the smoked paprika or add cayenne pepper. You can also mix in fresh chili peppers or a dash of hot sauce. Spicy seasonings will enhance the flavor and make it more exciting. Just remember to adjust to your taste. Great sides include steamed broccoli, sautéed spinach, or a fresh salad. These options add vitamins and fibers without many carbs. You could also serve it with a creamy dip or a low-carb sauce for extra flavor. This blog post covered the key ingredients and step-by-step instructions for Keto One-Pan Chicken & Potatoes. I shared tips for cooking chicken perfectly and adding flavor with marinades. We also discussed variations, storage, and common questions about the recipe. Keto meals can be simple and tasty. With a few options, you can make it your own. Enjoy cooking and make it fun!

Looking for a quick, tasty meal that’s also keto-friendly? You’ve found it! This Keto One-Pan Chicken & Potatoes recipe is simple and delicious. I’ll guide you through each step, from …

Read more

Categories Dinner
Older posts
Newer posts
← Previous Page1 … Page12 Page13 Page14 … Page59 Next →

TOSSED TASTES

Where flavors get playful! A fresh mix of easy bites, bold spices, and everyday cravings tossed into every recipe. 🍋🍅

PAGES

Home About Contact Privacy Policy Terms & Conditions Cookie Policy GDPR Policy Copyright Policy Disclaimer

CATEGORIES

Appetizers Desserts Salads Breakfast Dinner

Contact

  • Pinterest
  • Mail
Copyright © 2025 Tossed Tastes. All rights reserved.