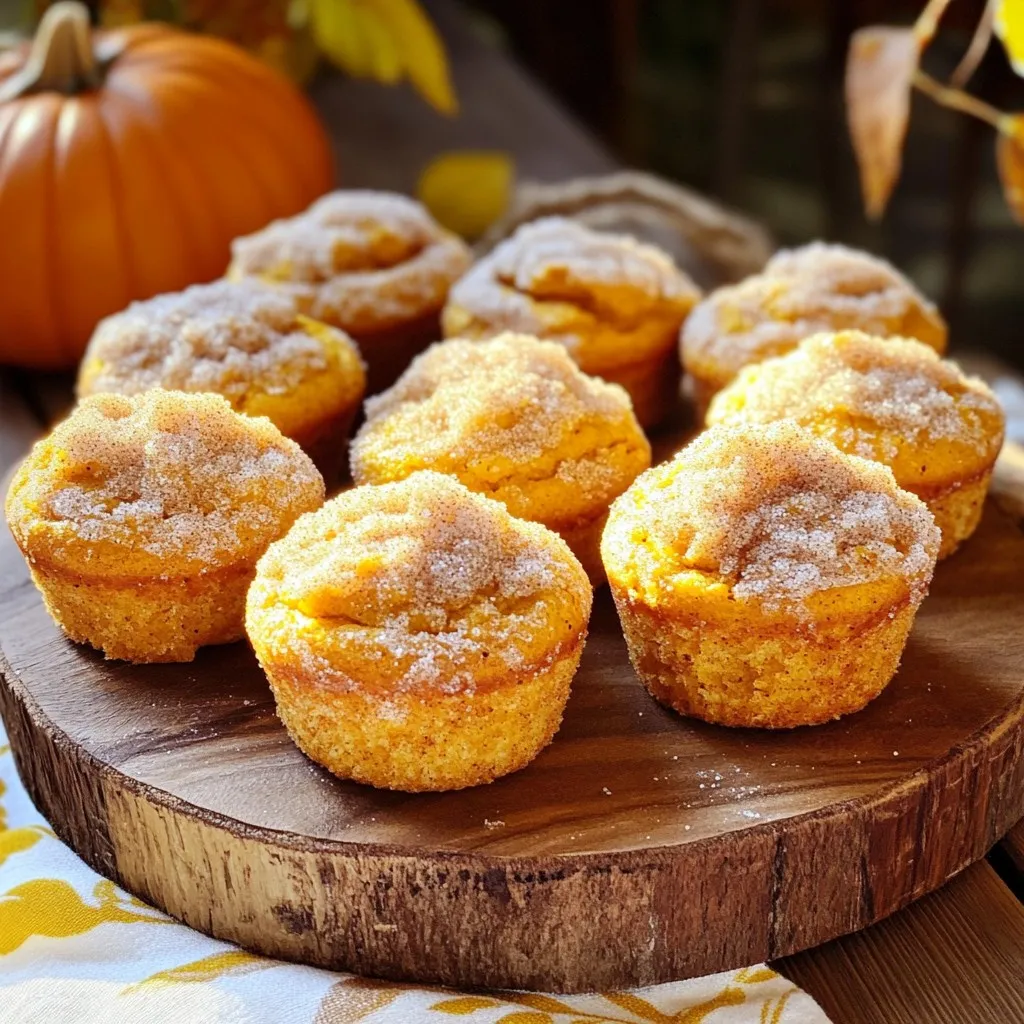
Skip to content
Tossed Tastes
  • Home
  • Appetizers
  • Desserts
  • Salads
  • Breakfast
  • Dinner
  • Privacy Policy
  • Contact
  • About

Chef Elliot

Caprese Salad with Balsamic Glaze Simple and Fresh

July 17, 2025 by Chef Elliot
- Fresh heirloom tomatoes - Mozzarella cheese - Fresh basil leaves - Balsamic glaze - Extra virgin olive oil - Salt and pepper For fresh heirloom tomatoes, you can use Roma or beefsteak tomatoes. They also taste great. If you want a different cheese option, try burrata or feta cheese. Both add unique flavors. For a low-sugar option, look for a balsamic glaze made with less sugar. This keeps the taste light and fresh. I love using these ingredients because they combine well and create a simple dish. Each ingredient shines, and together they make a delightful salad. You can find the full recipe for Caprese Salad with Balsamic Glaze in this article. To make a Caprese salad, start by washing your heirloom tomatoes well. This keeps them fresh and safe to eat. After washing, slice them into thick rounds, about half an inch each. Next, slice the fresh mozzarella cheese into thick rounds, similar in size to the tomatoes. This helps the salad look neat and balanced. Now, it’s time to arrange your ingredients. Grab a large serving platter, as this will showcase your beautiful salad. Begin by layering the salad. Place a slice of tomato on the platter. On top of that, add a slice of mozzarella cheese. Next, place a fresh basil leaf on the cheese. This creates a lovely stack. Keep repeating this pattern until all your ingredients are used. Layering not only looks nice but also allows each bite to have all the flavors. For aesthetic presentation, try to alternate colors and sizes. This adds visual interest and makes the salad more appealing. Now for the best part! Drizzle extra virgin olive oil over the arranged salad. This adds flavor and gives your dish a lovely shine. Then, carefully drizzle the balsamic glaze over everything. Use a back-and-forth motion to create beautiful patterns. Don’t forget to sprinkle salt and freshly cracked black pepper on top. This step is key to enhancing the flavors of your salad. If you want an even cooler experience, chill your salad in the fridge for about 10 to 15 minutes. This helps the flavors blend together nicely. For the full recipe, check out Caprese Salad with Balsamic Kiss. When you serve Caprese salad, presentation matters. I love using rustic wooden platters. They add charm and warmth. The natural look of the wood pairs well with the vibrant colors of the salad. To make it pop, you can garnish the salad. Add extra basil leaves on top. A light drizzle of balsamic glaze gives it a final touch. This not only looks great but tempts your guests too! You can boost the flavors of your Caprese salad easily. Try adding sliced avocado for creaminess. Sun-dried tomatoes can add a rich, sweet kick. A sprinkle of crushed red pepper flakes brings heat. For seasoning, use salt and pepper wisely. Start with a pinch of salt and a few cracks of pepper. Taste as you go. You want the flavors to shine without being overpowering. This balance makes the salad even more enjoyable. Serve your Caprese salad at room temperature. This helps the flavors truly shine. If you like, chill it for 10-15 minutes before serving. This keeps it fresh and cool. For drinks, pair it with a light white wine, like Pinot Grigio. It complements the salad’s flavors perfectly. You can also serve it with crusty bread or a light pasta dish for a complete meal. Enjoying this salad with good company makes it even better! {{image_4}} You can change the herbs you use for your Caprese salad. Try fresh oregano or dill for a new twist. Each herb brings its own unique flavor. You can also add seasonal vegetables. Sliced cucumbers or grilled zucchini can add texture and taste. Mixing in colorful vegetables makes the salad even more appealing. If you want a vegan option, use plant-based mozzarella. It melts and tastes great, just like the real thing. For dressing, choose a gluten-free balsamic glaze. Many brands offer gluten-free options. You can also make your own glaze with balsamic vinegar and a touch of maple syrup. Caprese skewers are a fun way to serve this salad. Just thread tomatoes, mozzarella, and basil onto skewers. This makes a great finger food for parties. You can also get creative with your serving style. Use small glasses to layer the ingredients. This adds a stylish touch and makes it easy to serve. Check the Full Recipe for more ideas! To keep your Caprese salad fresh, store it in the fridge. Use an airtight container. This helps prevent any unwanted odors from mixing in. If you have leftovers, separate the tomatoes and mozzarella. This keeps everything crisp and tasty. Your Caprese salad will last about three days in the fridge. Check for any signs of spoilage. If the tomatoes look mushy or the cheese smells off, it’s best to toss it out. Freshness matters for the best flavor. You can get creative with leftover Caprese salad. Chop the salad into smaller pieces for a pasta dish. Add it to a sandwich for a fresh bite. You can also mix it with scrambled eggs for a tasty breakfast. Just reassemble the flavors gently to keep the taste bright. You can make a Caprese salad ahead of time. To do this, slice the tomatoes and mozzarella, but wait to layer them. Store the slices separately in the fridge. You can also wash and dry the basil leaves. When you are ready to serve, layer the salad on a platter. Drizzle with olive oil and balsamic glaze just before serving. This keeps the salad fresh and tasty. Yes, you can use other cheeses! Some great options are burrata or goat cheese. Burrata adds a creamy texture. Goat cheese gives a tangy flavor. Each cheese brings a unique taste to the dish. Feel free to experiment and find your favorite. No, they are not the same. Balsamic glaze is thicker and sweeter than balsamic vinegar. It has been cooked down to create a syrupy texture. Use balsamic glaze for drizzling on salads or meats. Balsamic vinegar works well in dressings or marinades. They both add flavor, but the glaze offers a richer sweetness. Simple seasonings work best for Caprese salad. I recommend using fresh basil, salt, and black pepper. You can also add a pinch of garlic powder for extra flavor. Some people enjoy a dash of red pepper flakes for heat. Keep it simple to let the fresh ingredients shine. In this article, we explored how to create a delightful Caprese salad. We discussed fresh ingredients like heirloom tomatoes, mozzarella, and basil. I shared techniques to layer your salad beautifully and offered tips to enhance flavor and presentation. You can adapt the recipe with ingredient substitutes and variations to fit your needs. Remember, good storage makes a big difference in freshness. Enjoy your Caprese salad as a tasty appetizer or side dish, and get creative with it!

Caprese Salad is fresh, colorful, and easy to make. Topped with a rich balsamic glaze, this dish shines in any season. Gather heirloom tomatoes, creamy mozzarella, and fragrant basil for …

Read more

Categories Salads

Honey Garlic Chicken with Sweet Potatoes Delight

July 17, 2025 by Chef Elliot
To make Honey Garlic Chicken with Sweet Potatoes, gather these fresh and simple ingredients: - 4 chicken thighs, bone-in and skin-on - 2 tablespoons honey - 4 cloves garlic, finely minced - 1 tablespoon soy sauce - 1 tablespoon olive oil (you can use a bit more if desired) - 2 medium sweet potatoes, peeled and cut into 1-inch cubes - 1 teaspoon smoked paprika for a rich flavor - Salt and pepper to taste - Fresh parsley, finely chopped, for garnish These ingredients bring together sweet, savory, and earthy flavors. The chicken thighs are juicy and tender, while the sweet potatoes add a natural sweetness. Honey and garlic create a tasty glaze that coats the chicken perfectly. You can find the Full Recipe for detailed steps on how to cook this dish. Enjoy! - Preheat the Oven Start by preheating your oven to 400°F (200°C). This gets the oven ready while you prepare the meal. - Prepare the Marinade In a medium bowl, mix together 2 tablespoons of honey, 4 minced garlic cloves, 1 tablespoon of soy sauce, and 1 tablespoon of olive oil. Add a pinch of salt and pepper. Whisk until well blended. - Marinate the Chicken Add 4 chicken thighs to the marinade. Use your hands or tongs to coat the chicken evenly. For the best flavor, let it marinate for at least 30 minutes at room temperature. You can also refrigerate it overnight for a deeper taste. - Toss Sweet Potatoes with Seasoning In another bowl, take 2 cubed sweet potatoes. Toss them with olive oil, 1 teaspoon of smoked paprika, salt, and pepper. Make sure each piece is well coated. - Arrange on Baking Sheet Place the marinated chicken in the center of a baking sheet. Spread the seasoned sweet potatoes around the chicken. This creates a colorful and tasty dish. - Bake Chicken and Sweet Potatoes Drizzle any remaining marinade over both the chicken and sweet potatoes. Put the baking sheet in the oven and bake for 35-40 minutes. Check that the chicken is 165°F (75°C) and the sweet potatoes are fork-tender. - Check for Doneness After baking, check that the chicken is fully cooked and the sweet potatoes are soft. - Resting Period Let the dish rest for about 5 minutes. This helps the juices settle into the chicken, making it juicier. - Garnish Before Serving Just before serving, sprinkle finely chopped fresh parsley over the chicken and sweet potatoes. This adds a lovely pop of color and freshness. For the complete instructions and details, refer to the Full Recipe. Marinating adds deep flavor to your chicken. Here’s how to do it right: - Use a bowl that fits the chicken well. - Mix honey, garlic, soy sauce, and olive oil until smooth. - Coat the chicken thighs evenly with the marinade. For the best flavor, marinate the chicken for at least 30 minutes. If you have more time, let it sit overnight in the fridge. This makes the chicken juicy and full of taste. To ensure your chicken is juicy, follow these steps: - Bake at 400°F (200°C) for even cooking. - Use a meat thermometer to check doneness. Chicken should reach 165°F (75°C). - Let the chicken rest for 5 minutes after cooking. This helps keep it moist. For perfectly cooked sweet potatoes: - Cut them into 1-inch cubes for even cooking. - Toss them well with olive oil and smoked paprika. - Bake alongside the chicken for about 35-40 minutes. They should be fork-tender when done. Serving your dish well can impress your guests. Here’s how: - Use a large platter to arrange the chicken and sweet potatoes. - Garnish with fresh parsley for a pop of color. - Add lemon wedges on the side for a fresh squeeze. These simple tips make your Honey Garlic Chicken with Sweet Potatoes look great and taste even better. For the complete details, check the Full Recipe. {{image_4}} You can change the protein in this dish easily. - Using Chicken Breasts: If you prefer chicken breasts, they work well too. Use the same marinade and cook until the internal temperature reaches 165°F. This will keep them juicy and tasty. - Substituting with Tofu or Tempeh: If you're looking for a plant-based option, try tofu or tempeh. Cut them into cubes and marinate just like the chicken. Bake them for about 25-30 minutes until they're golden and flavorful. You can add your favorite flavors to make this dish your own. - Adding Different Spices: Spice it up with red pepper flakes or ginger for a kick. You can also use herbs like thyme or rosemary to enhance the taste. - Incorporating Vegetables: Toss in other veggies like broccoli or bell peppers. They add color and taste. Just cut them into bite-sized pieces and mix them with sweet potatoes before baking. You can prepare this dish in different ways. - Grilling instead of Baking: If you love the smoky flavor, grill the chicken and sweet potatoes. Just marinate as usual, then cook them on a grill for about 20-25 minutes, turning occasionally. - Slow Cooker Instructions: For a set-it-and-forget-it option, use a slow cooker. Place the marinated chicken and sweet potatoes inside. Cook on low for 4-6 hours or on high for 2-3 hours. This method makes the chicken super tender. For complete instructions, check out the Full Recipe. - Cooling Down Properly: After cooking, let the chicken and sweet potatoes cool. This helps keep the food safe and tasty. Cool them for about 30 minutes before storing. - Best Container Practices: Use airtight containers for storage. Glass containers work well. They keep the food fresh and are easy to clean. - Methods for Best Results: Oven vs. Microwave: The oven gives the best results. Preheat the oven to 350°F (175°C). Place the food in an oven-safe dish. Cover it with foil to prevent drying out. Heat for about 20-25 minutes. The microwave is faster but can make the food soggy. If using the microwave, heat in short bursts, checking often. - Maintaining Flavor and Texture: To keep flavors, add a splash of water or broth before reheating. This adds moisture and keeps the chicken juicy. - Best Practices for Freezing: Allow the dish to cool completely. Place portions in freezer-safe bags or containers. Remove as much air as possible. Label containers with the date. - Thawing and Usage Suggestions: Thaw in the fridge overnight for best results. You can also use the microwave for quick thawing. After thawing, reheat as described above to enjoy your Honey Garlic Chicken with Sweet Potatoes again. To ensure chicken is cooked through, use a meat thermometer. Insert it into the thickest part of the thigh. The safe internal temperature for chicken is 165°F (75°C). This way, you avoid any risk of undercooking. Check multiple pieces if cooking a lot at once. Yes, you can prepare the Honey Garlic Chicken ahead of time. Marinate the chicken in the fridge for up to 24 hours. You can also chop the sweet potatoes in advance. Just store them in water to prevent browning. This makes dinner time faster and easier. Honey Garlic Chicken goes well with several sides. Here are some great options: - Steamed broccoli - Roasted green beans - A simple garden salad - Quinoa or rice These sides will balance the flavors of the dish nicely. You can store leftovers in the fridge for up to 3 days. Keep them in an airtight container. Make sure to let the chicken cool down before sealing it. This helps keep the chicken moist and tasty. Yes, you can use different types of sweet potatoes. Orange-fleshed sweet potatoes are common, but you can also try purple or white varieties. Each type has its own unique flavor and texture. Just make sure to cut them into similar sizes for even cooking. For the full recipe, check the previous sections. This blog post shared a simple and tasty recipe for Honey Garlic Chicken with sweet potatoes. We discussed each ingredient and provided easy steps to prepare your meal. Tips on marinating and cooking ensured great flavor and texture. Variations offered many ways to customize, while storage information helped you save leftovers. Now you have all you need for a delicious meal. Enjoy cooking and sharing this dish!

If you’re ready for a flavor explosion, you’re in the right place! This Honey Garlic Chicken with Sweet Potatoes is not just a meal; it’s a feast for your taste …

Read more

Categories Dinner

Bruschetta Chicken Pasta Flavorful Weeknight Meal

July 16, 2025 by Chef Elliot
To make bruschetta chicken pasta, you need a few key ingredients. Here’s what you will need: - 2 boneless, skinless chicken breasts - Salt and freshly ground black pepper, to taste - 2 tablespoons extra virgin olive oil - 3 cloves garlic, finely minced - 1 cup cherry tomatoes, halved - 1/4 cup fresh basil leaves, coarsely chopped - 2 tablespoons balsamic vinegar - 12 ounces fettuccine pasta - 1/2 cup mozzarella cheese, shredded - Grated Parmesan cheese, for serving - Fresh basil leaves for garnish These ingredients build layers of flavor and make your dish fresh and vibrant. I love using extra virgin olive oil in this recipe. It adds a rich taste. It also helps cook the chicken to perfection. Salt and pepper are essential. They boost the chicken's flavor. Using fresh garlic makes a big difference. It gives a nice aroma that fills your kitchen. Balsamic vinegar adds a tangy twist. It balances the sweetness of the tomatoes. Together, these oils and seasonings create a delightful base for the pasta. Garnishes can make your dish shine even more. You can use fresh basil leaves on top. They add color and a burst of flavor. Grated Parmesan cheese is another great choice. It adds creaminess and a salty taste that compliments the dish. For an extra touch, drizzle some balsamic glaze over the top. This step makes the meal look fancy while enhancing its flavor. Start with two boneless, skinless chicken breasts. Season both sides with salt and freshly ground black pepper. Heat 2 tablespoons of extra virgin olive oil in a large skillet over medium heat. When the oil shimmers, add the chicken breasts. Cook for 6-7 minutes on each side until golden and cooked through. The internal temperature should reach 165°F. Once done, take the chicken out and let it rest for a few minutes. Then slice it into strips. In the same skillet, add 3 finely minced cloves of garlic. Sauté for about one minute until fragrant. Watch closely to avoid burning the garlic. Next, add 1 cup of halved cherry tomatoes and 1/4 cup of coarsely chopped fresh basil leaves. Cook for another 3-4 minutes. This allows the tomatoes to soften and release their juices. Finally, drizzle 2 tablespoons of balsamic vinegar over the mix and stir gently. While the tomato and basil mixture cooks, bring a large pot of salted water to a boil. Add 12 ounces of fettuccine pasta and cook according to the package instructions, usually about 8-10 minutes. When the pasta is ready, drain it but save about 1/2 cup of the pasta water. Add the cooked fettuccine to the skillet with the tomato-basil mix. Toss everything gently to coat the pasta. If it seems dry, add a splash of the reserved pasta water. Next, fold in the sliced chicken and sprinkle 1/2 cup of shredded mozzarella cheese on top. Mix gently to let the cheese melt. Serve your bruschetta chicken pasta on plates, topped with grated Parmesan cheese and fresh basil leaves. For a final touch, consider drizzling a bit more balsamic vinegar. For the full recipe, refer to the beginning of the article. To get juicy chicken, start with fresh, good-quality breasts. Season both sides with salt and pepper. Heat olive oil in a skillet over medium heat. Once hot, add the chicken. Cook it for about 6-7 minutes per side. Use a meat thermometer to check the internal temperature of 165°F. Let the chicken rest before slicing it. This keeps the juices inside. Use a large pot of salted water for boiling fettuccine. Bring the water to a rolling boil before adding pasta. Cook it according to package instructions, usually 8-10 minutes, until al dente. This means the pasta should have a slight bite. When draining, reserve some pasta water. This water helps bind the sauce and pasta together. Add more flavor by using fresh herbs. Consider thyme or oregano along with basil. A squeeze of lemon juice brightens the dish. For a spicy kick, add red pepper flakes. You can also throw in more veggies like spinach or bell peppers. These add color and nutrition. Lastly, a drizzle of high-quality balsamic vinegar elevates the taste. For the full experience, check out the Full Recipe. {{image_4}} If you want a meat-free dish, try using grilled eggplant or zucchini instead of chicken. You can also add more vegetables like bell peppers or spinach. These options keep the dish fresh and full of flavor. For a gluten-free version, use gluten-free pasta. There are many great options made from rice or quinoa. This swap will not change the taste much, so you can enjoy your meal without worry. Get creative with toppings! Consider adding olives or artichokes for a Mediterranean twist. You can also sprinkle some crushed red pepper for heat. A handful of arugula or spinach adds a nice peppery flavor and boosts nutrition. If you want the full recipe, check out the detailed steps to make this dish. Each variation allows you to enjoy bruschetta chicken pasta in your own way! To store leftover bruschetta chicken pasta, first let it cool to room temperature. Use an airtight container to keep it fresh. Store it in the fridge for up to three days. If you want to enjoy it later, ensure you label the container with the date. This way, you know how long it’s been stored. When it's time to heat your pasta, use the stove or microwave. For the stove, place the pasta in a skillet. Add a splash of water or broth to keep it moist. Heat over medium until warm, stirring often. If you use the microwave, cover the dish with a damp paper towel. Heat in short bursts, stirring in between, until it’s hot. Freezing bruschetta chicken pasta is a great way to save it. To freeze, let it cool completely. Then, place it in a freezer-safe bag or container. Remove as much air as possible before sealing. It will stay good for about three months. When ready to eat, thaw it overnight in the fridge before reheating. For the best taste, consume within a month of freezing. I love using fettuccine for Bruschetta Chicken Pasta. Its wide shape holds the sauce well. You can also try penne or rotini if you prefer. These shapes grab the sauce and flavor nicely. Yes, you can make Bruschetta Chicken Pasta ahead. Cook the chicken and pasta, then mix them with the sauce. Store it in the fridge for up to two days. Just reheat it gently on the stove or in the microwave. I suggest a simple green salad with a light vinaigrette. Garlic bread is another great choice. You could also serve steamed vegetables for a healthy balance. These sides complement the pasta's flavors well. In this post, we explored how to make Bruschetta Chicken Pasta. We covered the key ingredients, step-by-step cooking instructions, and helpful tips. We also discussed variations to fit your needs, along with storage and reheating methods. This dish is easy to adapt and delicious. Remember, cooking should be fun. Try new flavors and enjoy every bite!

Are you searching for a quick, tasty dinner? Bruschetta Chicken Pasta hits the spot! This dish combines juicy chicken, fresh tomatoes, and basil, creating a burst of flavor. In just …

Read more

Categories Dinner

Easy Zucchini Chocolate Layer Cake Simple Delight

July 16, 2025 by Chef Elliot
This cake needs a few special items to shine. Here’s what you will need: - 2 cups grated zucchini (about 2 medium zucchinis) - 1 ¾ cups all-purpose flour - ½ cup unsweetened cocoa powder - 1 ½ teaspoons baking soda - 1 teaspoon baking powder - ½ teaspoon salt - 1 cup granulated sugar - ½ cup packed brown sugar - ¾ cup vegetable oil - 3 large eggs - 2 teaspoons vanilla extract - 1 cup semi-sweet chocolate chips - 1 cup powdered sugar (for frosting) - 2 tablespoons unsweetened cocoa powder (for frosting) - 2 tablespoons milk (plus more, if needed for frosting consistency) You can add your twist to this cake. Here are some fun extras: - Nuts, like walnuts or pecans, for crunch - A splash of coffee to enhance the chocolate flavor - A pinch of cinnamon for warmth - Different types of chocolate chips, like dark or white chocolate Using fresh, high-quality ingredients makes a big difference. Choose firm, fresh zucchinis. They add moisture and nutrients. Opt for pure vanilla extract instead of imitation. It boosts the cake’s flavor. Use good cocoa powder for rich taste. Fresh eggs also improve the texture. Quality ingredients lead to a cake that is both delicious and satisfying. For the full recipe, check out the entire guide! Start by preheating your oven to 350°F (175°C). Grease two 9-inch round cake pans with butter or cooking spray. Lightly dust them with flour. This step helps your cake not stick. In a medium bowl, whisk together the flour, cocoa powder, baking soda, baking powder, and salt. Set this aside. In a large bowl, mix the granulated sugar, brown sugar, and vegetable oil. Use a hand mixer or whisk until smooth. Add the eggs one by one, mixing each in well. Stir in the vanilla extract for flavor. Gradually add the dry mix to the wet mix. Alternate this with the grated zucchini. Be careful not to overmix. Finally, fold in the chocolate chips for added sweetness. Divide the batter evenly between the prepared pans. Smooth the tops with a spatula. Place the pans in the oven to bake for 25-30 minutes. To check if they are done, insert a toothpick into the center. If it comes out clean, your cakes are ready. Let them cool in the pans for about 10 minutes. After that, turn them out onto wire racks to cool completely. While the cakes cool, make the frosting. In a mixing bowl, combine the powdered sugar, cocoa powder, and milk. Stir until the mix is smooth and spreadable. If it is too thick, add more milk, one teaspoon at a time. Once the cakes are cool, place one layer on a serving plate. Spread a thick layer of frosting on top. Stack the second layer on top. Use the remaining frosting to cover the top and sides of the cake. For a fun touch, sprinkle some chocolate chips or grated zucchini on top. For the full recipe, check out the details above. To get a moist cake, use fresh, grated zucchini. The zucchini adds natural moisture. Don't squeeze the zucchini too hard. You want it to keep some water. Also, don’t overmix your batter. Mix just until combined; this helps keep the cake light and fluffy. Baking is a science. Measure your ingredients carefully. Too much flour can make the cake dry. Always preheat your oven. This ensures even baking. Also, remember to check the cakes at the 25-minute mark. Ovens can vary in temperature, so use a toothpick to test doneness. If it comes out clean, your cake is ready. Frosting can be tricky, but I have some tips. First, ensure your cake is completely cool. If it's warm, the frosting will melt. Use a spatula to spread frosting evenly. Start with the top layer; then, frost the sides. For a smooth finish, dip your spatula in hot water before smoothing. This creates a beautiful look. For extra flair, top with chocolate chips or a sprinkle of grated zucchini. For the full recipe, check out the [Full Recipe] link. {{image_4}} You can make this cake gluten-free. Substitute all-purpose flour with a gluten-free blend. Look for a blend that includes xanthan gum. This helps mimic the texture of regular flour. You can enjoy the same taste without gluten. If you want a lighter cake, swap out the vegetable oil for applesauce. This lowers the fat content while adding moisture. You can also reduce the sugar by half and replace it with honey or maple syrup. Both add sweetness and flavor without all the granulated sugar. To make your cake unique, try adding spices like cinnamon or nutmeg. They enhance the chocolate flavor. You can also mix in nuts like walnuts or pecans for crunch. For a richer taste, add espresso powder. It boosts the chocolate taste without adding a coffee flavor. You can find the full recipe [here](#). To keep your Easy Zucchini Chocolate Layer Cake fresh, store it in an airtight container. This will help keep the moisture in. You can also cover it with plastic wrap or foil. Place it in the refrigerator for up to five days. If you want to keep it longer, try freezing it. If you have leftovers, freezing the cake is a great option. First, let the cake cool completely. Wrap each layer tightly in plastic wrap. Then, place them in a freezer-safe bag or container. You can freeze it for up to three months. When ready to eat, thaw it in the fridge overnight. To reheat your cake, remove it from the fridge or freezer. If it’s frozen, let it thaw fully first. Preheat your oven to 350°F (175°C). Place the cake on a baking sheet and cover it with foil to prevent drying out. Heat for about 10-15 minutes, or until warm. This keeps the cake moist and delicious. Enjoy every slice of your Easy Zucchini Chocolate Layer Cake! For the full recipe, check out the details above. Yes, you can use frozen zucchini. Just make sure to thaw and drain it well. Excess water can make the cake too moist. Pat it dry with paper towels to remove any extra moisture. This will help you keep the right cake texture. To check if the cake is done, stick a toothpick in the center. If it comes out clean or with a few crumbs, your cake is ready. Baking time is about 25-30 minutes, but ovens can vary. Keep an eye on it as it gets close to the time. If you run out of cocoa powder, you can use carob powder. Carob gives a similar taste but is sweeter. You can also use dark chocolate melted down. Just make sure to adjust the sugar in the recipe as needed. This cake can fit some special diets with a few tweaks. For gluten-free, use a gluten-free flour blend. For dairy-free, swap eggs with flax eggs and use plant-based milk for the frosting. It’s a fun way to make a cake everyone can enjoy. Check the Full Recipe for more details on making it fit your needs. This article has covered everything you need for a great Zucchini Chocolate Layer Cake. We discussed key ingredients, how to prep and bake, and tips for success. We also explored tasty variations and storage tips. Remember, baking takes practice. Don’t be afraid to try new things. Enjoy making and sharing this cake. It's a fun treat that everyone will love.

Love chocolate cake? You’ll adore my Easy Zucchini Chocolate Layer Cake! It’s rich, moist, and packed with hidden greens. Perfect for those who think veggies can’t shine in desserts. I’ll …

Read more

Categories Desserts

Rich Dark Chocolate Zucchini Cake Decadent Delight

July 16, 2025 by Chef Elliot
To make this cake, you need a few key items. Here is a list: - 1 medium zucchini, finely grated (approximately 1 cup) - 1 cup all-purpose flour - 1/2 cup unsweetened cocoa powder - 1 teaspoon baking soda - 1/2 teaspoon baking powder - 1/2 teaspoon salt - 1 cup granulated sugar - 1/2 cup packed brown sugar - 1/2 cup vegetable oil - 2 large eggs, at room temperature - 1 teaspoon pure vanilla extract - 1/2 cup dark chocolate chips - 1/4 cup chopped walnuts (optional) These ingredients work together to create a rich, moist cake. The zucchini adds moisture without a strong taste. The cocoa powder gives it that deep chocolate flavor. You can add some extras to make your cake even better. Here are some ideas: - 1/4 cup shredded coconut - 1/2 cup pecans or almonds - 1 teaspoon cinnamon or espresso powder - 1/2 cup dried cherries or cranberries These add-ins can change the taste and texture of your cake. You can mix and match based on what you like. If you have allergies or specific diets, you can still enjoy this cake. Here are some substitutions you can use: - Substitute the all-purpose flour with almond flour or oat flour for gluten-free options. - Use applesauce instead of vegetable oil for a lower-fat version. - Replace granulated sugar with coconut sugar or a sugar alternative like stevia. - For a vegan version, use flax eggs instead of regular eggs. These swaps will keep the cake tasty while fitting your needs. You can enjoy a slice without worry. For the full recipe, check the provided link. First, gather your ingredients. You need a medium zucchini, flour, cocoa powder, and more. Preheat your oven to 350°F (175°C). Grease a 9-inch round cake pan with butter. Line the bottom with parchment paper. This will help the cake come out easily later. In a large bowl, sift together the flour, cocoa powder, baking soda, baking powder, and salt. This step helps to mix and aerate the dry ingredients. Set this bowl aside. In another bowl, whisk the granulated sugar, brown sugar, and vegetable oil. Mix until smooth. Then, add your eggs, one at a time. Stir in the vanilla extract. This mixture should look light and fluffy. Now, gently add the dry mix to the wet mix. Stir until just combined. Be careful not to overmix! Next, fold in the grated zucchini, dark chocolate chips, and walnuts if you want some crunch. Pour the batter into your prepared cake pan. Use a spatula to spread it evenly. Now, bake for 30-35 minutes. To check if it's done, insert a toothpick into the center. It should come out clean or with a few moist crumbs. Once baked, let the cake cool in the pan for about 10 minutes. Run a knife around the edges to loosen it. Transfer the cake to a wire rack to cool completely. For the final touch, dust the cooled cake with powdered sugar or serve with whipped cream. Enjoy this rich dark chocolate zucchini cake! For the full recipe, check the earlier section. To keep your cake moist, start with fresh zucchini. Grate it just before using. This way, it retains more moisture. Do not squeeze out the juice from the zucchini. The liquid will add extra moisture to your cake. Use a mix of granulated and brown sugar for a rich flavor. Brown sugar gives a nice caramel note, making the cake taste better. One common mistake is overmixing the batter. This can lead to a dense cake. Mix just until you see no dry flour. Also, make sure your oven is at the right temperature. An oven that is too hot or too cold can change how the cake bakes. Use an oven thermometer to check the heat if needed. Finally, don’t skip the cooling time. Letting the cake cool in the pan for 10 minutes helps it set properly. When grating zucchini, use the largest holes on your grater. This creates larger shreds, which will melt into the cake as it bakes. Wash the zucchini well to remove any dirt. You can leave the skin on for added color and nutrients. If the zucchini is very large, cut it in half before grating. This makes it easier to handle. For the best taste, use zucchini that is firm and bright in color. If you want to add more flavor, you can mix in some spices like cinnamon or nutmeg. {{image_4}} You can make this cake even richer by mixing in different types of chocolate. For a sweet twist, try using milk chocolate chips. They add a creamy taste that contrasts with the dark chocolate. If you like a strong flavor, use semi-sweet chocolate. It balances the cake's sweetness well. You can also melt chocolate and swirl it into the batter before baking. This creates a marbled effect that looks stunning and tastes great. The frosting you choose can change the whole vibe of your cake. A classic cream cheese frosting pairs well, adding tanginess to the rich chocolate flavor. You can also use a simple chocolate ganache. To make ganache, heat heavy cream and pour it over dark chocolate. Stir until smooth and pour over the cooled cake. For a lighter option, consider whipped cream. Top your cake with whipped cream for a fluffy finish that complements the dense texture. You can easily adapt this cake for gluten-free or vegan diets. For a gluten-free version, swap all-purpose flour with a 1:1 gluten-free flour blend. Make sure the blend contains xanthan gum for better texture. To make it vegan, replace eggs with flax eggs. Mix one tablespoon of ground flaxseed with three tablespoons of water for each egg. Let it sit until it thickens. You can also substitute vegetable oil with applesauce to keep it moist and add a hint of sweetness. These adjustments keep the cake delicious while meeting dietary needs. For the complete recipe, check out the Full Recipe. To keep your rich dark chocolate zucchini cake fresh, store it in an airtight container. Place the leftover cake at room temperature for up to three days. If you want the cake to last longer, refrigerate it. Just remember to wrap it tightly in plastic wrap or foil to prevent it from drying out. You can freeze this cake to enjoy later. First, let it cool completely. Wrap the cake in plastic wrap, then in aluminum foil. This double wrapping helps keep the moisture locked in. You can freeze it for up to three months. When you’re ready to eat it, thaw the cake in the fridge overnight before serving. To reheat your cake, preheat the oven to 350°F (175°C). Place the cake on a baking sheet and warm it for about 10 minutes. This helps restore its moistness. If you prefer, you can microwave a slice for about 15-20 seconds. Just don’t overheat it, or the cake may dry out. Enjoy every bite! Yes, you can use regular chocolate. However, the cake will taste sweeter. Dark chocolate adds a rich flavor that balances the cake's sweetness. If you prefer a more bitter taste, stick with dark chocolate. It pairs well with zucchini, enhancing the flavors. Check your cake with a toothpick. Insert it into the center of the cake. If it comes out clean or with a few moist crumbs, your cake is ready. If it has wet batter on the toothpick, bake it for a few more minutes. Keep an eye on it to avoid overbaking. Absolutely! You can bake the cake a day in advance. Just let it cool completely, then cover it well. Store it at room temperature for a day, or in the fridge for up to three days. This can help the flavors meld together, making the cake even better. Serve it plain for a simple treat. For a fancier touch, add a dusting of powdered sugar. You can also top each slice with whipped cream or a sprinkle of grated chocolate. If you like nuts, a few chopped walnuts on top add a nice crunch. Enjoy this delicious cake with coffee or tea for a perfect pairing. Feel free to check out the Full Recipe to create this delightful dessert! You learned how to make a rich dark chocolate zucchini cake with key ingredients and steps. We covered tips to keep it moist and variations to suit your taste. Remember, using the right substitutions ensures everyone can enjoy it. Storing it properly keeps it fresh for later. Explore these ideas, get creative, and share this treat with others. Feel confident baking this cake, as it’s fun and delicious. Enjoy your baking journey!

Are you ready to indulge in a slice of heaven? This Rich Dark Chocolate Zucchini Cake is not just delicious; it’s a smart way to sneak in some veggies! With …

Read more

Categories Desserts

Moist Vanilla Cake with Strawberry Filling Delight

July 16, 2025 by Chef Elliot
To make the moist vanilla cake, you will need: - 2 ½ cups all-purpose flour - 2 ½ teaspoons baking powder - ½ teaspoon baking soda - ½ teaspoon salt - 1 cup unsalted butter, softened to room temperature - 2 cups granulated sugar - 4 large eggs, at room temperature - 1 tablespoon pure vanilla extract - 1 cup buttermilk, at room temperature For the delicious strawberry filling, gather these ingredients: - 2 cups fresh strawberries, hulled and sliced - ½ cup powdered sugar You will need specific tools to create this cake: - Two 9-inch round cake pans - Electric mixer - Mixing bowls (medium and large) - Whisk - Spatula - Wire rack for cooling - Serving plate Using these ingredients and equipment ensures you create a delightful moist vanilla cake with a sweet strawberry filling. It helps to prepare everything before you start. This makes the cooking process smoother and more fun. Happy baking! To start, gather your ingredients. You will need flour, baking powder, baking soda, salt, butter, sugar, eggs, vanilla extract, and buttermilk. 1. Preheat your oven to 350°F (175°C). 2. Grease two 9-inch round cake pans. Dust them lightly with flour. 3. In a bowl, whisk together 2 ½ cups of flour, 2 ½ teaspoons of baking powder, ½ teaspoon of baking soda, and ½ teaspoon of salt. Set this aside. 4. In a large mixing bowl, beat 1 cup of softened butter with 2 cups of sugar. Mix it until it turns light and fluffy. This should take about 3-4 minutes. 5. Add 4 large eggs one at a time. Make sure each egg is mixed in well before adding the next. Stir in 1 tablespoon of vanilla extract. 6. Gradually mix in the flour mixture and 1 cup of buttermilk. Alternate adding them, starting and ending with the flour. Mix gently until just combined. Now, it’s time to bake the cakes. 1. Divide the batter evenly between the two prepared pans. Smooth the tops with a spatula. 2. Bake for 25-30 minutes. You can check if they are done by inserting a toothpick in the center. If it comes out clean, they are ready! 3. Once done, remove the pans from the oven. Let them cool for 10 minutes. 4. Carefully transfer the cakes to a wire rack to cool completely. This keeps them moist and fluffy. While the cakes bake, prepare the strawberry filling. 1. In a medium bowl, combine 2 cups of hulled and sliced strawberries with ½ cup of powdered sugar. 2. Let this mixture sit for about 15-20 minutes. The sugar will draw out the juices from the strawberries. 3. After resting, you will have a sweet, juicy filling that will add flavor and moisture to your cake. For the full recipe, remember to check the detailed instructions provided above! To make a moist vanilla cake, follow these tips: - Use Room Temperature Ingredients: Bring your butter, eggs, and buttermilk to room temp. This helps blend better and creates a smooth batter. - Don’t Overmix: When combining wet and dry ingredients, mix just until combined. Overmixing can make your cake dense. - Add Sour Cream or Yogurt: For extra moisture, you can mix in a bit of sour cream or yogurt. This adds richness and flavor. - Check Oven Temperature: Use an oven thermometer to ensure your oven is at the right heat. An incorrect temperature can dry out your cake. Prepare your strawberries with these methods: - Choose Fresh Strawberries: Look for ripe strawberries that are bright red. This ensures the best flavor. - Hulling: Remove the green tops carefully. You can use a paring knife or a huller for this task. - Sugar Time: After slicing the strawberries, mix them with powdered sugar. Let them sit for 15-20 minutes. This helps draw out their sweet juices. - Taste Test: Always taste the strawberries before using them. If they are sour, add a bit more sugar to balance the flavor. Frost your cake beautifully with these tips: - Chill the Cake: Before frosting, chill the cake layers for about 30 minutes. This helps the frosting stay in place. - Use a Crumb Coat: Spread a thin layer of frosting on the cake first. This traps crumbs and creates a smooth surface for the final layer. - Pipe for Elegance: Use a piping bag to create fun designs. Simple swirls or rosettes can make your cake look stunning. - Garnish with Fresh Strawberries: Top your cake with whole strawberries or slices. This adds a nice touch and makes it look festive. For the full recipe, you can refer to the earlier section in this article. {{image_4}} If you want to change up the flavor of your vanilla cake, you have many options. Try adding lemon zest or almond extract for a fresh twist. You could also use coconut milk instead of buttermilk for a tropical taste. Chocolate lovers can mix cocoa powder into the batter for a rich chocolate cake. Each flavor adds its own charm to the cake. While strawberry filling is sweet and bright, you can experiment with other fruits. Blueberries or raspberries work great too. For a more decadent treat, consider a chocolate ganache or pastry cream. If you love nuts, a nut butter filling can add a rich, creamy layer. These fillings can make each slice a delight. Frosting is where you can get really creative. A classic whipped cream frosting is light and fluffy. If you want something richer, try cream cheese frosting. It pairs well with fruit flavors. You can also add a touch of food coloring to make the frosting pop. For a fun twist, drizzle some chocolate or caramel sauce on top. Each frosting choice brings a new look and taste to your cake. For the full recipe, check out the deliciously moist vanilla cake with strawberry filling. To keep your moist vanilla cake fresh, wrap it well. Use plastic wrap or aluminum foil. Place it in an airtight container. Store it at room temperature for up to three days. If you want it to last longer, refrigerate it. The cool air will help maintain its moisture. Freezing is a great way to store leftover cake. First, let the cake cool completely. Then, slice it into pieces for easy access. Wrap each slice in plastic wrap tightly. Place the wrapped slices in a freezer-safe bag or container. This method keeps the cake fresh for up to three months. Remember to label the bag with the date. When you're ready to enjoy your cake again, reheating is key. Remove the cake from the fridge or freezer. If frozen, let it thaw in the fridge overnight. For a quick warm-up, place a slice in the microwave. Heat it for 10-15 seconds. Check if it’s warm; avoid overheating to keep it moist. You can also warm it in the oven at 350°F for about 5-10 minutes. Enjoy your delicious cake just like fresh! You can easily make buttermilk at home. Just mix 1 cup of milk with 1 tablespoon of vinegar or lemon juice. Let it sit for about 5-10 minutes. This will thicken the milk and give it a tangy flavor. You can also use plain yogurt or sour cream. Just thin them with a little milk to match the buttermilk's consistency. To prevent sticking, grease your pans well. Use butter or non-stick spray and coat the sides and bottom. Dust with flour after greasing. You can also use parchment paper for extra protection. Cut circles for the bottom of the pans and fit them in. This way, you can lift the cakes out easily. Yes, you can make this cake ahead of time. Bake the cakes and let them cool completely. Wrap each layer in plastic wrap and store them in the fridge for up to 3 days. You can also freeze them for longer storage. Just thaw them in the fridge before assembling. Making the strawberry filling ahead is great too. Just keep it in the fridge until you are ready to use it. For the best taste, frost the cake close to serving time. Check the Full Recipe for more details. This blog post covered the key steps to making a moist vanilla cake with strawberry filling. We discussed essential ingredients, baking tips, and smart storage methods. You can enhance your cake with many flavors and fillings too. Remember, practice makes perfect. Enjoy experimenting with your cakes. Each attempt brings you closer to a delicious result. Happy baking!

Welcome to the delightful world of baking! Today, I’ll share my secret to a moist vanilla cake with luscious strawberry filling. This cake is perfect for any special occasion or …

Read more

Categories Desserts

Best Strawberry Cake – Fresh Cream Cake Delightful Treat

July 16, 2025 by Chef Elliot
To make the best strawberry cake, gather these fresh ingredients: - 2 cups all-purpose flour - 1 ½ cups granulated sugar - ½ cup unsalted butter, softened to room temperature - 1 cup whole milk, warmed - 3 ½ teaspoons baking powder - 1 teaspoon pure vanilla extract - ½ teaspoon salt - 4 large egg whites, at room temperature - 2 cups fresh strawberries, hulled and sliced - 1 cup heavy whipping cream, chilled - 2 tablespoons powdered sugar - Fresh mint leaves for garnish (optional) Choosing fresh strawberries is key to a tasty cake. Here are some tips: - Look for bright red berries. They should have a vibrant color. - Check for firmness. Soft or mushy berries are not fresh. - Smell the berries. They should have a sweet, fruity aroma. - Avoid strawberries with mold or dark spots. This shows they are past their prime. - Buy organic if possible. They often taste better and have fewer chemicals. Decorating your strawberry cake can make it even more appealing. Here are some fun ideas: - Use extra sliced strawberries on top. They add color and freshness. - Add whipped cream swirls around the edges. This makes the cake look fancy. - Sprinkle powdered sugar on the top for a sweet touch. - Fresh mint leaves add a pop of green. They also give a fresh taste. - Consider using edible flowers for a unique look. They can be both pretty and tasty. Remember, these garnishes can personalize your cake and impress your guests! Try to mix and match to see what you like best. For the full recipe, check out the detailed steps above. 1. Preheat your oven to 350°F (175°C). Grease and flour two 9-inch round cake pans. 2. In a large bowl, cream together ½ cup of softened unsalted butter and 1 ½ cups of granulated sugar. Beat until fluffy, about 3-5 minutes. 3. Add 4 large egg whites to the butter mix, one at a time. Mix well after each addition. 4. In a separate bowl, whisk together 2 cups of all-purpose flour, 3 ½ teaspoons of baking powder, and ½ teaspoon of salt. 5. Gradually add the dry mix to the butter and sugar blend. Alternate with 1 cup of warmed whole milk. Start and end with the dry mix. Mix until just combined. 6. Stir in 1 teaspoon of pure vanilla extract. Gently fold in 2 cups of hulled and sliced fresh strawberries. Reserve some for decoration. 7. Divide the batter evenly between the prepared cake pans. Smooth the tops with a spatula. 8. Bake in the preheated oven for 25-30 minutes. A toothpick should come out clean when inserted in the center. 9. Once baked, remove the cakes from the oven. Let them cool in the pans for 10 minutes. 10. Carefully turn the cakes onto a wire rack to cool completely. 11. While cooling, whip 1 cup of chilled heavy cream with 2 tablespoons of powdered sugar in a chilled bowl. Beat until soft peaks form. 12. Place one cooled cake layer on a serving plate. Spread whipped cream over the top. Add a portion of the remaining sliced strawberries. 13. Gently place the second cake layer on top. Spread the rest of the whipped cream over this layer. Decorate with reserved strawberries and fresh mint leaves if you wish. Now you have a delightful strawberry cake ready for serving. This cake is sure to impress your guests! For the complete recipe, check out the Full Recipe section. To make whipped cream, start with cold heavy cream. Use a chilled bowl and beaters. This helps the cream whip faster. Beat the cream on medium speed until soft peaks form. Add powdered sugar to sweeten it. I like to add a touch of vanilla for extra flavor. Be careful not to over-whip; you want it fluffy, not grainy. For a moist cake, use room temperature ingredients. This includes butter, eggs, and milk. They mix better and create a smooth batter. Make sure to cream the butter and sugar well until light and fluffy. This step adds air, which helps the cake rise. Adding fresh strawberries also keeps the cake moist and adds flavor. Check the temperature of your ingredients. Cold eggs or milk can affect the batter. Always warm the milk slightly before adding it. Keep the eggs at room temperature for better mixing. If you follow these tips, your cake will turn out fluffy and delicious. For the full recipe, check the recipe section above. {{image_4}} You can change up the flavor of this cake easily. Try adding lemon zest for a bright twist. Almond extract can give a nice nutty taste. You can also fold in chocolate chips or nuts for added texture. Each option brings a unique taste while keeping the strawberry flavor front and center. Making this cake dairy-free is simple. Use almond milk or coconut milk instead of whole milk. Swap the butter for a dairy-free spread. For a gluten-free version, use a 1:1 gluten-free flour blend. Ensure it has xanthan gum to help with texture. Both adaptations will keep the cake moist and delicious. While whipped cream is a classic frosting, other options exist. Cream cheese frosting pairs well with strawberries. It adds a tangy flavor that balances sweetness. You could also try a simple buttercream with strawberry puree mixed in. For a lighter option, a fluffy meringue frosting can be delightful. Each frosting offers a new way to enjoy your strawberry cake. For the full recipe, check out the details provided above. To keep your strawberry cake fresh, wrap it tightly in plastic wrap. This helps keep moisture in and prevents the cake from drying out. You can also place it in an airtight container. If you want to keep it pretty, use a cake dome or stand. Storing it in a cool, dark place helps too. Avoid direct sunlight or heat, as they can change the cake's texture and flavor. If you want to save some cake for later, freezing is great. First, slice the cake into pieces. Then, wrap each piece in plastic wrap. Place the wrapped slices in a freezer-safe bag or container. Make sure to label it with the date. When you want to enjoy a piece again, simply take it out. Let it thaw in the fridge overnight or at room temperature for a few hours. Avoid using a microwave, as it can make the cake soggy. If stored correctly, your strawberry cake will last about 3 to 5 days in the fridge. If you notice any signs of mold or unusual smells, it’s best to throw it away. Keeping it sealed helps maintain its flavor and texture. For the best taste, try to eat it within the first few days. After that, the flavors might not be as fresh. If you want to keep it longer, consider freezing it instead. For the full recipe, check out the detailed instructions above. To make a gluten-free strawberry cake, use gluten-free all-purpose flour. Look for a blend that includes xanthan gum. This helps mimic the texture of regular flour. You can find many brands at stores. Simply replace the 2 cups of all-purpose flour with the gluten-free mix. The rest of the recipe stays the same. Your cake will still be moist and tasty! If you don’t have heavy cream, you can use coconut cream. Chill a can of coconut milk overnight, then scoop out the solid part. Whip it like you would heavy cream. You can also use whipped topping as a quick option. Just be aware that flavors may change slightly. Each option gives you a nice, fluffy topping. Yes, you can use frozen strawberries! Just make sure to thaw and drain them first. Pat them dry to remove excess moisture. This way, your cake won’t get soggy. Frozen strawberries can work well in a pinch and still taste great. Just remember to slice them before adding to your batter. You now know how to make a delicious strawberry cake. We covered the best ingredients, selecting fresh strawberries, and great decoration tips. You learned step-by-step instructions to bake and assemble the cake. We explored tips for perfect whipped cream and keeping the cake moist. You also found variations and storage info for leftover cake. Enjoy baking your own strawberry cake. It’s a fun treat for everyone!

If you crave a sweet and fruity treat, you’re in the right place! This Best Strawberry Cake recipe is a fresh cream delight that will make your taste buds dance. …

Read more

Categories Desserts

Limoncello Cream Cake Delightful and Easy Recipe

July 16, 2025 by Chef Elliot
To make Limoncello Cream Cake, you need some key ingredients. Here’s what you’ll need: - 2 cups all-purpose flour - 1 ½ teaspoons baking powder - ½ teaspoon baking soda - ½ teaspoon salt - 1 cup unsalted butter, softened - 1 ½ cups granulated sugar - 4 large eggs, at room temperature - 1 tablespoon fresh lemon zest - 1 teaspoon pure vanilla extract - ½ cup buttermilk, at room temperature - 1 cup heavy cream, chilled - ¼ cup powdered sugar - ¼ cup fresh lemon juice - 1 cup mascarpone cheese, softened - Fresh lemon slices and mint leaves for garnish Using quality and fresh ingredients is key. Fresh lemons give the best flavor. Good butter makes your cake rich. Fresh eggs help with a nice rise. Always choose the best. It pays off in taste. You can play around with some optional ingredients. Here are a few ideas: - Swap out the buttermilk for Greek yogurt for a tangy twist. - Add a splash of orange juice for a citrus mix. - Use flavored extracts, like almond, to change the taste. - Try adding some toasted nuts for crunch. These choices can enhance the flavor. Get creative! You can adjust sweetness or tartness as you please. Start by preheating your oven to 350°F (175°C). Grab two 9-inch round cake pans. Grease them well with butter or cooking spray. Dust them lightly with flour. This helps the cake not stick. Next, mix the dry ingredients. In a medium bowl, sift together the flour, baking powder, baking soda, and salt. Whisk them to blend well. Set this bowl aside for later. Now, let’s cream the butter and sugar. In a large bowl, use an electric mixer. Beat the softened butter and granulated sugar. Mix on medium speed for about 3-5 minutes. You want it light and fluffy. This step is key for a good texture. Add the eggs to the butter mixture, one at a time. Make sure each egg is mixed in well before adding the next. Then, mix in the lemon zest and vanilla extract until everything is combined. Now, we combine the dry and wet ingredients. Gradually add the dry mix to the butter mixture. Alternate with the buttermilk. Start and end with the dry mix. Mix just until combined to avoid over-mixing. Evenly divide the cake batter between the prepared pans. Bake in the oven for 25-30 minutes. To check if your cake is done, insert a toothpick in the center. If it comes out clean, the cake is ready. Once baked, take the cakes out of the oven. Let them cool in the pans for 10 minutes. After that, carefully transfer them to wire racks. Let them cool completely before frosting. When the cakes are cool, it’s time to assemble. Place one layer on a serving platter. Spread half of the limoncello cream on top. Be sure to cover it evenly. Now, add the second layer on top. Use the remaining cream to frost the top of the cake. For a nice finish, garnish with fresh lemon slices and mint leaves. This adds color and freshness. Enjoy your homemade Limoncello Cream Cake! To bake a great Limoncello Cream Cake, avoid common pitfalls. Here are some key tips: - Measure ingredients carefully. Use a scale for precise results. - Room temperature eggs and butter. This helps create a light texture. - Don’t over-mix the batter. Mix just until combined to keep it tender. Useful tools include: - Electric mixer for creaming. It saves time and effort. - Silicone spatula for folding. This prevents deflating your whipped cream. - Parchment paper for cake pans. It ensures easy removal without sticking. For serving, pair your cake with fresh flavors. Here are some ideas: - Serve with a scoop of sorbet. Lemon or raspberry sorbet brightens the dessert. - Add fresh berries on the side. They add color and balance sweetness. - Drizzle with a lemon glaze. This enhances the lemony taste beautifully. Presentation can make a difference. Try these tips: - Use a cake stand. Elevate your cake for an impressive look. - Garnish with mint leaves. They add a lovely green contrast. - Dust with powdered sugar. This gives a nice finish and a touch of sweetness. You can elevate your cake with a few simple additions: - Add a splash of limoncello in the cream. It boosts the lemon flavor. - Mix in some lemon zest. This enhances the citrus aroma. - Try a layer of lemon curd. It adds a tart surprise between the cake layers. Adjust sweetness by: - Reducing sugar in the cream. This balances the cake’s sweetness. - Adding more lemon juice. It gives a brighter, tangy flavor. - Using a sugar substitute. This is good for a lower-calorie option. For the full recipe with detailed instructions, check the [Full Recipe]. {{image_4}} You can have fun with flavors in your Limoncello Cream Cake. Here are some unique twists: - Orange Limoncello: Swap some lemon juice for fresh orange juice. Use orange zest for a sweet, bright flavor. - Berry Additions: Add fresh berries to the cream layer. Strawberries or blueberries can boost taste and color. - Herb Infusion: Try adding fresh basil or mint to the cream. It gives a fresh, herbal note that surprises the palate. Other citrus options are great too. You can use grapefruit or lime for a different zing. Each citrus brings its unique flavor, making the cake fresh and exciting. Many people enjoy this cake, so let’s make it for everyone. Here’s how to adjust the recipe: - Gluten-Free: Use a 1-to-1 gluten-free flour blend. This swap keeps the texture light and fluffy. - Vegan Adaptation: Replace eggs with flaxseed meal or applesauce. For the cream, use coconut cream instead of heavy cream. These changes let everyone enjoy the delightful taste of Limoncello Cream Cake. Just remember, the key to great flavor is fresh ingredients, no matter the diet. Want to dive deeper? Check out the Full Recipe for more tips! To keep your Limoncello Cream Cake fresh, store it in an airtight container. This keeps moisture in and protects the cake from any strong odors in the fridge. If you have leftovers, place a piece of wax paper between the cake and the lid. This prevents the frosting from sticking. You can also wrap the cake tightly in plastic wrap before placing it in the container. If you want to freeze the cake, slice it first. Wrap each slice in plastic wrap, then place them in a freezer bag. Remove as much air as possible from the bag to avoid freezer burn. To thaw, take a slice out and leave it in the fridge overnight. This helps keep the texture and moisture intact. Avoid microwaving the cake, as this can make it dry. For the best taste, consume it within three months. Enjoy the deliciousness of your Limoncello Cream Cake whenever you want! What is Limoncello, and how does it affect the flavor of the cake? Limoncello is a sweet lemon liqueur from Italy. It brings bright, tangy notes to the cake. This citrus flavor balances the sweetness of the cream and cake layers. The cake has a refreshing taste that makes it perfect for spring and summer. Can I use store-bought limoncello or should it be homemade? You can use store-bought limoncello for ease and convenience. However, homemade limoncello offers a fresher taste. If you have time, I recommend making it yourself. The flavor can be richer and more vibrant than store-bought options. What to do if the cake doesn't rise properly? If the cake does not rise, check your baking powder and baking soda. Make sure they are fresh. Also, ensure you mixed the batter well. Under-mixing can prevent proper rising. If the oven temperature is too low, the cake may not rise as expected. Use an oven thermometer to check accuracy. How to fix a frosting that is too runny? A runny frosting can be thickened easily. Add more powdered sugar slowly until it reaches the right consistency. You can also chill the frosting for a few minutes. This helps it firm up before spreading on the cake. What drinks pair well with Limoncello Cream Cake? Limoncello Cream Cake pairs well with light drinks. Try sparkling water or a crisp white wine. You can also serve it with a refreshing lemon soda. Coffee or espresso also complements the cake nicely. How long can the cake be left at room temperature safely? The cake can stay at room temperature for about 2 hours. After that, it should be refrigerated. The cream may spoil if left out too long. Always keep it in a cool place to maintain freshness. For the full recipe, please refer to the earlier sections. Enjoy making your Limoncello Cream Cake! You now know how to make a Limoncello Cream Cake from start to finish. We covered the key ingredients, focusing on their quality. I shared step-by-step instructions and helpful tips to avoid common mistakes. Remember to explore variations and dietary adjustments to fit your needs. Finally, knowing how to store leftovers keeps your cake fresh. Enjoy this cake for any occasion, or just because. Happy baking!

Are you ready to impress your friends with a dazzling dessert? My Limoncello Cream Cake is not only delightful, but it’s also easy to make. With fresh ingredients and simple …

Read more

Categories Desserts

Lemon & Blueberry Traybake Cake Simple and Yummy Treat

July 16, 2025 by Chef Elliot
To make a delicious Lemon & Blueberry Traybake Cake, gather these key ingredients: - 200g unsalted butter, softened to room temperature - 200g caster sugar - 4 large eggs, at room temperature - Zest of 2 fresh lemons - 200g self-raising flour - 1 teaspoon baking powder - 100g fresh blueberries (plus extra for an elegant topping) - 100ml whole milk - A pinch of salt - Icing sugar for dusting These ingredients come together to create a moist and flavorful cake. The butter and sugar blend adds sweetness, while the lemon zest brightens the flavor. Blueberries not only taste great but also add a nice color. You can add a few optional ingredients to enhance the flavor: - A splash of vanilla extract - A handful of chopped nuts like almonds or walnuts Vanilla adds warmth and depth. Nuts give a nice crunch and can complement the softness of the cake. If you need to swap ingredients, here are some helpful tips: - Use margarine instead of butter for a dairy-free option. - Swap half of the sugar with honey or maple syrup for a natural sweetener. - Replace fresh blueberries with raspberries or blackberries if desired. These substitutions keep the essence of the recipe while allowing for personal tastes or dietary needs. Enjoy making your Lemon & Blueberry Traybake Cake with these options in mind! For the full recipe, refer to the detailed instructions provided. 1. Start by preheating your oven to 180°C (350°F). 2. Line a 20cm x 30cm (8inch x 12inch) traybake tin with baking paper. Leave some paper hanging over the edges for easy removal. 3. In a large bowl, cream together 200g of softened unsalted butter and 200g of caster sugar. Use an electric mixer for about 3-5 minutes until it is light and fluffy. 4. Add 4 large eggs, one at a time, mixing well after each addition. To prevent curdling, add a tablespoon of flour with the last egg. 5. Mix in the zest of 2 fresh lemons until evenly distributed. 6. Sift in 200g of self-raising flour, 1 teaspoon of baking powder, and a pinch of salt. Fold the dry ingredients in gently until just combined. 7. Gradually add 100ml of whole milk, folding gently until smooth. 8. Carefully fold in 100g of fresh blueberries, making sure they are evenly mixed throughout. 9. Pour the batter into the lined tin and smooth the top. Scatter some extra blueberries over the surface for a nice touch. 10. Bake for 25-30 minutes. Check if it’s done by inserting a skewer into the center. It should come out clean or with a few moist crumbs. 11. Remove the cake from the oven and let it cool in the tin for 10 minutes. This helps it set before transferring it to a wire rack. 12. Once fully cooled, dust the top with icing sugar. Slice into squares and serve. This Lemon & Blueberry Traybake is simple and yummy. For the complete recipe, check the Full Recipe. Enjoy your baking! To make your lemon and blueberry traybake shine, follow these tips: - Use room temperature ingredients. This helps the butter and eggs blend well. - Don’t overmix the batter. Gently fold in the dry ingredients to keep it fluffy. - Check your oven temperature. An oven thermometer ensures accurate baking heat. - Use fresh blueberries. They give the best flavor and color to your cake. Here are mistakes I often see and how to avoid them: - Skipping the zest. Lemon zest adds a bright flavor. Don't leave it out! - Using cold eggs. They can curdle the batter. Always use room temp eggs. - Not lining the tin properly. Proper lining helps with easy removal after baking. - Overbaking. Keep an eye on the time. Remove it when a skewer comes out clean. Want to make your traybake even better? Try these ideas: - Add almond extract. A small amount gives a lovely depth of flavor. - Incorporate a crumb topping. Mix butter, sugar, and flour for added crunch. - Use lemon juice. A splash in the batter brightens the taste. - Serve with cream. A dollop of whipped cream enhances the dish beautifully. These tips will help you create a stunning lemon and blueberry traybake cake. For the full recipe, refer to the section above. Enjoy baking! {{image_4}} You can switch up the berries based on the season. In spring, try raspberries. They add a tart taste that pairs well with lemon. In summer, fresh strawberries work great too. Their sweetness balances the tangy lemon flavor. In autumn, consider adding chopped apples or pears. They give a lovely texture and flavor contrast. Each fruit brings something unique to this traybake, so feel free to experiment! If you need a gluten-free version, switch the self-raising flour for a gluten-free blend. Many brands offer mixes that work well in baking. Just make sure it contains a rising agent, so your cake stays fluffy. You can also add almond flour for a nutty flavor. This keeps your traybake moist and delicious. Want to try different flavors? Replace lemon zest with orange zest for a sweet twist. You could also add a splash of vanilla extract for warmth. For a spicier note, mix in some ground ginger or cinnamon. These flavors can really change the cake’s profile. Don't be afraid to get creative with your tastes! To keep your Lemon & Blueberry Traybake Cake fresh, store it in an airtight container. This helps maintain its moisture and flavor. If you do not have an airtight container, wrap the cake in plastic wrap. Make sure it is tightly sealed to prevent air from entering. Place it in a cool, dry place, away from direct sunlight. This way, your cake stays soft and tasty for days. Freezing this cake is easy and effective. First, let the cake cool completely. Once cooled, cut the cake into squares. Wrap each piece in plastic wrap tightly. Then, place the wrapped pieces into a freezer-safe bag or container. Be sure to label it with the date. When you want to enjoy a piece, just take it out and let it thaw in the fridge overnight. You can also microwave it for a quick treat. When stored properly, the cake lasts about 3-4 days at room temperature. If you freeze it, it can stay good for about 2-3 months. To reheat, you can place a piece in the microwave for about 15-20 seconds. If you prefer, you can warm it in the oven at 160°C (320°F) for about 10 minutes. This will help bring back its delightful taste and texture, making it just as yummy as when it was fresh. For the full recipe, check out the detailed instructions above. Enjoy your baking! Yes, you can use frozen blueberries. They work well in this traybake. Just add them straight from the freezer. This keeps them from turning mushy. They may add a bit more moisture, so reduce the milk by a tablespoon if needed. Frozen blueberries save time and work great! You can check if it's done by inserting a skewer into the center. If it comes out clean or with a few moist crumbs, it's ready. The edges will also start to pull away from the sides of the tin. It should look golden brown on top. Trust your senses; the smell will be amazing! This traybake is great on its own, but you can add more fun! Serve it with whipped cream or vanilla ice cream for a treat. A cup of tea or coffee pairs nicely too. For a fresh twist, add a scoop of lemon sorbet on the side. Enjoy the flavors! For the full recipe, check out the Lemon & Blueberry Bliss Traybake! In this blog post, I covered how to make a Lemon & Blueberry Traybake. We started with the key ingredients and their substitutions. Then, I provided step-by-step baking instructions. You learned essential tips and tricks for the best results. Variations let you customize your cake further, and storage info helps keep it fresh longer. Baking this cake is fun and rewarding. Enjoy making it your own, and share it with friends!

If you love a sweet treat that’s easy to make, you’re in the right place! This Lemon & Blueberry Traybake Cake is simple, fun, and delicious. Bursting with fresh flavors, …

Read more

Categories Desserts

Delicious Sweet Cucumber Relish for Canning Recipe

July 15, 2025 by Chef Elliot
- 6 cups cucumbers, finely chopped - 2 cups bell peppers (a mix of red and green), finely chopped - 1 cup onions, finely chopped Cucumbers are the star of this relish. They give it a crisp bite. Use fresh, firm cucumbers for the best taste. Bell peppers add color and sweetness. I like to mix red and green for a vibrant look. Onions bring a nice sharpness that balances the flavors. - 3 cups granulated sugar - 2 cups apple cider vinegar - 1 tablespoon mustard seeds - 1 tablespoon celery seeds - 1 teaspoon ground turmeric - 2 teaspoons salt - 1 teaspoon ground black pepper The sugar is what makes this relish sweet. It blends well with the tangy apple cider vinegar. Mustard seeds and celery seeds add depth. Ground turmeric gives it a beautiful color. Salt and pepper enhance all the flavors in the mix. - 1/4 teaspoon red pepper flakes (optional, for a hint of spice) - Salt and pepper If you want some heat, add red pepper flakes. This will give your relish a little kick. Adjust salt and pepper to your taste. Always remember, you can customize this recipe to fit your preferences. For the full recipe, check the Sweet and Tangy Cucumber Relish section. Enjoy making this delightful condiment! Soaking and Draining Process Start with 6 cups of finely chopped cucumbers. Rinse them under cold water to freshen them up. Place them in a large mixing bowl. Sprinkle the cucumbers with 2 teaspoons of salt. Pour in enough water to cover them completely. Let them soak for about 2 hours. This helps reduce moisture and keeps them crunchy. Importance of Rinsing and Draining After soaking, drain the cucumbers in a colander. Rinse them under cold running water. This step removes excess salt, ensuring your relish is not too salty. Allow the cucumbers to drain well before you mix them with other ingredients. Mixing Vegetables in a Pot In a large pot, mix the drained cucumbers with 2 cups of finely chopped bell peppers and 1 cup of finely chopped onions. Stir gently to combine the veggies evenly. This mix will form the base of your relish. Preparing the Vinegar Mixture In a separate saucepan, pour in 2 cups of apple cider vinegar. Add 3 cups of granulated sugar, 1 tablespoon of mustard seeds, 1 tablespoon of celery seeds, 1 teaspoon of ground turmeric, 2 teaspoons of salt, and 1 teaspoon of ground black pepper. If you want a hint of spice, add 1/4 teaspoon of red pepper flakes. Heat this mixture on medium-high. Stir often until the sugar dissolves completely. Simmering Instructions Once the vinegar mixture boils, pour it over the cucumber and vegetable mix in the large pot. Stir well to coat all ingredients. Turn the heat up to medium. Bring everything to a rolling boil. Then, reduce the heat to a gentle simmer. Cook for 10 to 15 minutes, stirring occasionally. This helps all the flavors meld together. Sterilizing Jars While your relish simmers, get your canning jars ready. Submerge them in boiling water for about 10 minutes. This step kills any bacteria, making the jars safe for your relish. Ladling and Sealing Jars After simmering, carefully ladle the hot relish into the warm jars. Leave about 1/2 inch of space at the top. Clean the jar rims with a cloth to remove any residue. Place a sterilized lid on each jar and secure it with a band. Tighten just until snug, but don't over-tighten. It can stop the jar from sealing properly. Processing the Jars To seal the jars, process them in a boiling water bath for 10 minutes. This creates a vacuum seal to keep your relish fresh. Cool and Store After processing, take the jars out of the water and let them cool on a clean towel. You will hear a satisfying “pop” sound as they seal. This sound means your hard work paid off! - Over-soaking Cucumbers: Don’t soak cucumbers for too long. Two hours is enough. If you soak them longer, they may lose their crunch. - Incorrect Jar Sealing: Ensure lids are snug but not too tight. Over-tightening can prevent a proper seal. A good seal is key for safe canning. - Allowing Relish to Chill Before Serving: Chill the relish in the fridge. Chilling helps the flavors blend better, making each bite even tastier. - How Long to Simmer: Simmer your relish for 10 to 15 minutes. This time allows the flavors to meld without losing the crunch of the cucumbers. - Necessary Canning Equipment: Use proper canning tools. You need sterilized jars, lids, and a boiling water bath for safe processing. - Checking Seals After Processing: Once cooled, press the center of each lid. If it doesn’t pop back, it’s sealed. If it does pop, refrigerate and use right away. These tips can help you make a perfect batch of sweet cucumber relish. Enjoy your canning journey! For the complete process, check the Full Recipe. {{image_4}} You can easily make a sweet and spicy version of cucumber relish. To adjust the flavor, play with sugar and spice levels. If you want more heat, add more red pepper flakes. If you prefer it milder, reduce them. You could also add jalapeños for an extra kick. You can customize your relish by using different vinegars. Try white vinegar for a sharper taste or rice vinegar for a milder flavor. Mixing in other vegetables can also add depth. Carrots, zucchini, or even radishes can give your relish a unique twist. Just remember to chop them finely, so they blend well. For those looking to lower sugar, you can decrease the sugar amount without losing taste. You might also use a sugar substitute like stevia. For gluten-free diets, this recipe is safe as it contains no gluten ingredients. Always check your specific brands to ensure they are gluten-free. To keep your sweet cucumber relish fresh, store it in a cool, dark place. - Ideal Temperature Conditions: Aim for a temperature between 50°F and 70°F. This range helps maintain flavor and quality. - Avoiding Light Exposure: Light can change the taste and color. Keep jars in a dark cupboard or pantry. Understanding the shelf life of your relish is key to enjoying it fully. - Understanding How Long it Lasts: When stored well, your relish can last up to one year. - Signs of Spoilage to Look For: Check for any off smells, bubbles, or mold. If you see any, it's best to discard the jar. Both methods have their perks, but they serve different needs. - Pros and Cons of Each Method: Canning offers long-term storage and retains flavor well. Freezing is quicker but may change texture. Choose what fits your cooking style best! For the complete recipe, see the Full Recipe section. Sweet cucumber relish shines as a condiment. It pairs well with burgers, hot dogs, and grilled meats. You can also mix it into salads or use it as a dip with chips. Try it on sandwiches for a tasty crunch. The sweet and tangy flavor adds a delightful twist to many dishes. Yes, you can easily adjust the sweetness. If you prefer less sugar, reduce the amount of granulated sugar in the recipe. Alternatively, you can add more sugar if you like it sweeter. Taste the mixture before canning to find your perfect balance. This way, you can customize the flavor to suit your liking. To check if your jars sealed, press the center of each lid. If it pops back, it hasn't sealed. If it stays down, the jar sealed well. After processing, let the jars cool. Listen for the popping sound, which means they sealed correctly. Store sealed jars in a cool, dark place. For the best flavor, wait at least two weeks before eating your relish. This resting time allows the flavors to meld and deepen. However, it can be enjoyed sooner if you can't wait. Just remember, the longer it sits, the better it tastes! Absolutely! This recipe is perfect for beginners. The steps are clear and simple to follow. Just take your time with each part. Pay attention to the soaking, draining, and sealing steps. With a little care, you will create delicious relish. You can find more canning recipes in cookbooks, food blogs, and online forums. Websites like the USDA's page on canning offer reliable information. You can also join local canning groups for tips and ideas. Explore and discover new flavors to try! To wrap up, making sweet cucumber relish is fun and simple. Start with fresh cucumbers, bell peppers, and onions. Add sugar, vinegar, and spices for flavor. Follow easy steps, from soaking to canning. Remember tips to avoid mistakes and enhance taste. Feel free to experiment with flavors to make it your own. Store it right for the best taste later. Enjoy your homemade relish! It’s perfect for meals or gifts.

Are you ready to add a burst of flavor to your meals? This “Delicious Sweet Cucumber Relish for Canning Recipe” is your answer! With fresh cucumbers, bell peppers, and a …

Read more

Categories Appetizers
Older posts
Newer posts
← Previous Page1 … Page14 Page15 Page16 … Page59 Next →

TOSSED TASTES

Where flavors get playful! A fresh mix of easy bites, bold spices, and everyday cravings tossed into every recipe. 🍋🍅

PAGES

Home About Contact Privacy Policy Terms & Conditions Cookie Policy GDPR Policy Copyright Policy Disclaimer

CATEGORIES

Appetizers Desserts Salads Breakfast Dinner

Contact

  • Pinterest
  • Mail
Copyright © 2025 Tossed Tastes. All rights reserved.