APPETIZERS
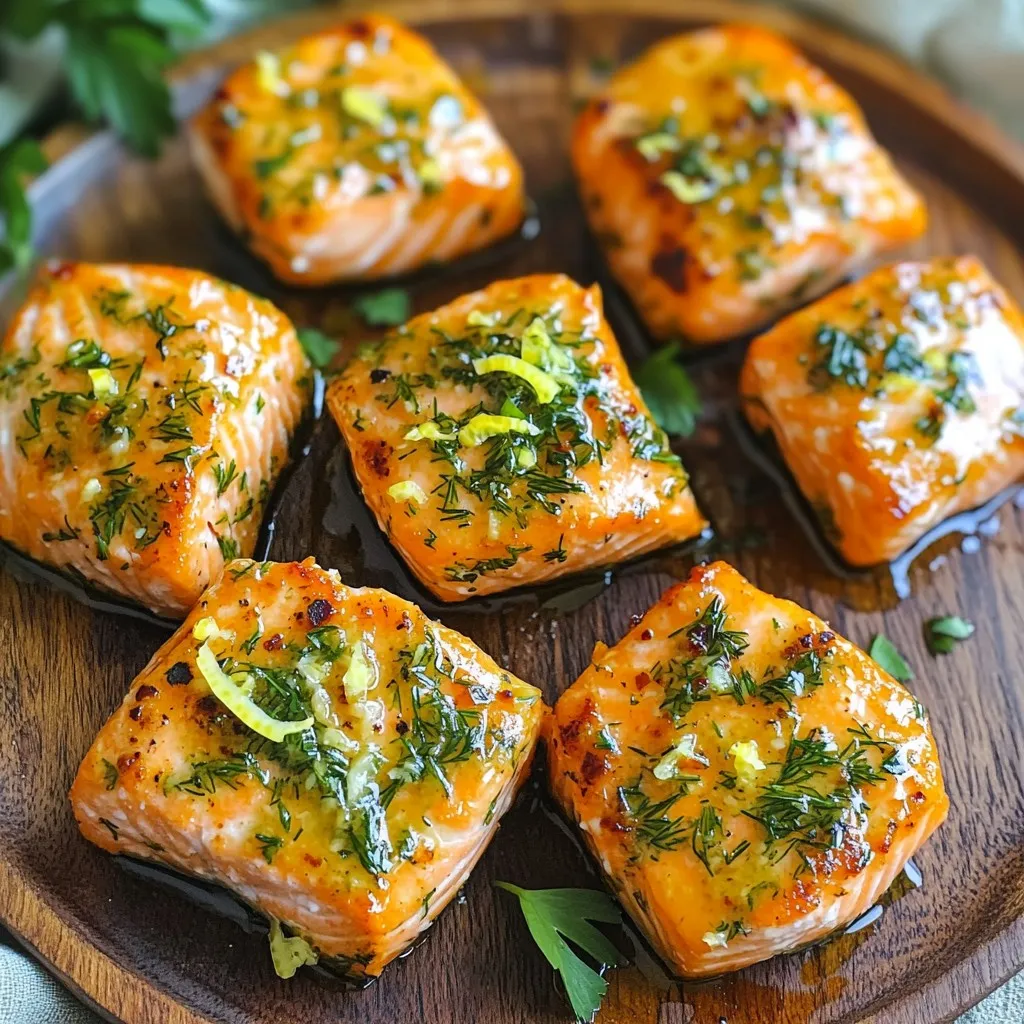
Air Fryer Garlic Herb Salmon Bites Flavorful Delight
Are you ready to elevate your dinner game? In this post, I’ll show you how to make tasty Air Fryer...
READ MORE →Chef Elliot
I’m Chef Elliot, your laid-back kitchen wingman with a serious love for bold flavors and easy cooking. 🥄✨
I believe anyone can cook—no fancy tools, no five-star background required. Just great recipes, a sprinkle of curiosity, and maybe a lemon zest moment to keep things fresh. 🍋💪
Think of me as your flavor coach: part guide, part cheerleader, always down for a second helping. I’m here to help you ditch the stress and stir up some joy—one tossed-together recipe at a time.

Delicious recipes crafted by Chef Elliot
Are you ready to elevate your dinner game? In this post, I’ll show you how to make tasty Air Fryer...
READ MORE →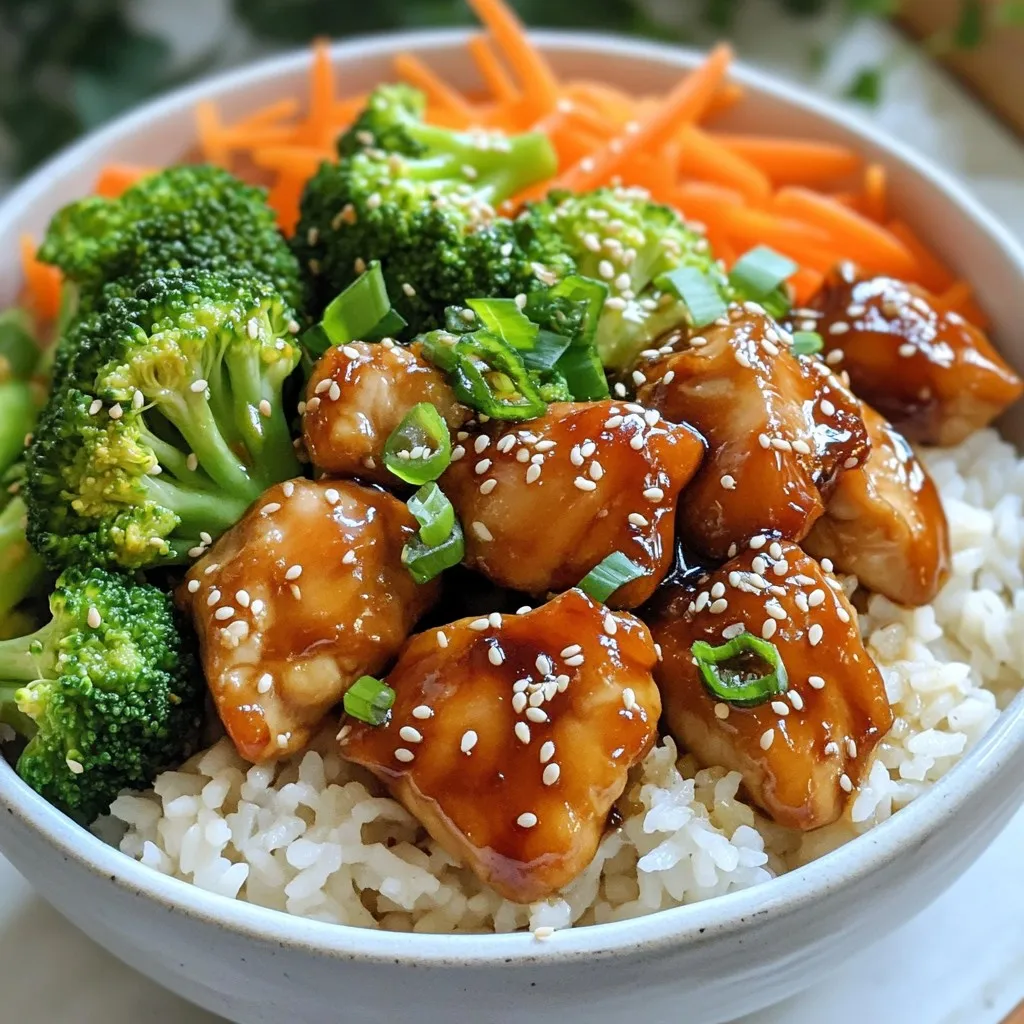
Craving a quick and tasty meal? Let’s dive into making Instant Pot Teriyaki Chicken Rice Bowls. This dish combines tender...
READ MORE →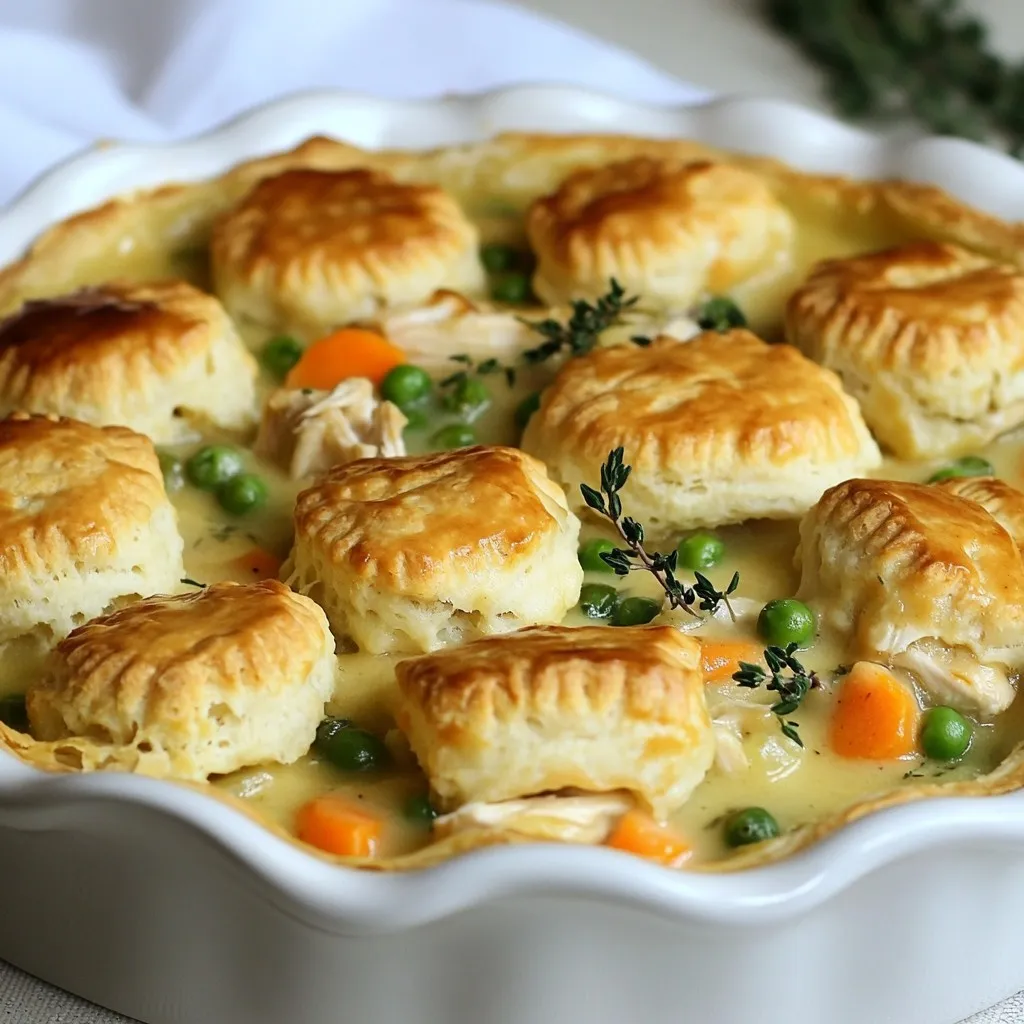
Craving a warm, cozy meal? My Biscuit-Top Chicken Pot Pie is the answer! This dish combines tender chicken and fresh...
READ MORE →
Start your day right with my Irresistible Slow Cooker Breakfast Tacos! These tasty tacos are quick to make and full...
READ MORE →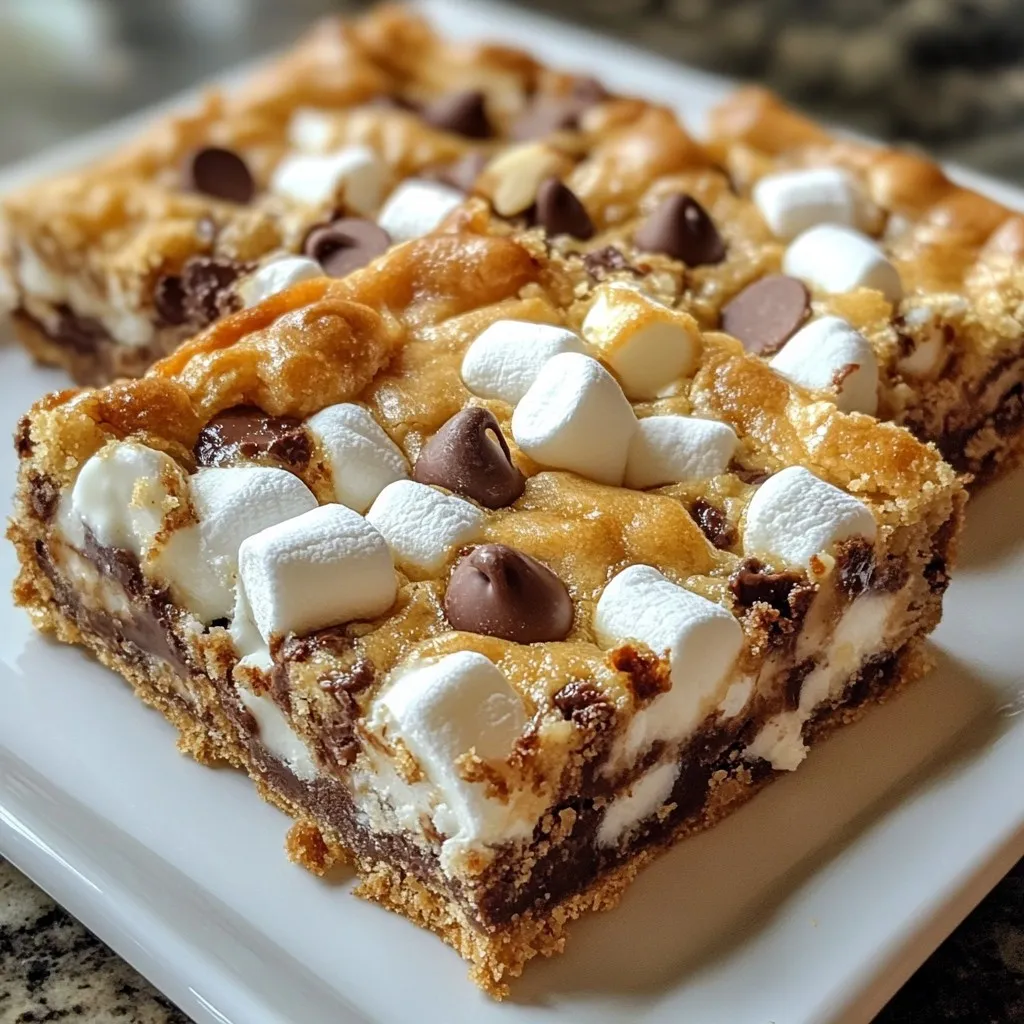
Are you hungry for something sweet and simple? Let me introduce you to Easy Ooey Gooey Bars, your new go-to...
READ MORE →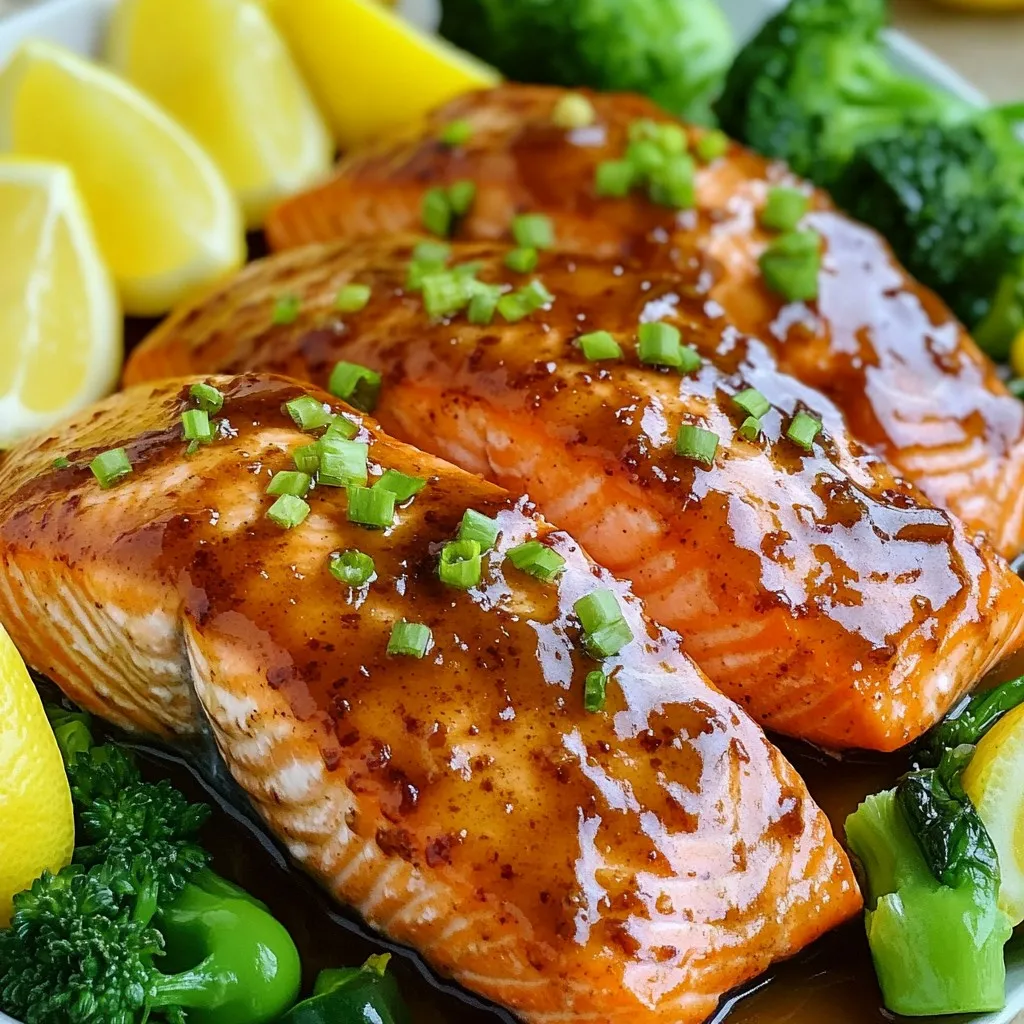
Looking for an easy yet delicious dinner idea? Try my Air Fryer Maple Brown Sugar Salmon! This sweet and savory...
READ MORE →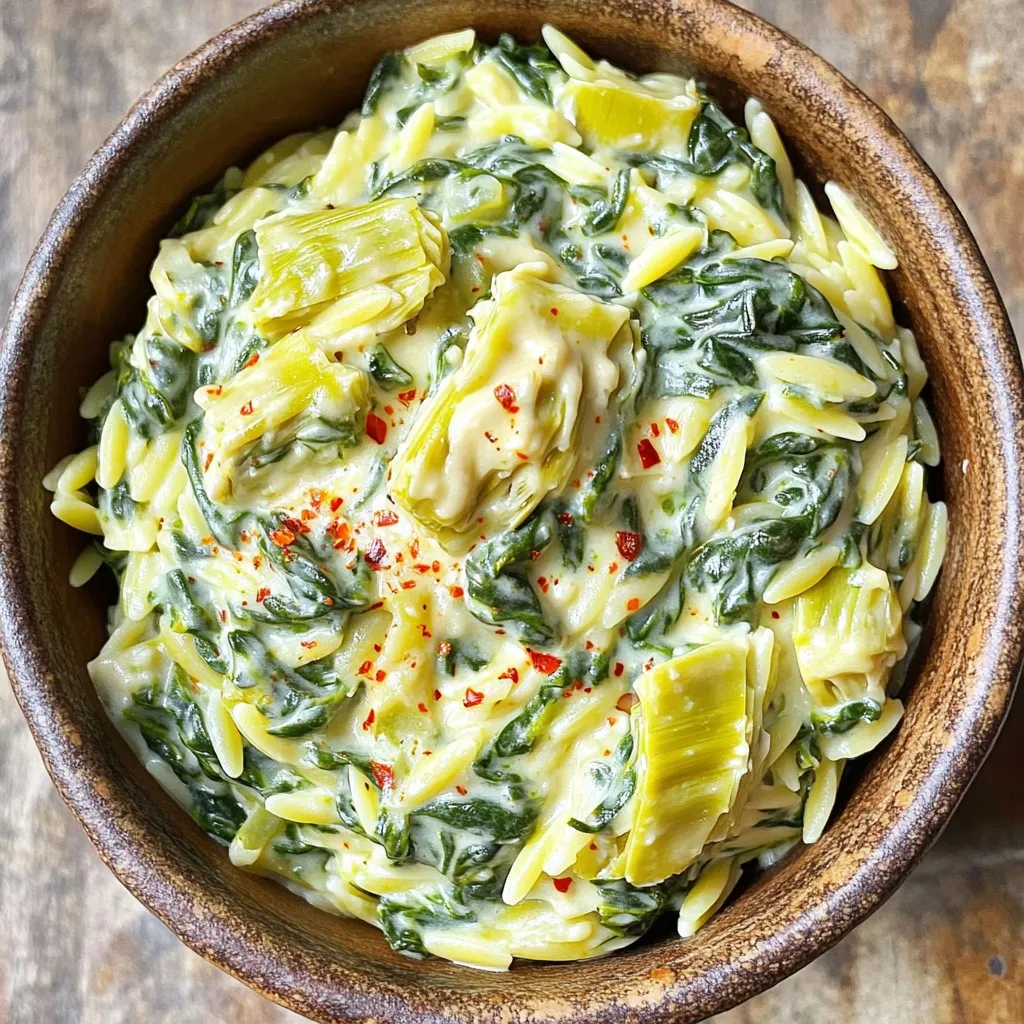
Looking for a quick, tasty dinner that impresses? My Creamy Spinach Artichoke Orzo is the answer! This dish combines tender...
READ MORE →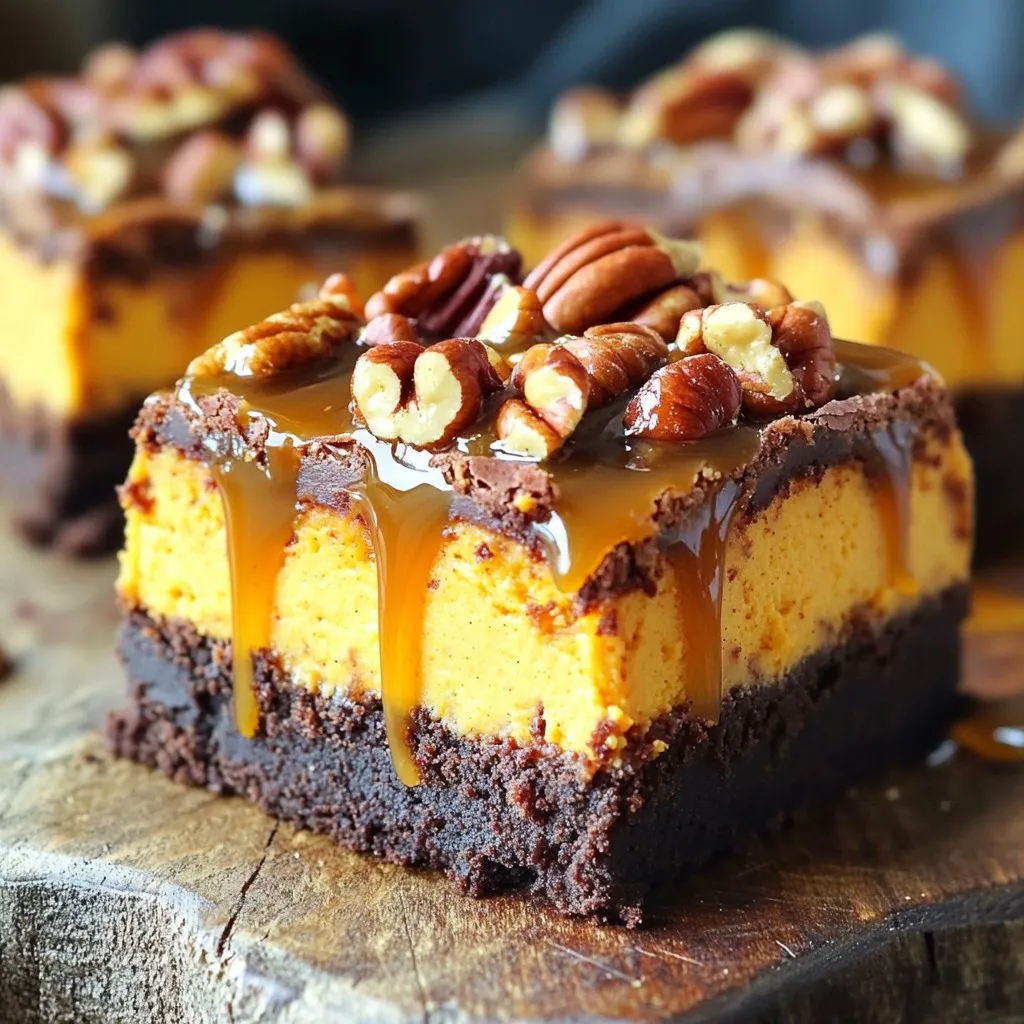
Indulge in a sweet twist this season with Pumpkin Pecan Cheesecake Brownies! These delightful treats blend rich chocolate brownies with...
READ MORE →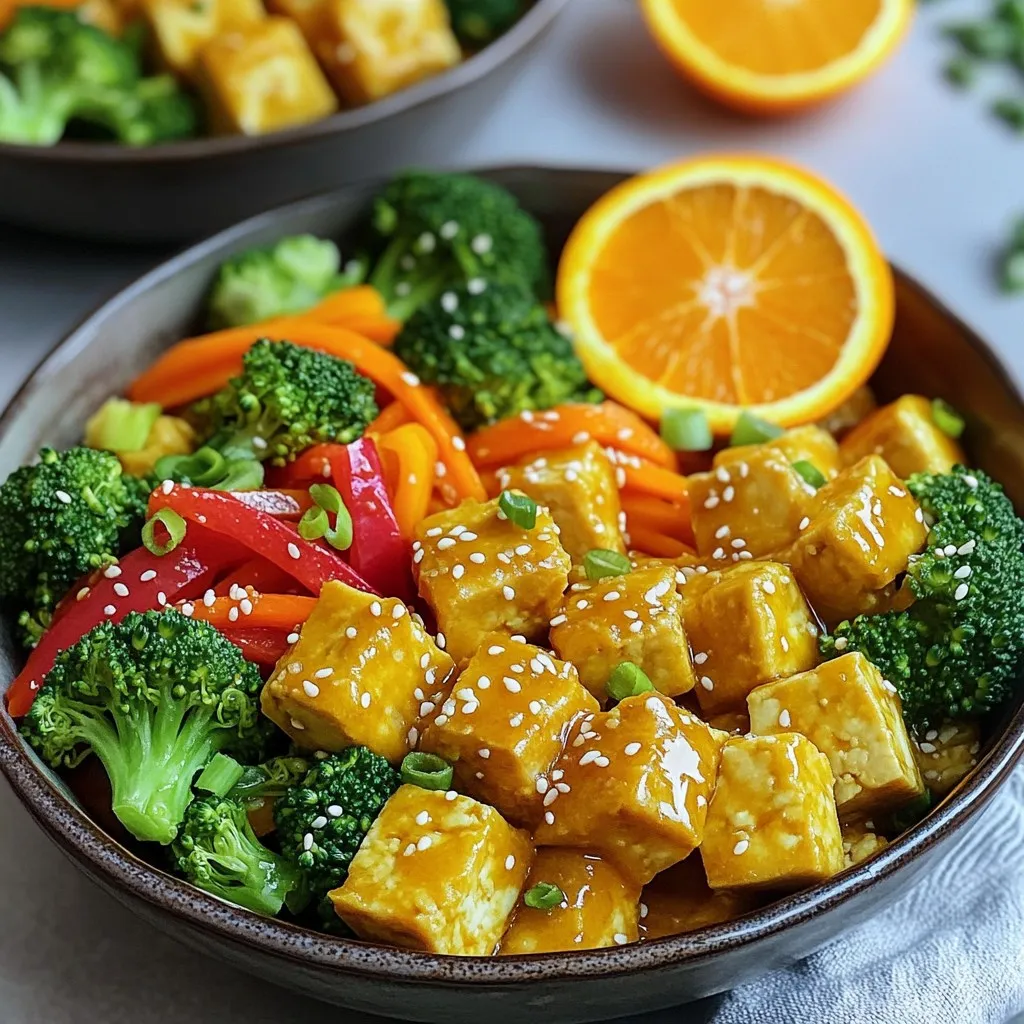
Craving a quick and tasty dinner? Let me introduce you to my Orange Tofu Bowls! This dish packs a punch...
READ MORE →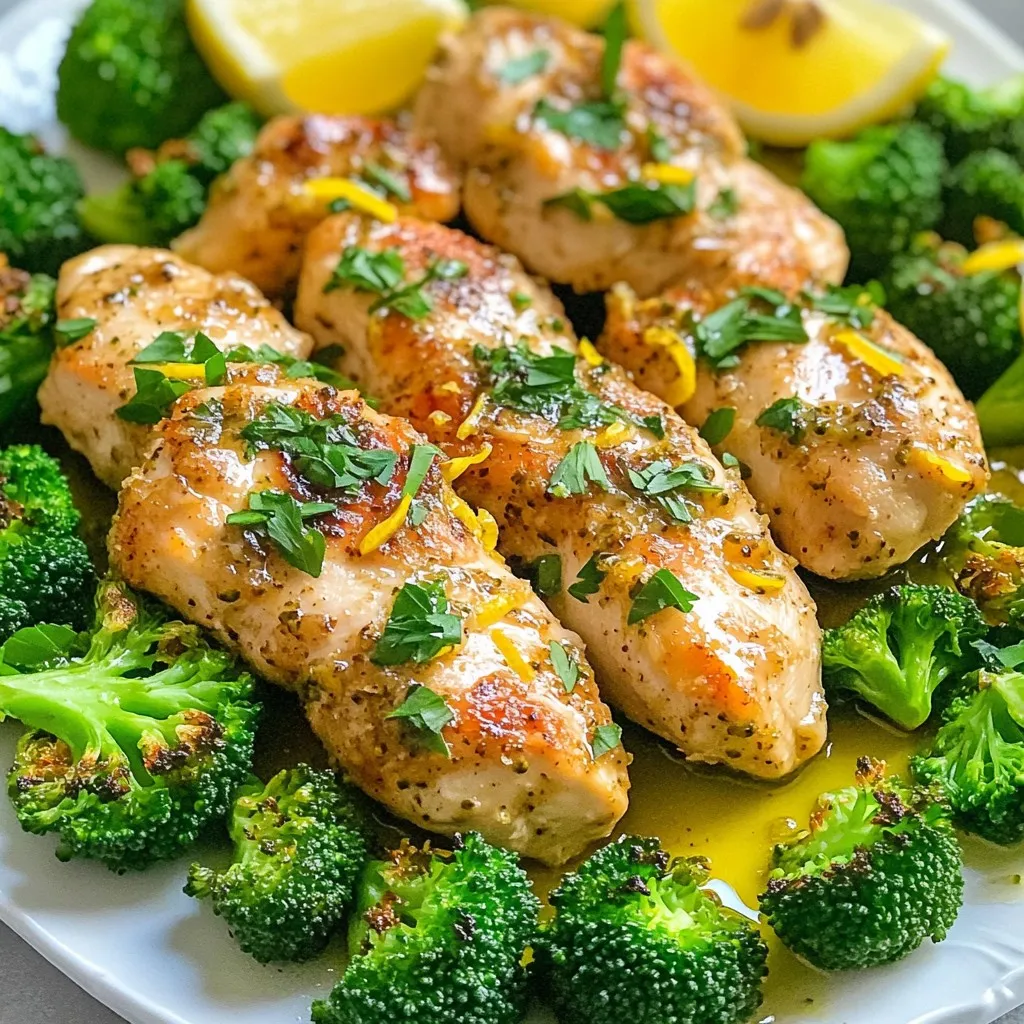
If you’re craving a quick and tasty dinner, you’re in the right place! My Sheet-Pan Lemon Garlic Chicken & Broccoli...
READ MORE →