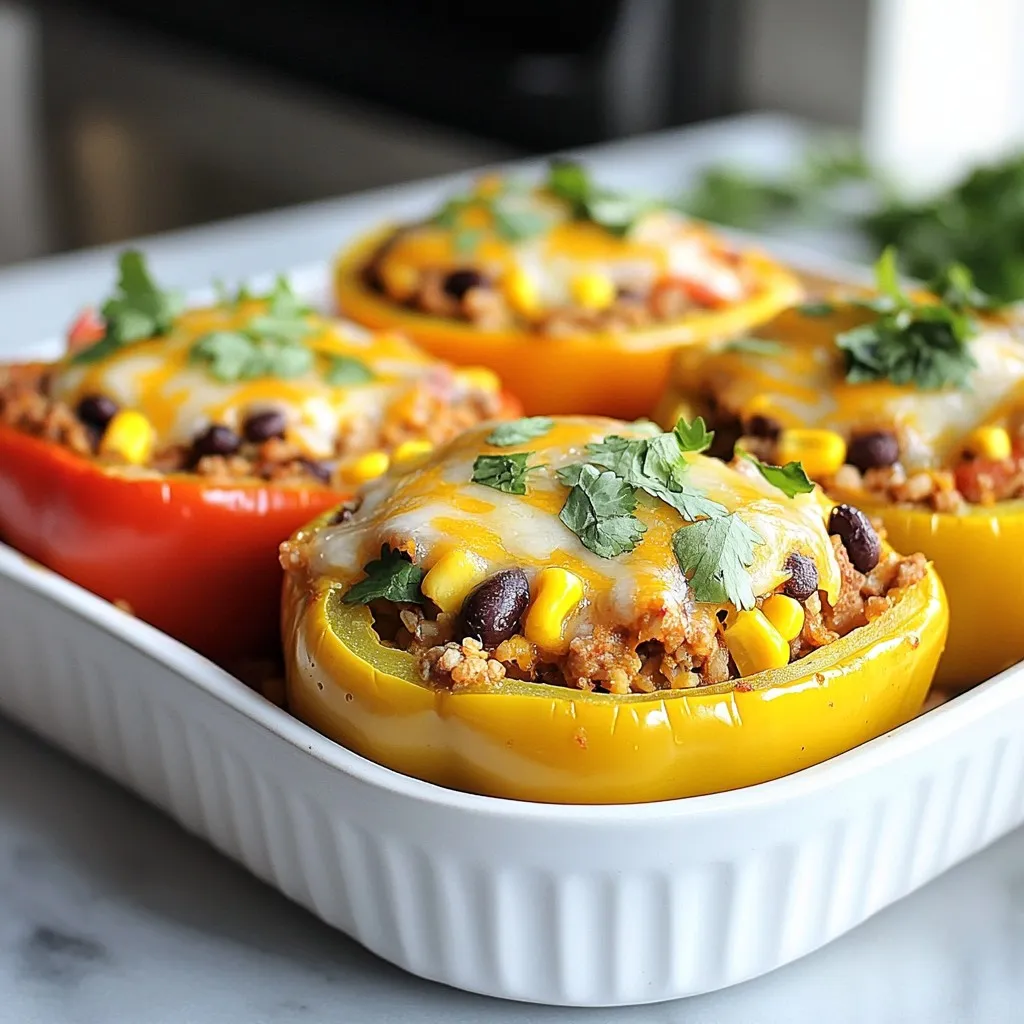
Skip to content
Tossed Tastes
  • Home
  • Appetizers
  • Desserts
  • Salads
  • Breakfast
  • Dinner
  • Privacy Policy
  • Contact
  • About

Chef Elliot

Irresistible Apple Cider Cookies Soft and Chewy Treat

August 8, 2025 by Chef Elliot
To make these apple cider cookies, you will need simple and fresh ingredients. They create a soft and chewy texture, perfect for any occasion. You can find the complete list of ingredients in the Full Recipe. - 2 cups all-purpose flour - 1 teaspoon baking soda - 1 teaspoon ground cinnamon - 1/2 teaspoon ground nutmeg - 1/2 teaspoon salt - 3/4 cup unsalted butter - 1 cup packed brown sugar - 1/2 cup granulated sugar - 1 large egg - 1 teaspoon pure vanilla extract - 1/4 cup apple cider - 1 cup finely chopped apples - 1/2 cup chopped walnuts or pecans (optional) - 1/4 cup powdered sugar These ingredients blend together to create cookies that taste just like fall. The apple cider adds a sweet and tangy flavor, while the spices give warmth. The chopped apples and nuts add texture and flavor, making each bite a joy. Choose your favorite apples, like Granny Smith or Honeycrisp, for the best results. 1. Preheat your oven to 350°F (175°C). This temperature helps the cookies bake evenly. 2. Prepare two baking sheets by lining them with parchment paper. This helps prevent sticking. 3. In a medium bowl, mix the dry ingredients. Combine 2 cups of flour, 1 teaspoon of baking soda, 1 teaspoon of cinnamon, 1/2 teaspoon of nutmeg, and 1/2 teaspoon of salt. Set this mix aside for later. 1. In a large bowl, use an electric mixer to beat 3/4 cup of softened butter, 1 cup of brown sugar, and 1/2 cup of granulated sugar. Mix until it’s light and fluffy, about 2-3 minutes. 2. Add 1 large egg and 1 teaspoon of vanilla extract to the butter mix. Blend until smooth. 1. Gradually pour in 1/4 cup of apple cider. Stir until the mixture is well combined. 2. Slowly add the dry mix to the wet ingredients. Stir gently until just combined. Be careful not to overmix. 3. Fold in 1 cup of finely chopped apples and any nuts if you like. This adds great flavor and texture. 1. Scoop heaping spoonfuls of dough onto the prepared baking sheets. Keep them about 2 inches apart. 2. Bake for 10-12 minutes. The edges should turn golden, while the centers may look underbaked. This gives a chewy texture. 3. Let the cookies cool on the baking sheets for 5 minutes. After that, move them to a wire rack to cool completely. 4. For a sweet finish, dust the cooled cookies with powdered sugar. Enjoy the delightful taste of your apple cider cookies! To bake soft and chewy apple cider cookies, avoid overmixing the dough. Mix until just combined to keep the cookies tender. Overmixing can lead to a tough texture, which we want to avoid. The ideal baking temperature is 350°F (175°C). Bake your cookies for 10 to 12 minutes. Keep an eye on them; the edges should be golden brown, while the centers should look slightly underbaked. This creates that perfect chewy bite. Choosing the right apples can boost the flavor. I recommend tart apples like Granny Smith or sweet varieties like Honeycrisp. Their unique tastes shine through in every bite. For a finishing touch, dust the cooled cookies with powdered sugar. This small step adds elegance and a sweet contrast to the cookies’ flavors. It makes them look even more inviting and festive. To keep your cookies fresh, store them in an airtight container. This helps maintain their soft texture and flavor. Place parchment paper between layers to prevent sticking. If you want to save some for later, freezing is a great option. Just wrap the cookies tightly in plastic wrap and place them in a freezer-safe bag. When you’re ready to enjoy, thaw them at room temperature. For the complete recipe, check out the full recipe section. Enjoy your baking! {{image_4}} To make gluten-free apple cider cookies, swap all-purpose flour for gluten-free flour. Be sure to choose a blend that works well for baking. This will help keep the cookies soft and chewy. You can also add a bit of xanthan gum to mimic the texture of regular flour. Adding spices can give your cookies a new twist. Try mixing in ginger or cloves for a warm flavor. These spices enhance the autumn feel of the cookies. For chocolate lovers, add chocolate chips to the dough. The sweet chocolate pairs perfectly with apple cider. Pumpkin spice brings a festive vibe to your cookies. You can add a teaspoon of pumpkin spice to the batter for a warm, cozy taste. Using different types of cider can also change the flavor. Try using spiced cider or even pear cider for a unique twist. For the full recipe, check out the detailed instructions above. What drinks go well with apple cider cookies? Warm apple cider is a classic choice. It brings out the apple flavor in the cookies. Hot tea also works well, especially chai or cinnamon flavors. If you want something cold, try a glass of milk or a creamy vanilla shake. For a fun twist, serve the cookies with a scoop of vanilla ice cream. The cold ice cream pairs nicely with the warm cookies. You can also make a cookie sandwich using two cookies and your favorite filling, like cream cheese or frosting. How should you plate these cookies for gatherings? Use a large, colorful platter to display them. Stack the cookies in groups or arrange them in a circle. You can sprinkle some extra cinnamon on top for a warm touch. Adding small, thin slices of apples around the cookies makes it look pretty and inviting. For special events, you can use seasonal decorations. A few small pumpkins or pinecones enhance the autumn vibe. Use a tablecloth in warm colors, like orange or brown, to match the season. How can you package cookies for gifts? Wrap them in clear bags tied with a ribbon. This way, the cookies stay fresh and look lovely. You can also place them in a decorative box with tissue paper. If you join a cookie swap, think about how to present them. Use a festive tin with a lid to keep them safe. Decorate the tin with stickers or a nice label to add a personal touch. Sharing these cookies brings joy to friends and family, making every bite even sweeter. For the full recipe, check out the [Full Recipe]. Can I use store-bought apple cider? Yes, you can use store-bought apple cider. Just ensure it’s non-alcoholic. This cider adds great flavor. Look for a brand that has a rich apple taste. The more flavorful the cider, the tastier your cookies will be. How can I make my cookies softer? To make your cookies softer, do not overbake them. Remove them from the oven when the edges are golden but the centers look slightly underbaked. Also, adding an extra egg yolk can help keep them moist. What can I substitute for butter? You can use coconut oil or applesauce instead of butter. Coconut oil gives a nice flavor, while applesauce makes them more moist. If you use applesauce, reduce other liquids in the recipe a bit. How do I adjust the recipe for smaller batches? To make a smaller batch, simply halve the ingredients. For example, use 1 cup of flour and 1/2 cup of sugar. You can also bake fewer cookies by dropping smaller spoonfuls of dough. Why are my cookies too dry? Dry cookies often come from too much flour. Make sure to measure the flour correctly. Scoop it gently into the measuring cup and level it with a knife. Overbaking can also cause dryness, so keep an eye on them in the oven. How to prevent cookies from spreading too much? To prevent spreading, chill the dough for at least 30 minutes before baking. Make sure the butter is softened but not melted. Another tip is to use parchment paper on your baking sheets for a better surface. For the full recipe, check out the detailed instructions above. In this post, we explored a full recipe for apple cider cookies. We broke down the ingredients, shared clear instructions, and offered practical tips for success. Remember to mix carefully and watch your baking time for the best results. Feel free to experiment with flavors and variations to make this recipe your own. With proper storage and presentation tips, your cookies will impress everyone. Enjoy baking and sharing these tasty treats!

Are you ready to bake something absolutely delightful? Let me introduce you to my Irresistible Apple Cider Cookies. These soft, chewy treats blend warm spices and fresh apples, making them …

Read more

Categories Desserts

Slow Cooker Cheesy Scalloped Potatoes Simple Recipe

August 8, 2025 by Chef Elliot
- 4 large russet potatoes, washed and peeled, then thinly sliced - 2 cups shredded sharp cheddar cheese - 1 cup heavy cream - 1 cup whole milk - 1 medium onion, finely chopped - 2 cloves garlic, minced - 1 teaspoon fresh thyme leaves - 1 teaspoon smoked paprika - Salt and freshly ground black pepper, to taste - 1 cup grated Parmesan cheese (for topping) - Fresh chives or parsley, finely chopped (for garnish, optional) For the best flavor, choose high-quality cheese. Fresh potatoes make a big difference too. Avoid any that have spots or soft areas. This ensures your dish stays creamy and luscious. You can add some extra flavor with these ingredients: - 1 cup cooked bacon, chopped - 1 cup diced bell peppers - 1 cup spinach, wilted If you have dietary needs, consider these swaps: - Use non-dairy cheese for a vegan option. - Substitute almond milk or oat milk for a lighter version. These additions and swaps can give your scalloped potatoes a unique twist. Feel free to get creative based on what you love! For the complete recipe, check out the Full Recipe. Start by washing the russet potatoes under cool water. Use a vegetable brush to scrub them well. Once clean, peel the potatoes with a vegetable peeler. To slice the potatoes, you can use a mandoline slicer or a sharp knife. Aim for thin, even slices about 1/8 inch thick. This helps them cook evenly. If you have trouble slicing, try chilling the potatoes first. Cold potatoes are firmer and easier to cut. In a mixing bowl, combine the heavy cream and whole milk. Add the minced garlic, fresh thyme, and smoked paprika. Season with salt and black pepper. Whisk until the mixture is smooth and creamy. Seasoning is key to adding depth. A good mix of salt and pepper enhances the flavors. You want each bite to taste rich and savory. Begin by layering half of the sliced potatoes in the bottom of your slow cooker. Spread them out evenly. Next, sprinkle half of the chopped onion over the potatoes. Follow this with half of the shredded cheddar cheese. Now, pour half of the cream mixture over these layers. Repeat the process with the remaining potatoes, onions, and cheese. Finish by drizzling the rest of the cream mixture on top. Even layers help the flavors mix better. Make sure every layer has some cream for a rich taste. Cover the slow cooker and set it on low heat. Cook for 6 to 8 hours. The potatoes should be fork-tender when done. Check for doneness by poking a potato slice with a fork. If it goes in easily, it’s ready. About 30 minutes before it’s done, sprinkle the grated Parmesan cheese on top. This creates a delicious, cheesy crust. Once cooked, turn off the slow cooker. Let the dish sit for 10 minutes before serving. This resting time helps the layers set. You can find the full recipe [here]. To make your scalloped potatoes shine, use fresh herbs. Fresh thyme adds a great taste. You can also try rosemary or parsley for more flavor. To prevent browning, soak potato slices in cold water. This keeps them crisp and fresh. Drain and dry them well before cooking. Watch for slices that are uneven. If they are too thick, some potatoes may not cook well. Use a mandoline or sharp knife for even slices. Avoid adding too much liquid; it can make the dish runny. If your slow cooker is too full, it may not cook evenly. Leave some space for the heat to circulate. Scalloped potatoes pair well with many dishes. Try serving them with grilled chicken or a fresh salad. They also work great alongside roasted veggies. For a nice touch, garnish with chopped chives or parsley. This adds color and flavor to your dish. Enjoy your meal with a glass of white wine for extra delight! {{image_4}} You can easily make this dish vegan or dairy-free. To do this, swap out dairy items. Use plant-based milk like almond or oat milk. For the cream, try coconut cream or cashew cream. Instead of cheese, use vegan cheese shreds or nutritional yeast for a cheesy flavor. If you need gluten-free options, make sure to check your cream and cheese labels. Most brands are gluten-free, but it’s best to confirm. Layer the potatoes with gluten-free sauces or broth to enhance the flavor. Get creative with the cheese types! You can use pepper jack for a spicy kick. Gouda also adds a rich, smoky flavor. Try mixing cheeses for a unique taste. Add spices like garlic powder or onion powder for depth. You can also mix in unique ingredients. Adding crispy bacon bits gives a savory crunch. Spinach adds color and nutrition. These variations keep the dish fun and exciting! Feel free to explore and make it your own. For the full recipe, check the details above. To store leftovers, let the scalloped potatoes cool to room temperature. Then, transfer them to an airtight container. This will keep them fresh. You can store them in the fridge for up to three days. Make sure to label the container with the date. This way, you know when to eat them. If you want to freeze portions, let the dish cool completely first. Then, cut it into servings. Wrap each portion tightly in plastic wrap. Place them in a freezer-safe bag or container. You can freeze them for up to three months. To reheat, thaw them in the fridge overnight. Bake them in the oven at 350°F until warmed through. This helps keep the texture and flavor intact. Enjoy your Slow Cooker Cheesy Scalloped Potatoes from the freezer! Slow cooker cheesy scalloped potatoes can last in the fridge for about 3 to 5 days. Store them in an airtight container. If you freeze them, they can last for up to 2 months. When you’re ready to eat, thaw them in the fridge overnight before reheating. Yes, you can prepare this dish in advance. Slice the potatoes and mix the cream mixture the night before. Layer the ingredients in the slow cooker and store it in the fridge overnight. Just set the slow cooker to cook in the morning. This saves time and makes meal prep easy. Cheesy scalloped potatoes pair well with many main dishes. Try serving them with roasted chicken, grilled steak, or baked ham. They also go great with a fresh salad for a balanced meal. The creamy potatoes complement meats nicely, adding rich flavor. If your scalloped potatoes are runny, there are easy fixes. First, you can mix a little cornstarch with water to thicken the sauce. Stir it into the dish and let it cook a bit longer. Alternatively, let the dish sit uncovered for a short time. This can help the sauce thicken. Absolutely! You can use many types of cheese in this recipe. Gouda gives a smoky flavor, while Monterey Jack adds creaminess. If you want something sharper, try using Gruyère or blue cheese. Each cheese brings its own unique taste to the dish, so feel free to experiment! This article covered all the important steps to make perfect slow cooker cheesy scalloped potatoes. You learned about the key ingredients, preparation, and cooking methods. I shared useful tips to enhance flavor and avoid mistakes. You also saw variations to fit different diets and ways to store leftovers safely. Now, you’re ready to create a dish that impresses everyone. Enjoy experimenting with flavors for your next meal!

Craving a delicious side dish that’s easy to make? Look no further! This Slow Cooker Cheesy Scalloped Potatoes recipe delivers rich flavors and creamy goodness without the fuss. Using just …

Read more

Categories Dinner

Chewy Pumpkin Cookies Soft and Irresistible Delight

August 8, 2025 by Chef Elliot
Creating chewy pumpkin cookies starts with the right ingredients. Here’s what you need: - 1 cup pumpkin puree - 1/2 cup granulated sugar - 1/2 cup packed brown sugar - 1/2 cup unsalted butter, softened - 1 large egg - 1 teaspoon pure vanilla extract - 2 cups all-purpose flour - 1 teaspoon baking soda - 1 teaspoon baking powder - 1 teaspoon ground cinnamon - 1/2 teaspoon ground nutmeg - 1/4 teaspoon ground ginger - 1/4 teaspoon salt - 1 cup chocolate chips or chopped walnuts (optional) Using pumpkin puree is key for that soft texture. I like to use canned pumpkin for ease and flavor. The sugars bring sweetness, while the butter adds richness. Don’t skip the spices! They give a warm taste that pairs well with pumpkin. You can mix in chocolate chips or walnuts for extra fun. This recipe yields about 24 cookies, perfect for sharing with friends or family. For the full recipe, check the detailed steps to bake these delicious treats! - Preheat your oven to 350°F (175°C). - Line a baking sheet with parchment paper. - In a large bowl, cream together the butter, granulated sugar, and brown sugar. - Mix until the blend is light and fluffy. - Add the pumpkin puree, egg, and vanilla extract. - Mix again until everything is smooth and well combined. - In another bowl, whisk together flour, baking soda, baking powder, cinnamon, nutmeg, ginger, and salt. - Gradually mix the dry ingredients into the wet mixture. - Stir gently until just combined. Avoid overmixing to keep the cookies soft. - Use a cookie scoop to portion the dough. - Place dollops on the prepared baking sheet, leaving space between each. - Bake for 10-12 minutes until the edges are set. - The centers should still be soft. To get chewy pumpkin cookies, avoid overmixing your dough. Mix until just combined. This keeps the cookies soft. Another key tip is to soften the butter before you start. If the butter is too cold, your cookies won't be as chewy or flavorful. Just let the butter sit at room temp for about 30 minutes before using it. The spices you use can change everything. I always prefer fresh spices over pre-ground. Fresh ground cinnamon, nutmeg, and ginger add a bright taste. You can also add chocolate chips or nuts for extra flavor. Chocolate chips give a sweet touch, while nuts add crunch. Both make the cookies even better! To check for doneness, look for set edges and soft centers. Remove the cookies from the oven when they start to crack on top. Don't bake them too long, or they will lose their chewy texture. After you take them out, let them cool on the baking sheet for about five minutes. This helps them stay soft and chewy. Then, transfer them to a wire rack to cool completely. Enjoy each bite of these chewy pumpkin cookies! For the full recipe, check out the complete guide. {{image_4}} You can make your pumpkin cookies even sweeter by adding chocolate chips. This twist brings a rich flavor that many love. Use semi-sweet or dark chocolate chips for a fun contrast. Fold them into the dough after mixing the wet and dry ingredients. This way, every bite has a lovely burst of chocolate goodness. For a crunchy texture, try adding chopped walnuts or pecans. These nuts add depth and a nice bite to the soft pumpkin cookies. You can mix in about one cup of nuts after combining the wet and dry ingredients. This variation gives you a hearty feel, perfect for enjoying with coffee or tea. Want to spice things up? Add extra spices like cloves or allspice. These spices enhance the warm flavor of pumpkin. Just a pinch of each can make a big difference. You can start with 1/4 teaspoon and adjust to your taste. This creates a cozy cookie that warms your heart and home. For the full recipe, check out the details above. To keep your chewy pumpkin cookies fresh at room temperature, place them in an airtight container. Make sure they are completely cool before storing. This helps to keep moisture out and prevents them from becoming soggy. You can store them this way for about one week. Adding a slice of bread can help keep them soft and moist. If you want to save cookies for later, freezing is the best option. Start by letting the cookies cool completely. Then, wrap each cookie in plastic wrap. Place them in a freezer-safe bag. Remove as much air as possible before sealing. You can freeze them for up to three months. When you’re ready to enjoy, just take out the cookies and let them thaw at room temperature. To make your cookies soft again after storage, you can reheat them in the oven. Preheat your oven to 300°F (150°C). Place the cookies on a baking sheet for about 5 minutes. This warms them up without drying them out. You can also use a microwave. Heat them for about 10-15 seconds. Just be careful not to overheat them, or they will become hard. Yes, you can use fresh pumpkin. Fresh pumpkin gives a brighter flavor. However, it requires more time and effort. You must roast and puree it first. Canned pumpkin is quick and easy. It also has a smooth texture. Both options work well in chewy pumpkin cookies. Look for the edges to be set. The tops should show slight cracks. You can also gently press the center. If it feels soft but not wet, the cookies are done. Remember, they continue to bake off the heat. Absolutely! Just double each ingredient. Add them to the bowl as usual. Make sure to mix well. You may need more baking sheets. This helps avoid crowding the oven. Larger batches mean more treats for everyone! You can use several egg substitutes. One option is to use flaxseed meal. Mix one tablespoon of flaxseed with three tablespoons of water. Let it sit for five minutes. Another option is unsweetened applesauce. Use 1/4 cup for each egg. Both work great in chewy pumpkin cookies. These cookies stay fresh for about one week. Store them in an airtight container. Keep them at room temperature. For longer storage, you can freeze them. They last up to three months in the freezer. Just thaw them before eating. Enjoy your chewy pumpkin cookies! In this blog post, we covered a tasty recipe for pumpkin cookies. We looked at key ingredients, step-by-step instructions, and tips to achieve the best texture. You can enhance flavor with spices or add chocolate chips for a sweet twist. Don't forget about storage tips to keep your cookies fresh. My final thought is to have fun while baking. Experiment with flavors and enjoy the warmth of homemade cookies. There's nothing quite like sharing treats fresh from your oven!

Looking for a cookie that brings the essence of fall right to your kitchen? My Chewy Pumpkin Cookies are soft, delicious, and impossible to resist! With just the right mix …

Read more

Categories Desserts

Slow Cooker Creamy Tomato Basil Chicken Delight

August 7, 2025 by Chef Elliot
- 4 boneless, skinless chicken breasts - 1 can (28 oz) crushed tomatoes - 1 cup heavy cream - 1 tablespoon extra virgin olive oil - 4 cloves garlic, finely minced - 1 medium onion, diced - 1 teaspoon dried oregano - 1 teaspoon dried basil - Salt and black pepper to taste - Fresh basil leaves for garnish - Grated Parmesan cheese (optional) When I make Slow Cooker Creamy Tomato Basil Chicken, I start with fresh, high-quality ingredients. The chicken breasts are the star of the dish, so I choose ones that are plump and tender. I find that using crushed tomatoes adds rich flavor and a great texture. You can also use diced tomatoes for a chunkier sauce, but crushed tomatoes blend well with the cream. For seasonings, I always add fresh garlic and onions. They give the dish a wonderful aroma and depth of flavor. The olive oil helps to sauté the onions and garlic before they go into the slow cooker. This step enhances the taste. Herbs are crucial too. Dried oregano and basil bring warmth and earthiness to the dish. You can adjust the salt and pepper to your liking. I love to finish the meal with fresh basil leaves. They add a bright touch. If you want to elevate your dish, sprinkle some grated Parmesan cheese on top. For the full recipe, make sure to check the details. Each ingredient plays a role in creating this creamy and comforting meal. Enjoy the process as you gather these simple yet delicious components! Sautéing Aromatics - Heat 1 tablespoon of extra virgin olive oil in a skillet over medium heat. - Add 1 medium diced onion and 4 cloves of minced garlic. - Sauté for 3-4 minutes. Stir frequently until they turn soft and fragrant. Preparing the Chicken - Season 4 boneless, skinless chicken breasts with salt, pepper, and spices. - Use 1 teaspoon of dried oregano and 1 teaspoon of dried basil. - Layer the seasoned chicken in the bottom of the slow cooker. Cooking the Mixture - Pour the sautéed onion and garlic over the chicken in the slow cooker. - Then add 1 can (28 oz) of crushed tomatoes on top without stirring. Slow Cooking Process - Cover the slow cooker with its lid. - Set cooking time to low for 6-7 hours or high for 3-4 hours. - Cook until the chicken is tender and fully cooked. Finishing Touches - Once the chicken is cooked, take it out and place it on a plate. - Shred or chop the chicken into bite-sized pieces. - Stir in 1 cup of heavy cream into the sauce in the slow cooker. Final Combine - Return the shredded chicken back to the slow cooker. - Stir everything well to combine. - Let it cook for an extra 15-20 minutes to thicken the sauce. For the full recipe, check out the main section! To make a rich sauce, use quality ingredients. Heavy cream adds thickness and flavor. For an extra boost, try adding a dash of Worcestershire sauce. It enhances the overall taste. Adjust flavors by tasting as you go. You can add more salt or herbs to suit your palate. If you like it spicy, a pinch of red pepper flakes works well. Meal prep makes life easier. Cook a large batch of creamy tomato basil chicken. Store it in airtight containers in the fridge. It stays fresh for about three days. To reheat, use the microwave or stovetop. Add a splash of water if the sauce thickens too much. This keeps the dish creamy and delicious. Serving this dish over pasta or rice makes it satisfying. Freshly cooked fettuccine works great with the sauce. You can also use fluffy white rice for a comforting meal. For garnishes, fresh basil leaves add color and flavor. A sprinkle of grated Parmesan cheese adds richness. These small touches make your meal look and taste gourmet. For more ideas, check the Full Recipe for inspiration. {{image_4}} If you want a low-carb meal, try serving this dish with cauliflower rice. It gives a great texture and absorbs the flavors. Just steam or sauté the cauliflower rice before serving. For a keto-friendly version, skip the heavy cream. Use coconut cream instead. It adds a nice flavor and keeps it creamy. You can easily make this dish vegetarian. Use firm tofu or chickpeas instead of chicken. Cut the tofu into cubes and add it to the slow cooker. If you use chickpeas, rinse and drain a can before adding. Adjust the cooking times to about 4-5 hours on low. This way, everything cooks evenly. Feel free to get creative with flavors. Add spices like red pepper flakes for some heat. You can also toss in spinach or bell peppers for extra veggies. Experiment with different herbs like thyme or parsley for a fresh twist. Each change can make the dish feel new and exciting. After you enjoy your creamy tomato basil chicken, store leftovers in an airtight container. Make sure to cool the dish first. This helps keep it fresh. You can safely store it in the fridge for up to 3 days. To keep flavors strong, avoid opening the container too often. Always check for signs of spoilage before enjoying leftovers. To freeze your creamy tomato basil chicken, let it cool completely. Place it in a freezer-safe container or bag. This helps to prevent freezer burn. It can freeze well for up to 3 months. When you're ready to eat, transfer it to the fridge to thaw overnight. This keeps the taste and texture nice. To reheat, avoid sogginess by using the stovetop or microwave. If using a microwave, heat in short bursts. Stir between bursts to ensure even heating. On the stovetop, heat in a pan over low heat, stirring often. This helps keep the sauce creamy and delicious. Enjoy your meal just like fresh! You can add heat in a few ways. Try using: - Red pepper flakes - Fresh jalapeños, diced - Hot sauce, like Sriracha Start with a small amount. Taste and adjust as needed. This way, you control the spice level. Yes! You can cook with frozen chicken. Just follow these steps: - Increase the cooking time to about 8 hours on low or 4-5 hours on high. - Ensure the chicken reaches 165°F (74°C) before serving. This method will keep the chicken juicy and tender. If you want a lighter option, try these substitutes: - Half-and-half for a creamy texture - Coconut milk for a dairy-free choice - Greek yogurt, but add it last to avoid curdling Each option will change the flavor slightly, but they work well. Cooking times vary: - On low: 6-7 hours - On high: 3-4 hours Low heat often gives a richer flavor. High heat cooks faster but may not be as tender. Yes, this recipe is gluten-free! Here’s how to keep it that way: - Use gluten-free broth if you ever add it. - Check your canned tomatoes for any added ingredients. Enjoy this dish worry-free if you follow these tips! You can find the full recipe for Slow Cooker Creamy Tomato Basil Chicken in the earlier sections. This recipe for Slow Cooker Creamy Tomato Basil Chicken is simple and packed with flavor. You learned how to sauté aromatics, cook chicken, and create a rich sauce. I shared tips for meal prep and variations, ensuring something for everyone. In the end, you can enjoy a delicious meal even on a busy day. With these steps, you can make cooking easy and fun. Try it out, and enjoy your tasty dish!

Are you ready to transform dinner with my Slow Cooker Creamy Tomato Basil Chicken Delight? This dish is a simple way to create a comforting meal that bursts with flavor. …

Read more

Categories Dinner

Savory Apple Pecan Cake for Easy Baking Delight

August 7, 2025 by Chef Elliot
- 2 cups all-purpose flour - 1 ½ cups granulated sugar - 1 teaspoon baking powder - 1 teaspoon baking soda - ½ teaspoon salt - 1 teaspoon ground cinnamon - ½ teaspoon ground nutmeg - 1 cup unsalted butter, softened to room temperature - 3 large eggs, at room temperature - 1 teaspoon vanilla extract - 2 cups Granny Smith apples, peeled and chopped into small pieces - 1 cup pecans, roughly chopped - ½ cup packed brown sugar (for topping) - ¼ cup rolled oats (for topping) - ½ teaspoon ground cinnamon (for topping) When picking apples, choose Granny Smith for their tartness. They add a nice balance to the cake. If you prefer sweeter apples, try Honeycrisp or Fuji. For pecans, look for pieces that are fresh and crunchy. You can swap them with walnuts or almonds if you like. Toasting the nuts before adding them enhances their flavor. Each ingredient plays a part in creating a rich, flavorful cake. The flour gives structure, while sugar adds sweetness. The spices bring warmth, and the butter keeps it moist. Eggs bind everything together, making the texture light. Using fresh ingredients makes a big difference. Always check dates on your baking powder and soda. Fresh ingredients yield the best results. For a twist, add a touch of maple syrup instead of some sugar. This adds depth and a hint of flavor that pairs well with apples and pecans. You can find the full recipe above to guide you through the baking process. Step 1: Preheating the oven and greasing the pan Start by preheating your oven to 350°F (175°C). This step is key for even baking. While the oven heats, grab a 9x13 inch baking pan. Grease the pan with butter or non-stick spray. A light dusting of flour will help the cake release easily. Step 2: Mixing the dry ingredients In a large mixing bowl, combine the following dry ingredients: - 2 cups all-purpose flour - 1 ½ cups granulated sugar - 1 teaspoon baking powder - 1 teaspoon baking soda - ½ teaspoon salt - 1 teaspoon ground cinnamon - ½ teaspoon ground nutmeg Use a whisk to mix these ingredients well. This helps to evenly distribute the baking powder and spices. Step 3: Creaming the butter In a separate bowl, take 1 cup of softened unsalted butter. Use an electric mixer to cream it until smooth and fluffy. This usually takes about 2 minutes. Creaming adds air and makes your cake light. Step 4: Adding eggs and vanilla extract Now, add 3 large eggs, one at a time. Mix well after each egg. Then, add 1 teaspoon of vanilla extract. Mix until everything is combined. This adds flavor and richness to your cake. Step 5: Mixing dry and wet ingredients Gradually add your dry mix to the wet mix. Use low speed to avoid over-mixing. It’s okay if small lumps remain. They’ll bake out, and this keeps the cake light. Step 6: Folding in apples and pecans Carefully fold in 2 cups of chopped Granny Smith apples and 1 cup of chopped pecans. Use a spatula to mix gently. Make sure they are evenly spread throughout the batter. Step 7: Baking instructions Pour the batter into your greased pan. Smooth the top with a spatula. In a small bowl, mix ½ cup of brown sugar, ¼ cup rolled oats, and ½ teaspoon ground cinnamon for the topping. Sprinkle this mixture over the batter. Bake in your preheated oven for 35-40 minutes. Check with a toothpick in the center. If it comes out clean, your cake is ready! After baking, let it cool for about 10 minutes in the pan. Then, transfer it to a wire rack to cool completely. For the full recipe, check the instructions above. Enjoy your baking! How to avoid a dense cake To keep your cake light and fluffy, use room temperature ingredients. Cold eggs and butter can lead to a heavy batter. Mix the dry and wet ingredients just until combined. Over-mixing could also make the cake dense. Trust me; little lumps are fine! Ensuring even baking For even baking, make sure your oven is properly preheated. Place the cake in the center of the oven. This helps the heat circulate around the cake. If your oven has hot spots, rotate the pan halfway through baking. This way, every slice will bake evenly. Recommendations for toppings After your cake cools, dust it with powdered sugar. This gives a lovely finish. You can also add a dollop of whipped cream or serve it with vanilla ice cream. For a nutty twist, sprinkle extra chopped pecans on top. Pairing ideas (e.g., beverages) Enjoy your apple pecan cake with a warm cup of tea or coffee. A sweet cider also pairs nicely. If you want something stronger, a glass of dessert wine can complement the flavors well. Each sip will make the cake even more delightful! {{image_4}} You can get creative with this cake by changing nuts and apples. Instead of pecans, try walnuts or almonds. Both will add a different crunch and flavor. Walnuts lend a rich, earthy taste, while almonds offer a sweeter bite. For apples, Granny Smith is a classic choice due to its tartness. However, you can also use Honeycrisp or Fuji apples. Honeycrisp adds a juicy sweetness, while Fuji gives a crisp texture. Mix and match to find your favorite blend! If you're looking for gluten-free options, swap the all-purpose flour for a gluten-free blend. Many brands offer great results in baking. Just be sure to check for a blend that includes xanthan gum for structure. For a vegan version, replace the eggs with flaxseed meal or applesauce. Use vegan butter in place of regular butter. This way, you can enjoy a tasty cake while sticking to your dietary needs! Explore these variations to tailor the apple pecan cake to your tastes. Don't forget to check the Full Recipe for all the details on preparing this delightful treat! To keep your apple pecan cake fresh, store it in an airtight container. This helps keep it moist and tasty. At room temperature, it will stay good for about three days. Make sure to place it in a cool, dry spot away from sunlight. If your kitchen is warm, the fridge might be a better option. If you choose to refrigerate it, wrap the cake tightly in plastic wrap or place it in a sealed container. This helps prevent it from absorbing other smells and flavors. In the fridge, your cake will stay fresh for up to a week. When you want to enjoy a slice, just take it out and let it sit for a few minutes to reach room temperature. To freeze your apple pecan cake, start by letting it cool completely. Once cool, slice the cake into pieces or freeze it whole. Wrap each slice or the whole cake with plastic wrap. Then, place it in a freezer-safe bag or container. This helps keep the cake fresh for up to three months. When you are ready to eat it, take the cake out of the freezer. For the best results, leave it to thaw in the fridge overnight. If you're in a hurry, you can let it sit at room temperature for a couple of hours. Enjoy it as is, or warm it up slightly in the oven for a cozy treat. For even more flavor, serve it with whipped cream or a scoop of ice cream. For the full recipe, check out the details above. What type of apples are best for baking? I recommend using Granny Smith apples for this cake. They are tart and hold their shape well. Other good options include Honeycrisp or Fuji. These apples add great flavor and texture to your cake. Can I make this cake ahead of time? Yes, you can make this cake a day in advance. Just wrap it tightly in plastic wrap. Store it at room temperature to keep it moist. You can also serve it cold or warm it up before serving. How long does the apple pecan cake last? This cake lasts about 3 to 5 days at room temperature. If you store it in the fridge, it can last up to a week. Just make sure it is in an airtight container. Why is my cake too dry? If your cake is dry, it may have been overbaked. Always check it a few minutes early. Also, ensure you measure your flour correctly. Too much flour can lead to dryness. What should I do if my cake doesn’t rise? If your cake doesn’t rise, check if your baking powder is fresh. Old baking powder may lose its power. Also, make sure you mix the batter enough but don’t overmix it. This can help your cake rise better. In this post, we explored making a delicious apple pecan cake. We covered the best ingredients, detailed steps for preparation, and tips for a great bake. You learned about variations and how to store your cake. Remember, choosing right apples and nuts makes a big difference. Baking should be fun, so feel free to try new flavors. Follow the steps and tips, and you will enjoy a tasty treat every time. Baking brings joy, and sharing it with others makes it even better. Enjoy your baking adventure!

If you’re looking for a treat that’s both easy to make and full of flavor, you’ve found it! This Savory Apple Pecan Cake combines sweet apples with crunchy pecans for …

Read more

Categories Desserts

Pumpkin Cupcakes with Cinnamon Cream Cheese Delight

August 7, 2025 by Chef Elliot
Making Pumpkin Cupcakes with Cinnamon Cream Cheese is fun and easy! Here’s what you need. - Essential ingredients for cupcakes - 1 ½ cups all-purpose flour - 1 teaspoon baking powder - 1 teaspoon baking soda - 1 teaspoon ground cinnamon - ½ teaspoon ground nutmeg - ½ teaspoon ground ginger - ½ teaspoon salt - 1 cup canned pumpkin puree - ½ cup vegetable oil - ¾ cup packed brown sugar - ½ cup granulated sugar - 2 large eggs - 1 teaspoon vanilla extract - Ingredients for cinnamon cream cheese frosting - 8 ounces cream cheese, softened - ½ cup unsalted butter, softened - 2 cups powdered sugar - 1 teaspoon vanilla extract - 1 teaspoon ground cinnamon - Tips for selecting the best ingredients - Choose canned pumpkin with no added sugar. - Buy fresh spices for the best flavor. - Use room temperature cream cheese and butter for easy mixing. - Look for eggs that are large and fresh. Using quality ingredients makes a big difference. Fresh spices and good pumpkin add rich flavor. You can find the Full Recipe [here](#). Start by preheating your oven to 350°F (175°C). This step is key for even baking. While the oven heats up, line your cupcake tin with paper liners. This makes it easy to take the cupcakes out later. Next, grab a medium bowl. In it, whisk together the flour, baking powder, baking soda, cinnamon, nutmeg, ginger, and salt. Mix them well and set this aside. Now, in a large bowl, combine the pumpkin puree, vegetable oil, brown sugar, granulated sugar, eggs, and vanilla extract. Whisk these together until you have a smooth mixture. This part adds rich flavor to your cupcakes. Slowly mix your dry ingredients into the wet ones. Use a spatula or whisk and combine gently. Don’t worry if there are a few lumps; that’s okay! Using a scoop or ladle, fill each cupcake liner about two-thirds full. This allows room for the cupcakes to rise without spilling over. Place the cupcake tin in your preheated oven. Bake for 18-22 minutes. To check if they are done, insert a toothpick into the center of a cupcake. If it comes out clean, they are ready! Once baked, take the cupcakes out of the oven. Let them cool in the tin for about 5 minutes. Then, move them to a wire rack to cool completely. This helps them stay fluffy. Now it's time to make the frosting! In a mixing bowl, beat the softened cream cheese and unsalted butter together using an electric mixer. Mix until it is creamy and smooth. Gradually add in the powdered sugar, vanilla extract, and ground cinnamon. Keep mixing until your frosting is light, fluffy, and free of lumps. After your cupcakes are cool, use a piping bag or spatula to apply the frosting on top. You can also check the [Full Recipe] for more details. Feel free to have fun with the frosting and make it look pretty! To bake pumpkin cupcakes perfectly, avoid common mistakes. First, always measure your flour correctly. Too much flour makes cupcakes dry. Use a spoon to fill your measuring cup, then level it off. Second, mix the batter gently. Overmixing can lead to tough cupcakes. It’s fine if some lumps remain. To ensure even baking, preheat your oven fully. An oven thermometer can help. If your oven runs hot or cold, it can change the bake time. Place your cupcake tin in the center of the oven. This spot gives the best heat flow for rising. When it comes to frosting, get creative! You can use a piping bag with different tips for fun shapes. A simple spatula also works well. For a unique touch, try a swirl pattern. Garnishing adds flair. A sprinkle of cinnamon or a few pecans on top can make a big difference. Also, consider placing small caramel pieces or chocolate chips on top for extra sweetness. Pair your pumpkin cupcakes with drinks for the best experience. A warm spiced chai or a cold glass of apple cider goes well with these treats. For special occasions, serve them at fall gatherings, birthday parties, or Thanksgiving. They add a cozy touch to any event. These tips will help you create the best pumpkin cupcakes with cinnamon cream cheese frosting. For the complete recipe, check out the Full Recipe section. Enjoy baking! {{image_4}} You can switch up the frosting for your pumpkin cupcakes. If you’re not a fan of cinnamon cream cheese frosting, try vanilla buttercream. It’s sweet and creamy, perfect for balancing the spice of the cupcakes. Another option is chocolate ganache. It adds a rich flavor that pairs well with pumpkin. For a twist, consider a maple cream cheese frosting. Just add maple syrup to the base recipe. You’ll get a warm, sweet flavor that screams fall. Want to make these cupcakes gluten-free? Use a gluten-free all-purpose flour blend instead of regular flour. This swap keeps the texture light and fluffy. For vegan cupcakes, replace eggs with flax eggs. Mix one tablespoon of ground flaxseed with three tablespoons of water. Let this sit for a few minutes to thicken. Also, swap the cream cheese with a vegan cream cheese alternative for the frosting. Feel free to adjust the spice levels too. If you love cinnamon, add an extra teaspoon. Or, if you prefer a milder taste, reduce the cinnamon. You can also skip the nutmeg or ginger if you want. Nuts can add a nice crunch. Chop some walnuts or pecans and fold them into the batter before baking. They add texture and flavor. For a fruity twist, mix in some dried cranberries or raisins. They add sweetness and chewiness that complements the cupcakes. Lastly, think about festive toppings. For Halloween or Thanksgiving, sprinkle some edible glitter on top or add a small candy pumpkin for fun. These touches make your cupcakes stand out and look special. For the full recipe, check out the Pumpkin Spice Delight Cupcakes. To keep your pumpkin cupcakes fresh, store them in an airtight container. This method helps keep moisture in and air out. You can also use plastic wrap if you don't have a container. Make sure the cupcakes are completely cool before wrapping them. If stored correctly, they can last for 3 to 5 days at room temperature. For longer freshness, place them in the fridge. Just remember, they may dry out a bit in the fridge, so always check before eating! Freezing your pumpkin cupcakes is simple. Start by letting them cool completely. Wrap each cupcake individually in plastic wrap. This keeps them from getting freezer burn. Place the wrapped cupcakes in a freezer-safe bag or container. You can freeze the cupcakes for up to 3 months. You can also freeze the cinnamon cream cheese frosting. Just put it in a separate airtight container. When you're ready to enjoy, take the cupcakes out of the freezer. Let them thaw in the fridge overnight for best results. Before serving, add the frosting once they are fully thawed. Enjoy your delicious Pumpkin Spice Delight Cupcakes later! Yes, you can use fresh pumpkin. Fresh pumpkin has a bright flavor and a unique texture. To use fresh pumpkin, start by roasting a small pumpkin. Cut it in half and scoop out the seeds. Place it cut-side down on a baking sheet. Roast it at 400°F (200°C) for about 45 minutes. Once soft, scoop out the flesh and puree it. This fresh puree can replace canned pumpkin in the recipe. However, canned pumpkin is more convenient. It saves time and gives a consistent texture. To keep your cupcakes from sinking, mix the batter gently. Overmixing can create too much air. This can cause the cupcakes to rise too quickly and then fall. Fill each cupcake liner only two-thirds full. This allows space for rising without overflowing. Also, make sure your oven is fully preheated. Baking at the right temperature ensures even baking and helps the cupcakes rise properly. Yes, you can make these cupcakes ahead of time. Bake and cool the cupcakes, then store them in an airtight container. This keeps them fresh for up to three days at room temperature. If you want to frost them later, wait until they are completely cool. You can also freeze the cupcakes for up to three months. Just wrap each cupcake in plastic wrap and place them in a freezer bag. Thaw them overnight in the fridge before frosting. For fun toppings, consider these ideas: - Whipped cream for a light touch. - Chopped nuts, like pecans or walnuts, for crunch. - Caramel drizzle for sweetness. - Chocolate chips for a rich flavor. - Sprinkles to add color and fun. These toppings can enhance the flavor and make your cupcakes look great! In this guide, we covered key ingredients for cupcakes and frosting, along with easy steps. You learned the best ways to mix, bake, and frost your treats. We also shared tips for decorating and serving, plus tasty variations. Remember, great cupcakes come from good ingredients and careful baking. Enjoy your baking journey, and let your creativity shine in each batch!

Get ready for a fall treat with my Pumpkin Cupcakes with Cinnamon Cream Cheese Delight! These cupcakes are soft, moist, and bursting with pumpkin flavor. The creamy cinnamon frosting will …

Read more

Categories Desserts

Baked Pumpkin Donuts Soft and Tasty Delight

August 7, 2025 by Chef Elliot
To make these tasty baked pumpkin donuts, you need a few key items: - 1 cup pure pumpkin puree - 1/2 cup granulated sugar - 1/4 cup brown sugar, packed - 1/2 cup unsweetened applesauce - 2 large eggs - 1 teaspoon vanilla extract - 2 cups all-purpose flour - 1 teaspoon baking powder - 1 teaspoon baking soda - 1 teaspoon ground cinnamon - 1/2 teaspoon ground nutmeg - 1/4 teaspoon ground ginger - 1/4 teaspoon salt - 1/4 cup melted coconut oil or unsalted butter - Cinnamon sugar (for coating; mix 1/4 cup granulated sugar with 1 tablespoon ground cinnamon) These ingredients blend to create soft, moist donuts that burst with pumpkin flavor. You can add some fun ingredients for extra taste. Consider: - Chocolate chips for sweetness - Chopped nuts for a crunchy texture - Dried cranberries for a tart kick - A dash of cloves for extra spice Feel free to mix and match based on what you love! If you can’t find an ingredient, don’t worry! Here are some swaps: - Use canned pumpkin if fresh pumpkin isn’t available. - Swap applesauce with yogurt for a creamier taste. - Replace coconut oil with vegetable oil if you prefer. - For gluten-free donuts, try almond flour or a gluten-free blend. These easy swaps will not change the joy of making baked pumpkin donuts. You can find the full recipe [here](#). Start by preheating your oven to 350°F (175°C). This step is key for even baking. While the oven heats, grease your donut pan well. Use non-stick spray or oil to keep donuts from sticking. In a large bowl, mix the pumpkin puree, granulated sugar, brown sugar, applesauce, and eggs. Add in the vanilla extract. Whisk these ingredients together until smooth. This mix brings out the pumpkin's rich flavor. In another bowl, sift together the flour, baking powder, baking soda, cinnamon, nutmeg, ginger, and salt. Sifting helps combine these ingredients well and avoids clumps. This step creates a consistent dough, which is crucial for texture. Gradually add the dry mix into the wet ingredients. Use a spatula or wooden spoon to stir gently. Mix only until the flour disappears. Overmixing can make the donuts tough. Take a spoon or piping bag to fill each donut cavity about 3/4 full. This gives your donuts room to rise. If you fill them too much, they might overflow. Place the filled donut pan in your preheated oven. Bake for 12-15 minutes. Check doneness by inserting a toothpick into a donut. If it comes out clean, your donuts are ready. Let them cool for 5 minutes in the pan before moving them to a wire rack. For the full experience, check the Full Recipe to make these delicious treats at home! To make light and fluffy donuts, avoid overmixing your batter. When you combine wet and dry ingredients, mix just until you see no flour. This keeps the donuts soft. Use room temperature eggs and pumpkin puree. They help create a smooth batter that rises well. Lastly, ensure you measure flour correctly. Too much flour can make your donuts dense. To prevent sticking, grease your donut pan well. Use non-stick spray or oil to coat each cavity. You can also dust the pan with flour after greasing. This gives an extra layer of protection. If your donuts do stick, let them cool for a few minutes before removing. Gently run a knife around the edges to help release them. While cinnamon sugar is classic, you can try other coatings. A simple glaze with powdered sugar and milk adds sweetness. For a chocolate twist, dip donuts in melted chocolate. You can also roll them in crushed nuts or coconut for texture. If you want a spice kick, mix cocoa powder with powdered sugar for a chocolatey treat. These options make your donuts fun and unique! {{image_4}} You can easily add chocolate chips or nuts to your baked pumpkin donuts. Just fold in about 1/2 cup of mini chocolate chips or chopped nuts, like walnuts or pecans, right before you fill the donut pan. This simple step boosts flavor and adds a nice texture. Chocolate pairs well with the spices in the donuts, making each bite even more delightful. If you want to switch up the usual cinnamon sugar coating, consider frosting options. A simple cream cheese frosting adds a rich, tangy flavor. Mix together 4 oz of cream cheese, 1/2 cup of powdered sugar, and a splash of vanilla. For a glaze, combine 1 cup of powdered sugar with 2 tablespoons of milk. Drizzle over the cooled donuts for a sweet touch. You can also top them with a sprinkle of crushed nuts or cocoa powder for added flair. While cinnamon, nutmeg, and ginger are classic spices for pumpkin donuts, you can experiment with others. Try adding a pinch of allspice or cardamom for a unique twist. You could even mix in a bit of clove for a stronger flavor. Adjust the amounts to fit your taste. Small changes in spices can lead to delightful new flavors in your baked pumpkin donuts. To keep your baked pumpkin donuts fresh, store them in an airtight container. Ensure they are completely cool before sealing. They can last up to three days at room temperature. If you want them to last longer, refrigeration is a good option. Just remember that cold storage can change their texture a bit. If you want to freeze your donuts, wrap each one in plastic wrap. Then, place them in a freezer-safe bag or container. This way, they won’t get freezer burn. They can stay good for up to three months. When you’re ready to eat them, simply thaw them at room temperature. To reheat, preheat your oven to 350°F (175°C). Place the donuts on a baking sheet for about 5 to 10 minutes. This method revives their soft texture. You can also microwave them for about 10-15 seconds, but this might make them a bit chewy. Enjoy your donuts warm for the best taste! For the full recipe, check out the [Full Recipe]. Yes, you can make baked pumpkin donuts dairy-free. Use coconut oil instead of butter. Substitute unsweetened applesauce for dairy ingredients like yogurt or milk. This keeps the donuts moist and tasty without dairy. Baked pumpkin donuts stay fresh for about three days. Store them in an airtight container at room temperature. For longer freshness, keep them in the fridge for up to a week. They are best enjoyed within the first few days. Serve baked pumpkin donuts warm or at room temperature. You can dust them with cinnamon sugar for extra flavor. Pair them with a warm drink like coffee or cider. For a fun twist, try serving with a side of maple syrup. Yes, canned pumpkin works great for this recipe. Just make sure to use pure pumpkin puree and not pumpkin pie filling. It saves you time and still gives you a rich pumpkin flavor. You can tell the donuts are done when a toothpick comes out clean. Bake them for 12-15 minutes at 350°F. They should spring back gently when touched. Enjoy making these delicious treats from the Full Recipe! You've learned how to make baked pumpkin donuts from start to finish. We covered the key ingredients, step-by-step instructions, and tips for fluffy results. Remember, you can mix and match flavors or try different toppings. Proper storage helps keep your donuts fresh for longer. Whether you're baking for yourself or a gathering, these treats will impress. Enjoy your delicious creations and have fun experimenting with different flavors!

Are you ready to indulge in a soft and tasty delight? Baked pumpkin donuts are the perfect treat for the fall season or any time you crave something sweet. With …

Read more

Categories Desserts

Pumpkin Cream Cheese Bread Irresistible Flavor Treat

August 7, 2025 by Chef Elliot
- 1 ¾ cups all-purpose flour - 1 teaspoon baking powder - ½ teaspoon baking soda - ½ teaspoon salt - 1 teaspoon ground cinnamon - ½ teaspoon ground nutmeg - ½ teaspoon ground ginger - 1 cup granulated sugar - ½ cup vegetable oil - 1 cup pumpkin puree (canned or fresh) - 3 large eggs - 1 teaspoon vanilla extract - 8 oz cream cheese, softened - ½ cup powdered sugar - 1 egg yolk When I make Pumpkin Cream Cheese Bread, I focus on the right balance of flavors. Each ingredient matters. The dry ingredients create a strong base. The wet ingredients add moisture and sweetness. The cream cheese filling brings richness. Dry Ingredients: Start with all-purpose flour. It gives the bread structure. I always add baking powder and baking soda for leavening. Salt enhances all the flavors. Spices like cinnamon, nutmeg, and ginger bring warmth. They make the bread smell amazing. Wet Ingredients: I use granulated sugar for sweetness. Vegetable oil makes the bread moist. Pumpkin puree is key. It adds flavor and makes the bread tender. Eggs bind everything together, while vanilla extract adds a lovely hint of warmth. Cream Cheese Filling Ingredients: Cream cheese is the star of the filling. I always choose softened cream cheese for easy mixing. Powdered sugar sweetens the filling, while egg yolk helps it set. This blend of ingredients creates a delicious treat. You can find the full recipe in the earlier section. 1. Preheat the Oven: First, preheat your oven to 350°F (175°C). Grease a 9x5-inch loaf pan. This helps the bread come out easily. 2. Combine Dry Ingredients: In a medium bowl, mix the dry ingredients. Add 1 ¾ cups all-purpose flour, 1 teaspoon baking powder, ½ teaspoon baking soda, ½ teaspoon salt, 1 teaspoon ground cinnamon, ½ teaspoon ground nutmeg, and ½ teaspoon ground ginger. Whisk them well to combine. 3. Mix Wet Ingredients: In a large bowl, whisk together 1 cup granulated sugar and ½ cup vegetable oil until smooth. Then add 1 cup pumpkin puree, 3 large eggs, and 1 teaspoon vanilla extract. Mix until everything is blended well. 4. Combine Wet and Dry: Now, gently fold the dry mix into the wet mix. Stir just until combined. It’s fine if your batter has some small lumps; don’t overmix. 5. Make the Cream Cheese Filling: In another bowl, beat 8 oz softened cream cheese with ½ cup powdered sugar and 1 egg yolk until smooth and creamy. This will be your delicious filling. 6. Layer the Batter in the Pan: Pour half of the pumpkin batter into the greased pan. Spread it evenly. Next, dollop half of the cream cheese mixture on top. Repeat with the remaining pumpkin batter and cream cheese, creating layers. 7. Create the Swirl: Use a knife or skewer to gently swirl through the layers. Aim for a marbled look without mixing them too much. 8. Bake the Bread: Place the loaf pan in your preheated oven. Bake for about 55-65 minutes. The bread is ready when a toothpick comes out clean or with a few moist crumbs. 9. Cool and Serve: Let the bread cool in the pan for about 10 minutes. Transfer it to a wire rack to cool completely. Slice and enjoy your Pumpkin Cream Cheese Bread! To get the best texture in your pumpkin cream cheese bread, avoid overmixing. Overmixing makes the bread dense and tough. Mix just until the dry ingredients blend with the wet. You can leave a few small lumps; this is okay! Measuring your ingredients correctly is also key. Use the right tools, like measuring cups and spoons. Level off the flour with a knife for accuracy. This small step can make a big difference in texture. For richer flavor, use fresh spices rather than pre-ground ones. Grinding whole spices releases oils that add depth to your bread. Fresh cinnamon, nutmeg, and ginger can elevate your dish. You might also consider adding nuts or chocolate chips. Chopped walnuts or pecans offer a nice crunch. Chocolate chips can add sweetness and richness. These add-ins can make your bread even more special. For serving, slice the bread into thick pieces. Present them warm on a pretty platter. A dollop of whipped cream on top looks nice and adds flavor. Lightly dust the bread with powdered sugar for a sweet touch. For special occasions, you can drizzle caramel sauce over the slices. This not only enhances the look but also makes it a treat for the taste buds. {{image_4}} You can have fun with pumpkin cream cheese bread by trying some tasty twists. Here are a few flavors you might enjoy: - Pumpkin Spice Cream Cheese Bread: Add more pumpkin spice to create a warm, cozy taste. Just mix in an extra teaspoon of cinnamon and a pinch of cloves. This will boost the spiced flavor in every bite. - Nutty Pumpkin Cream Cheese Bread: Toss in some chopped walnuts or pecans for a crunchy texture. Adding about half a cup of nuts will give your bread a delightful crunch. It pairs nicely with the creamy filling. - Chocolate Chip Pumpkin Cream Cheese Bread: If you love chocolate, add half a cup of chocolate chips. The sweet chocolate contrasts well with pumpkin. This variation makes a great treat for kids and adults alike. If you follow certain diets, you can still enjoy this bread with some easy swaps: - Gluten-free options: Use a gluten-free flour mix instead of all-purpose flour. This way, those with gluten sensitivities can still enjoy this tasty bread. Make sure the mix has a good binding agent like xanthan gum. - Dairy-free alternatives: Swap the cream cheese with a dairy-free cream cheese. You can also use almond milk or coconut milk instead of regular milk in the recipe. These swaps will keep the bread moist and creamy. Changing up the recipe with seasonal ingredients can make it exciting: - Incorporating cranberries or pecans: Add a cup of fresh or dried cranberries for a tart kick. Pecans also add flavor and crunch. Mix them in with the batter before baking. - Adjusting spices for different seasons: In spring, try using lemon zest for a fresh taste. In winter, consider adding nutmeg or allspice for a cozy feel. Adjusting spices can make the bread fit any season perfectly. For the full recipe and more tips, check out the Full Recipe. To keep leftover pumpkin cream cheese bread fresh, wrap it well. You can use plastic wrap or aluminum foil. Place it in an airtight container. This helps keep moisture in and air out. Choose a container that fits the bread snugly. A loaf container works best. This also protects it from other smells in your fridge. If you want to freeze slices, first cool the bread completely. Then, cut it into thick slices. Wrap each slice in plastic wrap. This prevents freezer burn. Place the wrapped slices in a freezer bag. Be sure to squeeze out the air before sealing it. When you want to eat a slice, take it out and let it thaw at room temperature. For reheating, you can microwave each slice for 10-15 seconds. This warms it up nicely. You can also toast it for a crunchy texture. At room temperature, the bread lasts for about 3 days. Make sure to keep it in a cool, dry place. If you store it in the fridge, it can last up to a week. Always check for any signs of spoilage, like mold or an off smell. For the best taste, eat it fresh! How long does it take to make Pumpkin Cream Cheese Bread? It takes about 1 hour and 15 minutes. This includes 15 minutes of prep and about 55 to 65 minutes of baking. Can I use pumpkin pie filling instead of pumpkin puree? You can, but it may change the flavor. Pumpkin pie filling has spices and sugar added. If you use it, reduce some sugar in the recipe. What can I substitute for cream cheese? You can use Greek yogurt or mascarpone. They both give a nice creaminess and flavor. How do I know when the bread is done baking? Insert a toothpick in the center. If it comes out clean or with a few crumbs, it’s done. Can I make this recipe into muffins? Yes! Just pour the batter into muffin tins. Bake for about 20 to 25 minutes. Check with a toothpick for doneness. Is there a way to add a glaze? Yes! Mix powdered sugar with a bit of milk or cream. Drizzle it over the cooled bread for a sweet touch. How do I store the bread for the best freshness? Wrap it in plastic wrap and keep it at room temperature. This keeps it soft and tasty. Best tips from those who’ve tried the recipe - Make sure your cream cheese is soft. This helps it mix well. - Don’t overmix the batter. A few lumps are okay! Common mistakes to avoid when baking - Using cold eggs or butter can affect the batter. Always use room temperature ingredients. - Forgetting to check the oven temperature can lead to uneven baking. Use an oven thermometer for best results. In this post, we explored how to make Pumpkin Cream Cheese Bread. We covered the right mix of dry and wet ingredients, as well as the cream cheese filling. I provided step-by-step instructions, tips for texture, and creative variations. Baking can be fun, especially with seasonal twists. Remember to measure carefully and enjoy your creation. This bread brings warmth to any table. Your cooking journey can make delicious memories!

Are you ready to bake something that combines the cozy flavors of fall with a rich, creamy touch? My Pumpkin Cream Cheese Bread is the perfect treat for any season. …

Read more

Categories Desserts

Irresistible Apple Crisp Cheesecake Easy and Delicious Recipe

August 7, 2025 by Chef Elliot
- 1 ½ cups graham cracker crumbs - ⅓ cup granulated sugar - ½ cup unsalted butter, melted - 24 oz cream cheese, softened to room temperature - 1 cup granulated sugar - 3 large eggs - 1 teaspoon vanilla extract - 1 teaspoon ground cinnamon - 3 cups apples, peeled, cored, and diced - ¼ cup packed brown sugar - 1 teaspoon ground cinnamon - 1 tablespoon lemon juice - 1 cup rolled oats - ½ cup all-purpose flour - ½ cup packed brown sugar - ½ teaspoon ground cinnamon - ½ cup unsalted butter, melted When I make this apple crisp cheesecake, I focus on fresh, simple ingredients. The crust gives a crunchy base, while the filling is creamy and rich. I use sweet apples like Honeycrisp for the filling. They add a nice balance to the cheesecake's sweetness. The crisp topping is key for that classic apple crisp flavor. It combines oats, brown sugar, and butter for a delightful crunch. You can find the full recipe for this dish [here](#). Each layer brings something special to the dessert. Enjoy gathering these ingredients! Set the oven to 325°F (160°C). This helps bake the cheesecake evenly. Combine the graham cracker crumbs, sugar, and melted butter in a bowl. Mix well until the crumbs are coated. Press this mixture firmly into the bottom of a 9-inch springform pan. Bake for 10 minutes and then set aside to cool. In a separate bowl, mix the diced apples with brown sugar, cinnamon, and lemon juice. Stir gently until the apples are coated. This helps the apples absorb the flavors. Let the mixture rest for a few minutes. In a large mixing bowl, beat the softened cream cheese until smooth. Gradually add sugar, mixing until fluffy. Add the eggs one at a time, mixing after each addition. Finally, stir in the vanilla extract and cinnamon. Pour half of the cheesecake filling into the cooled crust, smoothing it with a spatula. Layer the apple mixture evenly over this filling. Pour the rest of the cheesecake filling on top, ensuring it covers the apples. In another bowl, combine oats, flour, brown sugar, cinnamon, and melted butter. Mix until it looks like coarse crumbs. Sprinkle this topping evenly over the cheesecake layer. Place the cheesecake in the oven and bake for 55-60 minutes. It is done when the center is set but still jiggles slightly. After baking, turn off the oven and crack the door open. Let the cheesecake cool in the oven for 1 hour before transferring it to the fridge to chill for at least 4 hours, or overnight for the best flavor. You can find the complete recipe for Apple Crisp Cheesecake [Full Recipe]. To make a great Apple Crisp Cheesecake, follow these tips. - Use cream cheese at room temperature for a smooth mixture. - Mix just enough to combine; overmixing can cause cracks. - Check for doneness by looking for a slight jiggle in the center. - Overbaking can make the cheesecake dry and less tasty. - Drizzle caramel sauce on top for extra sweetness. - Serve with whipped cream for a rich touch. These simple steps can elevate your dessert. Enjoy the process and have fun! For the complete details, check the Full Recipe. {{image_4}} You can make a vegan version of this cheesecake. First, substitute cream cheese with tofu or cashew cream. This swap keeps the creamy texture. Next, use non-dairy butter for the crust and topping. This keeps the recipe plant-based without losing flavor. For a gluten-free cheesecake, replace graham cracker crumbs with gluten-free alternatives. You can use gluten-free oats or almond flour. Always check that all ingredients are certified gluten-free. This ensures everyone can enjoy this tasty dessert. To elevate the flavor, try adding spices like nutmeg or ginger. These spices add warmth and depth to the dish. You can also add nuts to the crisp topping for extra crunch. Chopped walnuts or pecans work well here, adding texture and flavor. For more details on making this delicious treat, check the [Full Recipe]. Store your cheesecake in an airtight container. It will stay fresh for up to 5 days. This helps keep the flavors rich and the texture smooth. If you slice it, cover the pieces well. This prevents them from drying out. You can freeze slices of your cheesecake. Use individual containers to keep them fresh. They will last up to 3 months in the freezer. Wrap each slice tightly in plastic wrap. Then place it in a container or a freezer bag to prevent freezer burn. When you're ready to enjoy your frozen cheesecake, thaw it in the refrigerator. Let it sit for several hours or overnight. This slow thawing helps keep the texture creamy. Avoid thawing at room temperature to maintain its quality. For more details on making this delicious treat, check the Full Recipe. Yes, it's recommended to make it a day ahead for best flavor and texture. Making it in advance lets the flavors blend well. You will enjoy a richer taste and creamier cheesecake. Sweet varieties like Honeycrisp, Fuji, or Granny Smith work well. These apples add a nice balance of sweetness and tartness. They hold their shape and provide great texture in the filling. Yes, a store-bought graham cracker crust can be used for convenience. This saves time if you're in a rush. Just make sure it fits a 9-inch springform pan for the best results. Allow it to cool at room temperature for about 1 hour. This step helps set the cheesecake properly. Cooling it gradually prevents cracks and maintains its texture. While not mandatory, chilling overnight enhances the flavor and texture. This extra time allows the cheesecake to firm up nicely. You will get a creamier slice that is even more enjoyable. Now you know how to make a delicious Apple Crisp Cheesecake. We covered each step, from the crispy crust to the creamy filling and the sweet apple topping. Remember to keep your cream cheese soft for the best mix. Experiment with flavors and toppings to make it your own. This dessert is perfect for gatherings or a cozy night in. Enjoy every bite of this tasty treat!

Are you ready to indulge in a dessert that combines creamy cheesecake with a delightful apple crisp? In this blog post, I will share my easy and delicious Apple Crisp …

Read more

Categories Desserts

Satisfying Slow Cooker Chicken Pot Pie Recipe Guide

August 7, 2025 by Chef Elliot
- 1.5 lbs boneless, skinless chicken thighs - 3 cups mixed frozen vegetables - 1 medium onion, diced - 2 cloves garlic, minced The main ingredients create a hearty base. Chicken thighs are tender and flavorful. Frozen vegetables add color and nutrients. Diced onion and minced garlic give depth to the dish. - 4 cups chicken broth - 2 teaspoons dried thyme - 1 teaspoon dried rosemary - Salt and pepper to taste Seasoning adds life to your pot pie. Chicken broth brings moisture and flavor. Thyme and rosemary offer an aromatic touch. Adjust salt and pepper to fit your taste. - 1 cup heavy cream - 1/4 cup all-purpose flour - 2 pre-made pie crusts or puff pastry - Fresh parsley for garnish The creamy filling makes the dish rich and satisfying. Heavy cream creates a luscious texture. Flour thickens the filling, giving it a nice consistency. Use pie crust for a traditional finish or puff pastry for a fun twist. Fresh parsley adds a pop of color and freshness. For the full recipe, check out the detailed steps that guide you through this comforting dish. Combine chicken, mixed frozen vegetables, diced onion, and minced garlic in the slow cooker. This mix brings great flavor and color to your dish. Make sure the chicken is cut into bite-sized pieces for even cooking. Stir gently to ensure everything is well mixed. Pour the chicken broth over the mixture. Sprinkle in dried thyme, dried rosemary, salt, and black pepper. Stir thoroughly to blend the flavors. The broth adds moisture and richness, while the herbs enhance the taste. Set your slow cooker to low for 6-7 hours or high for 4 hours. This slow cooking lets the chicken become tender and juicy. Keep the lid on to trap steam, ensuring all ingredients cook evenly. About 30 minutes before you serve, mix heavy cream and flour in a small bowl. Stir until smooth and creamy. Then, add this mixture into the slow cooker. This step thickens the filling and adds a rich texture. Roll out one pie crust and place it over the filling. You can also cut the crust into strips for a fun lattice design. If you want to try something different, use puff pastry instead, pressing it down over the mixture. Cover the slow cooker again and let it cook for an additional 30 minutes. This allows the crust to bake and turn golden. Before serving, sprinkle fresh chopped parsley on top for a burst of color and flavor. For the full recipe, check out Comforting Slow Cooker Chicken Pot Pie. - Use fresh herbs for a more robust flavor. - Adjust seasoning according to taste. Fresh herbs like thyme and rosemary really shine in this dish. You can also try parsley for a fresh touch. Taste as you go. This helps to find the right balance for your palate. - Make sure to monitor cooking times based on your slow cooker model. Each slow cooker can vary in heat. Check your chicken after the recommended time. It should be tender and easily shredded with a fork. If it’s not there yet, give it a little more time. - Use a high-fat content crust for better flakiness. A buttery pie crust or puff pastry works best. This creates a golden, flaky crust that contrasts perfectly with the creamy filling. If you like a crunch, brush the crust with egg wash for a shiny finish. For the full recipe, check the complete guide. Enjoy your cooking adventure! {{image_4}} You can easily switch out chicken for turkey or beef. Both options work well in this dish. Turkey gives a lighter taste, while beef adds a rich flavor. Just make sure to cut the meat into small pieces. This way, it cooks evenly and blends well with the other ingredients. Feel free to get creative with your veggies. You can use seasonal favorites or whatever you have on hand. Sweet potatoes, bell peppers, or broccoli all make great additions. Each veggie brings its own flavor and texture to the pot pie. Experimenting with different combinations can make each meal unique and fun. If you need a gluten-free version, it’s simple to adjust. Look for gluten-free pie crusts at the store. You can also use a biscuit topping made from gluten-free flour. This allows everyone to enjoy a tasty meal without worry. Just follow the same steps as you would with regular crust. For the full recipe, check out the Comforting Slow Cooker Chicken Pot Pie 🥧. You’ll find all the details to create your own delicious dish. To store leftovers, let the chicken pot pie cool first. Cover it with plastic wrap or foil. You can also use an airtight container. Place it in the fridge for up to three days. This keeps the flavors fresh. Always check for any signs of spoilage before eating. To freeze your chicken pot pie, first let it cool to room temperature. Cut it into individual portions for easy serving. Wrap each piece tightly in plastic wrap. Then place the wrapped pieces in a freezer-safe bag. Label the bags with the date. It can last up to three months in the freezer. When you're ready to enjoy, just thaw it in the fridge overnight. For the best texture, reheat your chicken pot pie in the oven. Preheat the oven to 350°F (175°C). Place the pie on a baking sheet and cover it with foil. Heat for about 20-30 minutes. If you want a crispy crust, remove the foil for the last 10 minutes. You can also use a microwave for quick reheating, but it may make the crust soft. Yes, you can make this chicken pot pie ahead of time. This recipe is great for meal prep. To prepare it early, follow these steps: - Cook the filling as directed. - Let it cool completely. - Store it in an airtight container in the fridge for up to 2 days. - When ready to eat, just reheat in the slow cooker or on the stove. You can use either the low or high setting on your slow cooker. - Low setting cooks for about 6-7 hours. This method makes the chicken super tender. - High setting cooks for about 4 hours. If you are short on time, this is a good option. Both settings yield delicious results, but low makes the flavors blend better. Check the chicken for safety. Here are key signs: - The chicken should be white and no longer pink. - The juices should run clear when you cut into it. - The internal temperature should reach 165°F (75°C). Using these tips ensures you enjoy a safe and tasty meal. This blog post guided you through making a tasty slow cooker chicken pot pie. We covered the main ingredients, step-by-step instructions, and helpful tips to ensure success. You learned about storage options and fun variations to try. Embracing this recipe will make cooking easy and enjoyable. You'll have a delicious meal ready to share. Simplifying dinner while keeping it flavorful is a win for everyone. Enjoy your pot pie, and let your creativity shine in the kitchen!

Looking to create a warm, comforting meal with minimal effort? My Satisfying Slow Cooker Chicken Pot Pie Recipe Guide is just what you need! This dish combines tender chicken, mixed …

Read more

Categories Dinner
Older posts
Newer posts
← Previous Page1 Page2 Page3 Page4 … Page66 Next →

TOSSED TASTES

Where flavors get playful! A fresh mix of easy bites, bold spices, and everyday cravings tossed into every recipe. 🍋🍅

PAGES

Home About Contact Privacy Policy Terms & Conditions Cookie Policy GDPR Policy Copyright Policy Disclaimer

CATEGORIES

Appetizers Desserts Salads Breakfast Dinner

Contact

  • Pinterest
  • Mail
Copyright © 2025 Tossed Tastes. All rights reserved.