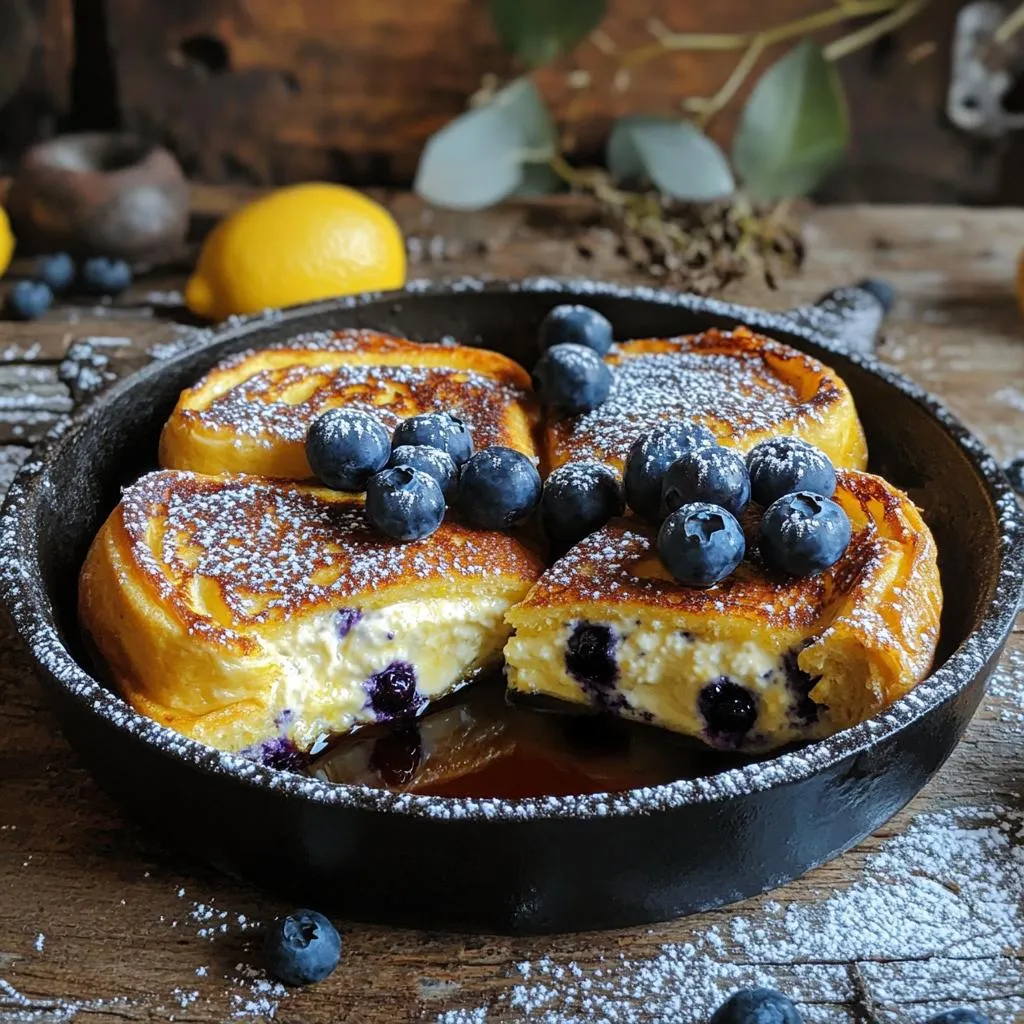
Skip to content
Tossed Tastes
  • Home
  • Appetizers
  • Desserts
  • Salads
  • Breakfast
  • Dinner
  • Privacy Policy
  • Contact
  • About

Chef Elliot

Beef and Rotini in Garlic Parmesan Sauce Delightful Meal

June 18, 2025 by Chef Elliot
- 1 pound ground beef - 8 ounces rotini pasta - 4 cloves garlic, minced - 2 cups heavy cream - 1 cup grated Parmesan cheese - 2 tablespoons olive oil - 1 teaspoon dried Italian herbs (basil, oregano, thyme blend) - Salt and freshly cracked pepper to taste - Fresh parsley, finely chopped (for garnish) When I cook Beef and Rotini in Garlic Parmesan Sauce, I choose fresh and simple ingredients. The ground beef adds rich flavor. The rotini pasta holds the creamy sauce well. Garlic gives a fragrant punch that makes it special. Heavy cream creates a smooth texture, while Parmesan cheese adds a salty bite. For seasoning, I use olive oil to sauté the beef. The dried Italian herbs bring warmth and depth. I always use salt and pepper to enhance the flavors. Finally, the fresh parsley not only adds color but also a fresh taste. Using these ingredients, I create a delightful meal that everyone loves. For the complete preparation, check the Full Recipe. - Bring a large pot of water to a boil. - Add a pinch of salt and the rotini pasta. - Cook the pasta until al dente, usually 8-10 minutes. - Drain the pasta well and set it aside. - Heat two tablespoons of olive oil in a skillet over medium heat. - Add one pound of ground beef and break it up with a spatula. - Season the beef with salt, pepper, and dried Italian herbs. - Brown the beef for about 5-7 minutes, until fully cooked. - Drain any excess fat if needed to keep it light. - Stir in four cloves of minced garlic with the browned beef. - Cook for 1-2 minutes until the garlic is fragrant and golden. - Pour in two cups of heavy cream and mix well. - Bring to a gentle simmer, then add one cup of grated Parmesan cheese. - Stir constantly until the cheese melts and the sauce is creamy. - Toss the drained rotini into the skillet with the sauce. - Mix well to ensure every piece of pasta is coated. - Plate the creamy beefy rotini in bowls. - Garnish with finely chopped parsley. - Offer extra grated Parmesan on the side for those who want more. For the complete cooking process, you can check the Full Recipe. Enjoy making this delightful dish! - Use freshly grated Parmesan for best flavor. It melts smoothly and adds richness. - Adjust cream for desired sauce thickness. Add more for a creamier sauce or less for a lighter one. - Modify cooking times for different pasta shapes. Larger shapes may need extra cooking time. - For browning beef evenly, use medium heat. Stir often to avoid burning and ensure even cooking. - Consider adding herbs like thyme, rosemary, or even red pepper flakes for heat. - Optional ingredients can heighten flavor. Try adding sun-dried tomatoes or mushrooms for extra depth. These tips will help you create the best Beef and Rotini in Garlic Parmesan Sauce. For the complete recipe, check out the Full Recipe. {{image_4}} If you want to switch things up, try using ground turkey or chicken. These meats are leaner but still bring great flavor. You can also make this dish vegetarian. Use mushrooms for a meaty texture or lentils for protein. Both options work well with the sauce. Adding vegetables makes the dish colorful and healthy. You can include spinach, bell peppers, or broccoli. To incorporate these, sauté them with the beef or add them to the sauce. This way, they cook nicely and blend with the flavors. If you want a change from the garlic Parmesan sauce, consider a tomato-based sauce. This gives a fresh, zesty flavor. You can also try pesto or a white sauce. Each option offers a new twist on the classic recipe. For the full recipe, check out the detailed instructions above. To keep your Beef and Rotini in Garlic Parmesan Sauce fresh, store leftovers properly. Let the dish cool to room temperature. Then, transfer it to airtight containers. Glass or BPA-free plastic containers work well. Seal them tightly to avoid air exposure. This keeps the flavors intact and prevents drying out. If you want to save some for later, freezing is a great option. Divide the meal into individual portions. Use freezer-safe containers or heavy-duty freezer bags. Remove as much air as possible to prevent freezer burn. When you're ready to eat, thaw it in the fridge overnight. Reheat it slowly on the stove over low heat. Stir often to keep the creamy sauce smooth. In the fridge, your Beef and Rotini will stay fresh for about three to four days. If you freeze it, it can last for up to three months. Always check for signs of spoilage before eating. Look for any off smells, unusual colors, or mold. If you see any of these, it's best to toss it out. Enjoy your meal safely! To make this dish, start by cooking the rotini. Boil water, add salt, and then the pasta. Cook until al dente, usually 8-10 minutes. Drain and set aside. In a skillet, heat olive oil. Brown the ground beef, adding salt, pepper, and herbs. Cook for 5-7 minutes. Stir in minced garlic and cook for another minute. Pour in heavy cream and simmer. Add grated Parmesan cheese and stir until it melts. Finally, toss the rotini in the creamy sauce. Serve with parsley on top. For the full recipe, check out the detailed instructions above. Yes, you can use various pasta shapes. Fusilli, penne, or farfalle work well too. The key is to choose a pasta that holds sauce well. Rotini's spirals catch the sauce, but any pasta will taste great. Just adjust cooking times based on the pasta type. Always check the package for cooking time, so your pasta turns out just right. You can make this dish lighter by using lean ground beef. Ground turkey is a great swap. Instead of heavy cream, use half-and-half or a plant-based cream. Cut down on cheese or use a low-fat version. Adding more veggies, like spinach or bell peppers, boosts nutrition. These changes keep the taste while making it healthier. This dish pairs well with a simple green salad. A side of garlic bread adds a nice touch too. You could serve steamed broccoli for extra veggies. A light vinaigrette on the salad complements the creamy sauce. Try serving it with a lemon wedge for a zesty kick. The total cooking time for Beef and Rotini in Garlic Parmesan Sauce is about 30 minutes. Prep time takes about 10 minutes. Cooking the rotini and browning the beef takes around 15 minutes. Finally, mixing everything together and finishing off takes about 5 minutes. It’s a quick meal for busy nights! This dish combines ground beef, rotini, garlic, and creamy Parmesan sauce. You learned how to cook rotini, brown beef, and make a rich sauce. We covered tips for storage and variations like meat alternatives and extra veggies. In the end, you can enjoy a delicious meal tailored to your taste. Try experimenting with flavors to make it your own. Happy cooking!

Are you ready to savor a rich and creamy Beef and Rotini in Garlic Parmesan Sauce? This dish combines tender ground beef, rotini pasta, and a luscious garlic sauce that …

Read more

Categories Dinner

Have Too Much Zucchini? Create Tasty Zucchini Muffins

June 18, 2025 by Chef Elliot
- 2 medium zucchinis, finely grated - 1 cup all-purpose flour - 1 cup whole wheat flour - 1 teaspoon baking powder - 1 teaspoon baking soda - 1 teaspoon ground cinnamon - ½ teaspoon ground nutmeg - ½ teaspoon sea salt - ½ cup granulated sugar - ½ cup packed brown sugar - 2 large eggs, at room temperature - ½ cup vegetable oil - 1 teaspoon pure vanilla extract - 1 cup chopped nuts (walnuts or pecans) - ½ cup semi-sweet chocolate chips Zucchini muffins need fresh ingredients to shine. First, the zucchinis give moisture and flavor. Grating them finely helps mix them well. Flour holds the muffins together. I like using both all-purpose and whole wheat flour for texture. Baking powder and soda help the muffins rise nicely. Flavor comes from cinnamon and nutmeg. These spices make the muffins warm and cozy. Don’t forget the salt. It balances the sweetness from granulated and brown sugar. Eggs bind the mix and add moisture. Vegetable oil keeps the muffins soft. Pure vanilla extract adds a lovely aroma. For extra crunch and taste, toss in some nuts. Walnuts or pecans work great. If you like a sweet twist, add chocolate chips. If you want a detailed guide, check out the Full Recipe. - Preheat oven to 350°F (175°C). - Prepare muffin tin with paper liners or cooking spray. - Combine grated zucchini with sugars; rest for 10 minutes. This step helps the zucchini release moisture. This moisture makes the muffins soft and tasty. - Whisk together flours, baking powder, baking soda, cinnamon, nutmeg, and salt. Mixing these dry ingredients well ensures even flavor and texture in your muffins. - Beat in eggs, oil, and vanilla to zucchini mixture. - Gradually incorporate dry ingredients. Mix until just combined. This keeps your muffins light and fluffy. - Carefully fold in chopped nuts and optional chocolate chips. This adds a nice crunch and sweetness to your muffins. Choose your favorite nuts or chocolate. - Spoon batter into the muffin tin and bake for 18 to 22 minutes. Check for doneness by inserting a toothpick. If it comes out clean, your muffins are ready! For the full recipe, you can refer to the details provided above. Enjoy your baking! To get moist muffins, let your grated zucchini rest for about 10 minutes. This helps the zucchini release its natural moisture. When mixing your batter, avoid overmixing. Stir just enough to combine. Overmixing can lead to tough muffins. For the best muffin texture, fill your muffin cups three-quarters full. This allows them to rise nicely while baking. If you fill them too high, they may spill over. If you fill them too low, they won’t rise as well. Dust your muffins with powdered sugar for an appealing touch. This simple step makes them look fancy. You can also serve them with a cream cheese spread. It adds a nice flavor and makes them even more enjoyable. {{image_4}} You can make simple swaps to add health to your muffins. First, try using almond flour instead of whole wheat flour. Almond flour adds a nice nutty taste and keeps the muffins moist. Next, use unsweetened applesauce instead of oil. This change will lighten the muffins and cut down on fat. To change up the flavors, try adding spices. A pinch of ginger or cardamom can add warmth and depth. You can also include dried fruits like raisins or cranberries. These fruits bring sweetness and chewiness to every bite. If you need gluten-free muffins, just switch to gluten-free flour. This swap works well without losing flavor. For a vegan option, use flax eggs. Mix one tablespoon of flaxseed meal with three tablespoons of water for each egg. This simple swap helps you enjoy delicious muffins while meeting your dietary needs. For the full recipe, check out the Zucchini Bliss Muffins. Enjoy experimenting with these tasty variations! Keep muffins in an airtight container at room temperature for up to 2 days. This way, they remain soft and tasty. If you plan to eat them within this time, leave them out on the counter. Just make sure the container is sealed well. You can freeze muffins for up to 3 months. To freeze, place them in a zip-top bag or a freezer-safe container. Be sure to remove as much air as you can. When you are ready to enjoy them, thaw at room temperature before serving. This keeps them fresh and delicious. To warm muffins, you can use the microwave or oven. For the microwave, heat them for about 15 seconds. If you prefer the oven, preheat it to 350°F (175°C) and warm them for about 5 to 10 minutes. This will restore their softness and taste, making them feel just baked again. For the best flavor, enjoy them warm! To keep your muffins light and fluffy, avoid overmixing your batter. When you mix the wet and dry ingredients, stir just enough to combine. This helps the muffins rise well and prevents them from becoming heavy. Yes, you can use frozen zucchini. Just remember to thaw it first and drain any excess moisture. This way, your muffins will not become soggy. The best way to check is to insert a toothpick into the center of a muffin. If it comes out clean, your muffins are ready. If there are wet crumbs, give them a few more minutes in the oven. Absolutely! You can double the recipe if you have a lot of zucchini. Just keep an eye on the baking time. Larger batches might need a bit more time. This recipe yields about 12 muffins. Perfect for sharing or enjoying all week long. For the full recipe, check out the Zucchini Bliss Muffins section! Zucchini bread muffins are tasty and healthy. We covered the key ingredients, mixing steps, and storage tips. You learned how to make them moist and flavorful. Remember to avoid overmixing and to adjust for dietary needs as needed. Enjoy experimenting with add-ins like nuts or fruit for fun flavors. Keeping muffins fresh is easy, whether at room temperature or frozen. With simple steps, you can create a yummy treat. Dive into baking and share your delicious results.

Got a mountain of zucchini? Transform that bounty into delicious zucchini muffins! These soft and sweet treats are simple to make and perfect for breakfast or a snack. In just …

Read more

Categories Desserts

Japanese Katsu Bowls with Tonkatsu Sauce Delight

June 18, 2025 by Chef Elliot
- 2 boneless chicken thighs or pork loin - 1 cup panko breadcrumbs - 1/2 cup all-purpose flour - Salt and pepper to taste - Vegetable oil for frying - 2 cups cooked jasmine rice - 1 cup shredded cabbage - 2 green onions, sliced - Pickled ginger for garnish - 1/4 cup tonkatsu sauce When making Japanese katsu bowls, the key is in the ingredients. Start with fresh boneless chicken thighs or pork loin. Both options taste great and cook well. I prefer using chicken for its juicy texture. Panko breadcrumbs give katsu its signature crispiness. They are light and airy, making the dish feel special. The all-purpose flour helps the breadcrumbs stick to the meat. Seasonings are simple but vital. Use salt and pepper to enhance the flavor of the meat. Vegetable oil is perfect for frying. It has a high smoke point, ensuring your katsu cooks evenly and crisps up nicely. Next, we need components for serving. Cook jasmine rice to serve as a warm base. The rice is soft and fluffy, making it a great match for the crunchy katsu. Shredded cabbage adds a fresh crunch that balances the meal. Slice green onions for an extra layer of flavor. Their sharpness pairs well with the rich tonkatsu sauce. Finally, don’t forget the pickled ginger! It offers a tangy contrast that brightens each bite. For the full recipe, check out the details above. Each ingredient plays a role in making this katsu bowl a delightful experience. To start, season the chicken thighs with salt and pepper. Make sure to coat both sides well. If you choose pork loin, use the same seasoning. Next, set up your dredging station. You need three bowls: one for all-purpose flour, one for beaten eggs, and one for panko breadcrumbs. This setup makes coating easy and quick. Now, we will coat the chicken. Take a piece of seasoned chicken and dip it in the flour. Shake off the extra flour. Next, dip it into the beaten eggs. Let any excess egg drip off. Finally, roll the chicken in the panko. Make sure it is fully covered. Repeat this for the second piece. For frying, heat enough vegetable oil in a skillet to cover the bottom by about 1/4 inch. Turn the heat to medium-high. Wait until the oil shimmers and reaches about 350°F (175°C). This temperature is perfect for frying. Carefully place the coated chicken into the hot oil. Fry each piece for about 5-7 minutes on one side. Then, flip it and cook for another 5-7 minutes. The chicken should be golden brown and crispy. Use a meat thermometer to check the inside temperature. It should reach 165°F (74°C) for safety. Once cooked, move the chicken to a plate lined with paper towels. This step helps absorb excess oil. After a few minutes, slice the chicken into strips. A sharp knife helps achieve clean cuts. Assemble your bowls by adding about 1 cup of warm jasmine rice to each serving bowl. Place the sliced chicken on top, then add a handful of shredded cabbage. Drizzle tonkatsu sauce generously over everything. Finally, add sliced green onions and a few pieces of pickled ginger for a delightful garnish. Enjoy your tasty creation! For the full recipe, see above. To get crispy katsu, start by using the right oil and temperature. I recommend vegetable oil, as it has a high smoke point. Heat the oil to about 350°F (175°C). This will give you that perfect golden crunch. Use a meat thermometer to ensure the oil is hot enough. If the oil is too cool, the katsu will soak up oil and become soggy. For a stunning bowl, layer your ingredients. Start with a base of warm jasmine rice. Then, add the sliced katsu on top. Next, pile on the shredded cabbage for color and crunch. Drizzle on the tonkatsu sauce for rich flavor. You can also sprinkle sesame seeds for extra texture. Garnish with green onions and pickled ginger. These touches make your dish look beautiful and appealing. You can use store-bought tonkatsu sauce for convenience. If you prefer, try making your own at home. Homemade sauce can have a fresher taste. Adjust the flavor based on your protein choice. For chicken, keep it simple with salt and pepper. If you use pork, you might want to add garlic powder or a touch of soy sauce for depth. This way, each bite is full of flavor! For the full recipe, check out the complete guide. {{image_4}} You can easily make a vegetarian katsu bowl. Substitute chicken with eggplant or tofu. Eggplant gives a nice meaty texture. Tofu absorbs flavors well, making it a great choice. For the tonkatsu sauce, use a plant-based option. You can swap soy sauce for tamari. This will keep the sauce tasty and vegan-friendly. If you're gluten-sensitive, you have options too. Use gluten-free flour and breadcrumbs. Brown rice flour works great for coating. For cooking, try baking or air frying. These methods reduce oil use while keeping the katsu crispy. To change up the flavor, add spices to the panko. Try garlic powder or paprika for a twist. Seasonal veggies also work well. Carrots or bell peppers can add color and crunch. Unique garnishes like sesame seeds or chopped herbs can enhance the dish. To keep your katsu bowls fresh, place them in an airtight container. Refrigerate them right after they cool down to room temperature. This helps to keep the flavors intact. You can store katsu for up to three days. Make sure to check for any signs of spoilage before eating. When reheating katsu, I want to maintain its crispy texture. The oven works best for this. Preheat your oven to 375°F (190°C). Place the katsu on a baking sheet and heat for about 10-15 minutes. If you use a microwave, the katsu may get soggy. If you must, use a microwave-safe plate and heat for 1-2 minutes. You can freeze katsu bowls for longer storage. First, freeze the chicken and rice separately. Place them in freezer bags and remove as much air as possible. They can last up to three months in the freezer. When ready to eat, thaw them in the fridge overnight. Reheat the chicken in the oven and warm the rice in the microwave. Enjoy your delicious meal like it was fresh! To make Japanese Katsu Bowls, you need about 20 minutes for prep and 20 minutes for cooking. In total, it takes around 40 minutes from start to finish. This quick time makes it perfect for a weeknight meal. Yes, you can prep Katsu Bowls ahead of time! You can cook the chicken and rice and store them separately in the fridge for up to three days. Just reheat them when you’re ready to eat. Keep the tonkatsu sauce and veggies fresh until serving to maintain their crunch. Many people make a few common mistakes when making Katsu. Here are tips to avoid them: - Skipping the seasoning: Always season the meat well. This step adds flavor. - Not using enough oil: Make sure there’s enough oil in the pan. This helps fry the chicken evenly. - Flipping too soon: Let the chicken cook fully before flipping it. This ensures a crispy crust. - Overcrowding the pan: Cook in batches if needed. This helps keep the temperature steady and the katsu crispy. These simple tips can help you make a perfect Katsu Bowl every time! For more details on making Katsu Bowls, check the Full Recipe. You can create tasty Japanese Katsu Bowls with ease. Starting with chicken or pork, you coat it in panko and fry it to crispy perfection. Pair it with rice, cabbage, and tonkatsu sauce for a delicious meal. With tips on frying, storage, and variations like vegetarian options, you can impress anyone. Don't shy away from trying new flavors or adjusting the recipe to suit your taste. Enjoy your cooking, and remember, practice makes perfect!

Ready to elevate your weeknight dinners? Japanese Katsu Bowls with Tonkatsu Sauce are a game-changer. Crispy, tender meat atop soft jasmine rice, fresh cabbage, and the perfect drizzle of tonkatsu …

Read more

Categories Dinner

Savory Birria Ramen Flavorful Comfort in a Bowl

June 18, 2025 by Chef Elliot
- 2 cups beef shank or chuck roast, cut into 1-inch cubes - 2 dried guajillo chilies, seeds removed - 2 dried ancho chilies, seeds removed - 4 cups beef broth (homemade or store-bought) - 2 packages ramen noodles (discard the seasoning packets) Savory Birria Ramen combines rich flavors and comforting textures. The beef shank or chuck roast provides a tender bite. The dried guajillo and ancho chilies add deep, smoky notes. Together with beef broth, they create a robust base. Ramen noodles transform this dish into a cozy bowl of goodness. - Fresh cilantro, chopped, for garnish - Sliced radishes, for garnish - 2 green onions, thinly sliced, for garnish - Lime wedges, for serving Garnishes elevate your Birria Ramen. Fresh cilantro adds brightness, while sliced radishes provide crunch. Green onions bring a mild onion flavor that balances the dish. A squeeze of lime adds a citrus kick, enhancing every bite. - Large heavy-bottomed pot - Skillet - Blender Using the right tools is key. A heavy-bottomed pot helps cook the beef evenly. A skillet is perfect for toasting chilies. A blender makes it easy to mix the sauce until smooth. These tools help you create the best Savory Birria Ramen, full of flavor and comfort. For the complete recipe, check the Full Recipe section. Start by toasting the chilies. Heat a dry skillet over medium heat. Add the guajillo and ancho chilies. Toast them for about 2-3 minutes. Keep turning them to avoid burning. When they smell great and darken a little, take them off the heat. Next, soak the chilies in hot water for 15 minutes. This step makes them soft and ready for blending. In a large pot, heat one tablespoon of olive oil over medium-high heat. Add the beef cubes in a single layer. Brown them for about 5 minutes. This gives the beef a nice flavor. Once browned, add the quartered onion and crushed garlic. Sauté for another 2-3 minutes. The onion should become see-through, and the garlic will smell good. After soaking, drain the chilies. Put them in a blender with cumin seeds, dried oregano, beef broth, and apple cider vinegar. Blend until you have a smooth sauce. If needed, add a bit more beef broth to get the right texture. This sauce is key to the dish's flavor. Pour your blended sauce over the browned beef in the pot. Make sure all the beef gets coated. Bring this mix to a gentle simmer. Lower the heat to keep it simmering steadily. Cover the pot and cook for about 2 hours. The beef should be very tender and easy to shred. While the beef cooks, prepare your ramen noodles. Follow the package instructions closely. Once the noodles are done, drain them and set them aside. This step is quick, so keep an eye on the time. To serve, place the cooked ramen noodles into four bowls. Ladle the hot Birria broth and shredded beef over the noodles. Make sure to include plenty of the broth for flavor. Garnish each bowl with chopped cilantro, sliced radishes, and green onions. Finally, add a lime wedge on the side. Squeezing the lime over your bowl adds a nice zing! For the full recipe, check out the detailed instructions above. Simmering time is key for a rich broth. I suggest cooking it low and slow. This allows flavors to meld together beautifully. Aim for at least two hours of gentle simmering. This gives the spices and meat time to shine. Adjusting spice levels can also make a big difference. If you like it hot, add more dried chilies. For a milder taste, reduce the amount or use less spicy varieties. For the best Birria, I recommend using beef shank or chuck roast. These cuts are flavorful and tender when cooked slowly. They break down nicely, adding richness to your broth. If you prefer, try alternative proteins. Pork shoulder or lamb can work well too. For a lighter option, consider chicken thighs. They add a different flavor profile but remain juicy and delicious. Choosing the right noodles is vital. Look for fresh or dried ramen noodles. They hold up well in broth. When cooking, follow the package instructions closely. Avoid overcooking them, as mushy noodles ruin the dish. Drain them quickly and rinse under cold water. This stops the cooking process and keeps them firm. Add them to your bowls just before serving. This keeps your dish fresh and tasty. For the full recipe, check the detailed steps to ensure success. {{image_4}} You can easily make birria ramen plant-based. Instead of beef, use jackfruit or mushrooms. Both options soak up flavors well. For the broth, swap beef broth for vegetable broth. You can add miso for depth. Try using soy sauce or tamari for an umami punch. These swaps keep the dish hearty and tasty. Want more heat? Add extra chilies or hot sauce. You could use serrano or habanero for a fiery kick. Blend these with the sauce for a uniform spice. Adjusting spice levels is key. Taste the broth and add more if needed. Balance the heat with lime juice for freshness. Birria ramen can blend with other cuisines. Think about adding kimchi for a tangy twist. You could also top your ramen with fried eggs or avocado. These toppings give texture and creaminess. Try unconventional garnishes like crispy shallots or nori strips. That adds flair to your bowl. For the full experience, check out the Full Recipe. To keep your Savory Birria Ramen fresh, place leftovers in airtight containers. Store them in the fridge for up to three days. When storing, keep the broth and noodles separate. This helps the noodles stay firm. If you want to freeze, do so with the broth only. Frozen broth lasts up to three months. You can add new noodles when you reheat the broth. When reheating, use a pot on medium heat for the broth. Stir gently to avoid burning. For noodles, boiling water works best. Cook them for just a minute before serving. This keeps the noodles from getting too soft. Always check that everything is hot before you enjoy your meal again. Birria Ramen pairs well with simple sides. Try tortilla chips or a fresh salad. You can also enjoy it with a cold drink, like agua fresca or iced tea. These options balance the rich flavors of the ramen. For a twist, add avocado or jalapeños for extra taste. Enjoy your delicious bowl of comfort! Savory Birria Ramen is a tasty mix of two dishes. It combines rich birria meat with ramen noodles. The birria broth is full of spices, making it warm and soothing. You get the best of both worlds in one bowl. The beef is tender and flavorful, while the noodles soak up the broth nicely. It’s comfort food that excites your taste buds. To make Birria Ramen gluten-free, use gluten-free ramen noodles. These noodles are easy to find at most stores now. Also, check the beef broth label. Some broths contain gluten, so look for gluten-free options. You can also make beef broth at home using only safe ingredients. This way, you can enjoy the dish without worrying about gluten. Yes, you can use a slow cooker for Birria Ramen. First, brown the beef in a pan to add flavor. Then, transfer the beef to the slow cooker. Add the soaked chilies, spices, and broth. Cook on low for about 6 to 8 hours until the beef is tender. This method makes the meat juicy and full of flavor, perfect for your ramen. Cooked Birria can last in the fridge for about 3 to 4 days. Store it in an airtight container to keep it fresh. If you want it to last longer, consider freezing it. Frozen Birria can last up to 3 months. Just remember to label the container with the date for easy tracking. Birria is often served with warm corn tortillas. You can also pair it with rice and beans for a full meal. Some people enjoy it with pickled onions or fresh salsa. These sides add extra flavor and texture. Enjoying Birria with these dishes makes it a true feast. For the full recipe, check out the section above. Savory Birria Ramen combines flavors and textures in a great way. We've covered key ingredients, from beef roast to delicious garnishes. Cooking tips help you perfect your broth and noodles. You can even explore vegetarian options and spices. Remember to store and reheat wisely. This dish is a tasty treat that brings together various cuisines. Dive in, enjoy it, and make it your own!

Are you ready to dive into a world of flavor with Savory Birria Ramen? This dish combines tender beef, rich spices, and comforting ramen noodles, creating the perfect bowl for …

Read more

Categories Dinner

Monterey Chicken Spaghetti Delightful Comfort Meal

June 17, 2025 by Chef Elliot
- 8 oz spaghetti - 2 chicken breasts, grilled and elegantly sliced - 1 cup cherry tomatoes, halved - 1 cup bell peppers (red and yellow), thinly sliced - 1 cup sweet and tangy BBQ sauce - 1 cup shredded Monterey Jack cheese - 1/2 cup green onions, finely chopped - Fresh cilantro for garnish (optional) - Salt and pepper to taste - 2 tablespoons extra virgin olive oil When making Monterey Chicken Spaghetti, the ingredients play a vital role. Each one contributes to the dish's flavor and texture. Start with the spaghetti. Use high-quality pasta for the best results. The chicken adds protein and heartiness. Grilling the chicken brings out its natural flavors. Slice it thin for a beautiful presentation. The cherry tomatoes add freshness and a burst of color. Their juiciness balances the dish. Bell peppers bring sweetness and crunch. Choose bright colors for visual appeal. BBQ sauce ties everything together. It adds a sweet and tangy flavor. Use your favorite brand or homemade sauce for a personal touch. Monterey Jack cheese melts beautifully. It creates a creamy texture and enhances the taste. For optional ingredients, consider adding green onions. They provide a mild onion flavor that brightens the dish. Cilantro can add a fresh touch if you enjoy it. Don’t forget salt and pepper. These simple seasonings elevate the dish. Extra virgin olive oil adds richness and helps with cooking. Gather these ingredients for a delightful meal. Check the full recipe for more details on preparation! - Bring salted water to a rapid boil. - Cook spaghetti until al dente and drain. Cooking spaghetti is simple and key to this dish. Start by boiling water with salt. The salt adds flavor to the pasta. Once it boils, add the spaghetti. Stir it a bit. Cook for around 8-10 minutes, or until it's firm but not hard. Al dente means "to the tooth" in Italian. It gives a nice bite to the pasta. Drain it well, but keep it warm. - Season and grill chicken breasts. - Allow chicken to rest before slicing. Next, we focus on the chicken. If it’s not pre-grilled, season chicken breasts with salt and pepper. This is a simple step that enhances the flavor. Grill the chicken on medium-high heat. Cook it for 7-8 minutes on each side. You want it to be juicy and cooked through. Resting the chicken is important. It helps keep the juices inside. After resting, slice it thinly for the dish. - Heat olive oil in a skillet. - Sauté bell peppers until softened. Now we move to the veggies. Heat olive oil in a large skillet. Use medium heat to warm it up. Add the thinly sliced bell peppers. Sauté them for 3-4 minutes. They should become soft and bright. This adds a nice crunch and sweetness to the meal. - Add cherry tomatoes and drained spaghetti. - Pour BBQ sauce and toss everything together. It’s time to mix it all. Add halved cherry tomatoes to the skillet. Then, toss in the drained spaghetti. Pour the sweet BBQ sauce over everything. This is where the flavors come together. Toss gently until all the ingredients are coated. The colors will be vibrant and inviting. - Fold in sliced chicken and Monterey Jack cheese. - Serve in a dish and garnish. Finally, we add the chicken. Fold in the sliced chicken gently so it combines well. Sprinkle half of the Monterey Jack cheese into the mix. Stir until the cheese melts and everything is warm. Transfer the mixture to a serving dish. Top with the rest of the cheese. Garnish with chopped green onions for a fresh touch. Enjoy this delightful comfort meal! For more details, check the Full Recipe. - Use fresh ingredients for better flavor. Fresh herbs and ripe tomatoes shine in this dish. - Adjust BBQ sauce according to taste preferences. Experiment with sweet or spicy sauces to find your favorite. - Ensure chicken is grilled to perfection for juicy texture. Cook it until the juices run clear. This keeps it moist and tasty. - Toss pasta in the skillet to combine flavors evenly. This step helps the noodles soak up the BBQ sauce. - Serve in a rustic bowl for an appealing look. A simple bowl adds charm to your meal. - Drizzle extra BBQ sauce on top before serving. This adds color and a burst of flavor. For more delicious ideas, check out the [Full Recipe]. {{image_4}} You can easily make this dish vegetarian. Simply substitute the grilled chicken with sautéed mushrooms or tofu. Both options add great texture and flavor. Mushrooms bring a rich umami taste. Tofu absorbs the sauce well and adds protein. This keeps the spirit of the dish while making it meat-free. Want to turn up the heat? Add jalapeños or your favorite hot sauce for a kick. You can slice fresh jalapeños and toss them in while cooking. If you prefer sauce, mix in a few drops of hot sauce when you combine the ingredients. This gives the dish a fiery twist that many love! For a family-friendly twist, incorporate broccoli or peas for additional nutrition. You can steam broccoli florets and add them to the skillet. Peas can be added straight from the freezer, which is quick and easy. Both options boost the veggie count and make the meal healthier, without losing flavor. You can find the full recipe for Monterey Chicken Spaghetti Delight in the earlier sections. Store your Monterey Chicken Spaghetti in an airtight container. You can refrigerate it for up to 3 days. This keeps the flavors fresh and tasty. When it's time to enjoy leftovers, reheat in a skillet or microwave. If it looks dry, add a splash of water. This helps keep the pasta moist and delicious. For longer storage, freeze portions of the spaghetti. Use freezer-safe containers or bags. You can keep it for up to 2 months. This makes for quick and easy meals later on. - Prep Time: 15 minutes | Cook Time: 25 minutes - Yes, cheddar or pepper jack can be excellent substitutes. They melt well and add flavor. - Pair with a green salad or garlic bread for a complete meal. This adds freshness and crunch. - Yes, it's perfect for meal prep. You can store it for up to 3 days. This makes it easy for busy weeks. - You can prepare the components ahead. Combine them just before serving for the best taste. - You can use a homemade sauce or any tangy dressing as a substitute. This keeps the dish fun and flavorful. For the full recipe, check out the detailed steps earlier. Enjoy your cooking! Monterey Chicken Spaghetti combines chicken, veggies, and cheese in a fun way. You can make it with fresh ingredients or tweak it for a spicy kick. Remember to store leftovers properly for easy meals later. This dish is great for family dinners or meal prep. Use these tips to create tasty variations. Make it your own with flavors that fit your taste. Enjoy this hearty meal that everyone will love!

Craving a comforting meal that’s both easy to make and packed with flavor? Look no further! This Monterey Chicken Spaghetti combines tender chicken, fresh veggies, and tangy BBQ sauce with …

Read more

Categories Dinner

Creamy Rotel Pasta with Ground Beef Flavorful Delight

June 17, 2025 by Chef Elliot
- 12 oz penne pasta - 1 lb ground beef - 1 can (10 oz) Rotel diced tomatoes with green chilies - 1 cup cream cheese, softened - 1 ½ cups shredded cheddar cheese - 1 cup chicken broth The heart of this dish is the penne pasta and ground beef. The Rotel adds a nice kick, while the cream cheese and cheddar create a rich, creamy sauce. Chicken broth gives moisture and flavor. - 1 teaspoon garlic powder - 1 teaspoon onion powder - 1 teaspoon ground cumin - ½ teaspoon smoked paprika - Salt and freshly ground black pepper to taste These seasonings boost the flavor. Garlic and onion powder bring depth. Cumin adds warmth, and paprika gives a hint of smokiness. Adjust salt and pepper to your taste. - 2 tablespoons olive oil - Fresh cilantro, chopped (for garnish) Olive oil helps brown the beef nicely. Fresh cilantro adds a pop of color and freshness at the end. For the full recipe, make sure to check the complete steps to create this mouthwatering dish. To cook penne pasta to al dente, start with a large pot. Fill it with water and add a good amount of salt. Bring the water to a rolling boil. Add the penne pasta and stir it gently. Cook according to the package instructions, usually around 10 to 12 minutes. You want it firm to the bite, not mushy. Once the pasta is done, drain it in a colander. Do not rinse the pasta. Rinsing can wash away the starch that helps the sauce stick. Set the pasta aside while you prepare the beef and sauce. To brown the ground beef, heat a large skillet over medium heat. Add 2 tablespoons of olive oil and let it warm up. Place the ground beef in the skillet, breaking it apart with a spatula. Cook it for about 5-7 minutes. Stir it often to get even browning. If there is too much fat, drain it off. This keeps the dish from being greasy. Now it's time to season the beef. Sprinkle in garlic powder, onion powder, ground cumin, smoked paprika, salt, and pepper. Mix well to coat the beef with all the spices. This step brings out the flavor and makes your dish taste great. Pour in the can of Rotel, juices and all, along with 1 cup of chicken broth. Stir the mixture and raise the heat to let it simmer gently. Cook for about 5 minutes. This helps the flavors meld together nicely. Next, lower the heat and add 1 cup of softened cream cheese. Stir until the cream cheese melts completely. This gives your dish a creamy, rich texture. Now, add the drained penne pasta to the skillet. Gently toss everything together. Make sure the pasta is coated with the sauce. Finally, sprinkle 1 ½ cups of shredded cheddar cheese on top. Stir until the cheese melts and combines with the pasta. This creates a deliciously creamy dish. Taste your creamy Rotel pasta and adjust the seasoning if needed. You may want to add more salt or pepper. When you're ready to serve, garnish with freshly chopped cilantro for a burst of color. This step makes your dish even more appealing. Enjoy your flavorful delight! For the complete recipe, refer to the [Full Recipe]. To avoid clumping with cream cheese, always soften it first. Place it out for an hour or microwave it for 15 seconds. This helps it blend smoothly into the sauce. Stir it in slowly over low heat. Mixing well ensures a creamy finish. For melting cheese evenly, sprinkle it in gradually. This allows the heat to distribute evenly. Stir constantly to help it melt fully. If you see lumps, lower the heat and mix more. This keeps the texture smooth and creamy. For added depth, consider spices like cayenne pepper or Italian herbs. These bring warmth and complexity to your dish. You could also mix in diced bell peppers for crunch and sweetness. Before serving, taste your pasta. Adjust the seasoning with salt or pepper as needed. A squeeze of lime can also brighten the flavors. Don’t skip this step; it makes a big difference. For serving styles, use individual bowls. This makes each dish feel special. Top each bowl with extra cheddar and a sprig of cilantro for color. Creative serving plate ideas can elevate your meal. A colorful platter or rustic wooden board can catch the eye. A drizzle of lime juice around the pasta adds a fresh touch. It turns a simple dish into a feast for the eyes! {{image_4}} You can easily make this dish vegetarian. Simply replace the ground beef with plant-based alternatives. Options like lentils or crumbled tofu work well. You can also add more vegetables to enhance the dish. Try bell peppers, zucchini, or spinach. They add color and crunch. Sauté them with the spices for added flavor. If you like heat, spice it up! Adding jalapeños gives a nice kick. You can also sprinkle in some red pepper flakes or cayenne pepper. Adjust the amount based on your heat preference. For a milder dish, use less Rotel or choose a milder version. Always taste as you go to find the right balance. Cheese is key to this creamy dish. While cheddar is great, you can explore different cheese types. Try Monterey Jack or pepper jack for a twist. For more creaminess, add cream cheese or mascarpone. Both will enhance the smooth texture. Mix and match cheeses to create your perfect blend. For the full recipe, check out the detailed instructions to get started! To keep your creamy pasta fresh, store it in an airtight container. Wait for the pasta to cool down before sealing it. This helps prevent moisture buildup, which can make your dish soggy. When reheating, use a skillet over low heat. Add a splash of chicken broth or milk to keep it creamy. Stir gently to avoid sticking and keep the texture smooth. You can freeze creamy Rotel pasta if you won’t eat it within a few days. Portion it into freezer-safe containers. Label each container with the date. For thawing, place it in the fridge overnight. When ready to eat, reheat it on the stove. Add a bit of broth to enhance the flavor and creaminess. Creamy Rotel pasta stays good in the fridge for up to four days. Check for signs of spoilage, like an off smell or mold. If it smells sour or looks strange, it’s best to toss it. This way, you’ll enjoy the delicious flavors without any risk. It takes about 30 minutes to make this dish. You need 10 minutes for prep and 20 minutes for cooking. This quick time makes it a perfect weeknight meal. Yes, you can use other pasta shapes. Feel free to swap penne for shells, rotini, or even spaghetti. Each type will hold the creamy sauce well, adding a fun twist to the dish. I recommend serving it with a simple salad or garlic bread. Steamed veggies also pair nicely. These sides balance the rich flavors of the pasta and add freshness to your meal. Absolutely! To make it more appealing to kids, you can cut the spice. Use mild Rotel or add a touch of sugar. Kids love cheesy dishes, so don’t skimp on the cheese. Serve it with a side of fruit for a complete meal. Creamy Rotel Pasta combines rich flavors and easy steps. We explored the key ingredients, from penne to ground beef, and the spices that make it pop. You learned how to cook pasta, brown beef, and mix everything for a creamy finish. I shared helpful tips to enhance flavor and presentation, plus variations to suit different tastes. Remember, you can store leftovers properly to enjoy later. This dish is not just a meal; it’s fun and flexible for everyone. Enjoy creating your own version of this creamy delight!

If you’re craving a quick, hearty meal that bursts with flavor, you’re in the right place! My Creamy Rotel Pasta with Ground Beef is the answer. This easy dish combines …

Read more

Categories Dinner

Chocolate Zucchini Bread Deliciously Moist and Easy

June 17, 2025 by Chef Elliot
- Grated zucchini - All-purpose flour - Cocoa powder - Baking essentials The main star of this recipe is the grated zucchini. It adds moisture and a subtle flavor that blends beautifully with chocolate. You will need about one medium zucchini, which gives you roughly one cup when grated. Next, grab your all-purpose flour, which forms the base of the bread. You will also need unsweetened cocoa powder for that rich chocolate taste. Don't forget the baking essentials, which include baking soda, baking powder, and a pinch of salt. These ingredients ensure your bread rises perfectly and has that light texture. - Chocolate chips - Nuts (walnuts or pecans) For extra indulgence, consider adding chocolate chips. They melt into the bread while baking, creating pockets of gooey chocolate. You can use semi-sweet or dark chocolate chips, depending on your taste. If you want a bit of crunch, chop up some walnuts or pecans and mix them in. These nuts add a nice texture and nutty flavor to the bread. - Coconut oil alternative - Sugar alternatives for healthier options If you're looking for a richer flavor, you can swap vegetable oil for melted coconut oil. It gives the bread a hint of coconut flavor that pairs well with chocolate. For those wanting to cut back on sugar, try using a sugar alternative like honey or maple syrup. You might need to adjust the liquid in the recipe, so keep an eye on the batter’s consistency. These small changes can make this delightful bread fit your dietary needs while keeping it delicious. For the complete recipe, check [Full Recipe]. 1. First, preheat your oven to 350°F (175°C). This helps the bread bake evenly. 2. Next, prepare a 9x5-inch loaf pan. Grease it well, then dust it with flour. You can also line it with parchment paper for easy removal later. 1. In a medium bowl, combine the grated zucchini with both sugars. Let it sit for about 10 minutes. This allows the zucchini to release moisture, making the bread moist. 2. In a separate bowl, whisk together all-purpose flour, cocoa powder, baking soda, baking powder, fine salt, and ground cinnamon. Mix them well to ensure even flavor in your bread. 3. In a large bowl, whisk together vegetable oil, eggs, and pure vanilla extract. Keep mixing until the mixture is smooth. 4. Gradually add the zucchini-sugar blend to the wet mixture. Stir until it combines well. 5. Slowly fold the dry mix into the wet mixture. Stir gently until just combined. Be careful not to overmix, as this can change the bread's texture. 1. Gently fold in the chocolate chips and nuts if you choose to add them. This adds extra flavor and texture. 2. Pour the batter into the prepared loaf pan. Use a spatula to smooth the top evenly. 3. Bake in your preheated oven for 50-60 minutes. To check if it's done, stick a toothpick into the center. If it comes out clean or has a few moist crumbs, your bread is ready. Now you have the steps to make delicious Chocolate Zucchini Bread! Enjoy baking and savor every bite! To keep your leftover chocolate zucchini bread fresh, wrap it in plastic wrap or foil. This helps lock in moisture. Store it at room temperature for up to three days. For longer storage, freeze the bread. Slice it first for easy thawing. Place the slices in a freezer-safe bag. It can last in the freezer for three months. When you want a slice, let it thaw on the counter. Avoiding common baking mistakes is key. Use fresh baking soda and powder for best results. Make sure your oven is at the right temperature before baking. This ensures even cooking. To ensure the right texture, do not overmix your batter. Mix just until combined to keep it moist and fluffy. For a lovely presentation, slice the cooled bread and place it on a nice plate. You can dust it lightly with powdered sugar. Add a dollop of whipped cream or a scoop of ice cream for a treat. These toppings enhance the rich chocolate flavor. Enjoy your chocolate zucchini bread delight with friends or family! {{image_4}} You can add spices to make your Chocolate Zucchini Bread even better. Cinnamon gives warmth, while nutmeg adds a sweet touch. Try ginger for a spicy kick. You can also experiment with different types of chocolate. Dark chocolate brings rich depth, while semi-sweet chocolate offers a nice balance of sweetness. Mixing chocolate types can create a unique flavor profile. If you're looking for gluten-free options, swap regular flour for gluten-free flour blends. These blends work well and keep the bread soft. For those who want to reduce sugar, try using applesauce or mashed bananas. This keeps the bread moist while lowering the sugar content. You can also use a sugar substitute like stevia to make your recipe low-sugar. Get creative by adding other fruits or flavors. Consider adding mashed bananas or chopped apples for extra moisture and taste. You can even mix in some shredded coconut for a tropical twist. Adding spices like nutmeg or ginger can also enhance the flavor. Don’t be afraid to explore new combinations. Each twist makes your Chocolate Zucchini Bread unique! For the complete recipe, check out the Full Recipe here. Zucchini offers many health benefits. It is low in calories and high in vitamins. This vegetable is rich in Vitamin C, which helps your immune system. It also has fiber, which supports digestion and keeps you full. When you compare the ingredients, you see health-focused choices. Instead of using a lot of sugar, I mix granulated and brown sugar. This gives a nice flavor while cutting down on sugar. Using vegetable oil or coconut oil keeps the bread moist without adding too many bad fats. One slice of this chocolate zucchini bread has about 200 calories. Each serving provides a good amount of carbs and some protein. Here are the highlights per slice: - Calories: 200 - Total fat: 10g - Saturated fat: 2g - Cholesterol: 40mg - Sodium: 150mg - Total carbohydrates: 28g - Dietary fiber: 2g - Sugars: 10g - Protein: 3g This breakdown helps you see what you eat, making it easier to stay on track. This recipe can be great for different diets. It can easily be nut-free by leaving out nuts. For dairy-free options, you can use dairy-free chocolate chips. This makes the bread suitable for those with common allergies. Always check labels to ensure your choices fit your needs. For a healthier twist, try using whole wheat flour instead of all-purpose flour. This adds more fiber and nutrients. Can I use frozen zucchini? Yes, you can use frozen zucchini. Just make sure to thaw and drain it. This helps remove excess water, which keeps your bread from getting too soggy. I often keep frozen zucchini on hand for baking. It works great in this recipe. How do I know when the bread is done? Check your bread by using a toothpick. Insert it into the center of the loaf. If it comes out clean or with a few moist crumbs, your bread is ready. I usually bake it for about 50-60 minutes, but ovens vary. Keep an eye on it as it bakes. Why is my bread too dense? A dense loaf may come from overmixing the batter. When combining wet and dry ingredients, mix just until they come together. Also, make sure to measure your flour correctly. Too much flour can lead to density. How to fix a dry loaf? If your loaf turns out dry, it may have baked too long. To help fix this, try adding a bit more moisture next time. You can add an extra egg or a splash of milk. A little extra oil can also help keep the bread moist. How to serve with toppings You can serve your chocolate zucchini bread plain, but toppings add fun. Try a drizzle of chocolate sauce or a spread of peanut butter. Cream cheese frosting makes a tasty choice too. Fresh berries or a dollop of whipped cream pair wonderfully with each slice. Best beverage pairings for this bread A cup of coffee or tea goes great with this bread. If you prefer something cold, try a glass of milk or almond milk. The flavors balance well, making your snack even more enjoyable. Enjoying it with friends is a treat in itself! This blog post covered how to make delicious chocolate zucchini bread. You learned about key ingredients, optional add-ins, and easy substitutions. Step-by-step instructions made the process simple. Tips and tricks helped with storage and baking success. We explored variations for different tastes and dietary needs, plus shared nutrition information. Trying this recipe can bring joy to your kitchen. You can enjoy a tasty treat while being healthy. Happy baking!

Are you ready to transform your snacking routine? My Chocolate Zucchini Bread is not just delicious—it’s moist and easy to make. With simple ingredients like zucchini and cocoa powder, you’ll …

Read more

Categories Desserts

Peach Crisp Delightful and Simple Dessert Recipe

June 17, 2025 by Chef Elliot
To make a perfect peach crisp, you need fresh and dry ingredients. Here’s what you will need: - 6 ripe peaches, peeled and elegantly sliced - 1 tablespoon fresh lemon juice Peaches are the star of this dish. Choose ripe ones for the best flavor. The lemon juice adds a bright note and balances the sweetness. - 1 cup wholesome rolled oats - 1 cup all-purpose flour, sifted - 1/2 cup packed light brown sugar - 1/2 cup granulated sugar - 1 teaspoon aromatic ground cinnamon - 1/4 teaspoon freshly grated nutmeg (or ground) - A pinch of fine salt The oats give the crisp its texture. The flour helps bind everything. Both sugars sweeten the dish. Cinnamon and nutmeg add warmth and depth. - 1/2 cup unsalted butter, gently melted - Ice cream or whipped cream (for serving, optional, but highly recommended) Melted butter creates a rich topping. Ice cream or whipped cream enhances the experience, making each bite heavenly. For the full recipe, refer to the section above. Enjoy creating this delightful dish! 1. Preheat your oven to 350°F (175°C). This step is key for a great bake. 2. In a large bowl, take your sliced peaches. Add lemon juice, sugar, and a pinch of salt. Mix gently. Coat each slice well. This brings out the peach flavor and adds a lovely zing. 1. In another bowl, combine oats, flour, both sugars, melted butter, cinnamon, and nutmeg. 2. Use your hands or a fork. Mix until the texture is crumbly. You want it to feel like small pebbles. This will give your crisp a great crunch. 1. Spread the peach mixture evenly in a greased baking dish. Make sure it covers the bottom well. 2. Sprinkle the crumbly topping over the peaches. Ensure it covers all the fruit. 3. Place the dish in the oven. Bake for 30-35 minutes. Look for a golden brown topping and bubbling peaches. Your kitchen will smell amazing! For the full recipe, you can refer to the details above. Enjoy this simple and delightful dessert! To make your peach crisp shine, try adding spices. Ginger and cardamom bring warmth and depth. You can also add a splash of vanilla or almond extract. These flavors blend well with ripe peaches and create a richer taste. For the best texture, don’t over-mix the topping. Lightly combine the ingredients until crumbly. This keeps the topping nice and crunchy. Keep an eye on it while baking. If it browns too much, pull it out to avoid burning. Peach crisp tastes best when warm. Serve it with a scoop of ice cream for a creamy contrast. You can also garnish with fresh peach slices or a sprig of mint. This adds color and freshness to your dish. For the full recipe, check the link below. {{image_4}} One way to make peach crisp even better is to try new twists. Let’s explore some fun variations! If you want a gluten-free version, it's easy! Just swap out the all-purpose flour for almond or gluten-free flour. This change keeps the crisp light and tasty. Don’t just stick to peaches! You can mix in berries for a colorful and tasty mixed fruit crisp. Strawberries, blueberries, or raspberries all work well. You can also try other stone fruits like plums or cherries. These fruits add different flavors and make your dessert even more special. Want to add some crunch? Toss in chopped nuts like walnuts or pecans into the topping. They add a nice texture and flavor. You can also experiment with granola for an extra crunchy layer. This variation makes each bite exciting! These variations will help you create a peach crisp that feels new and fun every time you make it. Try these ideas and enjoy peach crisp in a whole new way! For the complete recipe, check out the Full Recipe section. Store any leftovers in an airtight container. Keep it at room temperature for up to 3 days. This lets the flavors stay fresh. You can refrigerate the peach crisp for up to a week. If you want to keep it longer, freeze it. It can last in the freezer for up to 3 months. Make sure to wrap it well to avoid freezer burn. For the best texture, reheat the crisp in the oven. Preheat your oven to 350°F (175°C) and place the crisp in for about 10-15 minutes. This warms it up and keeps it crunchy. If you're in a hurry, you can use a microwave. Heat it in short bursts, checking often, so it warms evenly. You can use nectarines or any seasonal fruit. Plums, apricots, or even berries work well. Each fruit brings a unique flavor, making your crisp special. Peach crisp and cobbler are different. The topping for crisp is crumbly, while cobbler has a biscuit-like texture. Both are tasty, but they have their own charm. Yes, you can prepare it ahead. I suggest baking it just before serving. This keeps the topping crisp and the fruit warm. Look for a golden-brown topping and bubbling fruit underneath. The aroma will fill your kitchen, signaling it's time to enjoy. Absolutely! You can double the recipe easily. Just remember to adjust the baking time if you use a larger dish. It’s perfect for gatherings, and everyone will love it. Peach crisp is an easy and tasty dessert worth trying. You mix peaches with lemon, sugar, and salt for a tangy base. The crumbly topping blends oats, flour, butter, and spices perfectly. Don't forget to add ice cream for an extra treat! Feel free to try new spices or fruits for unique flavors. Store leftovers easily for later enjoyment. With these tips, your peach crisp will always impress. Enjoy your delicious creation and share it with friends!

Ready to impress your family and friends with a dessert that’s both simple and delicious? Our Peach Crisp is a sweet delight bursting with fresh flavors! With just a handful …

Read more

Categories Desserts

Creamy Chicken Sausage Orzo Tasty and Easy Recipe

June 17, 2025 by Chef Elliot
To make Creamy Chicken Sausage Orzo, you need the following items: - 1 cup orzo pasta - 2 chicken sausages, sliced into rounds - 1 tablespoon extra virgin olive oil - 1 small onion, finely diced - 2 cloves garlic, minced - 1 cup cherry tomatoes, halved - 2 cups low-sodium chicken broth - 1 cup fresh spinach, coarsely chopped - ½ cup heavy cream - ½ teaspoon dried oregano - Salt and freshly ground black pepper to taste - Grated Parmesan cheese, for serving - Fresh basil leaves, for garnish If you don’t have something on hand, here are some easy swaps: - Orzo Pasta: You can use rice or quinoa instead of orzo. - Chicken Sausages: Turkey or pork sausages work well too. - Heavy Cream: Swap it with half-and-half or a plant-based cream for a lighter dish. - Spinach: Kale or Swiss chard can replace spinach if needed. - Cherry Tomatoes: Regular diced tomatoes are a good alternative. This recipe is versatile for many diets. It can be: - Gluten-Free: Use gluten-free orzo or another gluten-free grain. - Dairy-Free: Replace heavy cream with coconut milk or cashew cream. - Low-Carb: Skip the orzo and add more veggies like zucchini or mushrooms. Feel free to adjust based on your needs! For the full recipe, check out the original instructions. First, gather all your ingredients. This makes cooking easier and more fun. You need: - 1 cup orzo pasta - 2 chicken sausages, sliced into rounds - 1 tablespoon extra virgin olive oil - 1 small onion, finely diced - 2 cloves garlic, minced - 1 cup cherry tomatoes, halved - 2 cups low-sodium chicken broth - 1 cup fresh spinach, coarsely chopped - ½ cup heavy cream - ½ teaspoon dried oregano - Salt and freshly ground black pepper to taste - Grated Parmesan cheese, for serving - Fresh basil leaves, for garnish Make sure your vegetables are washed and cut. This helps the dish cook evenly. Now let’s cook! Start by heating olive oil in a large pot over medium heat. Add the sliced chicken sausages and cook them until they turn brown. This takes about 5 to 7 minutes. Remove them and set aside. In the same pot, add the diced onion. Sauté it for about 3-4 minutes until it looks soft. Then, toss in the minced garlic and cook for another minute. You want that lovely garlic smell to fill your kitchen! Next, add the halved cherry tomatoes. Cook these for 2-3 minutes until they soften. Pour in the chicken broth and bring it to a gentle boil. Stir in the orzo pasta and dried oregano. Lower the heat and let it simmer. Cook for 8-10 minutes, stirring now and then, until the orzo is tender. After that, add the spinach and cooked sausage back into the pot. Gently pour in the heavy cream. Mix everything well and let it simmer for another 2-3 minutes. Taste and season with salt and pepper as you like. Once done, remove the pot from the heat. Let the orzo sit for a couple of minutes to thicken. Serve it in elegant bowls. Top it with grated Parmesan cheese and fresh basil leaves. This adds a nice touch to the dish and makes it look great. Enjoy your creamy chicken sausage orzo! For the complete recipe, refer to the Full Recipe. To make the best creamy chicken sausage orzo, here are some tips: - Use enough water: Make sure to use plenty of chicken broth for cooking. This adds great flavor. - Stir often: Stir the orzo every few minutes. This helps prevent it from sticking together. - Check for doneness: Taste the orzo a minute or two before the time is up. It should be tender but still firm. If you have leftovers, store them right to keep them tasty: - Cool down first: Let the orzo cool to room temperature before storing. - Use airtight containers: Place the orzo in a container with a tight lid. This keeps it fresh longer. - Refrigerate: Store in the fridge for up to three days. If you wait too long, it may spoil. When you want to enjoy your leftovers, reheating is easy: - Stovetop method: Place the orzo in a pot over low heat. Add a splash of chicken broth to help it heat evenly. - Microwave method: Put the orzo in a microwave-safe bowl. Add a little broth or water. Cover with a damp paper towel and heat in short bursts until hot. - Avoid overcooking: Watch the orzo closely. You do not want it to become mushy. For a full recipe, check the [Full Recipe]. {{image_4}} You can make this dish vegetarian by swapping chicken sausage for plant-based sausage. Choose one that has good flavor. Mushrooms also work well as a hearty substitute. They add a nice texture and umami taste. You can use a mix of veggies like zucchini and bell peppers too. Just sauté them until soft, then add them to your orzo. For a gluten-free meal, simply replace orzo with gluten-free pasta. Quinoa or rice can also be great alternatives. Just remember to adjust the cooking time. If you use quinoa, rinse it before cooking for better flavor. This way, you can enjoy this creamy dish without worry. To boost flavor, add spices like paprika or red pepper flakes. A squeeze of lemon juice gives a bright, fresh taste. You can also mix in fresh herbs like parsley or thyme. These herbs add a burst of color and flavor. For a richer taste, consider adding sun-dried tomatoes or artichoke hearts. For the complete recipe, check the Full Recipe section. Store any leftover creamy chicken sausage orzo in an airtight container. This helps keep it fresh. Make sure to let it cool before sealing. Place it in the fridge, where it stays good for about 3 days. When you’re ready to eat, you’ll have a tasty meal waiting for you! You can freeze your orzo dish for later. Use a freezer-safe container or bag. It’s best to divide it into portions. This way, you can thaw only what you need. It can last up to 3 months in the freezer. When you want to eat it, just take it out and let it thaw in the fridge overnight. To reheat, you can use the microwave or a stovetop. If using a microwave, place the orzo in a bowl. Add a splash of water or broth to keep it moist. Heat it in short bursts, stirring in between. If using a stovetop, warm it in a pot over low heat. Stir often until it’s heated through. Enjoy your creamy chicken sausage orzo just like the first time! For the full recipe, check out the instructions above. You can serve this dish with a simple side salad. A green salad with a light vinaigrette works well. Garlic bread pairs nicely for a comforting touch. You might also enjoy roasted vegetables for added flavor and nutrition. To spice up your orzo, add red pepper flakes while cooking. You can also mix in diced jalapeños for a fresh kick. Consider using spicy chicken sausage or adding a dash of hot sauce at the end. Yes, you can swap chicken sausage for turkey or pork sausage. Vegetarian sausage is a great option if you want a meatless choice. Just ensure to adjust cooking times based on the sausage type. Orzo is cooked when it becomes tender but still slightly firm to the bite, known as al dente. Check the package for specific cooking times. Stir occasionally to prevent sticking, and taste it a minute or two before the time is up. This guide covered all key parts of making Creamy Chicken Sausage Orzo. We discussed ingredients, cooking steps, and special tips. You can adapt the recipe for different diets and flavors, too. Cooking should be fun and easy. Use the tips to store, reheat, and enjoy your dish. With the right tools and ideas, you can make it perfect every time. Now, go ahead and make a tasty meal that everyone will love!

Looking for a quick, tasty meal? Creamy Chicken Sausage Orzo is your answer! This dish combines savory sausage with creamy orzo for a comforting and satisfying meal. I’ll guide you …

Read more

Categories Dinner

Quick Cowboy Butter Chicken Linguine Delicious Delight

June 17, 2025 by Chef Elliot
Here are the ingredients you need to make Quick Cowboy Butter Chicken Linguine: - 8 oz linguine pasta - 1 lb chicken breast, cut into bite-sized cubes - 3 tablespoons unsalted butter - 2 cloves garlic, finely minced - 1 teaspoon smoked paprika - 1 teaspoon chili powder - ½ teaspoon cayenne pepper - 1 cup heavy cream - ½ cup cherry tomatoes, halved - ¼ cup green onions, finely chopped - Salt and freshly ground black pepper to taste - Fresh parsley, chopped (for garnish) These ingredients come together to create a rich and hearty dish. The chicken breast adds protein. The butter and cream make it creamy and smooth. The spices bring warmth and flavor. You can adjust the cayenne pepper for more or less heat. The cherry tomatoes add freshness and a pop of color. Fresh parsley gives a nice finish. You can find the full recipe to guide you through the cooking process. Enjoy each step as you dive into this delicious meal! - Bring salted water to a boil in a large pot. - Cook linguine according to package directions until al dente. Cooking the linguine is the first step. Make sure your water is nice and salty. This helps flavor the pasta. Once the pasta is cooked, drain it and save a bit of that water for later. - Heat butter in a skillet over medium heat. - Season and cook chicken until golden brown. Now, let’s sauté the chicken. Start by melting some butter in your skillet. Add your bite-sized chicken pieces. Season with salt, pepper, smoked paprika, chili powder, and cayenne pepper. Cook for about 5-7 minutes. You want it golden brown and fully cooked. Once done, move the chicken to a plate. - Sauté garlic in remaining butter. - Add cream and cherry tomatoes, simmer. In the same skillet, add more butter and minced garlic. Sauté for about a minute. The garlic should smell nice but not burn. Pour in the heavy cream and halved cherry tomatoes. Stir well and let it simmer for 3-4 minutes. The sauce will thicken a bit. - Return chicken to skillet. - Toss with linguine and adjust consistency. Now, it’s time to combine everything. Put the chicken back in the skillet. Add the cooked linguine too. Use tongs to toss it all together. If the mixture is too thick, add a splash of that reserved pasta water. Taste it and add more salt or pepper if needed. - Sprinkle green onions and parsley. - Presentation tips for serving. Before serving, sprinkle chopped green onions and parsley on top. This adds color and flavor. Serve the pasta in deep bowls. Top with extra parsley and a few cherry tomato halves. A side of crusty bread works great with this dish. For the full recipe, feel free to check out the details! To make sure your chicken cooks evenly, cut it into bite-sized cubes. This helps it cook quickly and evenly. When seasoning, don’t be shy! Use salt, pepper, smoked paprika, and chili powder. These spices add flavor and warmth. For extra taste, try marinating the chicken. A simple mix of olive oil, garlic, and lime juice works wonders. Let it sit for 30 minutes, and your chicken will be full of flavor. The sauce must be creamy but not too thick. If it is thick, add a little pasta water. This water has starch that helps the sauce stick to your noodles. When adding cream, pour it slowly. Stir it gently to blend it with the garlic and butter. Cook it just enough to warm through but not boil. This keeps the sauce smooth and rich. This dish shines when served with crusty bread. The bread helps soak up the sauce. You can also add a simple salad for freshness. A mix of greens with a light vinaigrette pairs nicely. For wine, a chilled Sauvignon Blanc works great. Its crispness balances the richness of the sauce. Enjoy this meal with friends, and you’ll impress everyone! For the full recipe, check the detailed instructions above. {{image_4}} You can switch the chicken for shrimp or tofu. Shrimp cooks fast and adds a sweet taste. Tofu gives you a great vegetarian option. Just make sure to press the tofu to remove water. This helps it absorb flavors better. You can change the spice levels to suit your taste. If you like heat, add more cayenne pepper. If you want less spice, cut back on the chili powder. Adding veggies like spinach or bell peppers makes this dish even better. Spinach wilts nicely, while bell peppers add a crunch. For gluten-free options, try using rice noodles or zucchini noodles. These swaps keep the dish light and healthy. You can also look for gluten-free pasta brands. Just check the labels to ensure they meet your needs. Store any leftover Quick Cowboy Butter Chicken Linguine in an airtight container. This keeps the dish fresh and tasty. It lasts up to three days in the fridge. Make sure it cools down before sealing. This helps avoid moisture buildup. When reheating, I prefer the stovetop. Heat a pan over low to medium heat. Add a splash of cream or water to keep it moist. Stir gently until warm. This method keeps the texture nice. If you use a microwave, heat in 30-second intervals. Stir after each interval to avoid hot spots. To freeze, place portions in freezer-safe bags or containers. Remove as much air as you can before sealing. Label them with the date. This dish freezes well for up to three months. For best quality, thaw it overnight in the fridge before reheating. This way, you keep the creamy sauce smooth and delicious. It takes just 30 minutes to make this dish. You will spend 10 minutes prepping. Cooking the linguine and chicken takes about 20 minutes. This quick time makes it perfect for busy nights. Yes, you can prep this dish ahead. Cook the chicken and make the sauce early. Store them in the fridge. When you’re ready, cook the linguine and mix it all together. This makes meal prep easy and fast. Some tasty sides include: - Garlic bread - Steamed broccoli - Mixed green salad - Grilled vegetables These sides balance the creamy pasta and add freshness. This recipe has a mild heat. You can adjust spice levels. Add more cayenne for extra kick. If you prefer less heat, reduce the cayenne or skip it. Make it your own! In this blog post, we explored the steps to create Quick Cowboy Butter Chicken Linguine. We covered each ingredient, from linguine to spices, ensuring you if there's something extra delicious in each bite. I shared tips on sautéing chicken, making a creamy sauce, and even how to dress your dish for serving. Consider experimenting with protein alternatives or adjusting spice levels to fit your taste. Remember, this dish is versatile and easy to store or reheat. Enjoy cooking and savor every bite of this delightful meal.

Craving a meal that combines comfort and creativity? You’re in the right place! Today, I’ll show you how to whip up a Quick Cowboy Butter Chicken Linguine that’s both delicious …

Read more

Categories Dinner
Older posts
Newer posts
← Previous Page1 … Page30 Page31 Page32 … Page55 Next →

TOSSED TASTES

Where flavors get playful! A fresh mix of easy bites, bold spices, and everyday cravings tossed into every recipe. 🍋🍅

PAGES

Home About Contact Privacy Policy Terms & Conditions Cookie Policy GDPR Policy Copyright Policy Disclaimer

CATEGORIES

Appetizers Desserts Salads Breakfast Dinner

Contact

  • Pinterest
  • Mail
Copyright © 2025 Tossed Tastes. All rights reserved.