
DESSERTS
Greek Yogurt Brownies Rich and Fudgy Treat
If you crave a rich, fudgy treat, you’ll love Greek yogurt brownies! These brownies are not just tasty; they’re healthier...
READ MORE →Chef Elliot
I’m Chef Elliot, your laid-back kitchen wingman with a serious love for bold flavors and easy cooking. 🥄✨
I believe anyone can cook—no fancy tools, no five-star background required. Just great recipes, a sprinkle of curiosity, and maybe a lemon zest moment to keep things fresh. 🍋💪
Think of me as your flavor coach: part guide, part cheerleader, always down for a second helping. I’m here to help you ditch the stress and stir up some joy—one tossed-together recipe at a time.

Delicious recipes crafted by Chef Elliot
If you crave a rich, fudgy treat, you’ll love Greek yogurt brownies! These brownies are not just tasty; they’re healthier...
READ MORE →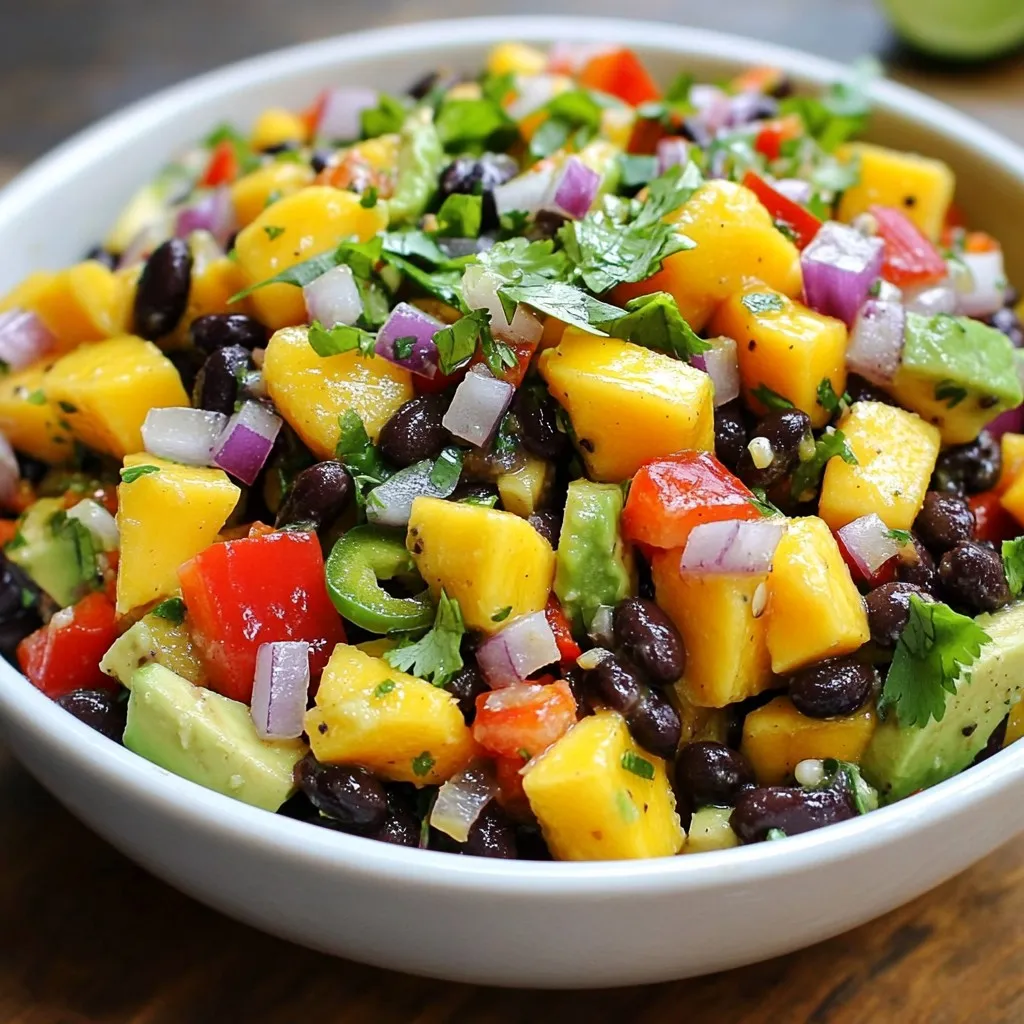
Looking for a fresh and healthy dish? Say hello to the Mango Avocado Black Bean Salad! This vibrant salad packs...
READ MORE →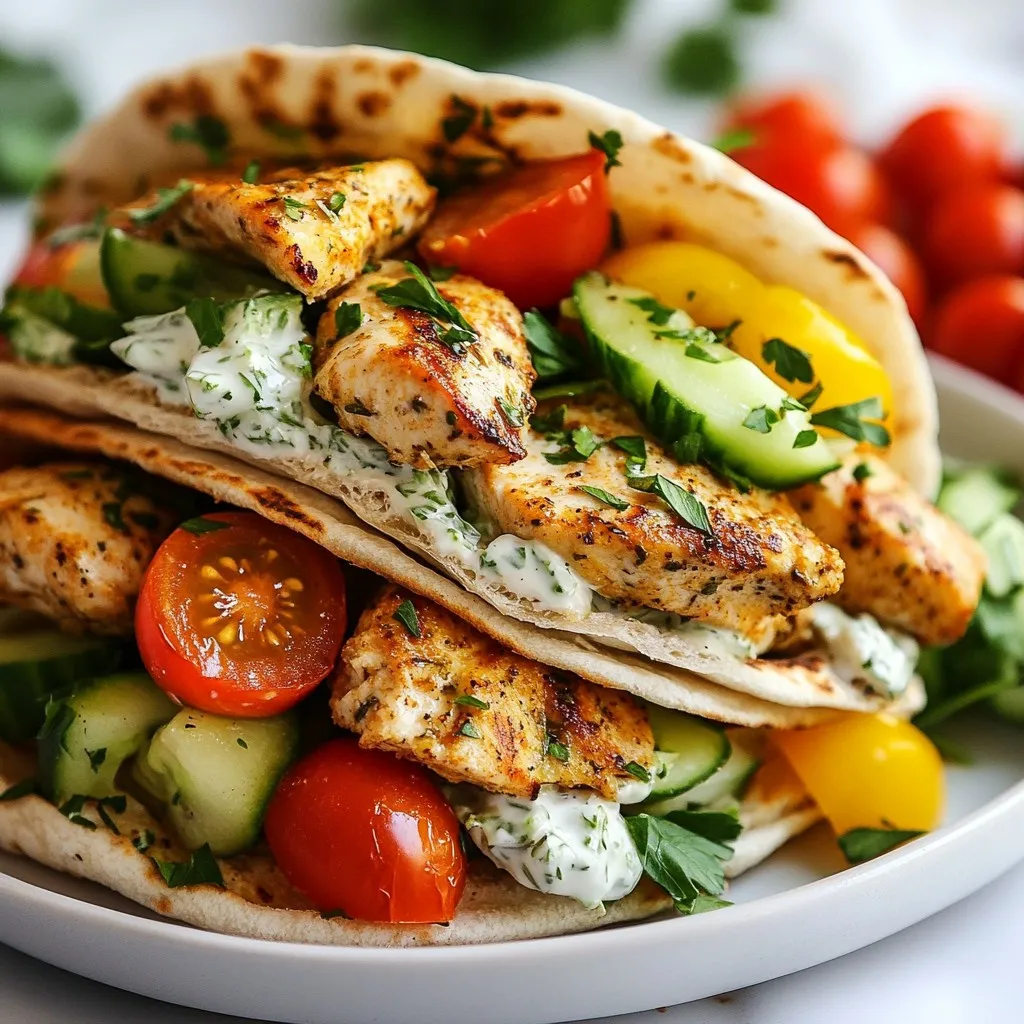
Looking for a simple and tasty meal? Try my Sheet Pan Chicken Pitas with Herb Ranch Slaw! This dish combines...
READ MORE →
Looking for a tasty snack that’s easy to make? Try these Air Fryer Everything Bagel Zucchini Chips! With just a...
READ MORE →
Are you ready to indulge in a treat that combines the sweet and salty perfection of no-bake salted caramel pretzel...
READ MORE →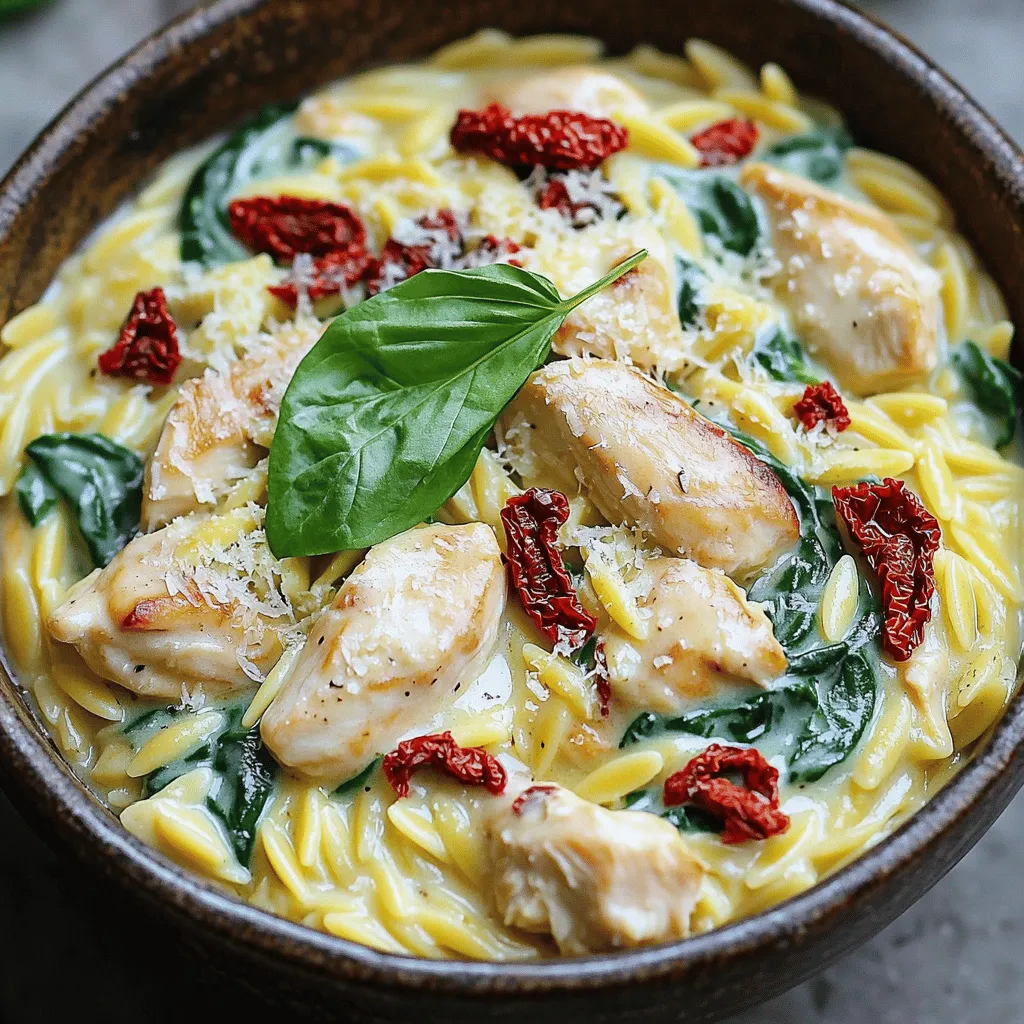
Are you ready to delight your taste buds with a rich and creamy dish? My Instant Pot Creamy Tuscan Chicken...
READ MORE →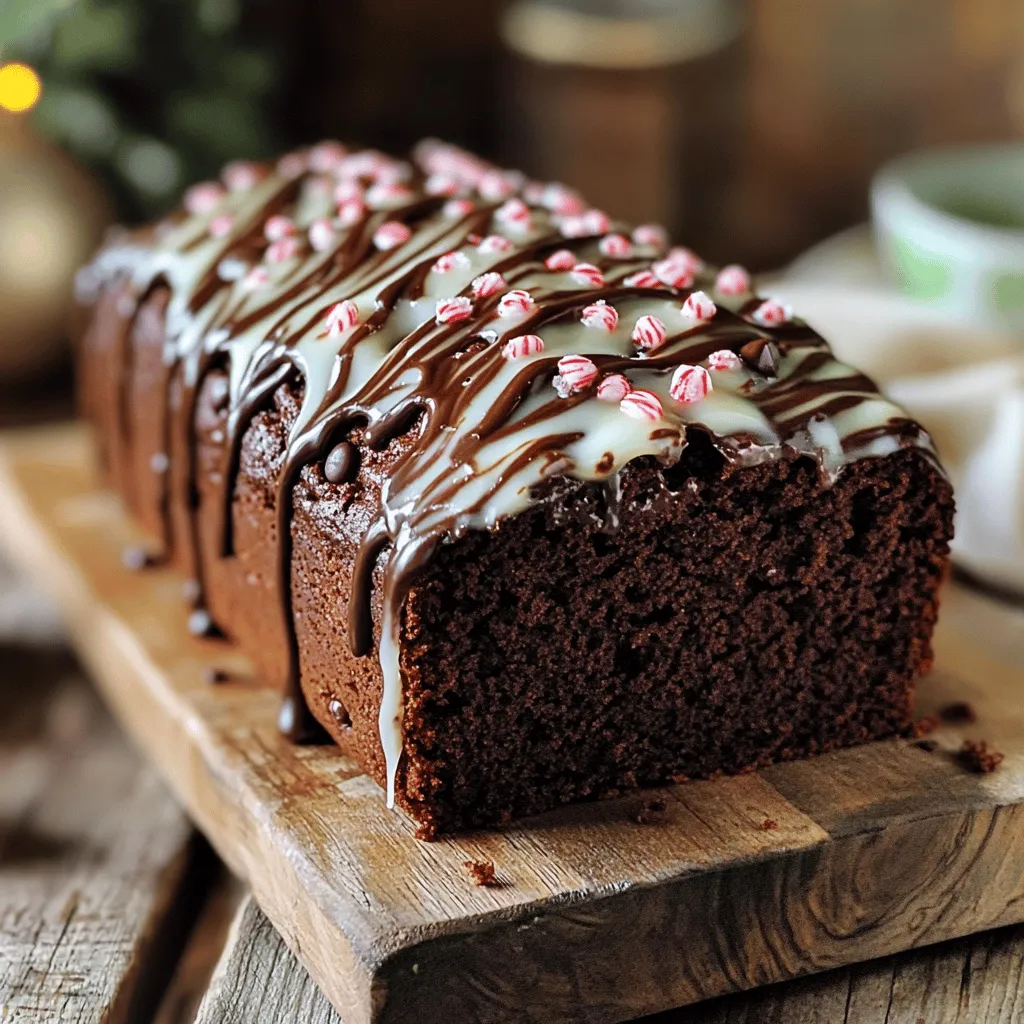
Get ready to bake a delicious Bakery-Style Chocolate Peppermint Loaf with Glaze that will impress anyone! This easy recipe combines...
READ MORE →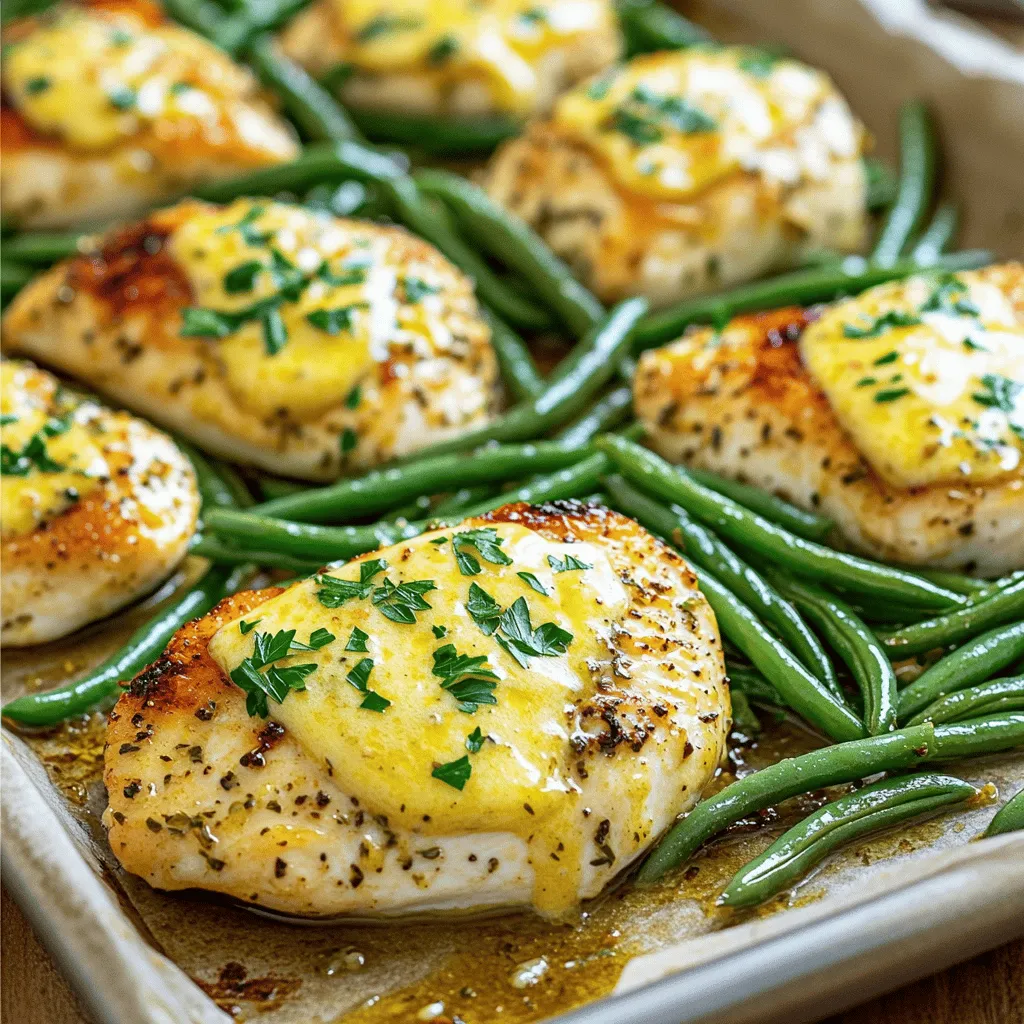
Are you ready for a one-pan meal that’s packed with flavor? This Savory Sheet-Pan Garlic Butter Chicken with Green Beans...
READ MORE →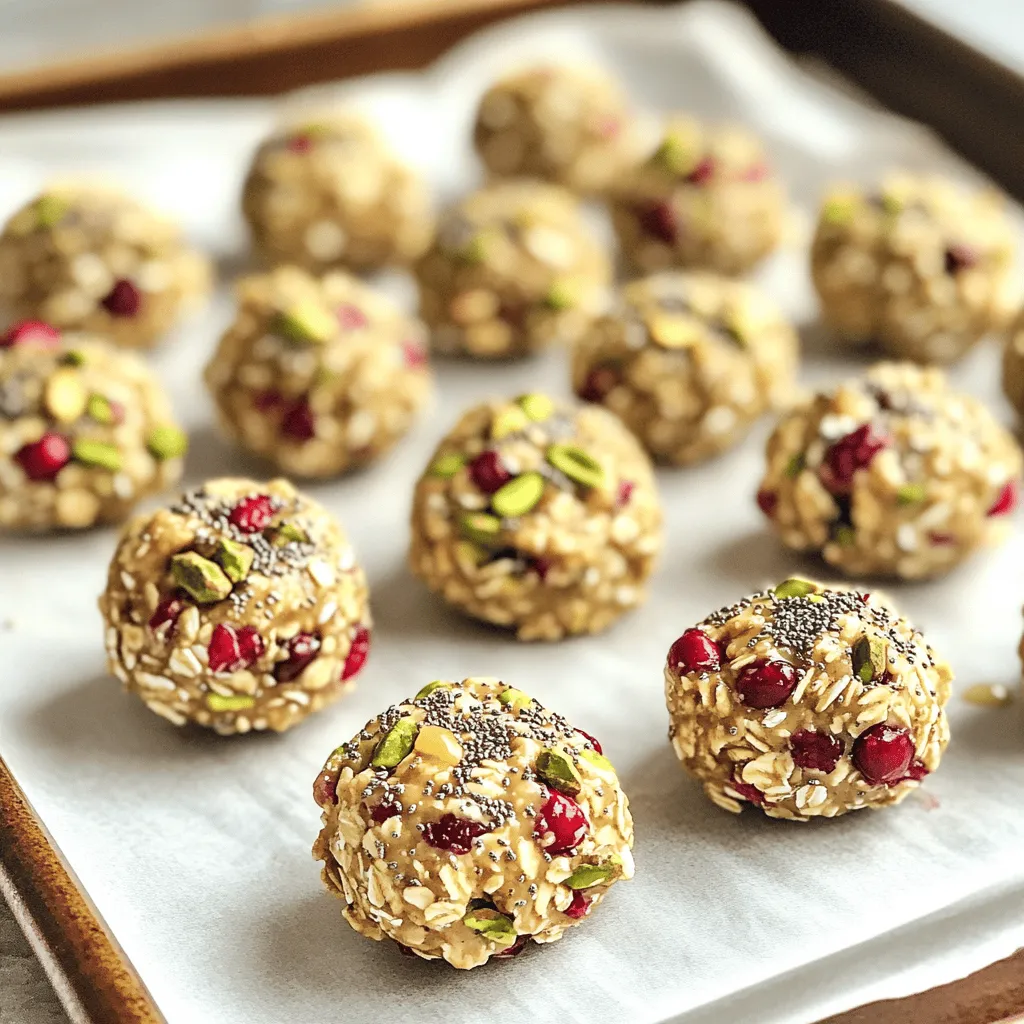
Looking for a quick and healthy snack? You’re in the right place! These No-Bake Cranberry Pistachio Energy Bites are not...
READ MORE →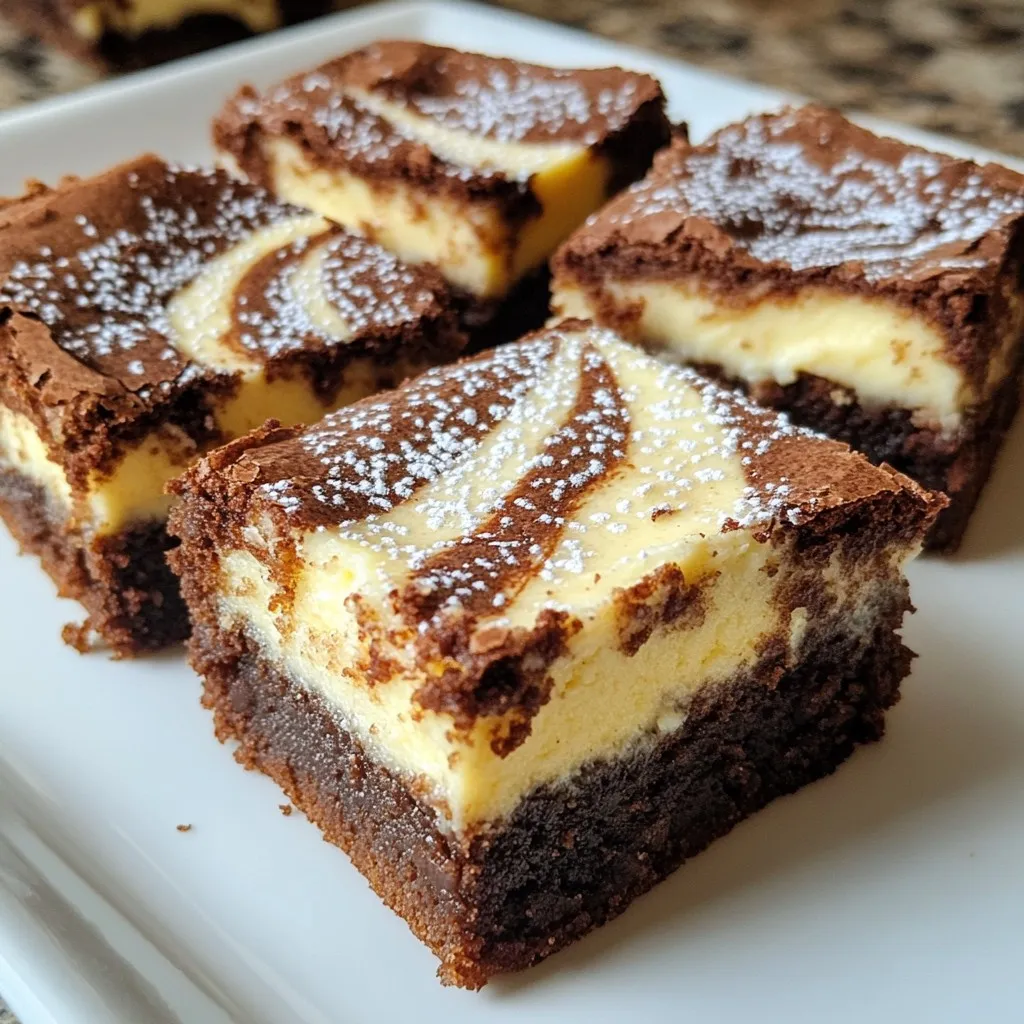
If you love rich, chocolatey treats, you’re in for a treat! Cream Cheese Swirl Brownies combine a fudgy brownie base...
READ MORE →