DINNER
Flavorful Sheet Pan Herb Salmon and Veggies Recipe
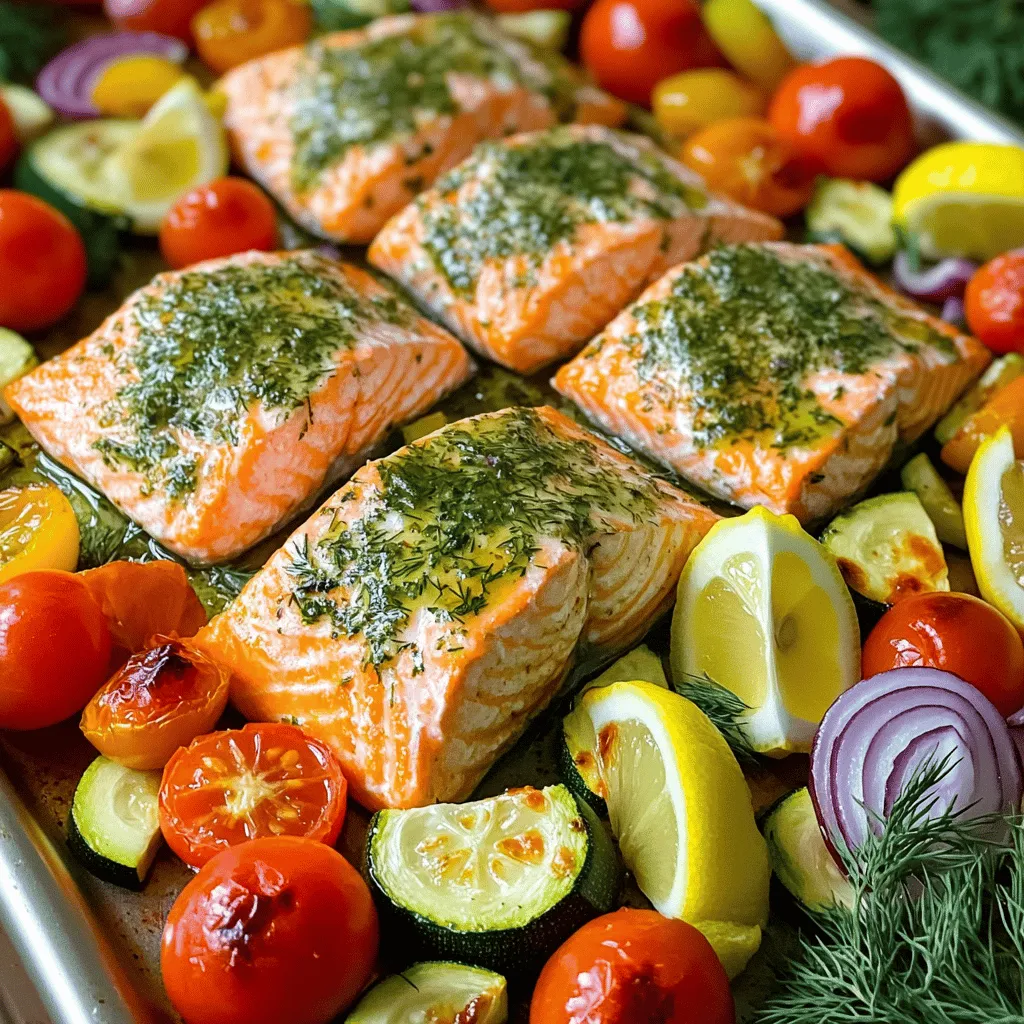
Looking for a quick, tasty meal that packs a punch? This Flavorful Sheet Pan Herb Salmon and Veggies Recipe is...
READ MORE →Chef Elliot
I’m Chef Elliot, your laid-back kitchen wingman with a serious love for bold flavors and easy cooking. 🥄✨
I believe anyone can cook—no fancy tools, no five-star background required. Just great recipes, a sprinkle of curiosity, and maybe a lemon zest moment to keep things fresh. 🍋💪
Think of me as your flavor coach: part guide, part cheerleader, always down for a second helping. I’m here to help you ditch the stress and stir up some joy—one tossed-together recipe at a time.

Delicious recipes crafted by Chef Elliot
Looking for a quick, tasty meal that packs a punch? This Flavorful Sheet Pan Herb Salmon and Veggies Recipe is...
READ MORE →
Get ready to savor a tasty treat with my Air Fryer Honey Garlic Cauliflower Bites! These bites bring a sweet...
READ MORE →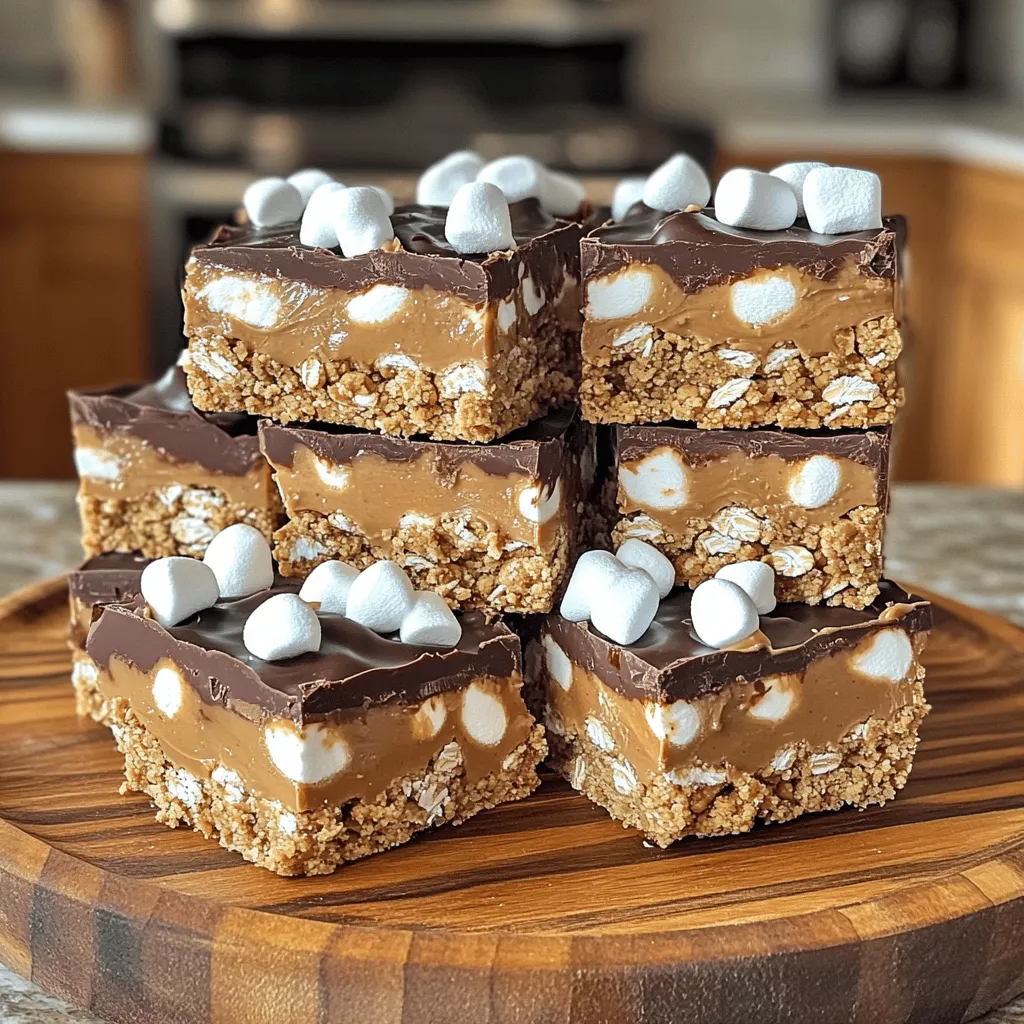
Are you ready to create a sweet treat that requires no baking? With my No Bake S’mores Peanut Butter Bars,...
READ MORE →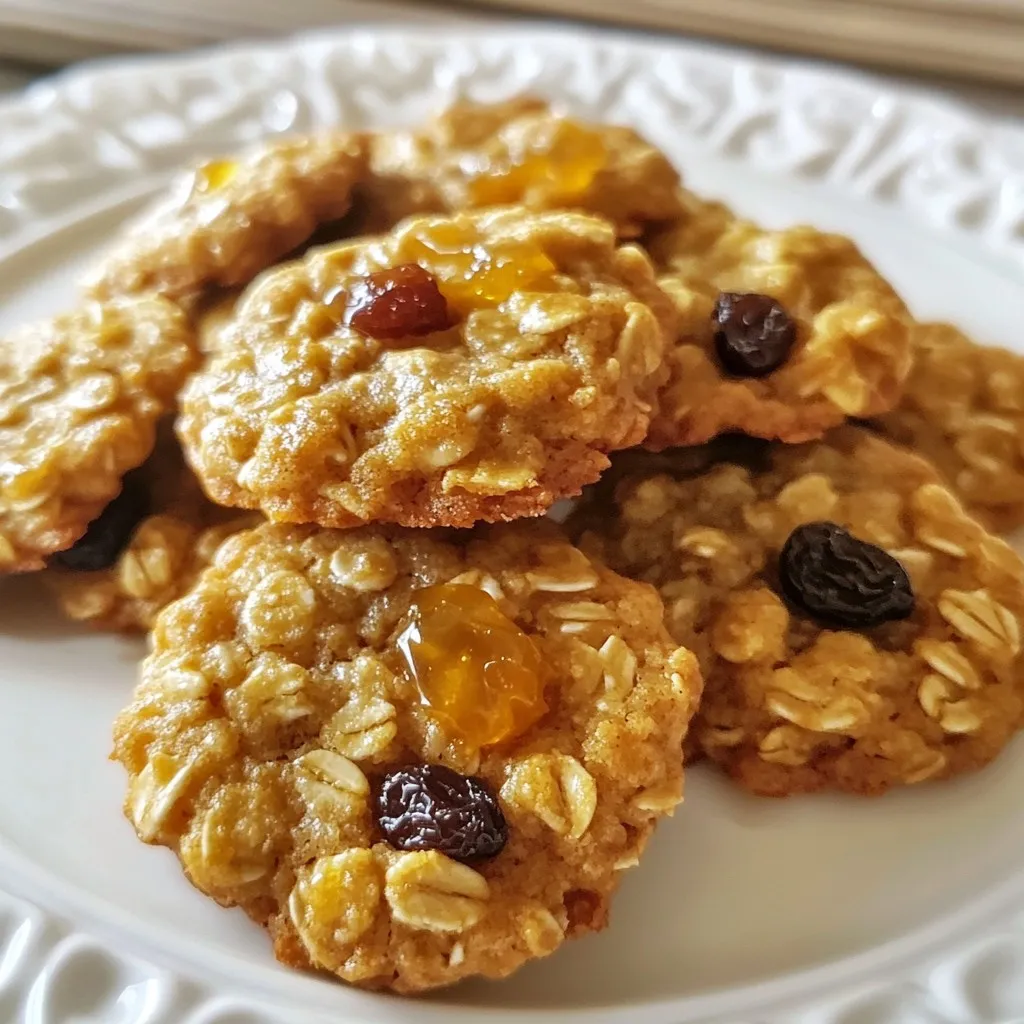
Get ready to enjoy soft, chewy, and delicious Honey Oatmeal Cookies! In this article, I’ll show you how simple it...
READ MORE →
Start your morning with a fun twist on a classic favorite: Spanish Churro Pancakes! These fluffy delights blend sweet churro...
READ MORE →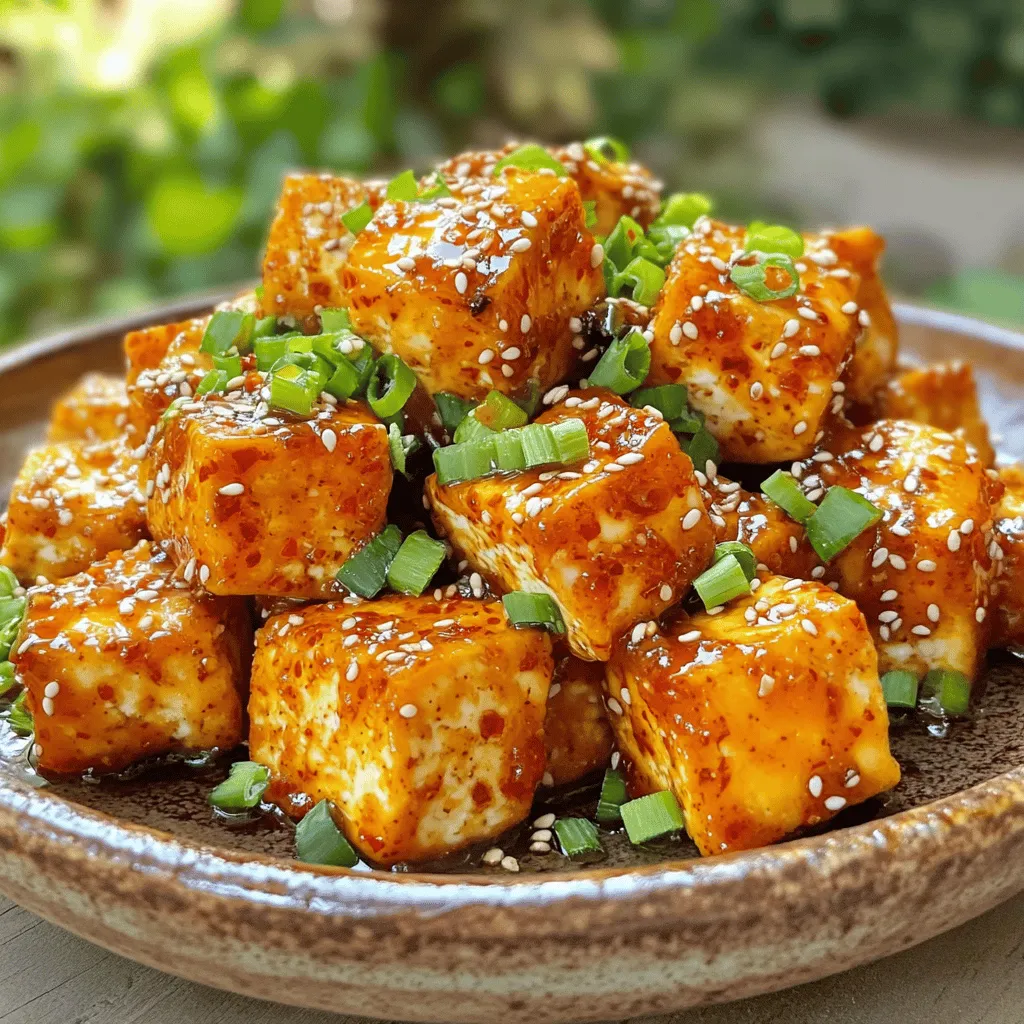
If you’re craving a dish that’s both tasty and easy to make, I’ve got just the recipe for you: Air...
READ MORE →
Looking for a quick and tasty treat? These Chocolate Coconut Macaroon Bites are easy to make and oh-so-delicious! With just...
READ MORE →
Get ready to impress your family with my Creamy Cajun Sausage Rice Skillet! This one-pan meal is easy to make...
READ MORE →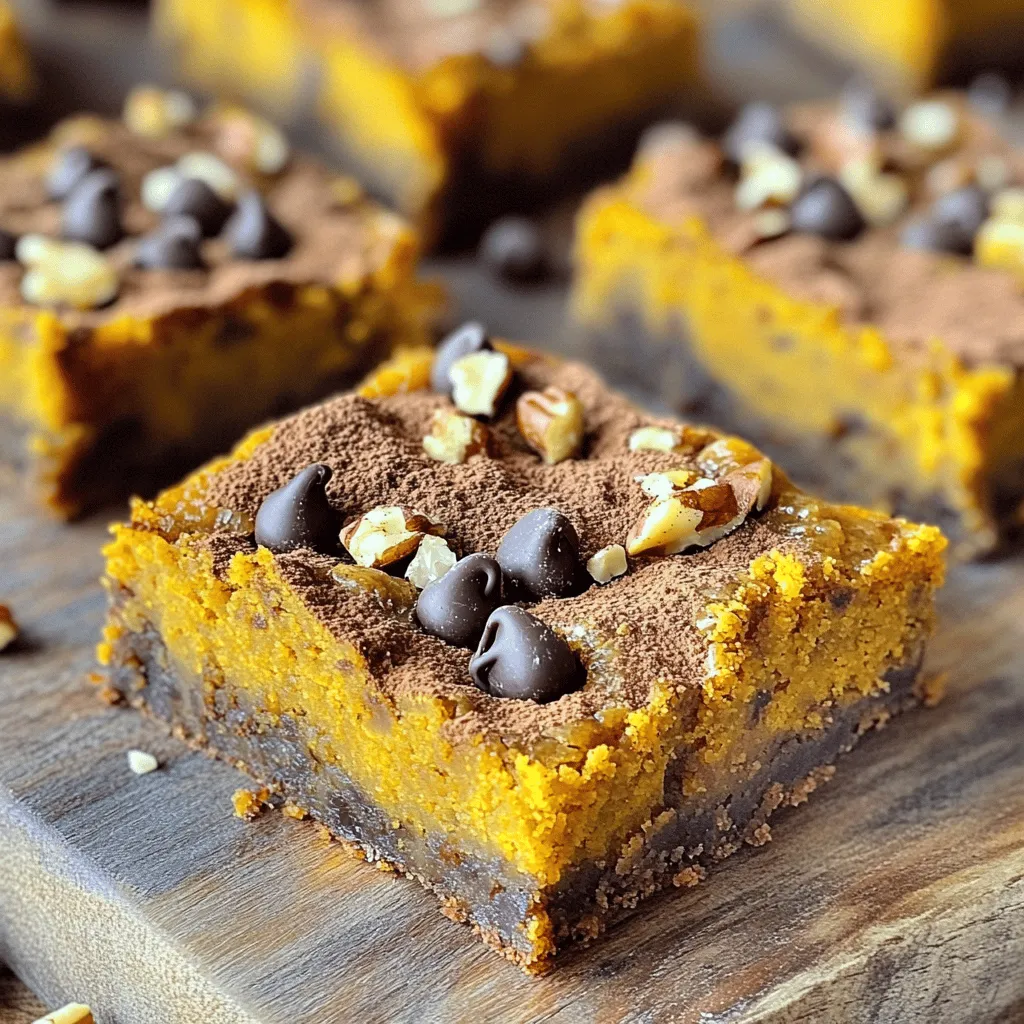
Craving a delicious fall treat? These Brown Butter Pumpkin Blondies are easy to make and full of flavor. With rich...
READ MORE →
Are you ready to spice up your taco night? My Salsa Verde Pulled Chicken Tacos are a game changer! They...
READ MORE →