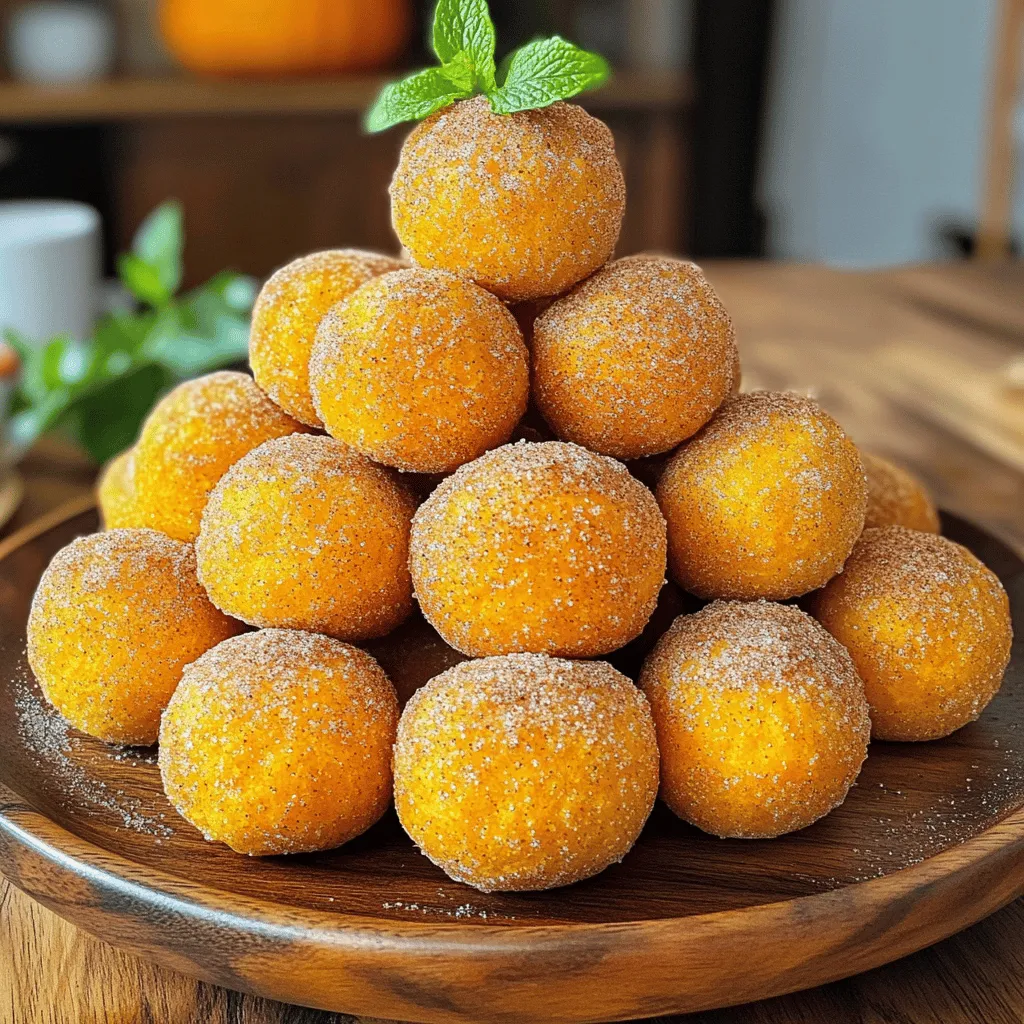
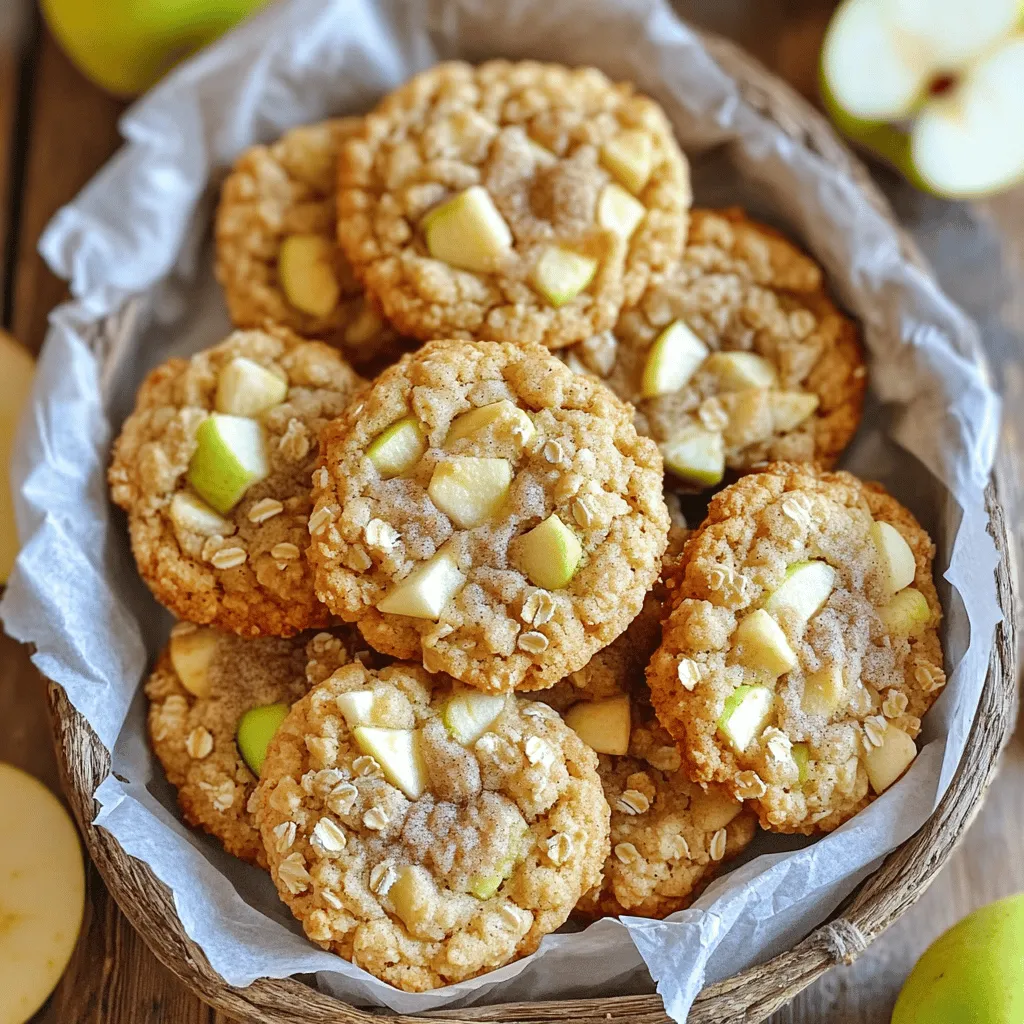
Skip to content
Tossed Tastes
  • Home
  • Appetizers
  • Desserts
  • Salads
  • Breakfast
  • Dinner
  • Privacy Policy
  • Contact
  • About

Chef Elliot

Strawberry Lemonade Layer Cake Rich and Flavorful Treat

May 27, 2025 by Chef Elliot
- 2 ½ cups all-purpose flour - 1 ½ cups granulated sugar - ½ cup unsalted butter, softened - 1 cup buttermilk, at room temperature - 3 large eggs, at room temperature - 1 tablespoon baking powder - 1 teaspoon baking soda - ½ teaspoon salt - Zest of 1 lemon - ½ cup fresh lemon juice - 2 cups fresh strawberries, hulled and diced - ½ cup granulated sugar - 1 tablespoon lemon juice - 2 tablespoons cornstarch - 2 tablespoons water - 1 cup unsalted butter, softened - 4 cups powdered sugar, sifted - 2 tablespoons fresh lemon juice - 1 teaspoon lemon zest - Pinch of salt The ingredients for this Strawberry Lemonade Layer Cake are simple yet essential for a vibrant flavor. The cake itself will be soft and airy, thanks to the buttermilk and whipped butter. The fresh lemon juice and zest bring a zesty brightness. The strawberry filling adds a sweet, fruity layer that pairs perfectly with the lemon frosting. When choosing your strawberries, look for ripe, juicy ones. They should smell sweet and feel firm. This ensures a bright flavor and nice texture in your filling. For the cake, using room-temperature eggs and buttermilk helps create an even batter. The lemon frosting is the crown jewel of this cake. The unsalted butter, paired with powdered sugar, makes it creamy and sweet. The zest and juice add a fresh kick, balancing the sweetness. When you combine all these ingredients, you create a cake that is rich and flavorful, perfect for any gathering. For the complete guide to making this delightful cake, refer to the Full Recipe. - Preheat your oven to 350°F (175°C). - Prepare three 8-inch round cake pans by greasing them with butter and dusting them with flour. This step helps the cakes come out easily after baking. - In a large bowl, cream together ½ cup of softened butter and 1 ½ cups of granulated sugar until the mix is light and fluffy. - Add 3 large eggs one at a time, mixing well after each. Next, mix in 1 tablespoon of lemon zest and ½ cup of fresh lemon juice. Keep blending until everything is smooth. - In another bowl, whisk together 2 ½ cups of all-purpose flour, 1 tablespoon of baking powder, 1 teaspoon of baking soda, and ½ teaspoon of salt. This helps to mix the leavening agents evenly. - Slowly add the dry mixture to the wet mix, alternating with 1 cup of buttermilk. Start and finish with the dry ingredients. Mix only until just combined to avoid making the cake dense. - Divide the batter evenly among the three prepared pans. Bake in the preheated oven for 25-30 minutes. A toothpick inserted in the center should come out clean when the cakes are done. - Let the cakes cool in the pans for 10 minutes. Then, transfer them to wire racks to cool completely. This step is important for the best texture. For the complete process, check the Full Recipe of Strawberry Lemonade Layer Cake. To make a light and fluffy cake, avoid overmixing the batter. Mix just until the dry and wet ingredients combine. Overmixing can make the cake tough. Always use room-temperature ingredients. This helps the batter mix evenly and rise well. Use ripe strawberries for the best flavor in your filling. Fresh, sweet berries make a big difference. After cooking the filling, let it cool completely. This step is key for a firm filling that won’t ooze out when you slice the cake. Adjust the sugar in your frosting to get the thickness you want. If the frosting feels too soft, chill it briefly. This will help it set up better for easy spreading. A good frosting should hold its shape on the cake. For the Full Recipe and more detailed steps, check out the rest of this article. {{image_4}} You can switch up the filling for this cake. Raspberries or blueberries work great in place of strawberries. These fruits add their own unique flavors. You can also create a mixed berry filling. This will give you a burst of various tastes in each bite. Just mash the berries with some sugar, and you are set. If you want a twist, try cream cheese frosting. It adds a tangy flavor that pairs well with the cake. You can also use whipped cream for a lighter touch. This will give your cake a fluffy and airy feel. Each option can change the cake's taste and make it special. For those needing gluten-free options, there's an easy fix. You can substitute all-purpose flour with a gluten-free blend. Make sure to choose a blend that works well for baking. This way, everyone can enjoy a slice of your tasty cake. Enjoying dessert should always be an option for everyone! To keep your cake fresh, cover it at room temperature. It will stay good for up to three days. If you want it to last longer, refrigerate it. This helps maintain its rich flavor and moist texture. If you want to store the cake for a while, you can freeze the layers. Wrap each layer tightly in plastic wrap and then in foil. This helps prevent freezer burn. You can freeze unassembled layers for up to three months. When you're ready to enjoy it, just thaw the layers. To serve the cake, thaw it overnight in the fridge. This way, it will warm up slowly and keep its taste. You can serve it chilled or at room temperature, depending on your preference. Enjoy the rich and flavorful treat! You can make the cake less sweet by reducing the sugar in the cake batter or frosting. Start with a quarter cup less sugar. Taste the batter as you go. This way, you can find the right level of sweetness for your liking. Yes, you can bake the cake in advance. Once cooled, wrap each layer in plastic wrap. Store them in the freezer for up to a month. This saves time for special occasions. If you don’t have buttermilk, you can use regular milk. Just add a splash of vinegar or lemon juice. Let it sit for about five minutes. This will mimic the acidity of buttermilk. To check if the cake is done, insert a toothpick into the center. If it comes out clean, the cake is ready. Keep an eye on the baking time to avoid overcooking. Absolutely! Using store-bought strawberry filling can save you time. Just layer it between the cake bits as you would with homemade filling. This makes the process quicker and easier. To layer the cake best, ensure each layer is level. Use a serrated knife to trim them if needed. This helps the layers stack nicely and prevents sliding. For detailed instructions on making this delightful cake, refer to the Full Recipe. In this post, we explored how to create a delicious Strawberry Lemonade Layer Cake. We covered essential ingredients, detailed steps for baking, and offered tips for success. Whether you choose fresh strawberries or opt for a gluten-free version, this cake suits any occasion. Remember to store it well for lasting freshness. Enjoy making this tasty treat and share it with friends and family. Happy baking!

If you love vibrant flavors and sweet treats, you’re in for a treat! This Strawberry Lemonade Layer Cake combines juicy strawberries and zesty lemons to create a cake that’s bursting …

Read more

Categories Desserts

Flavorful Grits Breakfast Bowl Easy and Satisfying Meal

May 27, 2025 by Chef Elliot
For a tasty Grits Breakfast Bowl, you need: - 1 cup white or yellow grits - 4 cups water or vegetable broth - 1 cup shredded sharp cheddar cheese - 2 tablespoons unsalted butter - 4 large eggs - ½ cup cooked turkey sausage, crumbled (or plant-based sausage for a vegetarian option) - 1 ripe avocado, sliced - ¼ cup green onions, finely chopped - Salt and black pepper, to taste - Hot sauce, for drizzling (optional) These ingredients work together to create a creamy and hearty meal. The grits form a rich base, while the cheese adds a nice sharpness. You can customize your bowl with fun add-ins. Here are some options: - Cooked bacon or ham - Sautéed spinach or kale - Diced tomatoes - Roasted red peppers - Fresh herbs like cilantro or parsley - A dollop of sour cream or Greek yogurt These extras let you mix and match flavors, making each bowl unique. To make this dish, gather these tools: - Medium saucepan for cooking grits - Non-stick skillet for frying eggs and sausage - Whisk for mixing grits - Serving bowls for the final dish Having the right tools helps you cook better and faster. With these, you can easily whip up a delicious breakfast. To start, grab a medium saucepan. Pour in 4 cups of water or vegetable broth. Turn the heat to high and bring it to a boil. Once it bubbles, lower the heat to medium. Gradually whisk in 1 cup of grits. Keep stirring so there are no lumps. After that, reduce the heat to low. Let the grits simmer uncovered for 20 to 25 minutes. Stir now and then until they look creamy. When they are almost done, add 2 tablespoons of unsalted butter and 1 cup of shredded sharp cheddar cheese. Mix until the cheese melts. Season with salt and black pepper to taste. While the grits cook, take a non-stick skillet and heat it over medium heat. Crack 4 large eggs into the skillet. Cook them sunny-side up or over-easy, as you like. In the same skillet, add ½ cup of cooked turkey sausage, crumbled. Cook it for a few minutes until it’s warm and has crispy edges. Now it’s time to build your bowl. Start by spooning a big scoop of creamy grits into each bowl. Next, add the cooked sausage on top. Then, place a fried egg right in the center. Finish with slices of 1 ripe avocado. Sprinkle ¼ cup of finely chopped green onions over the top. If you want some heat, drizzle hot sauce on your bowl. Enjoy your flavorful grits breakfast bowl! For the full recipe, check out the details above. To get smooth, creamy grits, use good broth or water. Start with a strong boil. Slowly whisk in the grits to prevent lumps. After they start to simmer, lower the heat. Let them cook while stirring often. This helps them become fluffy and soft. You want them to cling together but stay creamy. Cooking eggs can change your bowl's vibe. For sunny-side up eggs, cook them on medium heat. This gives you a runny yolk and a nice white. If you prefer your eggs cooked through, go for over-easy. Flip them carefully to keep the yolk intact. You can also scramble the eggs for a different texture. Just whisk them in a bowl before cooking. Spice things up to make your grits pop. Add salt and black pepper for basic flavor. If you want a kick, drizzle some hot sauce on top. Other great options include smoked paprika or garlic powder. Fresh herbs like chives or parsley can brighten the dish, too. For a richer taste, consider mixing in some cheese. Cheddar works well, but you can experiment with others. There’s a lot of room for creativity here. Check out the Full Recipe for more ideas! {{image_4}} For a vegetarian twist, skip the sausage. You can use plant-based sausage instead. This option keeps the bowl hearty and full of flavor. Consider adding sautéed mushrooms and spinach for extra nutrition. They add a nice earthy taste that pairs well with grits. You can top with fresh herbs like parsley or basil for a pop of color. To make a Southern-style bowl, focus on the basics. Use rich, creamy grits as your base. Top them with crispy bacon or fried chicken for protein. A drizzle of gravy can enhance the flavors, making it truly Southern. Add pickled jalapeños for a spicy kick. This version is sure to fill you up and keep you satisfied. Use seasonal vegetables to brighten your bowl. In spring, add asparagus and peas for freshness. In fall, roasted butternut squash and kale work beautifully. These veggies not only taste great but also add color and texture. Toss in some cherry tomatoes for sweetness. This variation makes your meal more vibrant and nutritious. Try these variations based on your taste and what you have at home. Each option keeps the spirit of the Grits Breakfast Bowl while adding your unique touch. You can find the full recipe to get started on your own delicious creation. To store leftovers, let the grits cool down first. Then, place them in an airtight container. You can keep them in the fridge for up to four days. Make sure to cover them well to keep them fresh. If you have toppings, store them separately to keep everything from getting soggy. When you want to reheat the grits, add a splash of water or broth. This will help them regain their creamy texture. Heat them in a saucepan over low heat. Stir often and check if they are warm enough. You can also use the microwave. Just heat in short bursts, stirring in between. You can freeze grits for later use. Place them in freezer-safe bags or containers. Make sure to squeeze out as much air as possible. They can last up to three months in the freezer. For best taste, freeze toppings like sausage and cheese separately. Thaw them in the fridge before reheating. This way, you can enjoy a quick and tasty meal from your Grits Breakfast Bowl later! To make grits from scratch, start with water or broth. Boil 4 cups in a pot. Slowly whisk in 1 cup of grits. Stir well to avoid lumps. Reduce heat and let them simmer. Cook for 20-25 minutes until creamy. Add butter, cheese, salt, and pepper to taste. This method gives you rich, flavorful grits. Yes, you can use instant grits. They cook faster and are easy to prepare. Just follow the package instructions. Instant grits can save time, but they may lack some texture. For a more traditional flavor, I recommend using regular grits. You have many tasty protein choices! Here are a few: - Cooked turkey sausage - Plant-based sausage for a vegetarian option - Crispy bacon or pancetta - Scrambled eggs - Grilled chicken or shrimp These proteins pair well with the creamy grits. Mix and match to find your favorite! For the full recipe, check out the Grits Breakfast Bowl Delight. You learned how to make a tasty grits breakfast bowl. We covered main ingredients, optional add-ins, and the best tools. I shared how to prepare the grits, cook the eggs and sausage, and assemble your dish. We explored tips to get the right texture and enhance flavors, plus fun variations and storage advice. Now, it’s time to enjoy your creation. With simple steps and fresh ingredients, you can make this breakfast both fun and delicious. Happy cooking!

Start your day right with a Flavorful Grits Breakfast Bowl! This meal is easy to make and packed with comforting taste. I’ll guide you through each step, from choosing the …

Read more

Categories Breakfast

Hearty Meat Lovers Pizza Casserole Delight

May 27, 2025 by Chef Elliot
- 1 lb ground beef - 1 lb Italian sausage, casings removed - 1 cup pepperoni slices - 1 cup diced ham - 1 red bell pepper, diced - 1 medium onion, diced - 3 cups marinara sauce - 12 oz pasta (cavatappi or penne) - 2 cups shredded mozzarella cheese - 1 cup shredded cheddar cheese - 1 tablespoon Italian seasoning - Salt and pepper to taste - Olive oil for sautéing To create a hearty Meat Lovers Pizza Casserole, you need key ingredients. Start with meats like ground beef, Italian sausage, pepperoni, and ham. These add rich flavors and textures. Fresh veggies like red bell pepper and onion bring color and crunch. Marinara sauce serves as the base, binding everything together with its savory taste. Choose pasta, like cavatappi or penne, to hold the sauce well. The melted mozzarella and cheddar cheeses create a gooey, cheesy topping that everyone loves. Italian seasoning adds depth, while salt and pepper enhance all the flavors. Olive oil is crucial for sautéing your veggies and meats. Each ingredient plays a role in making this dish both tasty and filling. For the full recipe, check out the details in the [Full Recipe]. - Set your oven to 375°F (190°C). - Cook and drain the pasta. Start by preheating your oven. This step is crucial for cooking the casserole evenly. Next, boil water for your pasta. Cook it until it's firm but not too soft. Drain it well and set it aside. - Brown ground beef and Italian sausage. - Add diced onion and bell pepper. In a large skillet, heat a splash of olive oil. Add your ground beef and Italian sausage. Break them up with a spoon as they cook. You want them brown and cooked through. After about 5 minutes, toss in the diced onion and bell pepper. Cook these until they soften and smell great. - Mix in pepperoni, ham, and marinara sauce. - Combine with pasta and layer cheeses. - Bake for 25-30 minutes. Add the pepperoni and diced ham to the skillet. Stir for a minute, then pour in the marinara sauce. Mix it all well and let it simmer for 5 minutes. In a big bowl, combine the meat sauce with the cooked pasta. Stir in half of the mozzarella and cheddar. Pour this mixture into a greased baking dish. Top it with the rest of the cheese. Bake for 25-30 minutes. You will know it’s done when the cheese is melted and bubbly. For the full recipe, check out the details above. Enjoy making this hearty meal! To make your casserole shine, choose high-quality meat and cheese. This choice adds rich flavor and makes every bite enjoyable. Also, avoid overcooking your pasta. If you cook it too long, it may turn mushy. Aim for al dente; this texture holds up better in the casserole. Make your dish visually appealing. Garnish each serving with fresh herbs like basil or parsley. This adds a pop of color and freshness. Before serving, drizzle a little olive oil on top. It enhances the flavor and gives a nice shine. Pair your casserole with a side salad or some garlic bread. This adds crunch and freshness to your meal. For drinks, consider a robust red wine. It complements the rich flavors of the casserole. Enjoy your hearty dish! {{image_4}} You can switch things up by using turkey or chicken. These meats are lighter but still tasty. If you want a fun twist, add bacon. Bacon brings a nice crispy flavor to the casserole. For those who prefer no meat, try plant-based sausage. It gives you the same great taste without the meat. You can also add veggies like mushrooms or spinach. They add nutrition and flavor to your dish. If you like heat, add crushed red pepper flakes. They give your casserole a spicy kick. You can also use spicy marinara sauce. This makes the dish even more exciting. After you enjoy your casserole, let it cool down first. This step is key to keeping it fresh. Place the leftover casserole in an airtight container. This helps prevent moisture loss and keeps flavors intact. When you want to enjoy it again, the oven is the best choice. Preheat your oven to about 350°F (175°C). Put the casserole in a baking dish and cover it with foil. Heat for about 20 minutes. This keeps the texture nice and cheesy. If you're in a hurry, the microwave works too. Just place a portion on a plate and heat for 1-2 minutes. If you want to save some for later, freezing is a great option. You can freeze individual portions for easy meals. Use freezer-safe containers or bags to store them. When you’re ready to eat, thaw overnight in the fridge. This makes it easier to bake later. Then, simply reheat it in the oven for a warm, hearty meal. Yes, you can prepare the casserole and refrigerate it before baking. This saves time on busy days. When you are ready, just pop it in the oven. It will taste fresh and delicious. If cooking from frozen, it takes about 40-50 minutes. Just make sure to cover it with foil for the first half. This helps it heat evenly. After that, remove the foil to brown the top. Absolutely! Gluten-free pasta works well in this recipe. It holds up nicely with all the meats and sauce. Just follow the package directions for cooking time. You can serve salads, garlic bread, or roasted vegetables. These sides balance the rich flavors of the casserole. They add freshness and crunch to your meal. This Meat Lovers Pizza Casserole is a tasty, hearty dish. You learned about essential ingredients and step-by-step instructions to make it. Tips for perfect cooking and presentation help elevate your meal. Don’t forget the fun variations! You can make it your own. Store leftovers properly and enjoy easy meals later. This casserole is perfect for any gathering or cozy night in. Try it today and impress your guests!

Are you ready for a hearty dish that satisfies your meat cravings? My Hearty Meat Lovers Pizza Casserole brings the best of pizza and comfort food together! Packed with ground …

Read more

Categories Dinner

Cajun Chicken Sloppy Joes Flavorful Dinner Recipe

May 27, 2025 by Chef Elliot
To make Cajun Chicken Sloppy Joes, gather these ingredients: - 1 lb ground chicken - 1 small onion, finely diced - 1 green bell pepper, finely diced - 2 cloves garlic, minced - 1 tablespoon Cajun seasoning - 1 tablespoon Worcestershire sauce - 1 can (8 oz) tomato sauce - 1 tablespoon brown sugar - Salt and freshly cracked pepper to taste - 4 soft hamburger buns - Fresh parsley, chopped (for garnish) These ingredients can add even more flavor to your dish: - 1 tablespoon hot sauce for heat - 1 teaspoon smoked paprika for depth - Sliced jalapeños for a spicy kick - Cheddar cheese for creaminess To complete your meal, consider these tasty sides: - Crispy potato chips - Dill pickles for crunch - A light salad for freshness - Iced tea or soda for a refreshing drink This recipe is simple and fun. You can also find the Full Recipe to guide you through the cooking steps. To start, gather the ingredients for Cajun Chicken Sloppy Joes. You will need: - 1 lb ground chicken - 1 small onion, finely diced - 1 green bell pepper, finely diced - 2 cloves garlic, minced - 1 tablespoon Cajun seasoning - 1 tablespoon Worcestershire sauce - 1 can (8 oz) tomato sauce - 1 tablespoon brown sugar - Salt and freshly cracked pepper to taste - 4 soft hamburger buns - Fresh parsley, chopped (for garnish) Next, finely chop the onion and bell pepper. Mince the garlic too. This prep helps the flavors blend well. Now, heat a large skillet over medium heat. Add the ground chicken. Break it apart with a spatula as it cooks. It should take about 5-7 minutes until it's no longer pink. Once the chicken is cooked, add the diced onion, bell pepper, and minced garlic. Sauté these for about 3-4 minutes. The veggies should soften and the onion will turn translucent. Sprinkle the Cajun seasoning and pour in the Worcestershire sauce. Stir everything well to coat the chicken and veggies. Next, pour in the tomato sauce and add the brown sugar. Mix it all together. Season with salt and freshly cracked pepper to your taste. Reduce the heat to low and let the mixture simmer for around 10 minutes. Stir it occasionally. This lets the flavors meld and the sauce thicken. While your mixture simmers, toast the hamburger buns. You can do this in a separate skillet or under a broiler. Aim for a golden brown and crispy texture. Once the chicken mixture is ready, scoop it onto the toasted buns. Let the filling overflow a bit for that messy, Sloppy Joe look. For a nice presentation, serve the Sloppy Joes on a rustic wooden board. Add pickles and chips on the side. This makes for a fun and casual meal. Don't forget to garnish each Sloppy Joe with chopped fresh parsley. It adds color and a fresh touch. If you want more details, check the Full Recipe for additional insights and tips. Happy cooking! One common mistake is overcooking the chicken. Cook it just until it's no longer pink. Another mistake is not seasoning enough. Cajun seasoning gives flavor, so use it generously. Don't skip the Worcestershire sauce; it adds depth. Lastly, avoid soggy buns. Toast them well to keep them from getting mushy. To enhance the Cajun flavor, start with fresh spices. If you can, use a blend that includes paprika, cayenne, and thyme. You can even make your own mix! Add a splash of hot sauce for extra heat. For a smoky taste, consider adding a bit of smoked paprika. Let the mixture simmer long enough to let the flavors meld together. This is key for a rich taste. To save time, prep your ingredients beforehand. Chop the onion and bell pepper the night before. You can also use pre-minced garlic to cut down on prep work. While the chicken cooks, toast the buns at the same time. This way, everything is ready to serve together. You can also double the recipe and freeze half for another day. This makes for an easy meal later on. For the Full Recipe, refer to the earlier section. {{image_4}} To make a vegetarian version, swap the ground chicken for lentils or mushrooms. Lentils provide a nice texture and soak up flavors well. Mushrooms add a savory taste that mimics meat. Use the same Cajun seasoning and sauce for a bold flavor. Cook the lentils separately, or sauté the mushrooms until they are soft. Combine them with the veggies and sauce just like in the original recipe. This will give you a hearty meal that everyone can enjoy. If you crave heat, add diced jalapeños or hot sauce to the mix. You can also include crushed red pepper flakes for an extra kick. Mixing in spicy sausage can enhance the flavor while keeping the dish meaty. Just remember to adjust the Cajun seasoning to balance the heat. Always taste as you go so you can find the right level of spice for your liking. The bun choice can change your Sloppy Joe experience. While soft hamburger buns are great, consider using brioche or ciabatta for a twist. Brioche adds a rich flavor, while ciabatta has a nice crunch. You can even use lettuce wraps for a low-carb option. Each type of bun can make your meal unique, so feel free to experiment. To store leftover Cajun Chicken Sloppy Joes, first, let them cool. Once cooled, place the filling in an airtight container. You can keep it in the fridge for up to three days. If you store the buns, keep them separate. This way, they stay fresh and do not get soggy. When it's time to reheat, you have a few options. The best way is to use a skillet. Heat it over medium heat. Add the chicken filling and cook until hot, about 5 minutes. You can also use the microwave. Place the filling in a bowl and cover it. Heat for 1-2 minutes, stirring halfway. If you reheating the buns, toast them lightly in a skillet or toaster. If you want to keep Cajun Chicken Sloppy Joes longer, freezing is a great choice. First, cool the filling completely. Then, put it in a freezer-safe container or bag. Make sure to remove as much air as possible. Label it with the date. You can freeze the filling for up to three months. When ready to eat, thaw it overnight in the fridge. Reheat it as mentioned above before serving. For the complete recipe, check the [Full Recipe]. You can use ground turkey or ground beef. Both will work well. They add their own flavor. If you like a vegetarian option, try lentils or black beans. They give a nice texture and taste. Just ensure you cook them well for the best results. Cajun Chicken Sloppy Joes can be mildly spicy. The heat comes from the Cajun seasoning. You can adjust the spice level by using less seasoning. If you like more heat, add hot sauce or red pepper flakes. Taste as you go to find your perfect balance. Yes, you can make this recipe in advance. Cook the mixture and let it cool. Store it in an airtight container in the fridge. It will last for about three days. You can also freeze it for up to three months. Just reheat before serving. For the best flavor, make it fresh and enjoy! For the full recipe, see above. Cajun Chicken Sloppy Joes are tasty and easy to make. I shared the ingredients and prep steps to guide you. Remember to avoid common mistakes to keep flavors bold. Plus, you can try fun variations like vegetarian options or spicy extras. Store leftovers safely for future meals. With this recipe, you can impress friends and family every time. Enjoy your cooking adventures and create the perfect dish tailored to your taste!

Looking for a tasty twist on a classic? Let me introduce you to my Cajun Chicken Sloppy Joes! This recipe packs bold flavors that will make your taste buds dance. …

Read more

Categories Dinner

20 Minute Honey Garlic Shrimp & Rice Bowl Delight

May 27, 2025 by Chef Elliot
- 1 lb shrimp, peeled and deveined - 2 cups cooked jasmine rice - 4 cloves garlic, minced - 1/4 cup honey - 2 tablespoons soy sauce - 1 tablespoon olive oil - 1 tablespoon fresh ginger, minced - Salt and pepper to taste - Broccoli florets, steamed until tender - Green onions and sesame seeds for garnish Gather these ingredients to create a delightful meal. The shrimp are the star of the dish. They cook up sweet and tender, thanks to the honey and soy sauce. The garlic adds a nice kick that you will love. Cooked jasmine rice makes a perfect base for this bowl. You can add optional items for extra flavor. Olive oil adds richness. Fresh ginger gives a zesty note. Using steamed broccoli makes the dish colorful and healthy. Green onions and sesame seeds add a nice crunch and visual appeal. This dish is quick and fun to prepare. You will enjoy each step as you create your meal. For the full recipe, check out the detailed instructions. First, grab a medium bowl. Add the peeled and deveined shrimp. Next, pour in the honey, soy sauce, minced garlic, and minced ginger. Mix everything gently. You want the shrimp to be coated well. Let this sit for 5 minutes. This helps the shrimp soak up all that yummy flavor. While the shrimp marinates, take a skillet and heat some olive oil over medium heat. You want the oil to shimmer. Then, add the marinated shrimp to the skillet. Cook them for about 2-3 minutes on each side. You will know they are done when they turn pink and opaque. Once the shrimp are cooked, season them with salt and pepper. If you have leftover marinade, pour it over the shrimp and let it cook for one more minute. This helps thicken the sauce. If you have not cooked your jasmine rice yet, do that now. You want it hot and fluffy. Now, it’s time to serve! In each bowl, place a layer of jasmine rice. Top it with the cooked shrimp. Add a scoop of steamed broccoli for some color and nutrition. Finally, sprinkle sliced green onions and sesame seeds on top for a nice finish. Enjoy your meal! For the full recipe, check out the details above. To get the best taste from your shrimp, marinate them just right. Mix honey, soy sauce, garlic, and ginger in a bowl. Let the shrimp sit in this mix for about 5 minutes. This helps the shrimp absorb all the yummy flavors. For more flavor, try adding a pinch of red pepper flakes or a dash of lime juice. You can also use fresh herbs like cilantro or basil for a fresh twist. Cooking shrimp just right is key to a great dish. Cook the shrimp for only 2-3 minutes on each side. Look for a pink color, which means they are done. Do not rush this step. If you cook them too long, they will turn rubbery. The shrimp should be tender and juicy. Garnishing makes your dish look fun and tasty. Sprinkle sliced green onions and sesame seeds on top for color and crunch. Serve the shrimp over a bed of jasmine rice with broccoli on the side. You can also add a wedge of lime for a pop of color and flavor. This makes your meal look as good as it tastes. Enjoy making your 20 Minute Honey Garlic Shrimp & Rice Bowl! For the full recipe, check out the previous sections. {{image_4}} You can change the main protein in this dish. If you don’t have shrimp, try chicken or tofu. Both options cook up well with the honey garlic sauce. Chicken will take a bit longer to cook, so cut it into small pieces. Tofu soaks up flavor nicely and adds great texture. If you want to swap the rice, brown rice or quinoa works great. Brown rice has a nutty taste and is more filling. Quinoa is light and packed with protein. Just remember to adjust cooking times as needed. Want a sweeter sauce? Add more honey to the mix. Start with an extra tablespoon and taste it. You can always add more, but it’s hard to take away sweetness. If you like heat, sprinkle in some chili flakes or drizzle chili sauce over the shrimp. This adds a fun kick. You can also mix in a bit of sriracha for a spicy twist. Make this dish your own by adding seasonal veggies. In spring, toss in snap peas or asparagus. In the fall, try roasted squash or Brussels sprouts. Mixing in these vegetables makes the meal colorful and nutritious. You can also change the style of the dish. For a Mexican twist, add black beans and corn. For an Italian flair, mix in diced tomatoes and fresh basil. The options are endless, and you can make it fit your taste and the season. For the full recipe of this delicious meal, refer to the [Full Recipe]. To store your leftovers, let the dish cool first. Place it in an airtight container. This keeps it fresh and tasty. The shrimp will stay good in the fridge for up to three days. Be sure to eat it before then for the best flavor. You can freeze the assembled bowl for later meals. Make sure it is fully cooled. Use a freezer-safe container or a heavy-duty freezer bag. Remove as much air as possible to avoid freezer burn. It can last up to three months in the freezer. When you're ready to eat it, thaw it overnight in the fridge. To reheat, use the microwave or a skillet on low heat. If using a microwave, heat in short bursts to avoid overcooking. Stir the bowl halfway through to warm it evenly. If using a skillet, add a splash of water to keep it moist. This helps prevent the shrimp from becoming rubbery. How to make sure the shrimp are cooked perfectly? To cook shrimp well, watch their color. They should turn pink. When they are opaque, they are ready. Cook for 2-3 minutes on each side. Avoid overcooking, or they will become tough. Can I prepare this dish ahead of time? Yes, you can prep this dish in advance. Marinate the shrimp a few hours before cooking. Cook the rice and broccoli ahead too. Store them in the fridge and heat when ready to serve. What can I serve with the Honey Garlic Shrimp & Rice Bowl? You can serve this dish with a side salad. Steamed vegetables work well too. Try adding some crispy spring rolls for extra crunch. Is this recipe gluten-free? This recipe is not gluten-free due to soy sauce. You can use a gluten-free soy sauce. That way, you can enjoy this dish without worry. What are the nutritional details for this dish? The Honey Garlic Shrimp & Rice Bowl is high in protein. Shrimp provides lean protein. The dish has healthy carbs from rice. Broccoli adds fiber and vitamins. What is the total preparation and cooking time? The total time is just 20 minutes. You need 10 minutes to prep. Cooking takes another 10 minutes. How many servings does this recipe yield? This recipe serves 2-3 people. Perfect for a quick family meal or a date night. Enjoy your cooking! You now have all you need to make a delicious Honey Garlic Shrimp and Rice Bowl. Remember the key steps: marinating the shrimp, cooking it just right, and enhancing flavors with your favorite spices. Experiment with different ingredients to suit your taste. Whether you adjust the recipe or store leftovers, you’re set for a tasty meal. Enjoy your cooking and impress with this easy yet flavorful dish. Your dinner time will never be the same!

Looking for a quick and tasty meal? This 20 Minute Honey Garlic Shrimp & Rice Bowl is your answer! With juicy shrimp, fragrant garlic, and sweet honey, it packs a …

Read more

Categories Dinner

Spicy Shrimp Tacos with Mango Salsa Fresh and Flavorful

May 27, 2025 by Chef Elliot
- 1 lb fresh shrimp, peeled and deveined - 2 teaspoons extra virgin olive oil - 8 small corn tortillas - 1 ripe mango, diced - 1 ripe avocado, diced - ½ medium red onion, finely chopped - 1 teaspoon smoked paprika - 1 teaspoon ground cumin - ½ teaspoon cayenne pepper For these spicy shrimp tacos, start with high-quality shrimp. Fresh shrimp makes all the difference. You want shrimp that is firm and smells like the sea. The olive oil adds a nice richness to the shrimp. It helps the spices stick and gives great flavor. Next, the corn tortillas are key. I prefer small corn tortillas because they hold the shrimp and toppings well. They also add a nice texture. The mango salsa brings a burst of sweetness. Ripe mango enhances the dish and balances the spice. The avocado adds creaminess, while the red onion gives a mild crunch. You can dice everything ahead of time for easy assembly. Spices are essential for flavor. Smoked paprika gives a warm, earthy taste. Cumin adds depth, while cayenne brings the heat. Adjust the cayenne to suit your taste. You can always add more if you love spice. For the full recipe, check out the complete instructions to make these tasty tacos. Enjoy! To start, gather your shrimp and a medium bowl. Combine the shrimp with 2 teaspoons of olive oil. Add 1 teaspoon of smoked paprika, 1 teaspoon of ground cumin, and ½ teaspoon of cayenne pepper. You can adjust the cayenne for more or less heat. Next, squeeze in 1 tablespoon of lime juice. Add sea salt and freshly cracked black pepper to taste. Gently toss the shrimp until they are fully coated in the spices. Let them marinate for 10 minutes to really soak in those flavors. While the shrimp marinates, we can make the mango salsa. In a separate bowl, mix 1 ripe diced mango, 1 diced avocado, and ½ medium finely chopped red onion. Add 1 minced jalapeño pepper, but remember to remove the seeds if you want a milder taste. Toss in 2 tablespoons of finely chopped cilantro as well. Finally, fold in 1 tablespoon of lime juice. This adds freshness to the salsa. Set it aside to let the flavors develop while you cook the shrimp. Now it’s time to cook the shrimp. Preheat a non-stick skillet over medium-high heat. Once hot, add the marinated shrimp in a single layer. Cook them for 2-3 minutes on each side. They should turn pink and opaque when done. Be careful not to overcrowd the pan, as this helps them sear properly. You want that nice, tasty crust! For the complete recipe, check out the Full Recipe. To make tasty shrimp, avoid overcrowding the pan. If you add too many shrimp, they will steam instead of sear. This makes them less flavorful. Cook in batches if needed. Adjust the cayenne pepper to fit your heat level. If you want a milder taco, use less cayenne. For more heat, add extra. Taste as you go to find your perfect balance. Warm your tortillas without making them crispy. You can use a dry skillet over low heat. Heat them for about 15-30 seconds on each side. This keeps them soft and pliable, perfect for filling. I recommend using fresh corn tortillas. They have a sweet flavor that pairs well with spicy shrimp. Store-bought options can work, but fresh ones add more taste. For an extra zing, add lime zest to your salsa. This gives it a bright flavor that really pops. You can use a microplane to zest the lime easily. Incorporate diced bell peppers for added crunch. They bring color and texture to the salsa. Choose red or yellow for sweetness, or green for a fresh taste. These tips will elevate your Spicy Shrimp Tacos with Mango Salsa and make your meal unforgettable. For the full recipe, check out the details above. {{image_4}} You can switch up the protein in your tacos. Try grilled chicken or fish instead of shrimp. Both options work well with the spices and salsa. If you want a vegetarian option, use chickpeas or grilled vegetables. These choices are hearty and full of flavor. Mango salsa is delicious, but you can mix it up. Substitute mango with pineapple for a tropical twist. The sweet and tart flavor of pineapple brightens the dish. You can also add black beans for extra protein and texture. They add a nice bite to the salsa and make it more filling. Not everyone likes it spicy. For a family-friendly version, use milder spices. You can skip the cayenne pepper or reduce the amount. If you want more heat, add sriracha or hot sauce. This gives your tacos a flavorful kick without overwhelming the taste. To keep leftover tacos fresh, store the filling and tortillas separately. This way, the tortillas won't get soggy. Place the shrimp and salsa in airtight containers. Store them in the fridge for up to 2 days. When ready to eat, warm the tortillas in a pan. Then, fill them with the shrimp and salsa. For mango salsa, use a glass container with a tight lid. This helps keep the salsa fresh. You can store it in the fridge for up to 3 days. The flavors will deepen over time. If you want the best taste, eat it within 24 hours. Yes, you can freeze cooked shrimp. To do this, let the shrimp cool. Then, place them in a freezer-safe bag. Remove as much air as you can. You can store them for up to 3 months. For tortillas, wrap them in foil or plastic wrap. Then, place them in a freezer bag. They can last for about 2 months in the freezer. When you're ready, thaw them overnight in the fridge before use. For the full recipe, check the details above. For shrimp tacos, I recommend using fresh, wild-caught shrimp. Look for shrimp that are pink and firm. Avoid shrimp that smells fishy. The size matters, too. Choose medium to large shrimp for a good bite. Generally, shrimp labeled as "U15" means there are under 15 shrimp per pound. This size is perfect for tacos. Yes, you can prepare the mango salsa ahead of time. Just mix all the salsa ingredients as mentioned in the recipe. Store it in an airtight container in the fridge. It stays fresh for about 2 to 3 days. The flavors will blend and taste even better after sitting for a bit. Just give it a stir before serving. Yes, this recipe is gluten-free if you use corn tortillas. Most corn tortillas do not contain gluten. Always check the label to be sure. If you are sensitive to gluten, stick with pure corn tortillas. They add a nice flavor and texture to the tacos. These spicy shrimp tacos are easy and fun to make. You start with fresh shrimp, marinate them, and cook them quickly. The mango salsa brings a tasty twist, adding flavor and color. You can even change the protein or spice levels to suit your taste. Store leftovers properly for later enjoyment. Try this recipe for a tasty meal. By mixing ingredients and spices, you get a dish full of flavor. Enjoy the process and share it with friends!

Are you craving a burst of flavor in your meals? Look no further than these Spicy Shrimp Tacos with Mango Salsa! With fresh shrimp, creamy avocado, and sweet mango, these …

Read more

Categories Dinner

Easy Greek Chicken Casserole Flavorful Family Meal

May 27, 2025 by Chef Elliot
- 2 cups cooked rotisserie chicken, shredded - 1 cup quinoa, thoroughly rinsed - 2 cups vegetable broth - 1 cup cherry tomatoes, halved - 1 cup cucumber, diced - 1/2 cup red onion, finely chopped - 1 cup Kalamata olives, pitted and halved - 1 cup feta cheese, crumbled (divided into two portions) - 2 tablespoons olive oil - 1 tablespoon dried oregano - Salt and pepper to taste - Fresh parsley for garnish The ingredients in this Easy Greek Chicken Casserole bring flavor and color to your plate. First, I love using rotisserie chicken because it saves time. You can find it at any grocery store. Shredding it makes it easy to mix with other ingredients. Next, quinoa is my go-to grain for a healthy boost. Rinse it well to remove any bitterness. The vegetable broth adds rich flavor and moisture. Fresh veggies like cherry tomatoes and cucumbers make this dish bright and crunchy. Kalamata olives offer a briny, savory touch. The feta cheese adds creaminess and tang. I always divide the feta into two portions. It melts nicely in the casserole while leaving some to sprinkle on top. Finally, the olive oil and oregano tie the dish together. A simple sprinkle of salt and pepper enhances all these flavors. Don’t forget to garnish with fresh parsley for a pop of color. This recipe truly showcases how simple ingredients can create a beautiful family meal. For the full recipe, check out the Mediterranean Bliss Chicken Casserole. 1. Preheat your oven to 375°F (190°C). Make sure it warms up well. 2. Grease a 9x13 inch casserole dish. This helps in easy serving later. 3. In a large bowl, mix 2 cups of shredded rotisserie chicken and 1 cup of rinsed quinoa. 4. Pour in 2 cups of vegetable broth. This adds great flavor and moisture. 5. Add 1 cup of halved cherry tomatoes, 1 cup of diced cucumber, and 1/2 cup of finely chopped red onion. 6. Toss in 1 cup of pitted and halved Kalamata olives. These give a nice salty punch. 1. Crumble half of the feta cheese into the mixture. 2. Drizzle 2 tablespoons of olive oil over the top. 3. Sprinkle 1 tablespoon of dried oregano, along with salt and pepper to your taste. 4. Stir gently to mix everything well without breaking the quinoa. 5. Transfer the mixed ingredients to the prepared casserole dish. Spread it evenly for even cooking. 6. Top with the remaining feta cheese for a tasty finish. 1. Cover the casserole tightly with aluminum foil. This keeps moisture in while baking. 2. Place it in the oven and bake for 30 minutes. 3. After 30 minutes, take off the foil. Return the dish to the oven. 4. Bake for another 15 minutes. This helps the top get golden and crispy. 5. Once done, remove it from the oven. Let it sit for 5 minutes to settle. 6. Garnish with fresh chopped parsley before serving to add color and taste. For the full recipe, refer to the main section above. Using rotisserie chicken makes this dish easy and quick. You save time and effort. Just shred the chicken right before mixing. This adds great flavor. Rinse the quinoa well before cooking. Use cold water and a fine mesh strainer. This step removes bitterness. It also improves the texture. A good rinse makes the quinoa light and fluffy. Covering the casserole with foil while baking is key. It traps steam and keeps the dish moist. Without this step, the quinoa can dry out. Make sure the foil fits snugly for best results. Spread the mixture evenly in the casserole dish. This helps it cook uniformly. If one side is thicker, it may bake slower. A flat layer ensures all parts cook at the same rate. Garnish this casserole with fresh parsley. It adds color and a fresh taste. You can also sprinkle more feta on top for a richer flavor. Pair it with crusty bread or a green salad. These sides complement the dish well. For drinks, a crisp white wine works great. A light lemonade is a nice non-alcoholic option. You can find the Full Recipe for more details on this tasty meal. {{image_4}} You can switch the chicken for turkey. Ground turkey works well and adds a nice flavor. If you prefer plant-based options, consider using chickpeas or lentils. They bring protein and a great texture. For cheese, feta is classic. However, you can try mozzarella for a milder taste. Goat cheese also adds a tangy kick. Each cheese changes the dish's flavor, so feel free to experiment. To boost the taste, add spices like paprika or cumin. These spices give warmth and depth. Fresh herbs like basil or dill can also elevate the dish. They add brightness and freshness to every bite. Seasonal vegetables are another great way to enhance flavor. Add bell peppers, zucchini, or spinach. They not only add color but also more nutrients. Mixing different veggies keeps the dish exciting. For a gluten-free option, use quinoa as the base. Quinoa is naturally gluten-free and adds protein. You can also use brown rice or farro if you prefer. If you're looking for a vegan version, tofu or tempeh is perfect. Both absorb flavors well and provide a hearty texture. Simply sauté them before adding to the casserole for extra flavor. For the full recipe, check out the Mediterranean Bliss Chicken Casserole. After cooking, store leftovers in the fridge. Use an airtight container to keep the casserole fresh. Glass or BPA-free plastic containers work best. They prevent moisture loss, keeping your dish tasty for days. You can freeze the casserole for later. First, let it cool completely. Then, wrap it tightly in plastic wrap and foil. This step prevents freezer burn. When ready to eat, thaw it in the fridge overnight. Reheat in the oven at 350°F (175°C) until hot. This way, you keep the flavors just right. In the fridge, your casserole lasts about three to four days. Always check for signs of spoilage. If you see mold or a strange smell, it's best to discard it. Trust your senses to ensure food safety. Yes, you can use various chicken cuts. Chicken thighs add more flavor and moisture. You can also use boneless chicken breasts for a leaner option. Some prefer to grill or pan-sear the chicken before adding it to the casserole. This step can enhance the taste and texture. To prepare this casserole in advance, follow these steps: - Cook the chicken and quinoa. - Mix all the ingredients in a bowl, but don’t bake yet. - Transfer the mixture to your casserole dish. - Cover it tightly with foil or plastic wrap. - Store it in the fridge for up to two days. - When ready, bake it as directed. This way, you save time on busy days. Yes, this recipe is gluten-free as it uses quinoa instead of pasta or bread. Quinoa is a great grain alternative. Ensure your vegetable broth is also gluten-free. You can substitute any ingredients like olives or feta cheese as needed. This makes it easy for those with gluten sensitivities to enjoy a tasty meal. This blog post covers a simple and tasty casserole recipe using rotisserie chicken, quinoa, and fresh veggies. You learned how to prepare, mix, and bake your dish for a golden finish. Plus, I shared handy tips and ways to customize it for your taste. Remember, this recipe is flexible. You can substitute ingredients or make it vegan easily. With proper storage, you can enjoy leftovers for days. Try making this dish your own, and enjoy delicious meals with family and friends!

Looking for an easy family meal that bursts with flavor? Look no further! My Easy Greek Chicken Casserole combines tender rotisserie chicken, hearty quinoa, and fresh vegetables. This dish transforms …

Read more

Categories Dinner

Juicy Steak Burritos Flavorful and Satisfying Meal

May 27, 2025 by Chef Elliot
To make juicy steak burritos, gather these key ingredients: - 1 lb flank steak, trimmed - 1 tablespoon olive oil - 1 teaspoon smoked paprika - 1 teaspoon garlic powder - 1 teaspoon ground cumin - 1 teaspoon chili powder - Salt and pepper, to taste - 4 large flour tortillas - 1 cup cooked rice (white or brown) - 1 can (15 oz) black beans, rinsed and drained - 1 cup corn (fresh or frozen) - 1 avocado, sliced - 1 cup shredded cheese (cheddar or Mexican blend) - 1 cup salsa - Fresh cilantro for garnish - Lime wedges for serving These ingredients create a rich and satisfying taste that you'll love. You can add extra flavors with these options: - Jalapeños for heat - Sour cream for creaminess - Pickled onions for tang - Green onions for freshness These ingredients boost the taste and make your burritos even more exciting. If you can't find certain ingredients, try these substitutions: - Skirt steak instead of flank steak - Brown rice or quinoa instead of white rice - Pinto beans instead of black beans - Tortilla wraps made from whole wheat or corn These alternatives will still give you a tasty burrito while fitting your needs. For the full recipe, check out the details above! To make juicy steak burritos, start by marinating the flank steak. In a bowl, mix one tablespoon of olive oil, one teaspoon of smoked paprika, garlic powder, ground cumin, and chili powder. Add a pinch of salt and pepper. Rub this mixture all over the steak. This helps to add great flavor. Let the steak sit for at least 30 minutes at room temperature. If you have more time, refrigerate it for up to two hours. This step makes the steak even tastier. Next, cook the steak to get the best taste. Preheat your grill pan or outdoor grill to medium-high heat. Once hot, add the marinated steak. Grill it for about 5-7 minutes on each side. You want it to reach your favorite doneness. Once cooked, take the steak off the grill. Let it rest on a cutting board for 5-10 minutes. This helps the juices stay inside. After resting, slice the steak thinly against the grain. This makes the steak tender and easy to eat. Now, let’s prepare the filling. In a large bowl, mix cooked rice, rinsed black beans, corn, and half of the shredded cheese. Stir well to combine everything. This mix is the heart of your burrito. To assemble, take a large flour tortilla. Place it on a flat surface. In the center, add a scoop of the rice and bean mixture, some sliced steak, avocado, and a spoonful of salsa. Top with the remaining cheese for extra flavor. For an added crunch, cook the wrapped burritos. Heat a skillet over medium heat. Place each burrito seam-side down in the skillet. Toast for 1-2 minutes on each side until golden brown and crispy. This step makes the burritos even more satisfying. Enjoy your delicious, juicy steak burritos! For the complete recipe, check out the Full Recipe. To grill the perfect steak, start with high-quality flank steak. Trim off any excess fat for better grilling. Marinating the steak is key. Use olive oil, spices, and a pinch of salt for flavor. Let it sit for at least 30 minutes. Preheat your grill to medium-high heat. A hot grill creates a nice sear. Grill for 5-7 minutes on each side. Always slice against the grain for the best texture. Wrapping a burrito may seem tricky, but it’s easy with practice. Start with a large, warm flour tortilla. Place your filling in the center and leave space on the sides. Fold the sides in first, then roll from the bottom. Tuck the filling tightly as you roll. This keeps everything inside. If you want a crispy burrito, heat it in a skillet after wrapping. Serve your juicy steak burritos with fresh lime wedges and extra salsa for dipping. You can also add a side of guacamole for extra creaminess. A light salad with tomatoes and avocado pairs well, too. If you enjoy a kick, serve with jalapeños or hot sauce. For drinks, try a refreshing iced tea or a cold beer. Enjoy this meal with friends for a fun gathering! {{image_4}} If you want to make a vegetarian burrito, you can swap the steak with veggies. Grilled peppers, mushrooms, and zucchini work great. You can also use beans for protein. Black beans or pinto beans add good flavor and texture. For a fresh taste, add spinach or kale. Don't forget to pile on the cheese and guacamole! You can switch out the flank steak for other meats. Chicken, pork, or even shrimp make tasty alternatives. Season them the same way as the steak for great flavor. If you want a quick option, try using rotisserie chicken. It saves time and still tastes amazing. For a vegan choice, use tofu or tempeh. Marinate them in the same spices for a lovely taste. Spice up your burrito with different seasonings. Try adding chipotle powder for heat or cinnamon for warmth. You can also mix in fresh herbs like cilantro or parsley. For extra crunch, add fresh veggies like radishes or shredded lettuce. Experiment with your favorite flavors to find what you love. Each time you make these burritos, you can create something unique. Check out the Full Recipe for the base ingredients to start your culinary journey! To keep your leftover burritos fresh, wrap each one tightly in plastic wrap. This helps keep them from drying out. You can also store them in an airtight container. Make sure to place them in the fridge. Leftover burritos can last up to three days in the fridge. If you want to enjoy them later, freezing is a great option. When you’re ready to eat the leftovers, you have a few options. You can reheat burritos in the microwave or on the stove. For the microwave, unwrap the burrito and place it on a plate. Heat it for one minute, then check if it's warm. If not, heat in 30-second bursts until hot. For the stove, place the burrito in a skillet over low heat. Cook for about 5 minutes, turning it often. This method keeps the outside crispy. Freezing burritos is simple and smart. First, let them cool completely. Then, wrap each burrito in plastic wrap. After that, place the wrapped burritos in a freezer bag. Label the bag with the date. They can last up to three months in the freezer. When you’re ready to eat, thaw them in the fridge overnight before reheating. Enjoy your juicy steak burritos anytime! For the full recipe, check back with the earlier sections. To make your steak more tender, always slice it against the grain. This cuts through the muscle fibers and makes each bite easier to chew. You can also marinate the steak for a longer time. Using a mix of olive oil with spices helps break down tough fibers. Try using citrus juice in your marinade for added tenderness. Yes, you can use different tortillas. Corn tortillas are a popular choice for a gluten-free option. Whole wheat tortillas provide a healthier twist. You can also find spinach or tomato tortillas for added flavor. Just make sure the tortillas are large enough to hold all the tasty fillings. Steak burritos pair well with many sides. You can serve them with a fresh salad or tortilla chips and salsa. Guacamole is another great choice. For a heartier meal, consider a side of Mexican rice or refried beans. These sides will complement the flavors of the burritos nicely. To make a gluten-free version, simply use gluten-free tortillas. Many brands offer tasty options made from rice or corn. Ensure that all other ingredients, like beans and sauces, are gluten-free. Always check labels to avoid hidden gluten in processed foods. This way, everyone can enjoy the deliciousness! You learned about making juicy steak burritos, from key ingredients to storage tips. Each step ensures robust flavor and easy assembly. Whether you grill or fry, there’s a method for everyone. You can even swap ingredients to suit your taste. Use these ideas to craft a meal that pleases everyone. Don't hesitate to experiment with spices and fillings. Enjoy your cooking adventure and share it with friends. There's nothing like a homemade burrito!

Are you craving a meal that’s both flavorful and filling? Look no further! Juicy steak burritos are a perfect choice. Packed with tender marinated steak and fresh ingredients, these burritos …

Read more

Categories Dinner

Hawaiian Sweet Roll French Toast Bake Delight

May 27, 2025 by Chef Elliot
- 12 Hawaiian sweet rolls, cut into quarters - 6 large eggs - 1 cup milk (or coconut milk for an extra tropical twist) - 1/2 cup heavy cream - 1/4 cup packed brown sugar - 1 teaspoon pure vanilla extract - 1 teaspoon ground cinnamon - 1/2 teaspoon freshly grated nutmeg The star of this dish is the Hawaiian sweet rolls. They are soft and fluffy, making them perfect for soaking. Next, we need eggs and dairy. The eggs bind everything together, while milk and cream add richness. For flavor, we use brown sugar, vanilla, cinnamon, and nutmeg. These ingredients create a warm, sweet base that brings out the best in the rolls. - 1/2 cup crushed pineapple, thoroughly drained - 1/2 cup shredded coconut (choose sweetened or unsweetened according to preference) - 1/4 cup chopped macadamia nuts (optional for added crunch) If you want to amp up the flavor, add crushed pineapple. It gives a nice tropical touch. Shredded coconut adds more texture and sweetness. You can also mix in macadamia nuts for a crunchy bite, but this is totally optional. - Powdered sugar, for a delightful dusting - Maple syrup, for drizzling Finish your bake with a dusting of powdered sugar. It looks lovely and adds sweetness. Drizzling warm maple syrup over each slice makes every bite even more delicious. This recipe has all the essential ingredients for a perfect Hawaiian Sweet Roll French Toast Bake. For the full recipe, check out the detailed steps later. 1. Preheat your oven to 350°F (175°C). This ensures a great bake. 2. Grease your 9x13 inch baking dish. Use cooking spray or softened butter. This helps prevent sticking. 1. In a large bowl, crack 6 eggs. Whisk them until smooth. 2. Pour in 1 cup of milk and 1/2 cup of heavy cream. 3. Add 1/4 cup brown sugar, 1 teaspoon vanilla extract, 1 teaspoon cinnamon, and 1/2 teaspoon nutmeg. Whisk again until well mixed. 4. Cut 12 Hawaiian sweet rolls into quarters. Add them to the egg mixture. Make sure each piece gets coated. 5. Let the sweet rolls soak for 15 minutes. This step is key for flavor. 1. After soaking, fold in 1/2 cup crushed pineapple and 1/2 cup shredded coconut. If using, add 1/4 cup chopped macadamia nuts for crunch. 2. Spread the mixture evenly in the prepared baking dish. Press down lightly for even cooking. 3. Place the dish in your preheated oven. Bake for 30-35 minutes. The top should be golden brown. 4. Once baked, take it out and let it cool for 10 minutes. This helps improve the texture. Enjoy your Hawaiian Sweet Roll French Toast Bake with a dusting of powdered sugar and a drizzle of maple syrup. You can find the Full Recipe in the previous section. To make the best Hawaiian Sweet Roll French Toast Bake, soak the rolls well. I let them soak for about 15 minutes. This time helps the rolls soak up all the delicious flavors. If you soak them too little, they may turn out dry. You want them soft and sweet all the way through. For even cooking, spread the soaked rolls out in the pan. Press down gently on the top with your hands. This helps all parts cook at the same rate. Check the center after baking. It should feel firm but not hard. When it comes to serving, looks matter. Serve each portion warm on a plate. Dust the top with powdered sugar for a sweet touch. It makes the dish look extra fancy. You can also drizzle warm maple syrup on top. To add more color, garnish with extra coconut flakes. Fresh pineapple slices make it pop. This not only looks good but adds bright flavor. It gives your dish a real tropical feel. Want to change things up? Try using different spices. A dash of ginger or cardamom can add a fun twist. You can also use other types of milk. Coconut milk gives it a tropical vibe. Almond milk works well too for a nutty taste. Feel free to mix and match! These small changes can create a whole new dish. Enjoy exploring different flavors! For the full recipe, check out the details above. {{image_4}} You can mix things up with seasonal flavors. In the fall, try adding pumpkin spice to the egg mixture. A dash of pumpkin spice gives a warm, cozy feel. For summer, use fresh fruits and berries. Strawberries, blueberries, or peaches can brighten your dish. Their juices soak into the bread, making it juicy and sweet. For those with dietary needs, you can adapt this bake. Use gluten-free Hawaiian sweet rolls for a gluten-free option. These rolls taste just as good and keep the dish soft. If you want a dairy-free version, swap regular milk and cream for coconut milk. This adds a lovely tropical taste. You can serve this dish in different styles. Individual servings look nice and are easy to grab. Just scoop out portions and place them on plates. If you're feeding a group, a family-style dish works well. Serve it warm in the baking dish and let everyone help themselves. This is a fun way to share the joy of your Hawaiian Sweet Roll French Toast Bake. To store your Hawaiian Sweet Roll French Toast Bake, let it cool first. This helps keep the texture nice. Use an airtight container to keep it fresh. I recommend glass or plastic containers with tight lids. These containers prevent air from drying out the bake. When reheating, you have a few good options. You can use the oven, microwave, or stovetop. In the oven, preheat to 350°F (175°C). Place slices on a baking sheet and warm for about 10-15 minutes. In the microwave, heat for 30 seconds to 1 minute. If you use the stovetop, warm in a pan over low heat, flipping gently. This helps keep the outside crispy and the inside soft. To freeze your bake, first cut it into individual portions. Wrap each piece well in plastic wrap, then place them in a freezer bag. This keeps them safe from freezer burn. For thawing, move the portions to the fridge overnight. If you're in a hurry, you can use the microwave on defrost mode. Enjoy the same great taste even after freezing! Yes, you can prepare this dish the night before. Just follow the steps until you need to bake it. Cover the dish with plastic wrap and store it in the fridge. In the morning, take it out and bake it right away. This saves time and gives flavors a chance to blend. You can use other types of soft bread. Brioche or challah works great. These breads are sweet and fluffy, similar to Hawaiian rolls. If you want a twist, try cinnamon rolls for a fun flavor. Check for a golden brown top. The center should feel firm and not jiggly. You can also insert a toothpick in the center. If it comes out clean, it’s done. You want a nice, fluffy texture throughout. Yes, you can swap milk for other kinds. Almond milk or oat milk works well. For a tropical touch, try coconut milk. Each type of milk brings its own flavor, so choose what you like best. You can add fresh fruit like bananas or berries. Whipped cream adds a nice touch too. For a crunch, try nuts like walnuts or pecans. You could even drizzle honey or chocolate sauce for extra sweetness. This recipe uses Hawaiian sweet rolls, eggs, and flavorings. You can add crushed pineapple or nuts. The baking process is simple. Remember to soak the rolls and adjust cooking for even results. You can add seasonal flavors or tailor it for dietary needs. Store leftovers properly and know how to reheat or freeze them. Enjoy trying new toppings and making it your own! Each bite will remind you of fun times. Cooking can be a joy, so dive in and enjoy your creation!

Welcome to my kitchen! Today, we’re diving into a special treat: Hawaiian Sweet Roll French Toast Bake. This dish combines soft, sweet rolls with rich flavors for a breakfast delight. …

Read more

Categories Breakfast

Cheese Breadsticks Fresh and Tasty Snack Idea

May 27, 2025 by Chef Elliot
To make delicious cheese breadsticks, you need a few key ingredients. Here’s a list for you: - 2 cups all-purpose flour - 1 tablespoon granulated sugar - 1 teaspoon salt - 2 teaspoons baking powder - 1 cup shredded mozzarella cheese - 1/2 cup milk (preferably whole) - 1/4 cup unsalted butter, melted (plus extra for brushing) - 2 teaspoons garlic powder - 1 tablespoon fresh parsley, finely chopped (optional, for garnish) These ingredients work together to create a soft and cheesy breadstick. The flour gives the dough structure, while the cheese adds that creamy flavor we all love. You can add a few optional ingredients to make your breadsticks even better. Consider these: - Different types of cheese like cheddar or parmesan for varied taste. - Fresh herbs like rosemary or thyme to add a fragrant note. - Spices such as paprika or chili flakes for a hint of heat. Using these extras can really elevate your cheese breadsticks. Feel free to mix and match based on what you have at home. Using good-quality ingredients matters. Here are some tips: - Choose fresh mozzarella, as it melts beautifully and tastes great. - Use whole milk for a richer flavor and a softer texture. - Opt for unsalted butter to control the salt level in your dough. When you select quality ingredients, your cheese breadsticks will taste fantastic. Always remember, fresh is best! For the full recipe, check out the detailed steps to create these tasty snacks. First, gather your ingredients for the dough. You need all-purpose flour, sugar, salt, baking powder, shredded mozzarella, milk, and melted butter. 1. Preheat your oven to 375°F (190°C). 2. Line a baking sheet with parchment paper to prevent sticking. 3. In a large bowl, whisk together the flour, sugar, salt, and baking powder. Make sure there are no lumps. 4. Next, fold in the shredded mozzarella cheese. Ensure it's mixed well with the dry ingredients. 5. In a separate bowl, combine the milk and melted butter. Whisk until they blend together. 6. Pour this wet mixture into the dry ingredients. Mix with a wooden spoon or spatula until a soft dough forms. 7. Transfer the dough to a floured surface. Knead gently for about one minute until it feels smooth. Now it’s time to shape the dough into breadsticks. 1. Roll the dough into a rectangle about 1/2 inch thick. 2. Use a sharp knife or pizza cutter to cut the dough into strips. Aim for strips that are about 1 inch wide and 4 inches long. 3. Arrange the strips on the prepared baking sheet. Leave space between each stick for rising. Baking is where the magic happens. 1. In a small bowl, mix garlic powder with a tablespoon of melted butter. 2. Use a pastry brush to apply this garlic butter over the tops of the breadsticks. 3. Place the baking sheet in the oven and bake for 15-18 minutes. Look for golden edges and a slightly crispy top. 4. Once baked, let the breadsticks cool for a few minutes. You can sprinkle chopped parsley on top for a fresh touch if you like. 5. Serve warm, ideally with marinara sauce for dipping. Enjoy your delicious cheese breadsticks! Make sure to check the full recipe for more details and insights on making these tasty snacks! To get soft and chewy breadsticks, use the right mix of flour. All-purpose flour works best. Don't over-knead the dough. Knead just until smooth. This keeps the breadsticks light. Also, let the dough rest for a few minutes. This helps it rise better. Brush the sticks with melted butter right before baking for a nice finish. One common mistake is adding too much flour. This can make the dough dry. Always measure flour carefully. Another mistake is not letting the dough rise. Rising gives the breadsticks their fluffy texture. Lastly, don't skip the garlic butter. It adds a lot of flavor. Use the Full Recipe to guide you through each step. For extra flavor, try adding herbs. A bit of dried oregano or thyme can make a big difference. You can also mix in some grated Parmesan cheese. It adds a nice salty kick. For a spicy twist, add red pepper flakes to the garlic butter. This gives your breadsticks a fun zing! {{image_4}} You can mix things up by using different types of cheese. While mozzarella is a favorite, try cheddar for a sharp taste. If you like blue cheese, it adds a bold flavor. Mix in some parmesan for a nutty twist. Each cheese will change the taste and texture. You can blend cheeses for a fun, unique treat. Just remember, different cheeses melt in different ways. Adding herbs and spices can enhance the flavor. Fresh herbs like rosemary or thyme give a fragrant touch. Dried herbs like oregano or basil work well, too. For a kick, sprinkle in some red pepper flakes. Garlic powder adds a savory punch. You can even mix in some Italian seasoning for a classic taste. Be creative with your choices to find your favorite mix. Stuffed cheese breadsticks are a fun variation. You can fill them with cheese or other tasty fillings. Try adding pepperoni, cooked spinach, or roasted peppers. To stuff them, roll out the dough flat, place your filling, and fold it over. Pinch the edges to seal, then cut into strips. Bake as usual for a cheesy surprise inside. These stuffed sticks are perfect for a snack or appetizer. For the full recipe, check out Cheesy Garlic Pull-Apart Breadsticks. To keep your cheese breadsticks fresh, store them in an airtight container. Place parchment paper between layers to prevent sticking. You can keep them at room temperature for one day. For longer storage, move them to the fridge. They will stay good for up to three days. When you're ready to enjoy leftovers, preheat your oven to 350°F (175°C). Place the breadsticks on a baking sheet. Bake for about 5-7 minutes until warm. This method helps maintain their soft texture. If you want to freeze cheese breadsticks, let them cool completely first. Wrap each stick in plastic wrap, then place them in a freezer bag. They can last for up to three months in the freezer. When you're ready to eat, thaw them in the fridge overnight. Reheat as mentioned above for the best taste. After trying the Full Recipe, you’ll have many delicious breadsticks to enjoy later! I recommend using mozzarella cheese. It melts well and gives a nice stretch. You can also mix in some cheddar for a sharper taste. Other good choices include provolone or gouda. These cheeses add flavor and richness to your breadsticks. Yes, you can use gluten-free flour. Just ensure it's a 1:1 substitute for all-purpose flour. This swap keeps the texture light. You may need to adjust the liquid slightly, so watch the dough's consistency. It should remain soft and pliable. Look for golden brown edges and a slightly crispy top. The breadsticks should feel firm but soft inside. If you poke them lightly, they should spring back. The baking time is around 15-18 minutes at 375°F (190°C). Enjoy them warm for the best taste with marinara sauce. This article covered key ingredients and their importance in making cheese breadsticks. I shared step-by-step instructions to prepare, shape, and bake them perfectly. We explored tips for soft and chewy breadsticks, plus common mistakes to avoid. I highlighted fun variations and best practices for storing and reheating leftovers. Using fresh, quality ingredients matters most. Enjoy experimenting with flavors and textures. Now, you have all you need to create delicious cheese breadsticks at home!

If you crave a warm, cheesy snack that’s easy to make, cheese breadsticks are perfect. They’re soft, chewy, and packed with flavor. In this post, I’ll guide you step-by-step to …

Read more

Categories Appetizers
Older posts
Newer posts
← Previous Page1 … Page62 Page63 Page64 Page65 Next →

TOSSED TASTES

Where flavors get playful! A fresh mix of easy bites, bold spices, and everyday cravings tossed into every recipe. 🍋🍅

PAGES

Home About Contact Privacy Policy Terms & Conditions Cookie Policy GDPR Policy Copyright Policy Disclaimer

CATEGORIES

Appetizers Desserts Salads Breakfast Dinner

Contact

  • Pinterest
  • Mail
Copyright © 2025 Tossed Tastes. All rights reserved.