
DESSERTS
Cinnamon Roll Cookies Divine and Simple Treat
Are you ready for a sweet treat that combines the best of cinnamon rolls and cookies? I’m talking about Cinnamon...
READ MORE →Chef Elliot
I’m Chef Elliot, your laid-back kitchen wingman with a serious love for bold flavors and easy cooking. 🥄✨
I believe anyone can cook—no fancy tools, no five-star background required. Just great recipes, a sprinkle of curiosity, and maybe a lemon zest moment to keep things fresh. 🍋💪
Think of me as your flavor coach: part guide, part cheerleader, always down for a second helping. I’m here to help you ditch the stress and stir up some joy—one tossed-together recipe at a time.

Delicious recipes crafted by Chef Elliot
Are you ready for a sweet treat that combines the best of cinnamon rolls and cookies? I’m talking about Cinnamon...
READ MORE →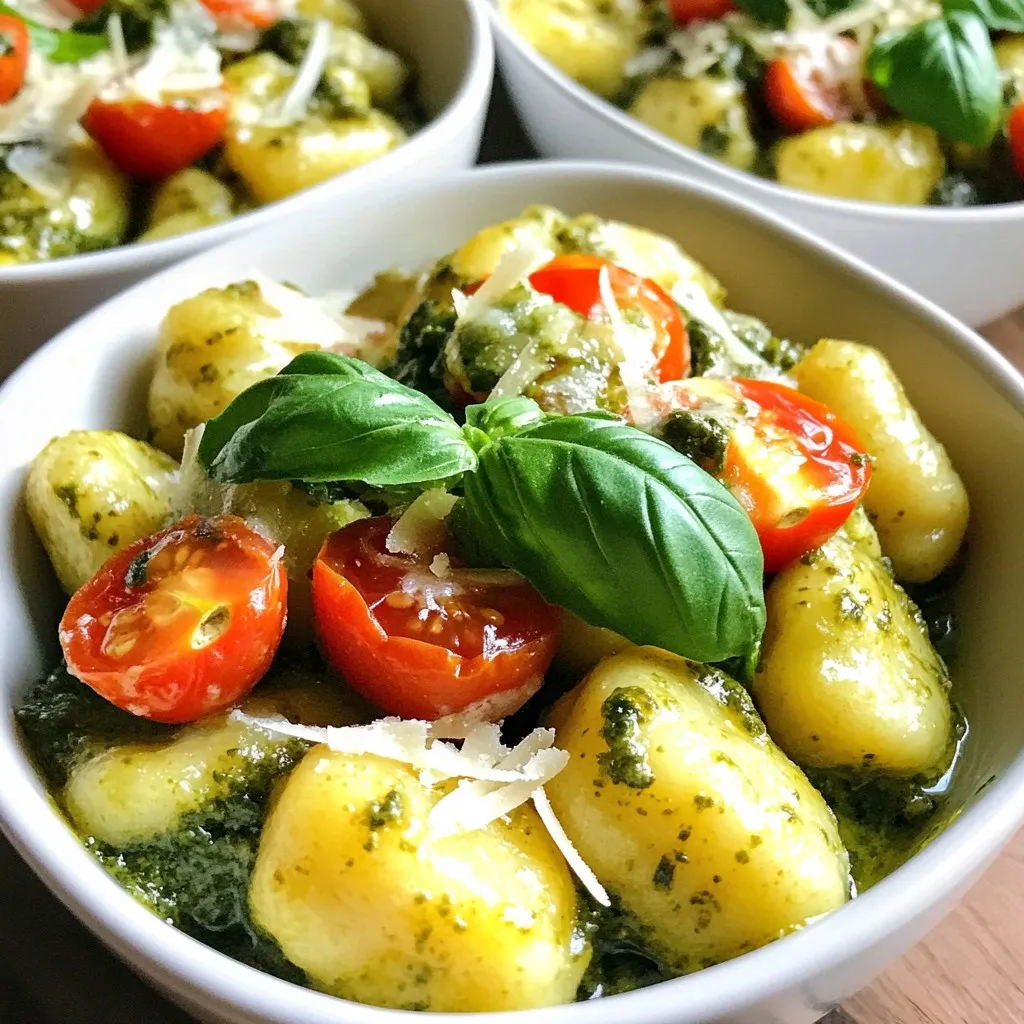
If you’re craving a warm, savory meal, you’ve found it! Creamy Pesto Gnocchi with Spinach is the perfect comfort food....
READ MORE →
Looking for a tasty treat that won’t ruin your health goals? You’ve come to the right place! These Healthy Cookie...
READ MORE →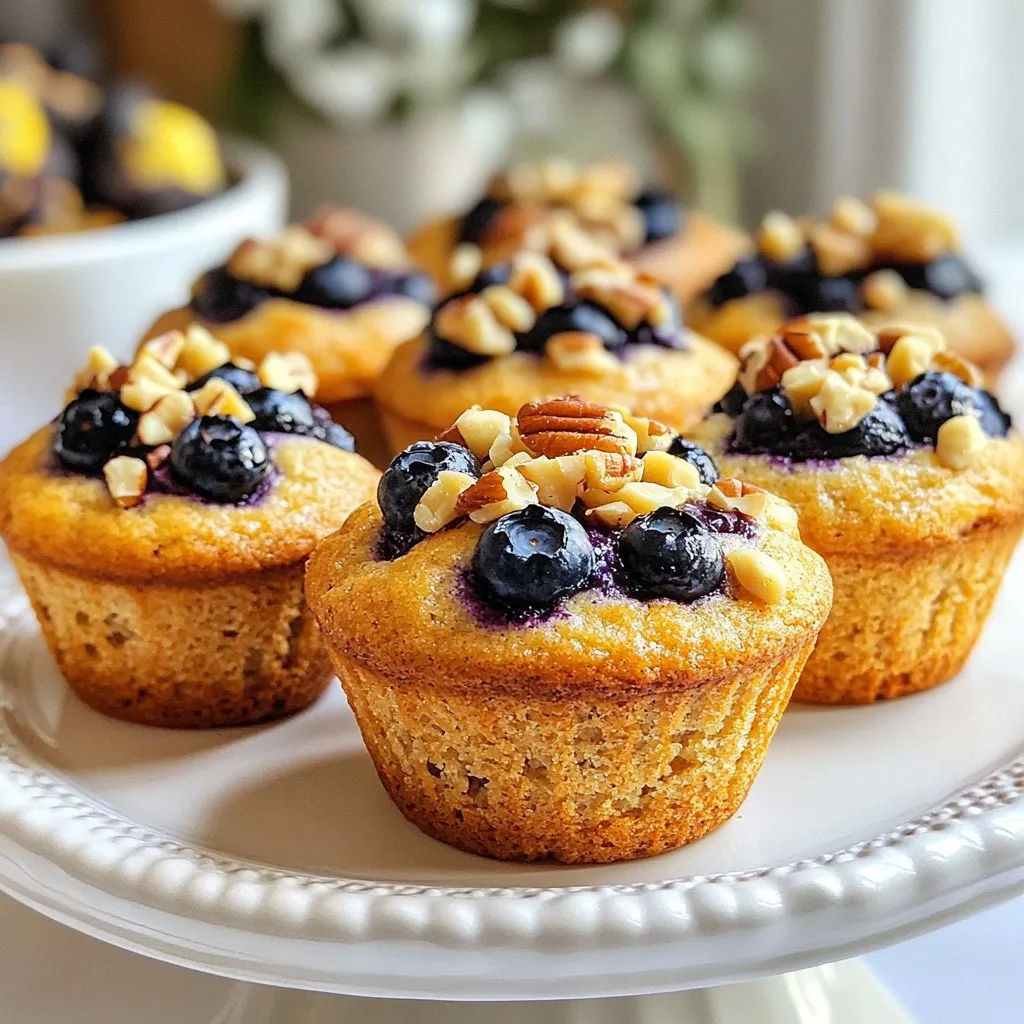
Looking for a tasty treat without the sugar? I’ve got the perfect recipe for you! These Sugar-Free Blueberry Muffins are...
READ MORE →
Are you ready to elevate your mornings? This Savory Breakfast Croissant Sandwich recipe is packed with flavor and can be...
READ MORE →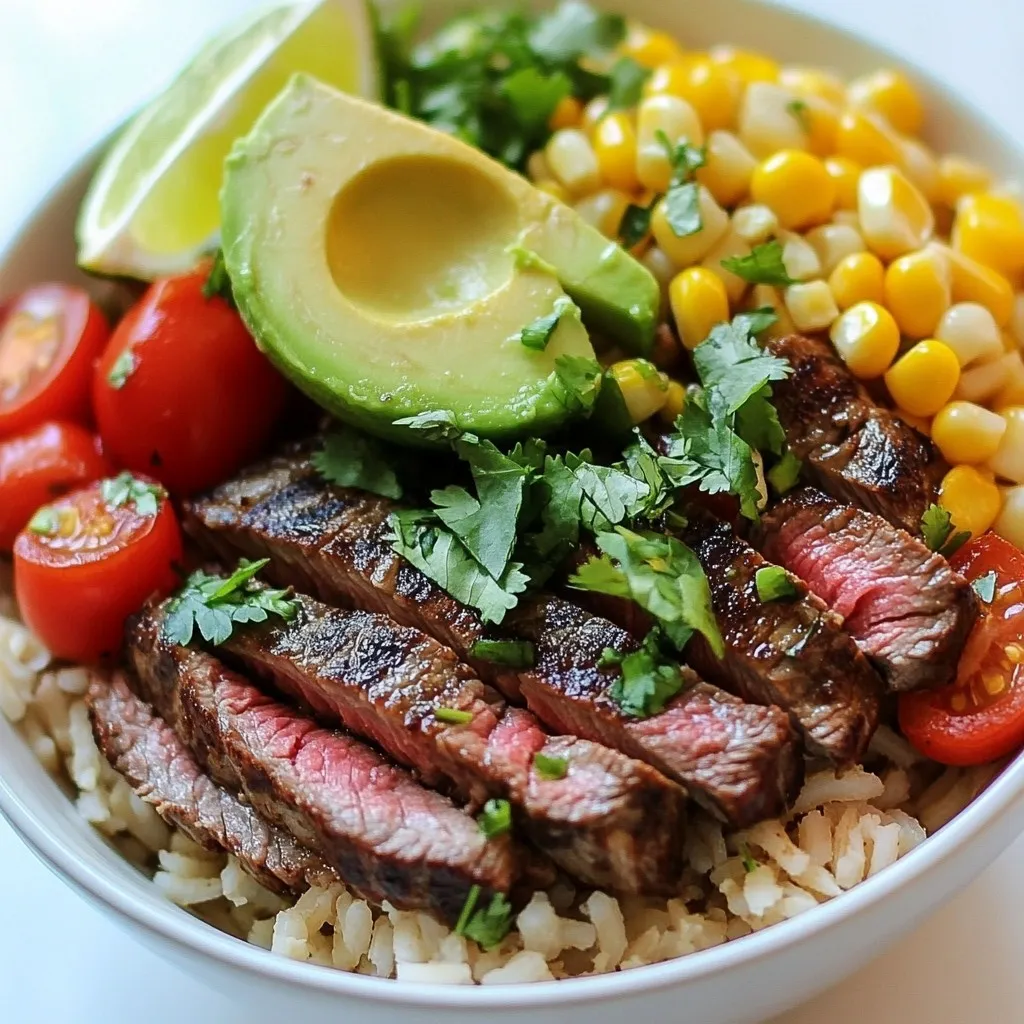
Craving a fresh and tasty meal? My Cilantro Lime Steak Bowls are the answer! They combine juicy steak, zesty lime,...
READ MORE →
Get ready for a taste adventure with my Sticky Sesame Chicken Meatballs! These meatballs are a perfect blend of juicy...
READ MORE →
Looking for a quick and tasty meal? My Quick Chicken Stir-Fry is your answer! This simple recipe brings juicy chicken...
READ MORE →
Craving a quick and tasty meal? These Coconut Lime Chicken Tacos are your answer. Packed with zingy flavor and fresh...
READ MORE →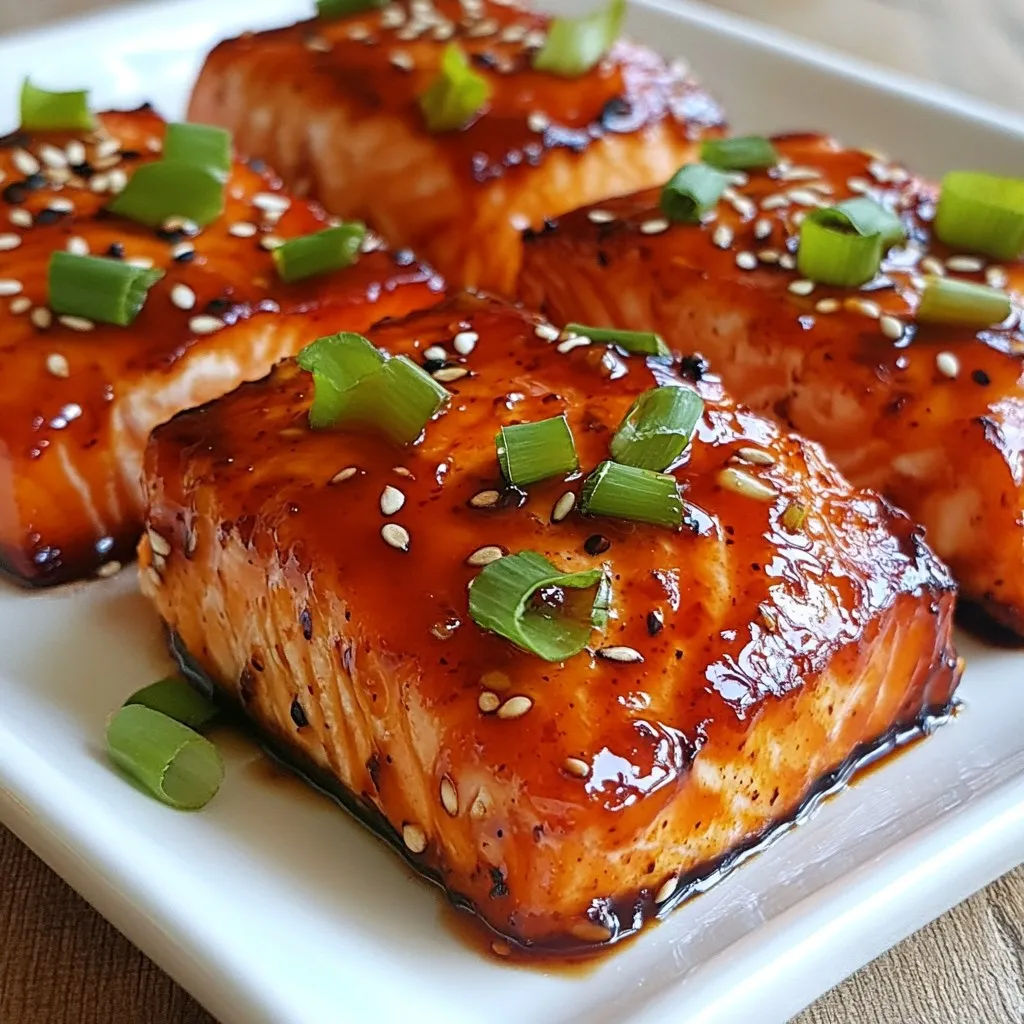
Looking for a quick, tasty meal? My Honey Sriracha Glazed Salmon is the perfect dish for you! It combines sweet...
READ MORE →