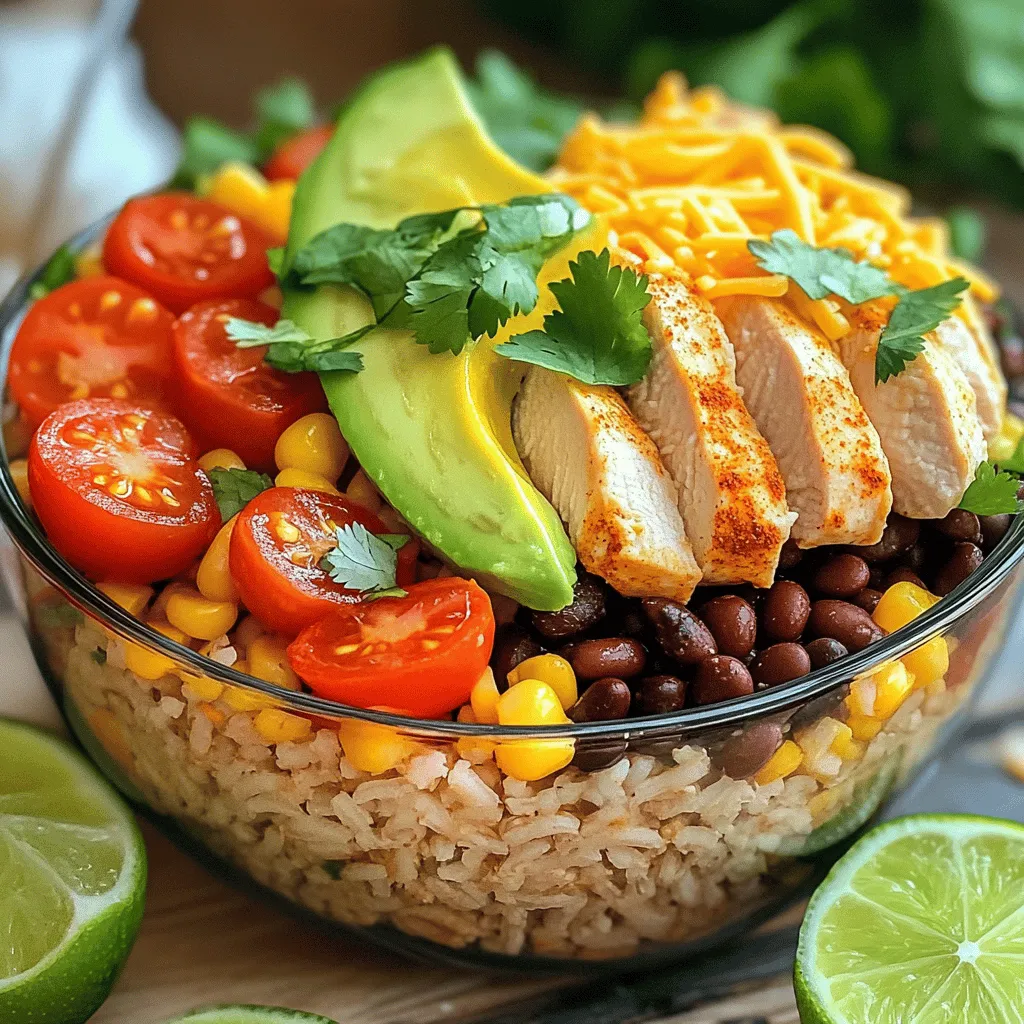
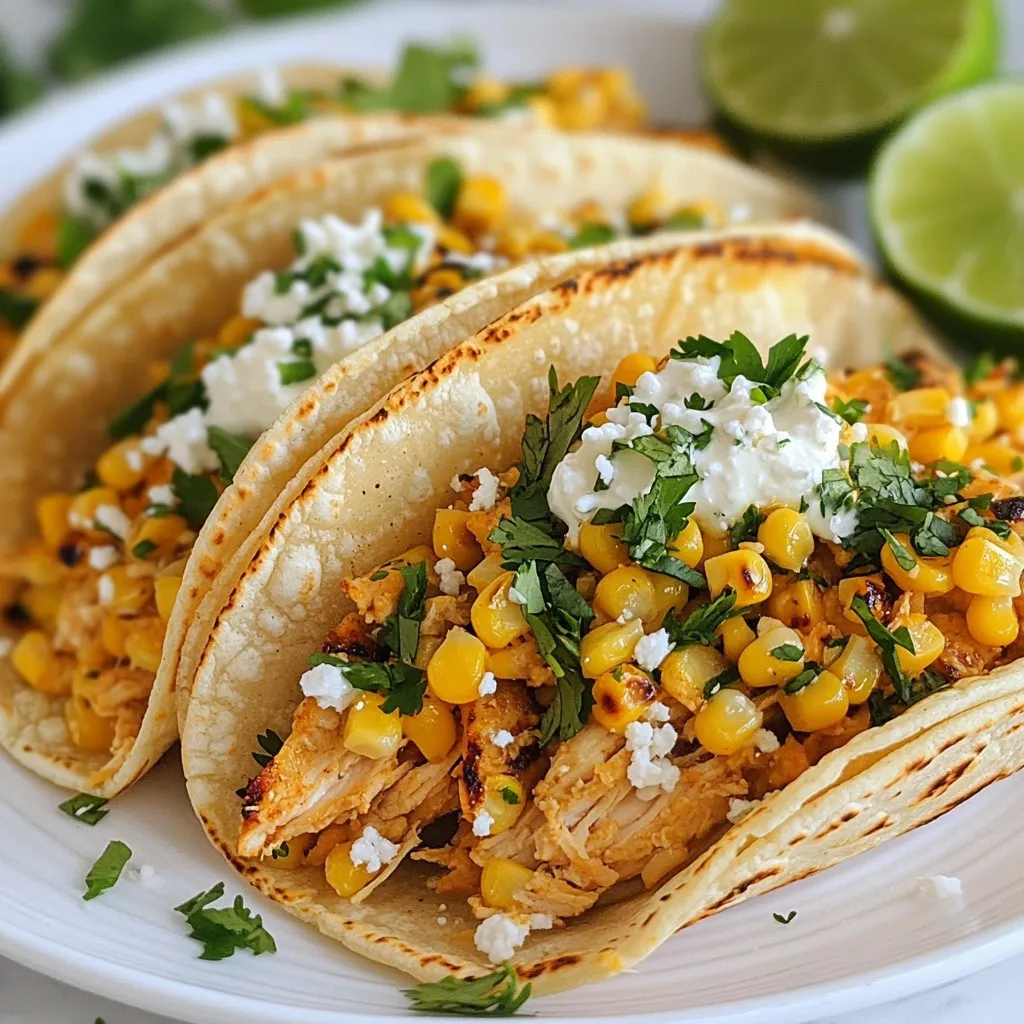
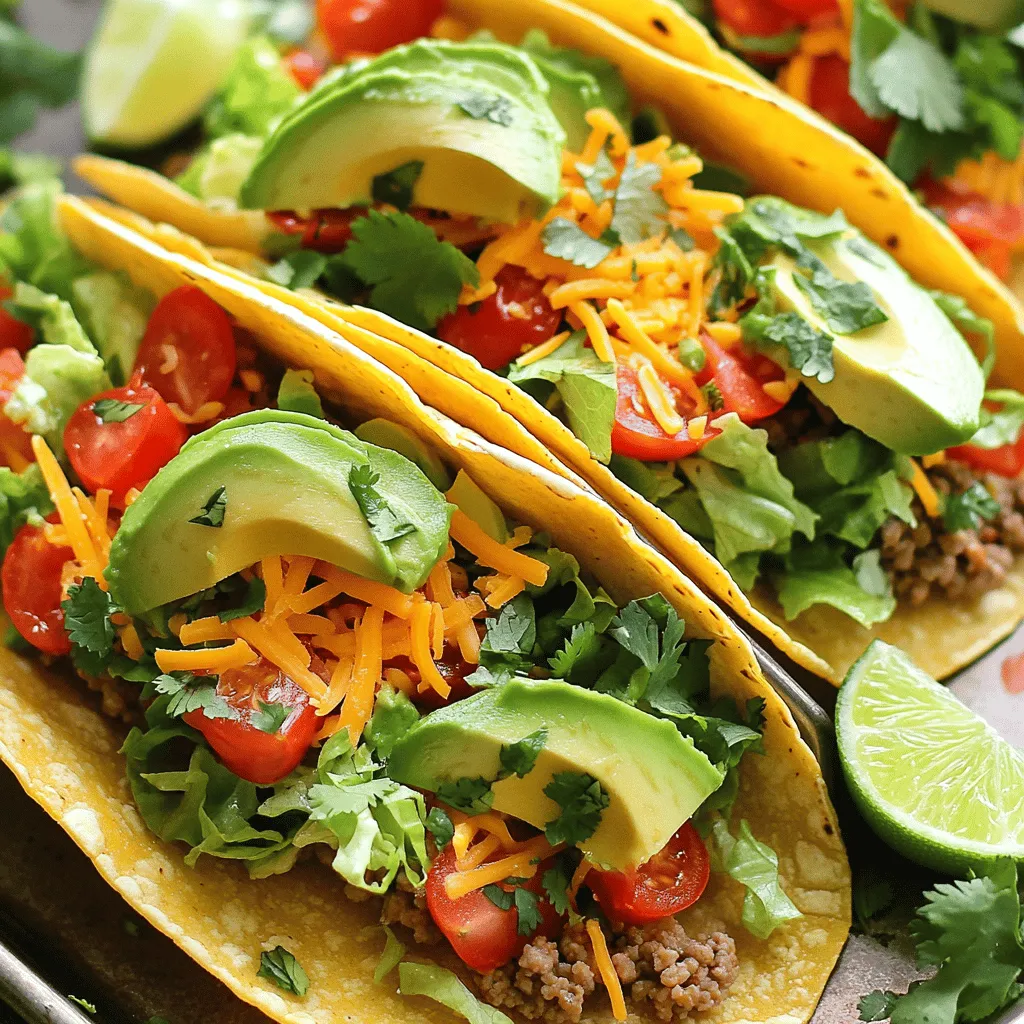
Chef Elliot
I’m Chef Elliot, your laid-back kitchen wingman with a serious love for bold flavors and easy cooking. 🥄✨
I believe anyone can cook—no fancy tools, no five-star background required. Just great recipes, a sprinkle of curiosity, and maybe a lemon zest moment to keep things fresh. 🍋💪
Think of me as your flavor coach: part guide, part cheerleader, always down for a second helping. I’m here to help you ditch the stress and stir up some joy—one tossed-together recipe at a time.

Latest from Chef Elliot

Apple Crisp Coffee Cake Simple and Tasty Recipe
If you love the warm, sweet taste of fall, you’ll adore this Apple Crisp Coffee Cake recipe! It blends tender apples with a crunchy top

Savory Slow Cooker Birria Tacos Recipe to Savor
If you’re ready to delight your taste buds, this Savory Slow Cooker Birria Tacos Recipe is a must-try. Imagine tender beef slow-cooked to perfection, wrapped

Balsamic Grilled Flank Steak Caprese Delightful Feast
Transform your grilling game with my Balsamic Grilled Flank Steak Caprese! This dish marries the rich flavors of marinated flank steak with the refreshing zest

Broccoli and Cheddar Twice-Baked Potatoes Delight
Are you ready to elevate your dinner game? Let me introduce you to my Broccoli and Cheddar Twice-Baked Potatoes Delight! This dish is a tasty,
![- Strawberries - Pineapple - Kiwi - Blueberries - Grapes - Orange - Honey - Fresh mint - Lime juice How to measure fruits Use a measuring cup for accuracy. Cut the fruit into small pieces before measuring. This helps you get a good amount for each fruit in the salad. Tips for hulling and slicing fruit To hull strawberries, use a small knife to remove the green top. For kiwi, cut off both ends and slice down the sides to remove the skin. Make sure to slice your fruits evenly for a nice look. Best practices for freshness Choose ripe fruits that are firm but not hard. Wash fruits thoroughly before cutting. If you prepare the salad ahead of time, add lime juice to keep it fresh. This helps prevent browning and keeps it looking bright and tasty. For the complete recipe, check out the Fruity Fiesta Salad . - Combining the fruits Start by gathering all your fresh fruits. I recommend using strawberries, pineapple, kiwi, blueberries, grapes, and orange. In a large mixing bowl, combine one cup each of quartered strawberries, diced pineapple, sliced kiwi, juicy blueberries, halved grapes, and orange segments. Toss the fruits gently to mix them without breaking them. - Making the honey-lime dressing In a small bowl, whisk together two tablespoons of pure honey, the juice of one zesty lime, and one tablespoon of finely chopped fresh mint. Whisk until smooth. This dressing adds a sweet and tangy flavor to your salad. - Tossing without mashing After you drizzle the honey-lime dressing over the fruit, use a spatula to toss the salad. Be careful not to mash the fruits. You want to keep them whole and pretty. - How to properly coat the fruits As you toss, make sure all the fruits get a nice coating of the dressing. This step ensures every bite is full of flavor. If you see some fruits not coated well, gently toss again. - Best ways to serve Serve the fruity fiesta salad in individual bowls. This way, everyone gets their own colorful serving. You can also use a big bowl for a family-style presentation. - Ideal serving temperature This salad tastes best chilled or at room temperature. Let it sit for about ten minutes before serving. This resting time helps the flavors blend nicely. Enjoy the freshness! For the [Full Recipe], check the details above. To make your fruit salad pop, try adding extra ingredients. Nuts like almonds or walnuts add crunch. A dollop of yogurt gives creaminess. Both options enhance the taste. Mix fruits based on their flavors. Sweet strawberries pair well with tangy kiwi. Pineapple and blueberries create a refreshing balance. Serve your salad in creative bowls. A clear glass bowl shows off the bright colors. You can also use halved pineapples as bowls for fun. Garnish with fresh mint leaves. They add a pop of green and a fresh scent. Avoid overmixing your fruits. If you mix too hard, they can turn mushy. Instead, toss gently to keep them whole. Also, let your salad sit for a bit. This time helps the flavors meld. It makes the salad taste even better. {{image_4}} For summer, use bright, juicy fruits. Think about watermelon, peaches, and cherries. These fruits add color and sweetness. You can mix them with your base recipe. They keep the salad cool and refreshing. In winter, aim for citrus fruits. Oranges, grapefruits, and pomegranates work well. They give a nice twist. The bright flavors help lift your spirits during colder months. You can also add apples for a nice crunch. If you want a vegan option, skip the honey. Use agave syrup or maple syrup instead. These sweeteners keep the salad delicious. They help you maintain a plant-based diet without losing flavor. For gluten-free additions, focus on fruits. Most fruits are naturally gluten-free. You can add seeds or nuts for more texture. Almonds, walnuts, or chia seeds add a nice crunch and boost nutrition. For a different flavor, try yogurt dressing. Mix plain yogurt with honey and a squeeze of lime. This gives a creamy twist to your salad. You can spice things up with herbs or spices. Fresh basil or mint can add a fresh hit. A pinch of cinnamon or ginger can also enhance the taste. Try out different combinations to find your favorite! To keep your fruit salad fresh, use airtight containers. Glass or plastic containers work well. Make sure the lid fits tightly. This will help keep out air and moisture. You can also use a bowl covered with plastic wrap. Here are some tips for freshness: - Store in the fridge within two hours of making it. - Keep it in the back of the fridge where it is coldest. - Avoid mixing in the dressing until you are ready to eat. Can you freeze fruit salad? Yes, but not all fruits freeze well. Some fruits become mushy when thawed. Berries and bananas are good for freezing, but others like watermelon are not. Here are best practices for thawing: - Freeze in small portions for easy use. - Thaw overnight in the fridge for best results. - Use in smoothies or as toppings after thawing. In the fridge, fruit salad lasts about three days. After that, it may lose its taste or texture. Look for these signs of spoilage: - Fruits become slimy or overly soft. - A sour smell or off-putting odor. - The color of the fruits dulls significantly. Stay safe and enjoy your fruity fiesta salad! For the full recipe, check out the earlier section. - Start by gathering fresh fruits like strawberries, pineapple, kiwi, blueberries, grapes, and orange. - In a large bowl, combine the quartered strawberries, diced pineapple, sliced kiwi, juicy blueberries, halved grapes, and orange segments. - Gently toss the fruits to mix them without mashing. - In another bowl, whisk together two tablespoons of honey and the juice of one lime. - Drizzle this dressing over the fruit mixture, then toss again to coat the fruits evenly. - Let the salad sit for ten minutes for the flavors to blend. - Serve chilled or at room temperature for the best taste. - Strawberries: Sweet and juicy, they add color. - Pineapple: Tart and refreshing, it brings a tropical feel. - Kiwi: Its bright green color and tangy taste make it a favorite. - Blueberries: Small and sweet, they burst with flavor. - Grapes: Crisp and juicy, they add a nice crunch. - Orange: Sweet segments add brightness and balance. - Use citrus juice, like lime or lemon, to coat cut fruits. - Store the salad in an airtight container to keep air out. - Add bananas or apples just before serving to prevent browning. - Choose fresh fruits that are ripe but not overripe to start. - Enjoy your salad soon after making it for the best look and taste. This blog covers the essentials for making a delicious fruit salad. You learned about fresh fruits like strawberries and grapes, and how to enhance flavors with honey and mint. I shared tips for preparation and serving, along with ways to store leftovers. Keep experimenting with seasonal fruits and dressings. The right mix can brighten any meal. Enjoy your fruit salad and share it with friends!](https://tossedtastes.com/wp-content/uploads/2025/06/47e9f578-3654-4c29-ba84-374c448b4014.webp)
Easy Fruit Salad Recipe Quick and Fresh Delight
Looking for a simple and tasty treat? This Easy Fruit Salad Recipe is the fast, fresh choice you need! With vibrant flavors from strawberries, pineapples,
![- 8 oz. fusilli pasta - 2 cups fresh corn kernels (or 1 can of corn, drained) - 1 red bell pepper, diced - 1 small red onion, finely chopped - 1 jalapeño pepper, minced - 1/2 cup fresh cilantro, chopped - 1/2 cup crumbled feta cheese - 1/4 cup mayonnaise - 2 tablespoons lime juice - 1 tablespoon chili powder - 1 teaspoon garlic powder - Salt and pepper to taste - 1 avocado, diced (for garnish) - Lime wedges for serving The ingredients for this Mexican Street Corn Pasta Salad bring joy to every bite. Each one adds its own flavor and texture. Fusilli pasta is the perfect base. It holds onto the dressing well. Fresh corn gives a sweet crunch. You can use fresh kernels or canned corn if you need to save time. The diced red bell pepper adds color and sweetness. The small red onion brings a bit of sharpness. If you like heat, the minced jalapeño is your friend. Don't forget the cilantro; it adds brightness and freshness. The creamy dressing is key. Mayonnaise makes it rich, while lime juice adds zing. Chili powder and garlic powder round out the flavors. Adjust salt and pepper to your taste. Finally, the crumbled feta cheese adds a salty bite. When you're ready to serve, top with diced avocado for creaminess and garnish with lime wedges. This salad is not just pretty; it’s full of flavor. Check out the Full Recipe for more details. To start, cook the fusilli pasta. Boil water in a large pot. Add a pinch of salt. Then, add the pasta and stir gently. Cook until al dente, usually about 8 to 10 minutes. Drain the pasta well in a colander. Rinse it under cold water. This stops the cooking and cools the pasta quickly. Now, let’s chop the veggies. If using fresh corn, cut the kernels off the cob. Dice the red bell pepper into small pieces. Finely chop the red onion. Remove the seeds from the jalapeño and mince it. Use fresh ingredients for the best flavor. Fresh herbs like cilantro add a nice touch, too. In a large bowl, combine the fresh corn, bell pepper, onion, jalapeño, and cilantro. Gently add the cooled fusilli pasta to this mix. Next, in a small bowl, whisk together the mayonnaise, lime juice, chili powder, garlic powder, and some salt and pepper. This dressing brings everything together. Pour it over the pasta salad and mix gently. Finally, fold in the crumbled feta cheese without breaking it apart. For the complete recipe, check the [Full Recipe]. To make your Mexican Street Corn Pasta Salad stand out, adjust the spice levels to suit your taste. If you like heat, keep the seeds in the jalapeño. For milder flavors, remove them. You can also add a pinch of cayenne pepper to the dressing for extra kick. Consider using smoked paprika instead of chili powder. It adds a deep, rich flavor. Fresh lime juice is key. It brightens the salad and brings all the flavors together. Garnishing your salad can elevate its look and taste. Top it with diced avocado for creaminess and extra richness. A sprinkle of extra cilantro enhances the fresh taste. For sides, pair this salad with grilled chicken or shrimp. It also goes well with tortilla chips for crunch. Serve it at a picnic or barbecue for a vibrant dish everyone will enjoy. For the full recipe, check out the Mexican Street Corn Pasta Salad recipe. {{image_4}} You can easily make this pasta salad fit your needs. If you want a gluten-free option, swap fusilli pasta for gluten-free pasta. Many brands offer great alternatives that taste good. Look for pasta made from rice or chickpeas. This keeps the salad tasty and safe for those who avoid gluten. If you're dairy-free, you can also change the dressing and cheese. Use a dairy-free mayo for the dressing. For cheese, try using avocado or a nut-based cheese. This keeps the dish creamy without using dairy. Adding seasonal vegetables can boost the flavors. Try including diced zucchini or cherry tomatoes for a fresh twist. These veggies add color and taste to your salad. You can also switch up the cheese. While feta is great, cotija cheese is a fantastic choice. Cotija adds a salty punch that fits well with the corn and spices. You can mix and match these ideas to create your own version of this salad. For the Full Recipe, refer back to the beginning of the article. Enjoy making this vibrant dish with your own unique spin! To keep your Mexican Street Corn Pasta Salad fresh, follow these steps: - Refrigerate Leftovers: Store the salad in an airtight container. This keeps moisture in and prevents it from drying out. Place it in the fridge right after serving. - Freezing and Defrosting: I do not recommend freezing this salad. The fresh veggies and creamy dressing do not freeze well. If you must freeze it, leave out the avocado and dressing. When ready to eat, thaw it in the fridge overnight before mixing in those fresh ingredients. For the best flavor and quality, enjoy your salad within a few days. - Recommended Longevity: The salad stays fresh for about 3 to 5 days in the fridge. After that, the veggies may lose their crunch. - Signs the Salad Has Gone Bad: If you see mold, a sour smell, or the veggies look slimy, throw it away. Always trust your senses; if it doesn’t look or smell right, it’s best to discard it. What can I use instead of mayonnaise? You can use Greek yogurt or sour cream. These options add creaminess and flavor. If you want a dairy-free choice, try avocado or a vegan mayo. Each will give a different taste but will still work well. Can I make this salad ahead of time? Yes, you can make this salad a day in advance. Just keep it in the fridge. This helps the flavors mix and taste better. Add avocado right before serving to keep it fresh. What's a good alternative for fusilli pasta? You can use penne or rotini if you can’t find fusilli. Both pasta types will hold the dressing well. You can even use gluten-free pasta if needed. How can I make the dish spicier? Add more jalapeño or include diced serrano peppers. You can also mix in a few dashes of hot sauce. This will give your salad a nice kick without changing the base flavor. Nutritional facts per serving Each serving has about 250 calories. It also has healthy fats from the avocado and cheese. The salad is rich in vitamins from the fresh veggies. How many servings does the recipe yield? This recipe makes six servings. It’s perfect for sharing at a picnic or family meal. You can easily double it for a larger crowd. For the full recipe, check out the details above. Enjoy your cooking! This blog post covered how to make a tasty Mexican Street Corn Pasta Salad. We looked at key ingredients, cooking tips, mixing instructions, and storage advice. I shared ideas for tasty variations and serving suggestions too. In closing, this dish is a fun way to enjoy fresh flavors. Whether you eat it right away or save it for later, you'll love how easy it is to make!](https://tossedtastes.com/wp-content/uploads/2025/06/2063c485-3ab1-478c-a24c-b2c12d07710e.webp)
Mexican Street Corn Pasta Salad Vibrant and Flavorful
Are you ready to brighten up your meals with a burst of flavor? This Mexican Street Corn Pasta Salad is your ticket to a vibrant
![For a tasty blueberry yogurt, gather these key items: - 2 cups plain Greek yogurt - 1 cup fresh blueberries, divided - 1 tablespoon honey (or maple syrup for a vegan alternative) - 1/2 teaspoon pure vanilla extract - 1/2 cup granola (your choice – nutty, fruity, or a mix) - 2 tablespoons chia seeds - Fresh mint leaves for an elegant garnish These ingredients create a rich and creamy yogurt that bursts with flavor. The Greek yogurt gives a thick texture and high protein. Fresh blueberries add natural sweetness and vibrant color. Honey or maple syrup enhances the taste, while vanilla extract brings warmth. To make your blueberry yogurt even better, consider these add-ins: - Sliced almonds for crunch - Coconut flakes for a tropical twist - Cinnamon for warmth - A dash of lemon juice for brightness - Nut butter for a creamy finish These extras allow you to customize your yogurt. Each add-in brings a new flavor and texture, making breakfast fun and exciting. Each serving of this blueberry yogurt parfait offers: - Calories: 250 - Protein: 12g - Carbohydrates: 32g - Fiber: 5g - Sugars: 10g This yogurt parfait is not only delicious but also nutritious. The protein keeps you full, while fiber aids digestion. You get a healthy dose of vitamins from blueberries, too. Enjoy this breakfast knowing it fuels your day! For the complete recipe, check out the [Full Recipe]. To start, gather your ingredients. You need plain Greek yogurt, fresh blueberries, honey, and vanilla extract. In a bowl, mix the yogurt, honey, and vanilla. Stir until it is smooth. This step is key; it makes your yogurt taste sweet and rich. Next, take half of the blueberries and mash them lightly with a fork. You want to release some juice but leave some pieces whole. This gives your yogurt a nice texture and flavor. Now, you are ready to build your parfait. Grab a clear glass or parfait cup. Spoon a layer of the yogurt mixture into the bottom. Then, add a layer of mashed blueberries. Sprinkle some chia seeds on top, then add a layer of granola. Repeat these layers until you use all the ingredients. Make sure to end with yogurt on top. For a final touch, place whole blueberries on top. Add a sprinkle of granola and fresh mint leaves for a nice look. Once you finish layering, place your parfaits in the fridge. Chill them for about 10 to 15 minutes. This chilling time helps all the flavors mix well. It also makes the parfait refreshing to eat. When you are ready to serve, enjoy your delicious blueberry yogurt parfait! When picking blueberries, look for plump, firm berries. They should be deep blue with a light bloom. This bloom is a natural wax that keeps berries fresh. Avoid any berries that are soft or have green spots. Fresh blueberries should smell sweet and fruity. If you can, buy them from local farms for the best taste. To mash blueberries, use a fork or a potato masher. Place half of the blueberries in a bowl. Gently press down to break the skins. Do not mash them too much; leave some whole for texture. The goal is to get juices flowing while keeping some pieces intact. This creates a nice mix in your parfait. For a stunning parfait, use clear glasses or cups. This way, you can show off the colorful layers. Start with yogurt, then add mashed blueberries, chia seeds, and granola. Repeat the layers until you reach the top. Finish with whole blueberries and a sprinkle of granola. Add fresh mint leaves for a pop of color. This makes your parfait look fancy and inviting. {{image_4}} You can easily make this blueberry yogurt vegan. Just swap plain Greek yogurt for coconut yogurt. It has a creamy texture and a nice taste. Use maple syrup instead of honey. This keeps it plant-based and delicious. The rest of the recipe stays the same, so you can enjoy every layer! Feel free to change the fruit in your yogurt. You can use strawberries, raspberries, or peaches instead of blueberries. Each fruit gives a new flavor and taste. Mix and match your favorites for fun. You can even blend different fruits for a colorful twist. This keeps your breakfast exciting and fresh. Toppings can take your yogurt to the next level. Try adding nuts like almonds or walnuts for crunch. Seeds like pumpkin or sunflower seeds add nutrition and texture. You can also sprinkle cinnamon or nutmeg for spice. Dried fruits like raisins or cranberries can add sweetness. Get creative and have fun with your toppings! To keep your blueberry yogurt fresh, store it in a clean, airtight container. This will help keep out air and moisture. If you have leftover parfait, cover it with plastic wrap or a lid. This will help keep it tasty for your next breakfast. Always use fresh blueberries for the best flavor. Check for any bruises or soft spots before buying. Store your blueberries in the fridge. Keep them in their original container or a breathable one. Avoid washing them until you're ready to eat. This helps them stay fresh longer. Homemade blueberry yogurt can last in the fridge for up to five days. If you want to keep it longer, you can freeze it. Pour your yogurt into ice cube trays or small containers. This way, you can grab just what you need. When you want some, thaw it in the fridge overnight. Enjoy your blueberry yogurt fresh! Yes, you can use frozen blueberries. They are still tasty and healthy. When using frozen blueberries, let them thaw first. Drain any excess liquid before adding them to your yogurt. This helps keep your yogurt from getting too watery. Frozen blueberries may not be as firm as fresh, but they work well in recipes. You can easily make this yogurt recipe dairy-free. Simply swap out plain Greek yogurt for almond or coconut yogurt. Both options offer a creamy texture. Choose unsweetened varieties for a healthier choice. You can also use oat yogurt for a thicker consistency. This way, you still get a delicious parfait without any dairy. If you want to skip granola, there are many great substitutes. You can use nuts and seeds for crunch. Try sliced almonds, walnuts, or pumpkin seeds. Another option is to use crushed whole grain cereal or oats. These add texture without the sweetness of granola. You can also try shredded coconut for extra flavor. Enjoy experimenting! In this blog post, we explored how to make a tasty blueberry yogurt parfait. We covered the main ingredients and optional add-ins that enhance flavor. I shared step-by-step instructions to prepare and layer your parfait. Tips on choosing blueberries and mashing techniques were also included. We discussed fun variations to suit all diets and how to store leftovers safely. Enjoying a healthy dessert or snack like this can be simple and fun. Try mixing it up with your favorite ingredients!](https://tossedtastes.com/wp-content/uploads/2025/06/8a99a33e-a431-4d36-b8b4-0aaf5817c60c.webp)
Best Blueberry Yogurt Recipe for Healthy Breakfast
Looking for a delicious way to kickstart your day? This best blueberry yogurt recipe is your answer! Packed with fresh berries and creamy goodness, it
![To create the perfect garlic Parmesan cheeseburger, you need fresh, quality ingredients. Here’s what you’ll need: - Ground beef (preferably an 80/20 blend) - Parmesan cheese - Fresh garlic - Worcestershire sauce - Onion powder - Black pepper - Salt - Cheddar cheese - Burger buns - Lettuce - Tomato - Dill pickles - Garlic aioli Each ingredient plays a key role in making this burger flavorful. The ground beef gives the burger its juicy base. An 80/20 blend ensures your patty remains moist. Adding fresh garlic and Parmesan cheese elevates the taste to new heights. Worcestershire sauce adds depth, while onion powder gives a hint of sweetness. Black pepper and salt bring out all the flavors. Sharp cheddar cheese melts beautifully on top, creating a rich layer of cheese. For the bun, choose soft burger buns to keep the burger simple and fun. Crisp lettuce and juicy tomato add freshness. Dill pickles offer a crunchy contrast, making each bite exciting. Lastly, the garlic aioli ties everything together with its creamy texture and bold taste. Gather these ingredients, and you’re ready to start your culinary adventure. This full recipe will guide you through each step to achieve burger bliss. - In a large bowl, mix together the ground beef, Parmesan cheese, minced garlic, Worcestershire sauce, onion powder, black pepper, and salt. Use your hands to combine gently. Avoid overmixing to keep the patties tender. - Divide the mixture into four equal parts, each about 4 oz. Shape each part into a patty. Make a small dent in the center to stop them from puffing up while cooking. - Heat your grill or a non-stick skillet over medium-high heat. Once hot, place the patties on the grill or skillet. Cook for 4-5 minutes without pressing them down. This helps create a nice crust. - After 4-5 minutes, flip each patty carefully. Top with a slice of cheddar cheese. Cook for another 4-5 minutes until the cheese melts and the burgers reach 160°F. - While the patties cook, toast the burger buns on the grill or in a toaster until they are golden brown and crispy. - Spread a nice layer of garlic aioli on the bottom half of each toasted bun. - Add a cheesy burger patty on top of the aioli. Layer a crisp lettuce leaf, a slice of tomato, and dill pickles if you like. - Finish by placing the top half of the bun on the burger. - Avoiding overmixing: When you mix the beef with the cheese and spices, do it gently. Overmixing can lead to tough patties. You want a soft and juicy burger. - Achieving the perfect sear: Let your skillet or grill get hot before adding the patties. This high heat helps form a nice crust. Avoid pressing down on the patties as they cook; this keeps all those tasty juices inside. - Ensuring proper doneness: Use a meat thermometer to check the internal temperature. Aim for 160°F (70°C) for a medium burger. This ensures safety and a great taste. - Adding spices and herbs: Feel free to experiment! Adding a pinch of smoked paprika or fresh herbs can elevate the flavor. Just remember, balance is key. - Customizing the toppings: Your burger is a canvas! Try avocado slices, crispy bacon, or sautéed mushrooms. Mix and match until you find your favorite combo. - Pairing sides for a complete meal: Serve your garlic Parmesan cheeseburgers with crispy fries, onion rings, or a fresh side salad. This adds variety to your meal and enhances the experience. For the complete recipe, check out the [Full Recipe]. {{image_4}} When making a garlic Parmesan cheeseburger, you can switch things up! Here are some fun ideas to try. - Gouda: This cheese has a creamy texture and a mild flavor. It melts beautifully on burgers. - Blue cheese: For a bold taste, use blue cheese. It adds a tangy layer to your burger. - Pepper jack: If you like some heat, try pepper jack. It has a zesty kick that makes every bite exciting. - Avocado: Sliced avocado makes your burger creamy and rich. It also adds healthy fats! - Bacon: Crispy bacon gives your burger a salty crunch. It’s a classic favorite that many love. - Sautéed mushrooms: These add a savory flavor and texture. Mushrooms pair well with the garlic and cheese. - Whole wheat buns: For a healthier option, choose whole wheat buns. They have more fiber and add a nutty taste. - Lettuce wraps: If you want to skip bread, use crisp lettuce. It’s light and refreshing! - Gluten-free buns: For those with gluten issues, gluten-free buns are a great choice. They let everyone enjoy the burger! Feel free to play with these variations. You can create your own flavor fix that fits your taste. For the full recipe, check out the Garlic Parmesan Cheeseburger Delight 🧄 above! Store leftover patties in an airtight container. They can last up to three days in the fridge. Make sure they cool down before you seal them in. To keep assembled burgers fresh, wrap them in foil or plastic wrap. However, they taste best when enjoyed right away. You can freeze raw patties for up to three months. Place them on a baking sheet, freeze until firm, then transfer to a freezer bag. This keeps them from sticking together. If you have cooked burgers, they can also go in the freezer. Wrap each burger in foil and put them in a freezer bag. They will stay fresh for about two months. To reheat patties, use a skillet over medium heat. Cook for about five minutes on each side. This method keeps them juicy. You can also use a microwave for quick reheating. Just place a patty on a plate and cover it with a damp paper towel. Heat in 30-second intervals until warm. For reheating assembled burgers, the oven is best. Wrap them in foil and heat at 350°F for about 10-15 minutes. This keeps the bun soft and the cheese melty. The best way to season a garlic parmesan cheeseburger is to mix the right spices with the beef. Start with Worcestershire sauce for a savory kick. Then, add garlic, onion powder, and black pepper for flavor. Finally, sprinkle salt to taste. This blend enhances the beef and complements the Parmesan. Yes, you can use ground turkey instead of beef. Turkey is a leaner choice and still works great. Just choose a mix with some fat for flavor. You may want to add extra seasoning to keep it tasty. To know if your burger is cooked through, use a meat thermometer. The internal temperature should reach 160°F (70°C) for medium doneness. If you don't have a thermometer, cut into the burger. The juices should run clear, and there should be no pink inside. Several side dishes pair well with garlic parmesan cheeseburgers. Try crispy fries or onion rings for a classic touch. A fresh side salad also works well to balance the meal. Coleslaw can add a nice crunch, too. Yes, you can make these burgers ahead of time. Prepare the patties and store them in the fridge for up to a day. You can also freeze them for longer storage. Just remember to cook them straight from the fridge or thawed. To make homemade garlic aioli, you need a few simple ingredients. Combine one egg yolk, one tablespoon of Dijon mustard, and one tablespoon of lemon juice in a bowl. Slowly whisk in one cup of olive oil until it thickens. Finally, stir in minced garlic and season with salt. This creamy sauce adds a great touch to your garlic parmesan cheeseburger. For a full recipe, check out the Full Recipe. This blog covered everything you need for the perfect garlic parmesan cheeseburger. We discussed key ingredients, step-by-step cooking instructions, and clever tips. I shared ways to customize your burger with different cheeses and toppings. Plus, I explained how to store and reheat leftovers. Now, you’re ready to impress at your next cookout! With these easy steps, you can create juicy burgers that everyone will love. Enjoy experimenting with flavors and don’t forget the garlic aioli!](https://tossedtastes.com/wp-content/uploads/2025/06/92a3abef-8733-495e-a5e8-e7de219da386.webp)
Garlic Parmesan Cheeseburger Irresistible Flavor Fix
Are you ready to take your burger game to the next level? The Garlic Parmesan Cheeseburger brings bold flavor and mouthwatering juiciness to your plate.
![Western Ranch Pasta Delight brings joy to your table. This dish is colorful, tasty, and easy to make. It is perfect for family meals or gatherings with friends. The blend of pasta, veggies, beans, and ranch dressing creates a flavor explosion. You can find the full recipe above. - 8 oz (about 225g) pasta (penne or fusilli recommended) - 1 cup cherry tomatoes, halved - 1 cup corn kernels (fresh or frozen) - 1 red bell pepper, diced - 1 cup cooked black beans, rinsed and drained - 1 ripe avocado, diced - 1/2 cup ranch dressing - 1/2 teaspoon garlic powder - 1 teaspoon chili powder - Salt and pepper to taste - Fresh cilantro, chopped (for garnish) - 1/2 cup shredded cheese (cheddar or Monterey Jack) If you want to spice things up, consider these extras: - Sliced jalapeños for heat - Chopped green onions for a fresh crunch - A squeeze of lime juice for zest - Additional herbs like parsley or dill for a twist These options can help you create your perfect plate of Western Ranch Pasta Delight! Start with a large pot. Fill it with water and add salt. Bring the water to a boil. Add 8 oz of pasta. I like penne or fusilli. Cook according to the package. Aim for al dente. This means the pasta should still have a bit of bite. Once done, drain it well. Set it aside and avoid overcooking. Grab a big skillet and add a splash of olive oil. Heat it over medium heat. When the oil shimmers, add the diced red bell pepper. Also, toss in the halved cherry tomatoes. Sauté for about 3-4 minutes. Stir often. You want them to soften and release their juices. Now, it's time to add flavor! Mix in 1 cup of corn and 1 cup of black beans. Stir everything well. Let it cook together for another 2-3 minutes. This warms everything up and blends the tastes. Next, whisk together the ranch dressing, garlic powder, chili powder, and salt and pepper in a bowl. Pour this creamy sauce over the pasta. Toss everything together until the pasta is well coated. Finally, gently mix in diced avocado and shredded cheese. Be careful not to mash the avocado. Taste and adjust seasoning as needed. Serve hot, and enjoy this colorful dish! For the full recipe, check the earlier section. Cooking pasta seems simple, but there are tricks to make it perfect. First, always use a large pot. This allows the pasta to move freely. Use plenty of water—at least four quarts for every pound of pasta. Add salt when the water boils. This enhances the flavor. Cook the pasta until it’s al dente, which means firm to the bite. This keeps the pasta from becoming mushy. After draining, do not rinse the pasta. Rinsing removes the starch that helps sauce stick. The dressing is key in this dish. You can make it your own! Start with the ranch dressing base. Add garlic powder and chili powder for flavor. Want to switch it up? Try using a spicy ranch or a yogurt-based dressing. For added zest, squeeze in some fresh lemon juice. You can also mix in herbs like dill or parsley. This adds freshness and depth to the dressing. How you serve this dish matters. Use deep bowls to show off the colorful ingredients. Garnish with fresh cilantro for a pop of green. If you love cheese, sprinkle extra on top before serving. You can also serve it cold as a pasta salad. Just chill it in the fridge for an hour before serving. This makes it a great dish for hot days. For the full experience, enjoy it with crusty bread on the side. {{image_4}} You can easily add protein to your Western Ranch Pasta Delight. Chicken is a great choice. Simply grill or sauté chicken breast, then slice it and mix it in. Shrimp also works well. Sauté shrimp in a pan until they turn pink, then toss them with the pasta. This makes the dish even more filling. If you want a vegetarian meal, skip the meat altogether. You can add extra veggies like zucchini or spinach. Roasted mushrooms add a nice umami flavor. Use chickpeas instead of black beans for added protein. These changes keep your meal hearty and satisfying. For a spicy kick, add sliced jalapeños or a dash of hot sauce. You can also mix in crushed red pepper flakes with the dressing. This adds heat without overpowering the dish. If you love bold flavors, consider swapping ranch dressing for spicy ranch or chipotle sauce. This gives the pasta a nice, smoky flavor. For the complete recipe, explore the [Full Recipe]. To keep your Western Ranch Pasta Delight fresh, store it in an airtight container. This helps keep the flavors strong and the ingredients safe. Make sure to cool the pasta to room temperature before sealing it. Store it in the fridge for up to three days. If you notice any change in smell or color, it's best to toss it out. When you're ready to enjoy leftovers, reheating is simple. Use a microwave-safe dish and cover it loosely with a lid. Heat it in short bursts, stirring in between. This helps heat evenly. You can also use a skillet over low heat. Add a splash of water to keep it moist. Stir often until it's warm throughout. If you want to save some for later, freezing is a good option. First, let the pasta cool completely. Then, place it in a freezer-safe container or bag. Try to remove as much air as possible. Label it with the date so you remember when you made it. It can last up to three months in the freezer. When you're ready to eat, thaw it in the fridge overnight. Reheat as mentioned above. For the full recipe, check out the Full Recipe section. Enjoy your meal! For this dish, I recommend using penne or fusilli pasta. Both shapes hold the sauce well. Penne has a tube shape that traps the ranch dressing. Fusilli's spirals catch the veggies and beans nicely. Either choice adds great texture and flavor to your meal. Yes, you can! Simply swap the regular pasta for gluten-free pasta. Many brands offer gluten-free penne or fusilli. Look for options made from rice, corn, or chickpeas. These will work well and keep your dish tasty and satisfying. To add more creaminess, try these tips: - Use a thicker ranch dressing. - Mix in some cream cheese or sour cream. - Add a splash of heavy cream or milk. - For a dairy-free option, use cashew cream. These changes will make your pasta rich and delicious. For the full recipe, check out the details above! This blog post covered how to make Western Ranch Pasta Delight. I shared a full recipe, step-by-step instructions, and tips for perfect results. I also offered variations to suit different tastes and included storage info. You now have the tools to create a tasty dish. Don’t be afraid to experiment with flavors or ingredients. Enjoy the cooking process and share your meal with friends!](https://tossedtastes.com/wp-content/uploads/2025/06/0d383923-ba68-4b60-ad71-596f47e4646d.webp)
Western Ranch Pasta Delight Flavorful Meal Idea
Are you ready to whip up a meal that’s both fun and tasty? My Western Ranch Pasta Delight is the perfect mix of flavors and

Fireman’s Overnight Breakfast Casserole Easy Recipe
Looking for a simple breakfast that fuels your day? My Fireman’s Overnight Breakfast Casserole is perfect for busy mornings. With just a few key ingredients,