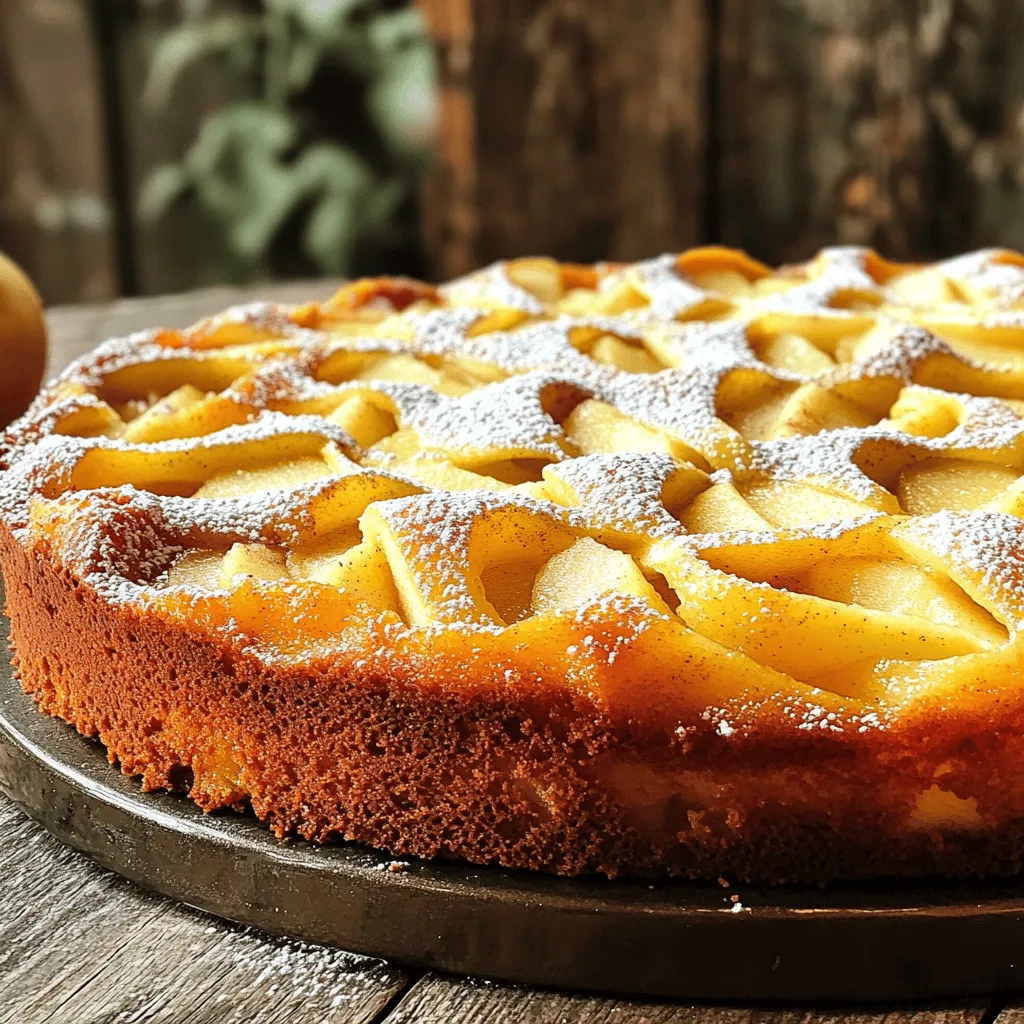
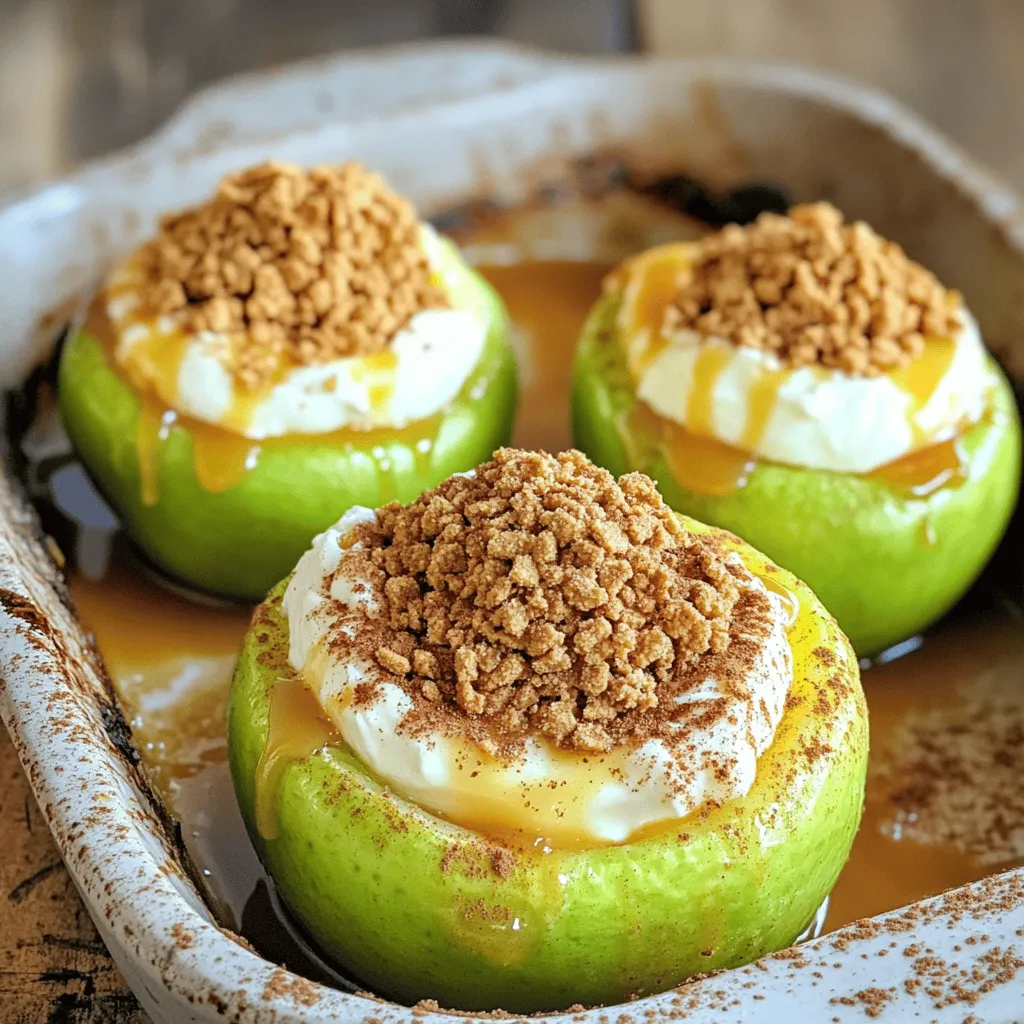
Chef Elliot
I’m Chef Elliot, your laid-back kitchen wingman with a serious love for bold flavors and easy cooking. 🥄✨
I believe anyone can cook—no fancy tools, no five-star background required. Just great recipes, a sprinkle of curiosity, and maybe a lemon zest moment to keep things fresh. 🍋💪
Think of me as your flavor coach: part guide, part cheerleader, always down for a second helping. I’m here to help you ditch the stress and stir up some joy—one tossed-together recipe at a time.

Latest from Chef Elliot
![- 2 cans of crescent rolls - 16 oz cream cheese, softened - 1 cup granulated sugar - 1 teaspoon pure vanilla extract - 3 large eggs - 1 cup sour cream - 1 tablespoon freshly squeezed lemon juice - 1/2 teaspoon ground cinnamon - Powdered sugar for dusting (optional) - Electric mixer - 9x13-inch baking dish - Spatula To make the Cheesecake Crescent Rolls Casserole, gather all the ingredients first. The main ingredients create a rich, creamy base. The crescent rolls give it a flaky texture. You need soft cream cheese for easy mixing. The sugar adds sweetness, while vanilla gives it a warm flavor. Next, the additional ingredients help bind everything together. Eggs are key for a smooth filling. Sour cream adds tanginess and creaminess. Fresh lemon juice brightens the taste, and cinnamon gives a hint of warmth. Finally, powdered sugar is optional but adds a sweet touch for presentation. You will also need some tools. An electric mixer helps mix the cream cheese and sugar quickly. A 9x13-inch baking dish is perfect for the casserole. A spatula is handy for spreading the filling evenly. For the full recipe, check the guide above and get ready to enjoy this delightful treat! - Preheat the oven to 350°F (175°C) - Prepare the baking dish with grease Start by preheating your oven. This ensures it’s hot and ready for baking. Grease a 9x13-inch baking dish well. This will help the casserole come out easily. - Combine cream cheese, sugar, vanilla, and lemon juice - Blend until smooth with electric mixer In a large bowl, combine softened cream cheese, granulated sugar, vanilla, and lemon juice. I like to use an electric mixer for this step. Mix on medium speed until the mixture is smooth and creamy. You want to avoid lumps. - Layering the crescent rolls in the baking dish - Spreading the cheesecake filling evenly Open both cans of crescent rolls and unroll them. Lay the first set of rolls into the greased dish. Press them down gently, pinching seams to create a flat layer. Next, pour half of the cheesecake filling over the rolls. Spread it evenly with a spatula for a nice layer. - Covering with second layer of crescent rolls - Bake for 30-35 minutes until golden brown Unroll the second can of crescent rolls and place it on top of the cheesecake filling. Press down lightly. Then, pour the remaining cheesecake mixture on top, spreading it out evenly. Place the dish in your preheated oven. Bake for 30 to 35 minutes. Look for a golden brown top and a set center. To get a smooth cheesecake texture, you need your ingredients at room temperature. Cold ingredients can cause lumps. So, take your cream cheese and eggs out ahead of time. It makes mixing easier and results in a creamier filling. Also, avoid over-mixing your cheesecake. Mix just enough to blend all the ingredients well. Too much mixing can add air, making your cheesecake rise too much and then fall. This casserole tastes best when warm or at room temperature. I love to slice it into squares and serve it right away. Garnish each piece with a dusting of powdered sugar for a sweet touch. Fresh berries add color and flavor, making it look even more inviting. You can also serve it with whipped cream on the side for extra delight. To check if your casserole is done, look for a golden brown top. The center should be set and not wobbly. If your oven runs hot or cold, you might need to adjust the baking time. Keep an eye on it after the 25-minute mark. If it’s not quite there, add a few more minutes. Make sure to check often so it doesn’t overcook. {{image_4}} You can make this dish even more fun. Try adding chocolate chips for a sweet twist. You can also mix in fresh fruit like berries or sliced bananas. These add flavor and make the dish look pretty. Another great idea is to infuse different extracts. Almond or coconut extracts can bring a whole new taste. Just add a teaspoon for a burst of flavor. If you want a lighter version, swap in low-fat cream cheese. Use sugar substitutes like stevia or monk fruit for sweetness. You can also use gluten-free crescent rolls. This way, even those with gluten issues can enjoy this dish. It tastes just as good but fits into different diets. You don’t have to serve this casserole the same way each time. Try making individual serving cups. These are easier for kids or parties. Mini casseroles are also fun. They cook faster and look cute on a table. Want something cool? Freeze the casserole for a frozen dessert option. Just let it thaw before serving. This gives you a new way to enjoy this tasty treat. For the full recipe and detailed steps, check out the [Full Recipe]. To keep your cheesecake crescent rolls casserole fresh, store it in the fridge. Place the leftovers in an airtight container. If you don't have one, cover the dish tightly with foil. This helps prevent the casserole from drying out. The casserole stays fresh for about three to four days in the fridge. When you're ready to enjoy leftovers, reheat them gently. The best method is to use the oven. Preheat it to 350°F (175°C) and place the casserole inside for about 15-20 minutes. Check if it's warm throughout by inserting a knife in the center. If it comes out warm, it’s ready to eat. You can freeze the casserole if you want to keep it longer. To freeze, wrap the dish well in plastic wrap before baking. You can also freeze it after baking. If frozen before baking, thaw it overnight in the fridge before cooking. If frozen after baking, reheat in the oven straight from the freezer, adding extra time as needed. Enjoy this delightful treat later! You can use mascarpone cheese for a rich taste. Ricotta works too, but it is grainier. If you prefer a dairy-free option, try coconut cream. It gives a nice flavor and creamy texture. Yes, you can prepare the casserole the night before. Just mix the filling and layer it with the crescent rolls. Cover it well and store it in the fridge. Bake it in the morning for a fresh, warm treat. The casserole stays fresh for about 3 to 4 days in the fridge. Make sure to store it in an airtight container. This helps keep it moist and tasty. Yes! You can use gluten-free crescent rolls. Look for brands like Pillsbury or Immaculate. They offer great taste without gluten. This way, everyone can enjoy this sweet treat. This cheesecake casserole recipe includes simple ingredients and easy steps. You learned about prepping, mixing, and baking for the perfect texture. Remember to use room temperature items and avoid over-mixing. You can customize it with flavors or healthier choices. Proper storage keeps your leftovers fresh for later. Try this dish warm or chilled, topped with berries or powdered sugar. Enjoy your baking and the delicious results!](https://tossedtastes.com/wp-content/uploads/2025/05/1e61a58f-beec-4f31-a315-a9958cc12b96.webp)
Cheesecake Crescent Rolls Casserole Delightful Treat
Are you ready to whip up a deliciously easy dessert? The Cheesecake Crescent Rolls Casserole is your new go-to treat. With just a few simple

Crispy Bang Bang Salmon Bites for a Tasty Snack
Looking for a quick and tasty snack? You’ll love these Crispy Bang Bang Salmon Bites! With a crunchy coating and a spicy kick, they’re perfect

Easy Italian Antipasto Pasta Salad Flavorful Delight
Looking for a tasty dish that’s easy to whip up? You’ll love my Easy Italian Antipasto Pasta Salad! This colorful salad is packed with rich

No Bake Almond Butter Cookies Quick and Easy Treat
Craving a sweet treat that’s quick, easy, and requires no baking? You’re in the right place! These No Bake Almond Butter Cookies are made with
![To make this Honeycrisp Apple Broccoli Salad, you need: - 2 cups fresh broccoli florets - 1 large Honeycrisp apple, diced into bite-sized pieces - 1/2 cup dried cranberries - 1/2 cup walnuts, roughly chopped - 1/4 cup red onion, finely diced These ingredients bring bright colors and flavors to your dish. You can add some fun extras to enhance your salad. Here are some ideas: - Shredded carrots for crunch - Feta cheese for creaminess - Sunflower seeds for a nutty flavor - Cooked bacon bits for a savory touch Feel free to mix and match based on what you love or have at home. The dressing ties everything together. For the creamy dressing, gather: - 1/2 cup creamy Greek yogurt - 2 tablespoons golden honey - 1 tablespoon apple cider vinegar - Salt and pepper, to taste Whisk these ingredients together until smooth. This dressing adds a sweet and tangy kick, making the salad truly special. For the full recipe, check out the detailed instructions. Start by rinsing the broccoli florets in cold water. This helps remove any dirt. If needed, cut them into smaller pieces. Next, bring a pot of water to a rolling boil. Carefully add the broccoli florets and blanch them for just 2 minutes. This keeps the broccoli bright and crisp. After blanching, transfer the broccoli to a bowl of ice water. This stops the cooking. Once cool, drain the broccoli well and set it aside. In a big mixing bowl, combine the diced Honeycrisp apple, blanched broccoli, dried cranberries, chopped walnuts, and diced red onion. Gently stir the mixture together. Make sure each ingredient is evenly distributed. This creates a great base for your salad. Take a small mixing bowl and whisk together the creamy Greek yogurt, golden honey, and apple cider vinegar. Add a pinch of salt and a dash of pepper. Keep whisking until the dressing is smooth. Taste it and adjust the seasoning if you like. The dressing should balance the sweetness of the apple and the tartness of the cranberries. Now, pour the dressing over your salad mixture. Use a gentle folding motion to combine everything. Make sure every piece of the salad is covered in the creamy dressing. This step brings all the flavors together. To let the flavors blend, cover the bowl with plastic wrap. Place it in the fridge for at least 30 minutes. This chilling time is key for a tasty salad. When ready to serve, take it out and enjoy. For a fun touch, garnish with extra walnuts and cranberries. This adds color and crunch. For the full recipe, click here. Choose the freshest broccoli florets you can find. Look for bright green color and firm texture. For Honeycrisp apples, pick ones that feel heavy for their size. This means they are juicy and crisp. Wash all produce under cold water before use. Keeping ingredients cold helps maintain their crunch. You can easily change this salad to fit your taste. Add other fruits like pears or grapes for a twist. Try different nuts, such as pecans or almonds, for varied flavors. If you prefer more crunch, include celery or bell peppers. You can also swap the Greek yogurt for a vegan option like cashew cream. A pinch of salt can brighten the flavors in your salad. Consider adding spices like garlic powder or paprika for a kick. For a zesty touch, squeeze a bit of lemon juice on top. If you love sweetness, add more honey to the dressing. Adjust to your taste for the perfect balance. For the complete recipe, check out the [Full Recipe]. {{image_4}} You can add fruits based on the season. In fall, try pears or pomegranate seeds. In summer, fresh berries like strawberries or blueberries work great. The sweetness of these fruits pairs well with the Honeycrisp apple. You can mix and match to keep the flavors exciting. Each fruit adds its own twist, making the salad feel new every time. If you want to switch up the nuts, try almonds or pecans. They both add crunch and flavor. If you prefer seeds, sunflower seeds or pumpkin seeds are excellent choices. They bring a fun crunch and boost the nutrition. You can also skip the nuts and seeds if you have allergies, and the salad will still taste amazing. To make this salad vegan, swap Greek yogurt for a plant-based yogurt. You can use coconut yogurt or almond yogurt for a creamy texture. Instead of honey, maple syrup works well to keep it sweet. This way, you can still enjoy the flavor without any animal products. The salad remains fresh and delicious while meeting your dietary needs. Try these options to see what you like best! To keep your Honeycrisp Apple Broccoli Salad fresh, store it in an airtight container. This helps prevent any drying out or wilting. Make sure to chill the salad in the fridge right after serving. It stays good for up to three days. However, the apples may brown a bit over time. To slow this down, add a splash of lemon juice on top before sealing the container. I do not recommend freezing this salad. Freezing can change the texture of the apples and broccoli. The creamy dressing can also separate and become watery when thawed. If you have extra dressing, you can freeze it in ice cube trays. This way, you can use it later for other salads. To keep your salad tasting fresh, use vibrant ingredients. Choose bright green broccoli and firm Honeycrisp apples. Store the salad separately from the dressing if you plan to eat it later. This helps maintain the crunch of the vegetables and the creaminess of the dressing. Enjoy the salad soon after making it for the best flavor and texture. For the complete recipe, check out the Full Recipe section. You can store this salad in the fridge for up to three days. To keep it fresh, use an airtight container. After a day, the apples may brown a bit. To avoid this, add some lemon juice on the apples. Yes, you can use other apples. Try Fuji or Gala for sweetness. Each type adds a unique taste. Keep in mind, the texture may change slightly based on the apple. Broccoli is full of vitamins and minerals. It helps with digestion and boosts your immune system. Apples provide fiber and antioxidants, which are great for heart health. Together, they make a tasty and healthy dish. This salad is already gluten-free! Just ensure that the ingredients, like the yogurt and honey, are gluten-free. Always check the labels to confirm they meet your dietary needs. This blog post covered how to make a delicious Honeycrisp Apple Broccoli Salad. You learned about fresh ingredients, optional add-ins, and dressing components. I provided step-by-step instructions for prepping, mixing, and serving. Tips shared will help you customize the salad for added flair. We discussed variations and best storage practices for leftovers. Enjoy experimenting with different flavors. You can make this salad your own. It’s healthy, tasty, and perfect for every meal. Dive in and enjoy!](https://tossedtastes.com/wp-content/uploads/2025/05/59b01e94-02f7-43e8-9357-e741a282bd95.webp)
Honeycrisp Apple Broccoli Salad Fresh and Flavorful Mix
Are you ready to elevate your salad game? This Honeycrisp Apple Broccoli Salad mixes fresh tastes for a dish that’s both bright and satisfying. With
![- 2 cups of prepared mashed potatoes - 1 cup of shredded cheddar cheese - 1/2 cup of grated Parmesan cheese - 1/4 cup of finely chopped green onions - 1/2 teaspoon of garlic powder - 1/2 teaspoon of onion powder - 1/2 teaspoon of salt - 1/4 teaspoon of black pepper - 1/2 cup of panko breadcrumbs (for extra crunch) - 1 large egg, beaten - Cooking spray The main ingredients build a creamy and cheesy base. I love using prepared mashed potatoes because they save time and add great flavor. Mixing in cheddar cheese and Parmesan gives each bite a rich taste. Adding green onions brightens the flavor and adds a nice crunch. The seasonings make a big difference too. Garlic powder and onion powder add depth without being overpowering. Salt and black pepper enhance all the flavors, making the dish pop. The panko breadcrumbs create a crispy outer layer when air-fried. The egg helps the breadcrumbs stick, ensuring a perfect crunch. For the best results, make sure to use high-quality ingredients. This simple list will help you create a delightful treat that everyone will love. If you want the full recipe, check out the details above! - In a large bowl, combine your prepared mashed potatoes, shredded cheddar cheese, grated Parmesan cheese, chopped green onions, garlic powder, onion powder, salt, and black pepper. - Mix everything well until the cheese is evenly distributed. - With clean hands, take some of the mixture and roll it into small balls, about 1 inch wide. - Place the balls on a tray. You should get around 16 to 20 balls. - Set up a breading station with two shallow bowls. - In one bowl, add the beaten egg. - In the second bowl, add panko breadcrumbs. - Take each potato ball, dip it into the egg, and let the extra egg drip off. - Roll the ball in the panko breadcrumbs until it’s fully covered. - Place the breaded balls back on the tray. - Preheat your air fryer to 375°F (190°C) for about 5 minutes. - Spray the air fryer basket lightly with cooking spray to prevent sticking. - Arrange the potato balls in a single layer in the basket. Make sure they do not touch. - Air fry the potato balls for 10-12 minutes. Turn them halfway through to get a golden brown color. - Once done, carefully remove the basket. Let the cheesy potato balls cool for a few minutes on a rack before serving. For the full details, check the [Full Recipe]. For the best texture, even cooking is key. When you place the potato balls in the air fryer, make sure they are not touching each other. This allows hot air to flow around each ball. It helps them cook evenly and turn crispy. Using cooking spray is also important. Lightly spray the air fryer basket before adding the balls. This prevents sticking and gives a nice golden finish. You can also spray the tops of the balls for extra crunch. To boost flavor, try adding different seasonings. Garlic powder adds a nice kick. You can also use smoked paprika for a smoky taste. Fresh herbs like parsley or chives can brighten the dish. For cheese, feel free to swap in different types. Mozzarella gives a gooey texture. Feta cheese adds a tangy flavor. Experiment with your favorites to find the perfect mix. For dips, sour cream pairs nicely with cheesy mashed potato balls. You can also try ranch dressing or spicy ketchup for a fun twist. When plating, use a stylish platter. Arrange the balls in a circle for a beautiful look. Add a sprinkle of chopped green onions on top for color. This little touch makes your dish pop! {{image_4}} You can switch up the cheese in this recipe. Try using mozzarella for a milder taste. Gouda adds a nice smoky flavor. For a tangy twist, opt for feta or blue cheese. If you want a vegan version, use plant-based cheese. For gluten-free options, swap panko breadcrumbs with crushed rice cereal or gluten-free breadcrumbs. These changes keep the balls tasty and enjoyable for everyone. Want to amp up the flavor? Adding cooked bacon or ham can give your potato balls a savory kick. Just chop the meat into small pieces and mix it into the potato blend. Vegetables are also a great addition. Spinach adds a pop of color and nutrition. You can even include jalapeños for a spicy kick. Just be sure to chop them finely so they mix well. You can also bake these cheesy mashed potato balls in the oven. Preheat your oven to 400°F (200°C) and place the balls on a baking sheet. Bake them for about 20-25 minutes until golden brown. If you prefer traditional frying, heat oil in a deep pan. Fry the balls in batches until they are crispy and golden. This method gives a different texture but is also delicious. These variations let you customize the recipe to your taste. For the full recipe, check out the main section. After enjoying your air fryer cheesy mashed potato balls, let them cool. Place them in a clean, airtight container. Refrigeration will keep them fresh for up to four days. I recommend using glass containers. They help maintain the taste and texture well. To enjoy your leftovers, the air fryer is the best option. Preheat your air fryer to 350°F (175°C). Place the potato balls in a single layer in the basket. Heat them for about 5-7 minutes. This method keeps them crispy. Avoid using the microwave, as it can make them soggy. If you want to save some for later, freezing works well. First, arrange the potato balls on a baking sheet. Make sure they do not touch each other. Freeze them for about an hour. Once frozen, transfer them to a freezer bag. They can last for up to three months. For cooking from frozen, preheat your air fryer to 375°F (190°C). Cook the frozen potato balls for about 12-15 minutes. No need to thaw them first; just enjoy! Cook the cheesy mashed potato balls for 10-12 minutes at 375°F (190°C). This temperature helps them get crispy and golden brown. Make sure to turn them halfway through. This method ensures even cooking and a tasty crunch. Yes, you can prep these potato balls in advance. Form the balls and place them on a tray. Cover the tray and store it in the fridge for up to 24 hours. This saves time on busy days. You can also freeze them for longer storage. Just freeze them on a tray, then transfer to a bag. Some popular sauces to dip these balls in include sour cream, ranch dressing, and ketchup. You can also try a spicy aioli for extra flavor. Each sauce adds a unique taste to the creamy potato balls and makes them even more delicious. To make these potato balls healthier, consider these options: - Use Greek yogurt instead of sour cream for a lower-fat dip. - Swap regular cheese for low-fat cheese. - Add extra veggies like spinach or zucchini into the mixture. These changes keep the flavor while reducing calories and fat. For the full recipe, check out the entire process. This blog explained how to make tasty cheesy mashed potato balls. We covered major ingredients, step-by-step instructions, and cooking tips. You can also explore fun variations and how to store leftovers. These potato balls are easy, delicious, and perfect for any meal. Experiment with flavors and find your favorites. Enjoy your cooking journey and share these fun bites with family and friends!](https://tossedtastes.com/wp-content/uploads/2025/05/7757a8d9-db65-4fcc-86ac-1518e0da6640.webp)
Air Fryer Cheesy Mashed Potato Balls Delightful Treat
Are you ready to elevate your snack game? Air Fryer Cheesy Mashed Potato Balls are an easy and delicious treat that anyone can enjoy. With
![- 2 lbs live crabs, cleaned and prepped - 6 cups water - 1/2 cup unsalted butter - 1/4 cup honey - 6 cloves garlic, minced - 1 tablespoon Old Bay seasoning - 1 tablespoon lemon zest - 1 teaspoon red pepper flakes (adjust to taste) - 1 lemon, cut into wedges (for garnish) - Fresh parsley, chopped (for garnish) - Salt and pepper to taste Gathering the right ingredients is key to a great Garlic Honey Butter Crab Boil. Start with live crabs. You want them fresh and lively for the best flavor. Make sure to clean and prep them well; this makes cooking easier. Next, you need water for boiling. Six cups will do nicely. The butter adds richness, while honey brings a sweet touch. Garlic gives that amazing aroma. Old Bay seasoning adds depth, and lemon zest brightens everything up. The red pepper flakes? They add a nice kick. You can adjust the amount to suit your taste. Lemon wedges and parsley are for garnish. They not only look nice but also add fresh flavors. Salt and pepper round out the dish. You can find the full recipe above to help you with measurements and preparations. - Bring 6 cups of water to a boil in a large stock pot. - Carefully add the cleaned crabs to the pot. Cook for 5 to 7 minutes until they turn vibrant red. - Once cooked, remove the crabs and drain them well. Set them aside for later. - In a spacious skillet, melt 1/2 cup of unsalted butter over medium heat. - Add 6 cloves of minced garlic to the melted butter. Sauté for about 2 to 3 minutes until the garlic is golden and fragrant. - Stir in 1/4 cup of honey, 1 tablespoon of Old Bay seasoning, 1 tablespoon of lemon zest, and 1 teaspoon of red pepper flakes. Cook for an additional 2 minutes to blend all the flavors. - Gently toss the cooked crabs in the garlic honey sauce. Make sure they are evenly coated in the rich mixture. - Let the crabs cook in the sauce for another 2 to 3 minutes. This allows them to absorb all the delightful flavors. - Adjust the seasoning with salt and pepper to your taste. For the full experience, check out the Full Recipe to guide you through every step. Boiling crabs needs the right time to get the best texture. I recommend boiling them for 5-7 minutes. This time lets them turn vivid red, showing they are done. If you cook them too long, they become mushy. Keep an eye on them to avoid this. You can take the flavor of your crab boil to the next level. Try adding spices like smoked paprika or cayenne pepper for a kick. You can also toss in some fresh herbs, like thyme or dill. Marinating the crabs in a mix of honey and spices for one hour before cooking can add depth. It helps the crabs soak up all the wonderful flavors. Serve your garlic honey butter crab boil family-style for a warm feel. Use a big platter to show off your dish. Scatter lemon wedges and chopped parsley on top for color. Don't forget to offer seafood crackers and bibs! They make the meal more fun. Check the [Full Recipe] for details on how to make this dish shine on your table. {{image_4}} You can mix up your crab boil with other seafood. Shrimp is a great choice. They cook quickly and soak up flavors well. You can add lobster for a richer taste. Slice the lobster in half to help it cook evenly. To create a mixed seafood boil, simply combine different types of seafood. Just make sure to adjust cooking times based on what you add. Want more heat? You can add fresh peppers like jalapeños or serranos. Just chop them finely and toss them in with the garlic. If you prefer milder flavors, skip the red pepper flakes. You can also try different seasoning blends, such as Cajun or Creole, for a new twist. Each blend brings its own unique flavor. If you need gluten-free options, check your seasoning labels. Many spices are naturally gluten-free. For a vegetarian version, swap crabs for artichokes or mushrooms. These options can still give you that savory flavor. You can use the same garlic honey butter sauce to enhance these ingredients. This way, you enjoy the same great taste! To keep your crab boil fresh, store leftovers in an airtight container. Place the crabs in the fridge within two hours of cooking. This helps prevent bacteria growth. The crab boil will last up to three days in the fridge. After that, the quality may decline. When reheating, skip the microwave. Instead, use a skillet over low heat. Add a splash of water or broth to keep moisture. This way, crabs stay juicy and tender. Make sure to stir often to avoid sticking. If you want to keep the flavor, heat gently and don’t overdo it. Enjoy every tasty bite! For the full recipe, check the link. You can tell when crabs are cooked by their color. Fresh crabs will turn a bright red when done. Look for the crab's shell to be bright and shiny. The meat inside should be opaque and firm. If the crab is gray or translucent, it needs more time in the pot. Yes, you can use frozen crabs, but adjust the cooking time. Frozen crabs will need a bit longer to cook. If you use frozen, steam them for about 8-10 minutes. The flavor may also differ slightly, as fresh crabs taste sweeter. Always check that they turn bright red before serving. You can enjoy many side dishes with this crab boil. Here are a few ideas: - Corn on the cob: Its sweetness complements the crab. - Coleslaw: The crunch adds texture and freshness. - Garlic bread: Perfect for soaking up the delicious sauce. - Potato salad: Creamy potatoes balance the rich flavors. - Lemonade or iced tea: Refreshing drinks to wash down the meal. Feel free to mix and match these sides for a great crab boil experience. For the full recipe, check out the Garlic Honey Butter Crab Boil. This blog post guides you on how to make a delicious Garlic Honey Butter Crab Boil. You learned about the key ingredients, cooking steps, and helpful tips. Each step matters for great taste. Remember to avoid overcooking to keep your crab tender. Feel free to try different seafood or spice levels to suit your taste. Now, you can impress your friends and family with this feast. Enjoy the flavors and make it your own!](https://tossedtastes.com/wp-content/uploads/2025/05/91626c3d-4082-49f6-80c8-7df5e32c780a.webp)
Garlic Honey Butter Crab Boil Savory Seafood Delight
Are you ready to dive into a seafood feast that will impress everyone? In this blog post, I will guide you through creating a mouthwatering

Air Fryer Grilled Cheese Hot Dogs Quick and Tasty Meal
Ready for a fun twist on a classic favorite? Air Fryer Grilled Cheese Hot Dogs bring a delicious mix of gooey cheese, savory hot dogs,

Light and Creamy Pesto Caprese Pasta Salad Delight
Looking for a refreshing take on pasta salad? You’ll love my Light and Creamy Pesto Caprese Pasta Salad! It’s super easy to make with fresh

Fried Cauliflower Crispy and Irresistible Snack
Craving a tasty snack that’s crispy and oh-so-irresistible? Look no further than fried cauliflower! This simple dish transforms plain cauliflower into a munch-worthy delight. I’ll