DESSERTS
Delicious Apple Cider Donut Cake Easy and Flavorful
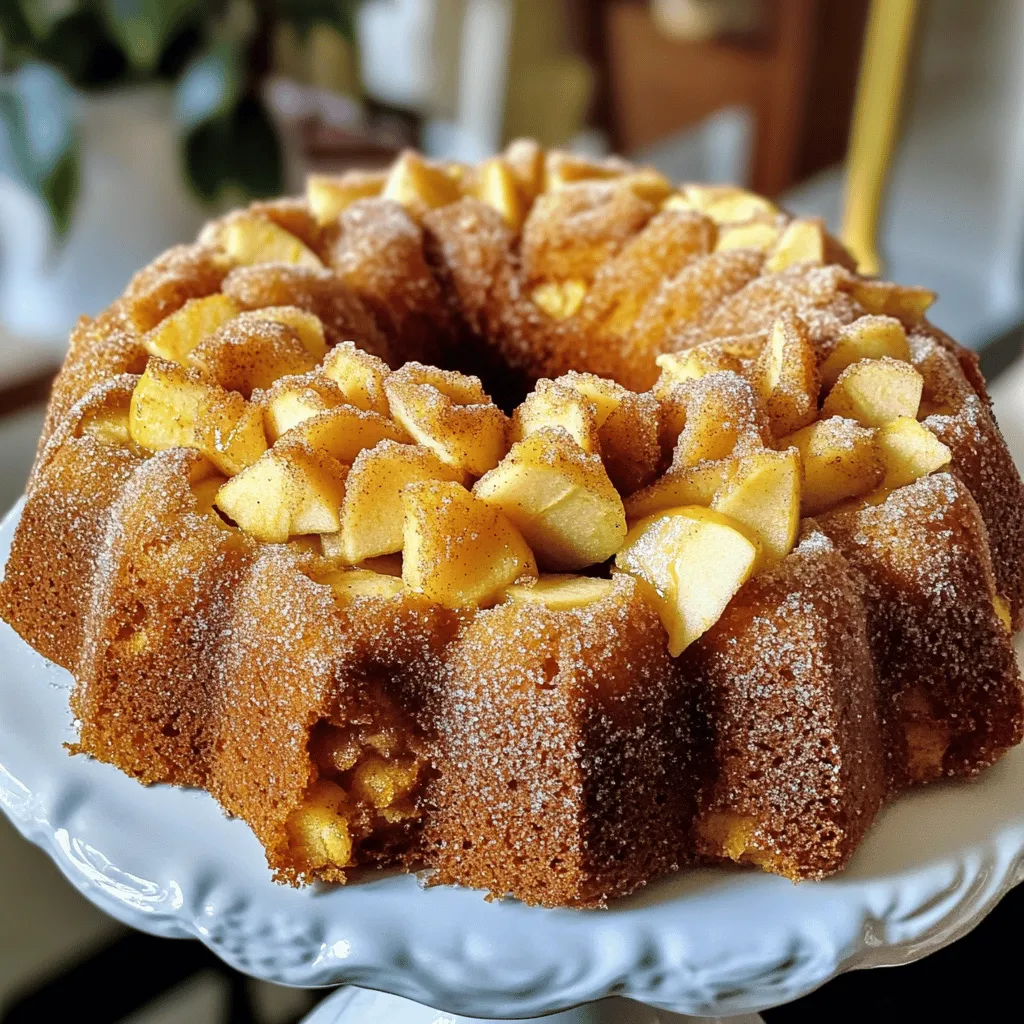
Are you ready to enjoy the amazing taste of fall? Today, I’m excited to share my easy and flavorful Apple...
READ MORE →Chef Elliot
I’m Chef Elliot, your laid-back kitchen wingman with a serious love for bold flavors and easy cooking. 🥄✨
I believe anyone can cook—no fancy tools, no five-star background required. Just great recipes, a sprinkle of curiosity, and maybe a lemon zest moment to keep things fresh. 🍋💪
Think of me as your flavor coach: part guide, part cheerleader, always down for a second helping. I’m here to help you ditch the stress and stir up some joy—one tossed-together recipe at a time.

Delicious recipes crafted by Chef Elliot
Are you ready to enjoy the amazing taste of fall? Today, I’m excited to share my easy and flavorful Apple...
READ MORE →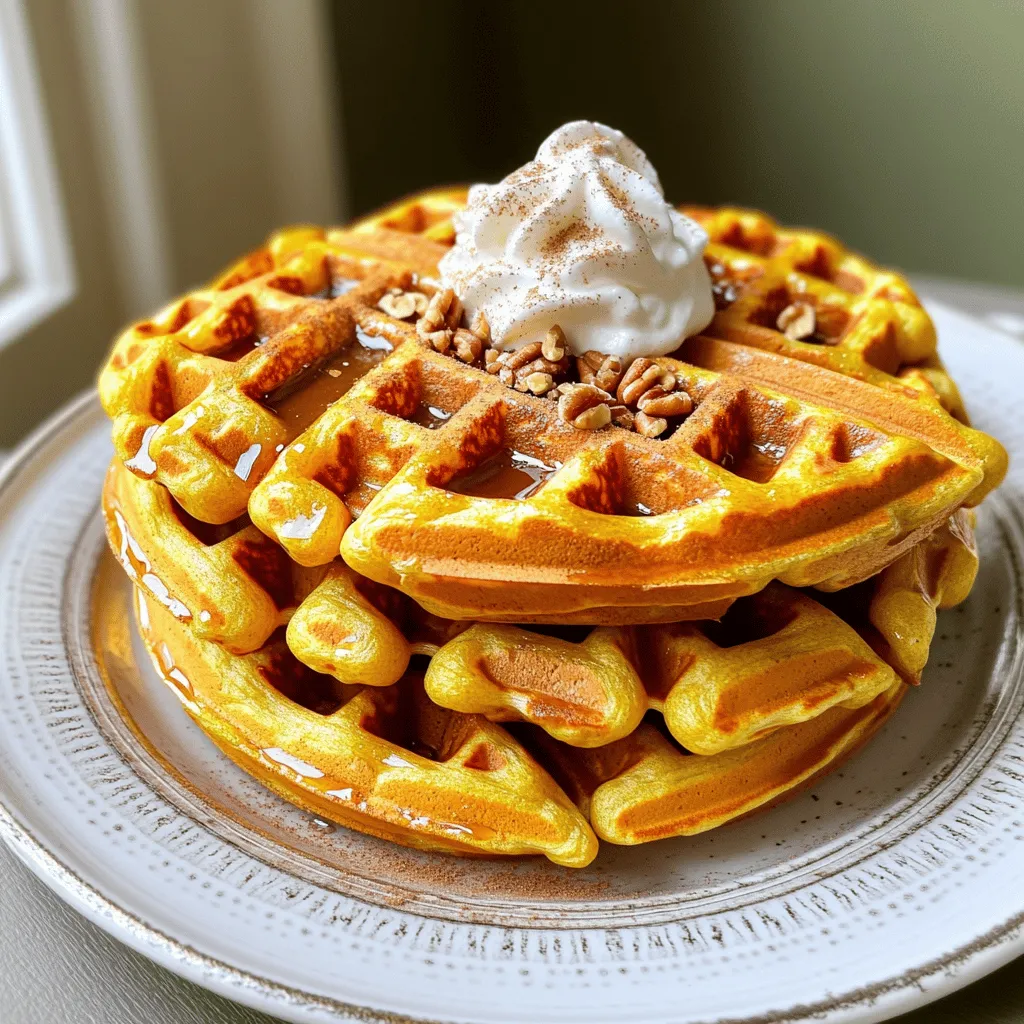
Ready to indulge in a cozy fall favorite? My Spiced Pumpkin Waffles with Brown Butter Syrup offer the perfect mix...
READ MORE →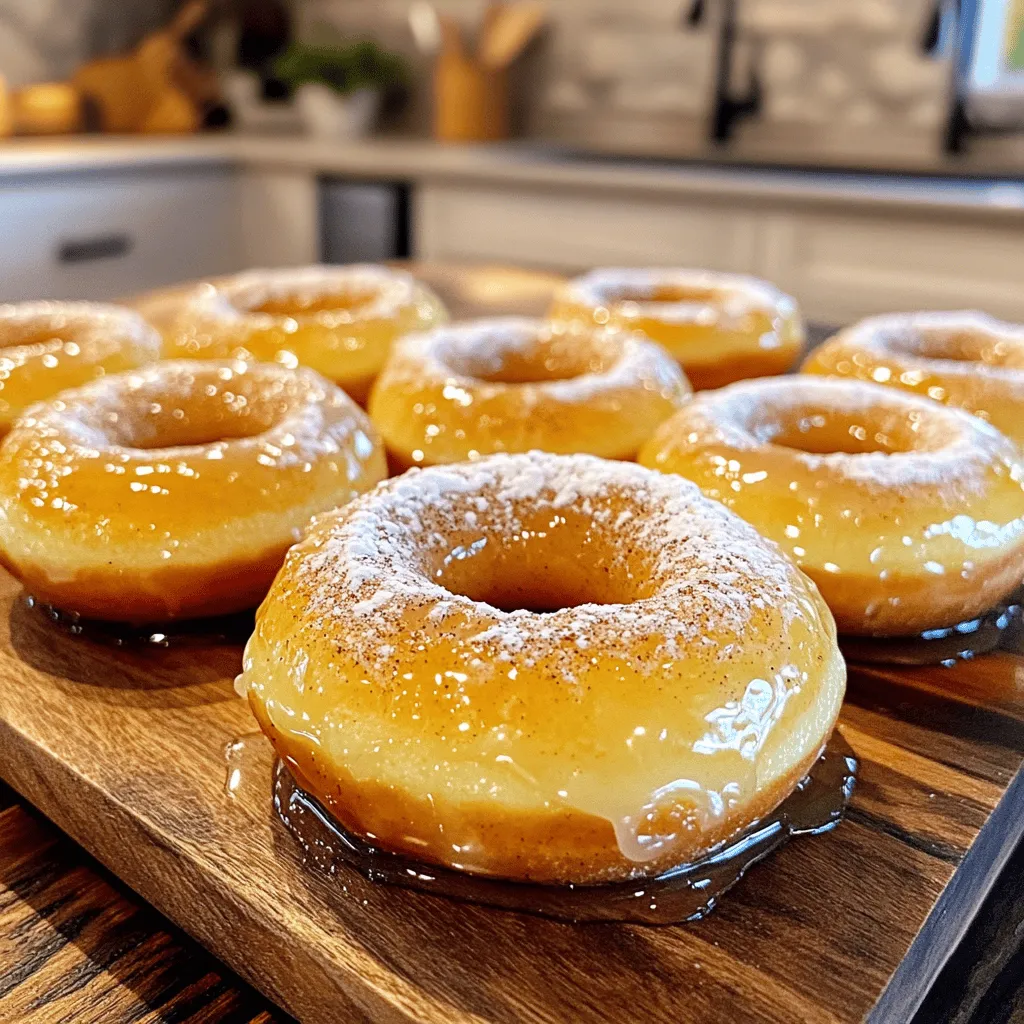
Are you craving a sweet treat that warms your heart? Let me introduce you to spiced maple doughnuts! These doughnuts...
READ MORE →
If you love coffee and cinnamon, you’ve come to the right place! In this article, I’ll share my easy recipe...
READ MORE →
Welcome to the world of baking! If you’re craving a cozy treat, my Apple Cinnamon Loaf is a rich and...
READ MORE →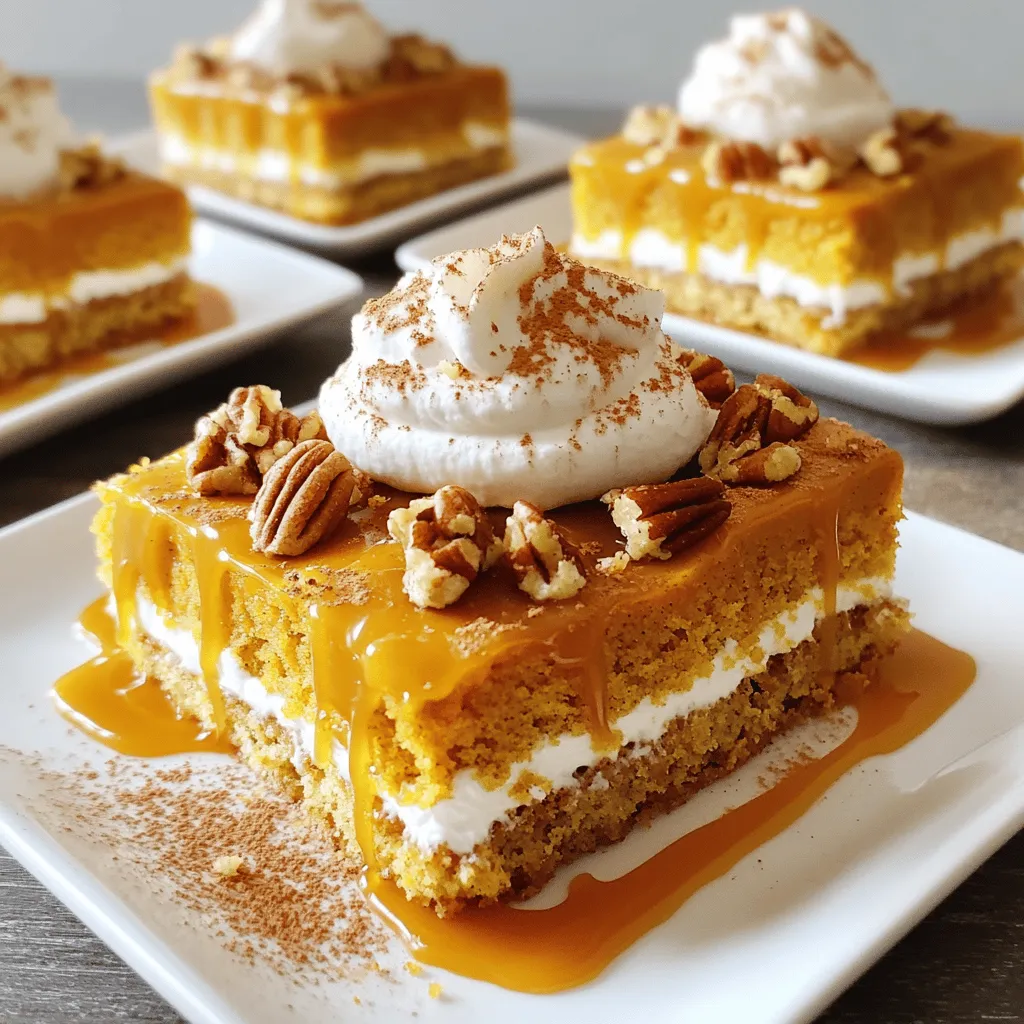
Autumn is here, and nothing says cozy like a Pumpkin Crunch Cake! Imagine the warm spices, creamy pumpkin, and a...
READ MORE →
Fall flavors are calling! If you love pumpkin treats, you’re in for a tasty surprise with these Easy Baked Pumpkin...
READ MORE →
Craving something bold and tasty? Try my Buffalo Chicken Flatbread recipe! It packs a punch with spicy sauce and tender...
READ MORE →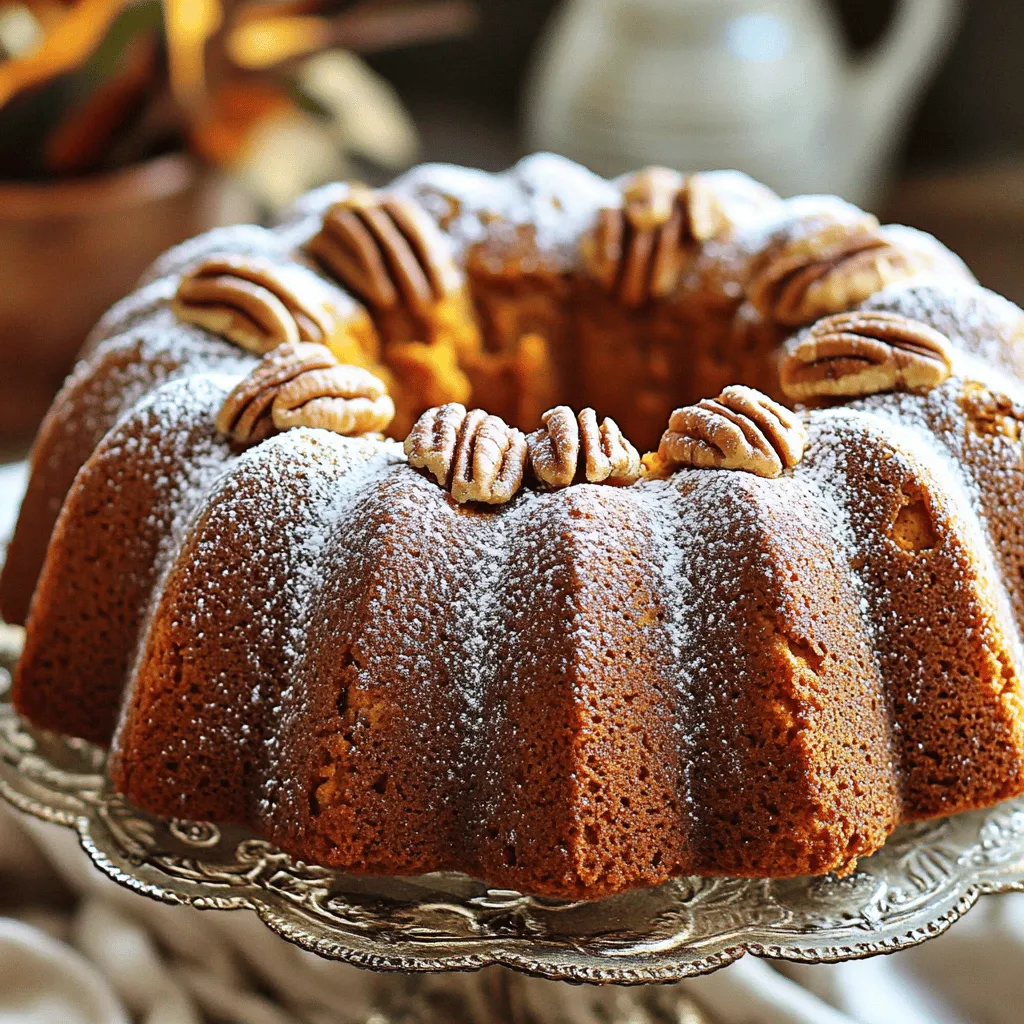
Looking for a tasty fall treat? This Easy Pumpkin Bundt Cake is fluffy and full of flavor. With just a...
READ MORE →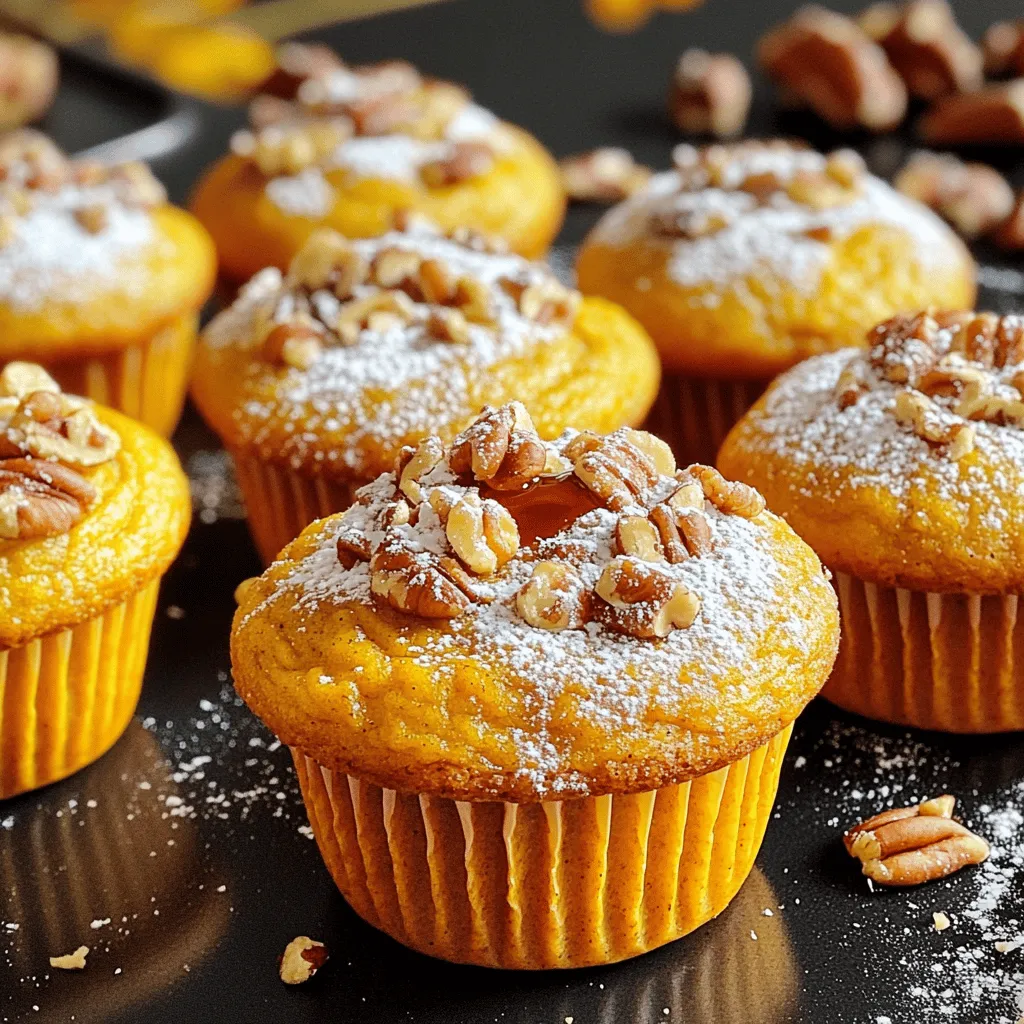
Looking for a delicious fall treat? These pumpkin muffins with maple filling are perfect! This recipe blends warm spices with...
READ MORE →