
BREAKFAST
Breakfast Egg Muffins Delightful and Easy Recipe
Are you searching for a quick, tasty breakfast? Look no further! In this post, I’ll share my simple and delightful...
READ MORE →Chef Elliot
I’m Chef Elliot, your laid-back kitchen wingman with a serious love for bold flavors and easy cooking. 🥄✨
I believe anyone can cook—no fancy tools, no five-star background required. Just great recipes, a sprinkle of curiosity, and maybe a lemon zest moment to keep things fresh. 🍋💪
Think of me as your flavor coach: part guide, part cheerleader, always down for a second helping. I’m here to help you ditch the stress and stir up some joy—one tossed-together recipe at a time.

Delicious recipes crafted by Chef Elliot
Are you searching for a quick, tasty breakfast? Look no further! In this post, I’ll share my simple and delightful...
READ MORE →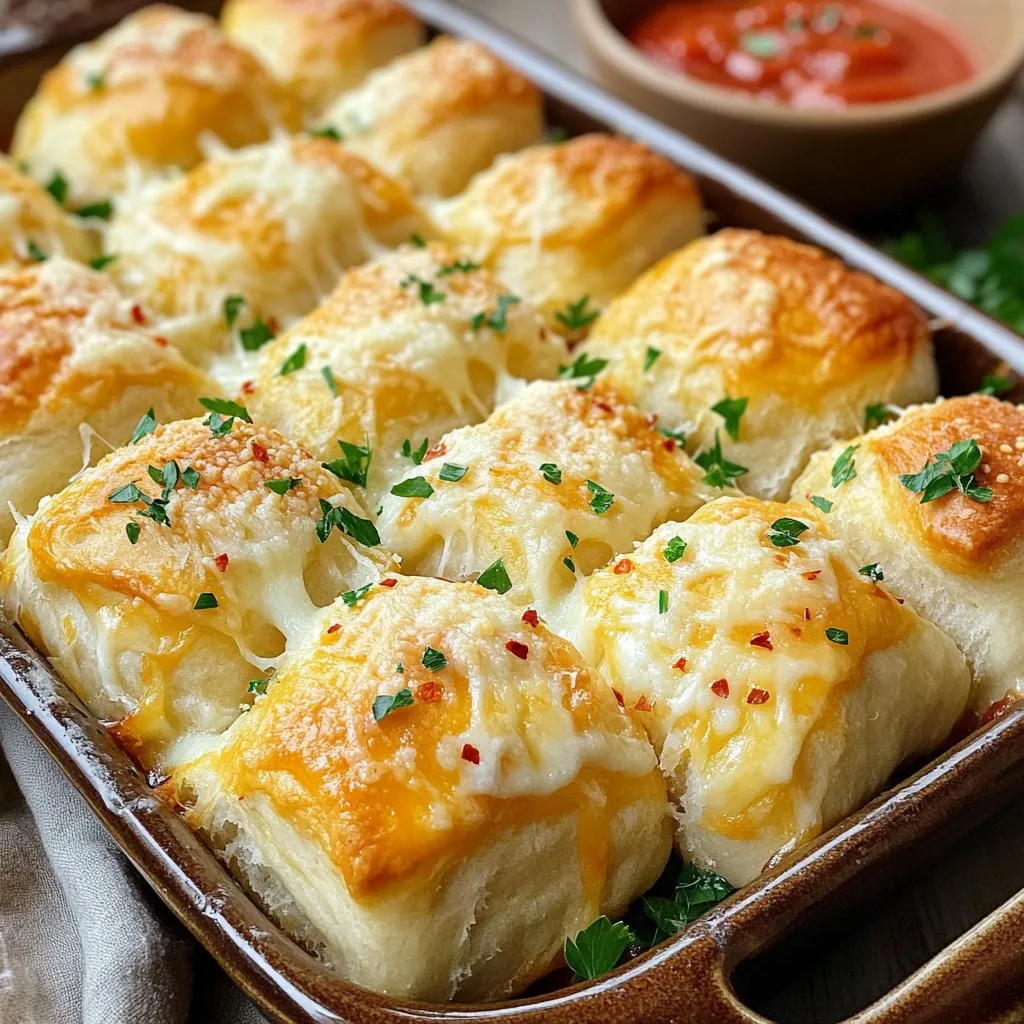
Are you ready to indulge in warm, cheesy garlic rolls that burst with flavor? In this blog post, I’ll show...
READ MORE →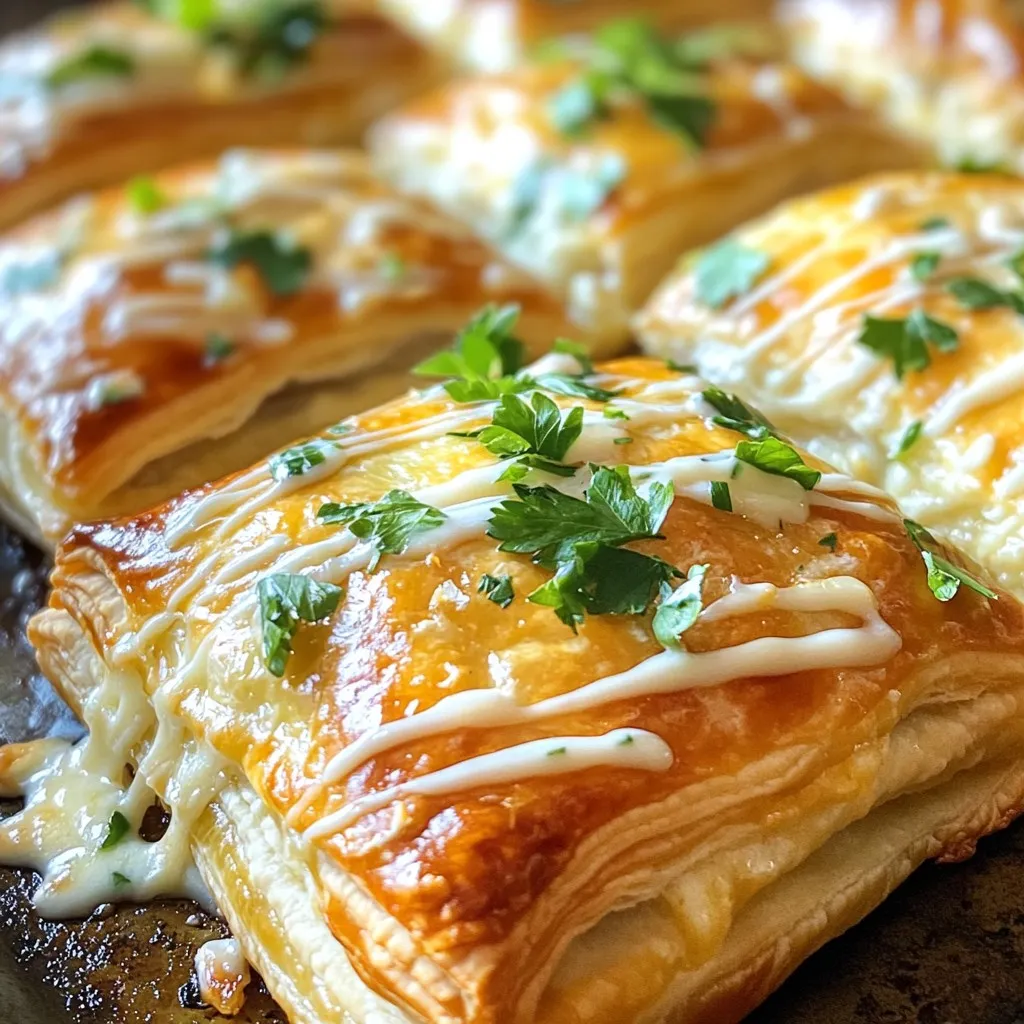
Craving an easy and tasty dinner? Let’s dive into making savory Chicken Pillows with Parmesan Cream Sauce! This dish wraps...
READ MORE →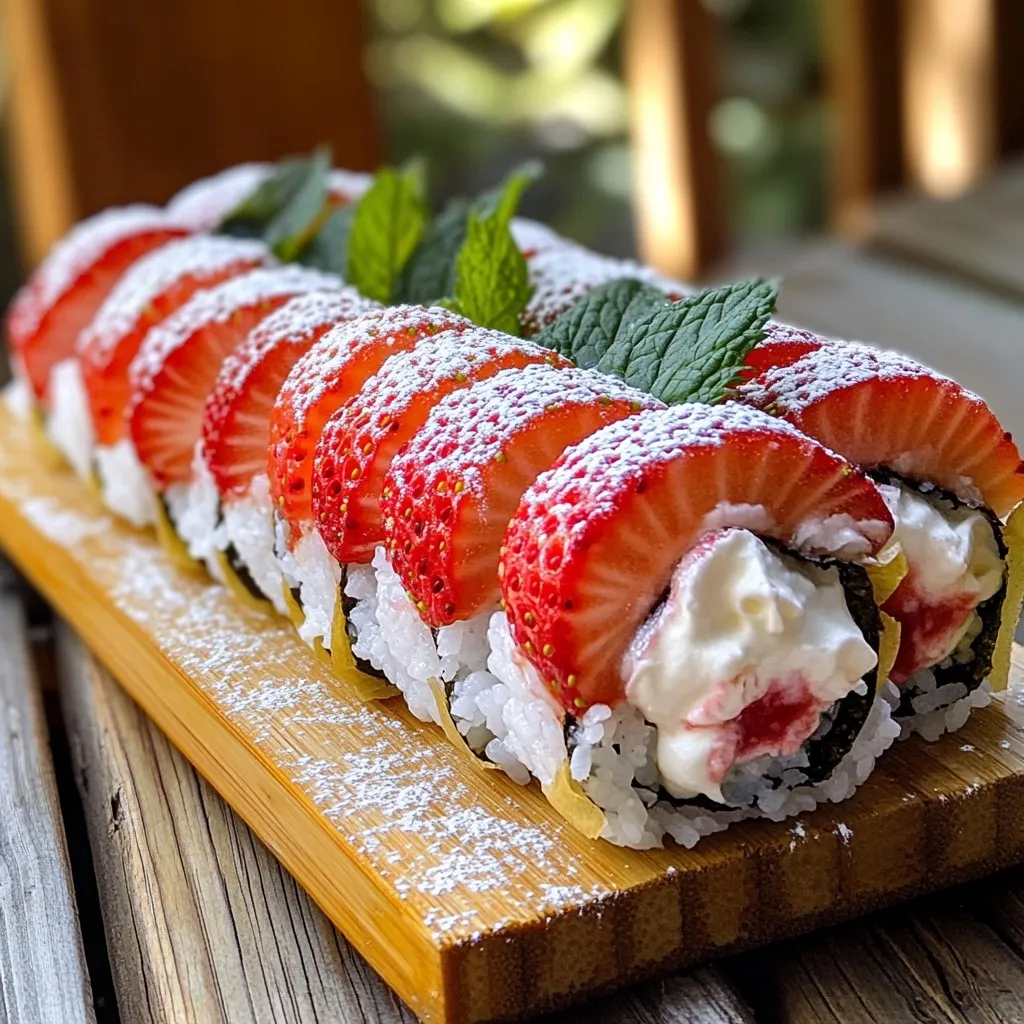
Looking for a fun summer treat? Strawberry Shortcake Sushi Rolls are the perfect blend of fresh flavors and creative presentation....
READ MORE →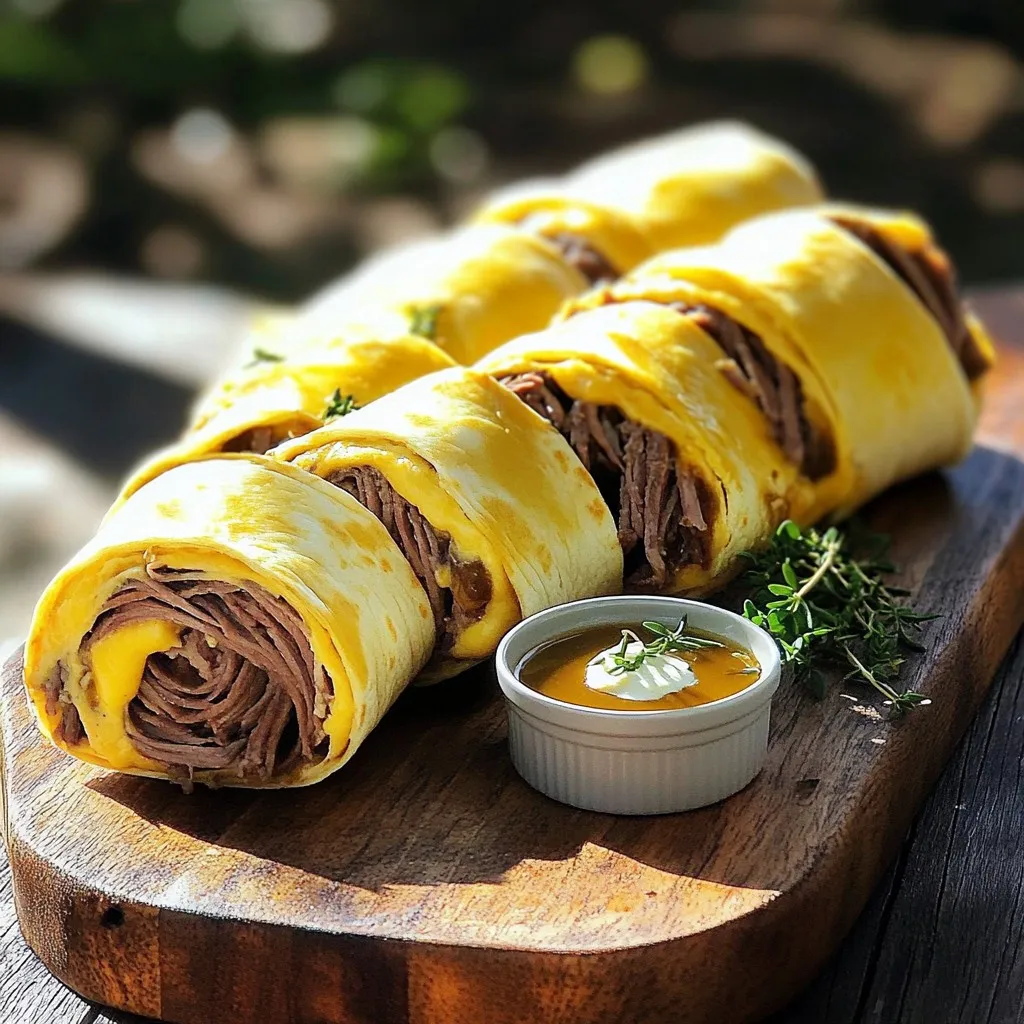
Looking for a fun and tasty snack? Try French Dip Tortilla Roll Ups! They’re quick to make and bursting with...
READ MORE →
Are you ready to elevate your taco nights? My Chicken Street Tacos recipe is flavorful, simple, and perfect for any...
READ MORE →
Looking for a quick and healthy snack? You’ll love my freezer-friendly protein biscuits! In this simple recipe guide, I’ll show...
READ MORE →
Are you craving a tasty snack that packs a protein punch? Look no further! Protein cookie dough bites are simple...
READ MORE →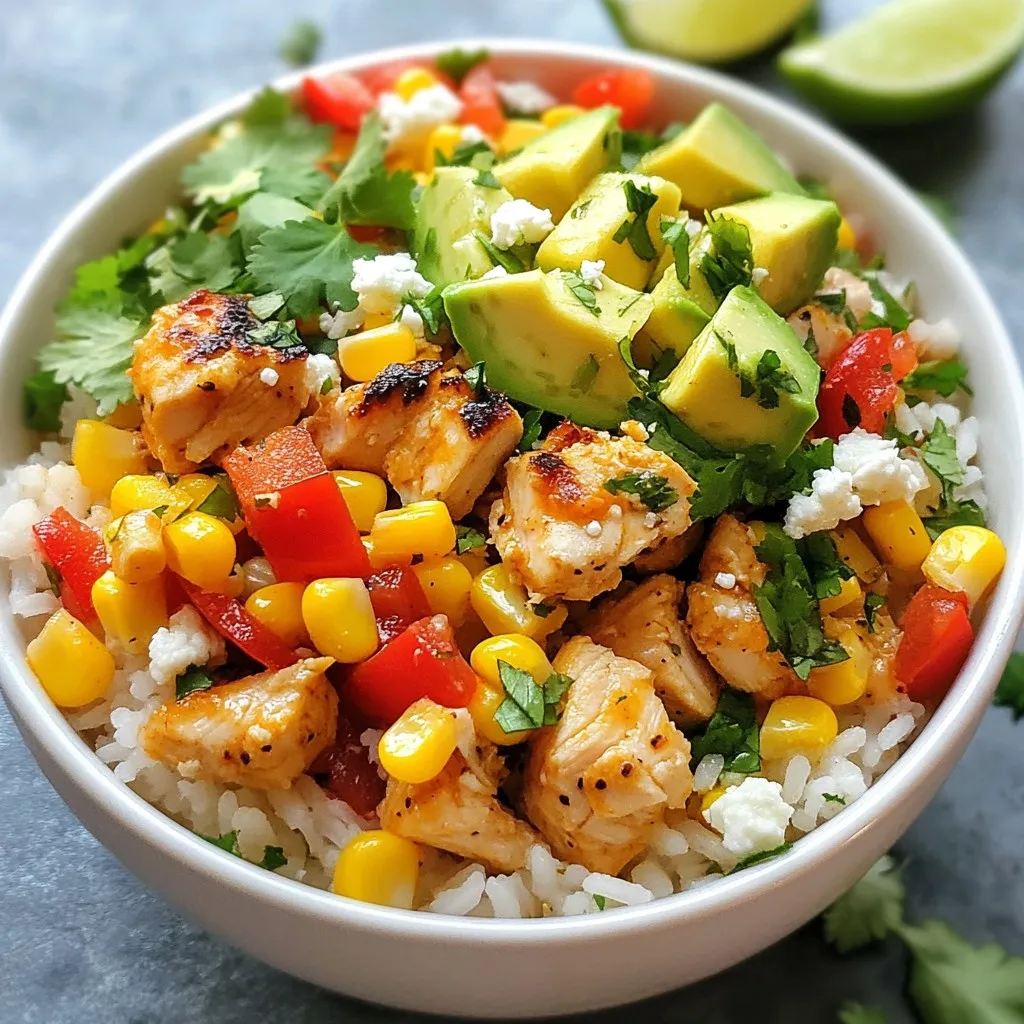
Are you ready to spice up your dinner routine? In this Savory Street Corn Chicken Rice Bowl Recipe Guide, I’ll...
READ MORE →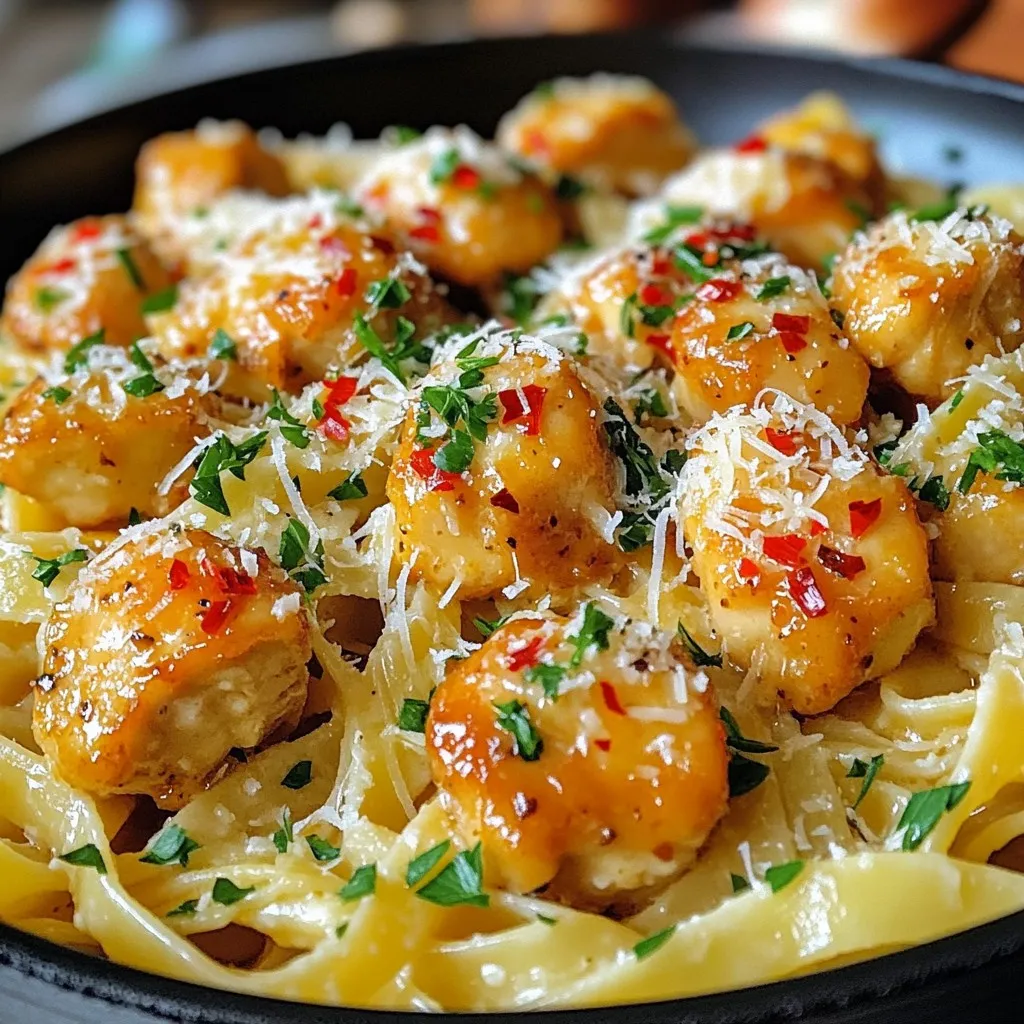
Craving a quick and tasty meal? Garlic Butter Chicken Bites with Pasta is your answer! This dish combines tender chicken...
READ MORE →