
Are you ready to impress your friends and family with warm, flaky scones? Get ready for Bakery Style Brown Sugar Cinnamon Scones Delight! These treats are easy to make and perfect for breakfast or tea time. I’ll guide you through each step and show you how to use simple ingredients. Soon, you’ll enjoy the sweet aroma filling your kitchen. Let’s dive into the delightful world of scone baking!
Ingredients
Detailed Ingredient List
To make bakery-style brown sugar cinnamon scones, gather the following ingredients:
– 2 cups all-purpose flour
– 1/2 cup packed brown sugar
– 1 tablespoon baking powder
– 1 teaspoon ground cinnamon
– 1/2 teaspoon salt
– 1/2 cup unsalted butter, chilled and diced into small cubes
– 3/4 cup heavy cream (plus a little extra for brushing)
– 1 teaspoon pure vanilla extract
– 1 large egg, at room temperature
– 1 tablespoon coarse sugar for topping (optional)
Measurements and Substitutions
When measuring flour, spoon it into the cup and level off. This will prevent scones from being too dense. If you don’t have brown sugar, you can use white sugar with a bit of molasses. For a dairy-free option, substitute the heavy cream with coconut cream. Use a vegan butter alternative if you want dairy-free scones.
Importance of Quality Ingredients
Using high-quality ingredients makes a big difference. Fresh flour helps the scones rise well. Good brown sugar adds moisture and flavor. I prefer unsalted butter because it allows you to control the salt in your recipe. Always choose pure vanilla extract—it gives the best flavor. These choices help ensure your scones taste just like the ones from a bakery.
Step-by-Step Instructions
Prepping the Oven and Baking Sheet
First, set your oven to 400°F (200°C). This high heat helps the scones rise. Grab a baking sheet and line it with parchment paper. This step keeps the scones from sticking.
Mixing and Preparing Dry Ingredients
In a large bowl, whisk together the dry ingredients. Combine 2 cups of all-purpose flour, ½ cup of packed brown sugar, 1 tablespoon of baking powder, 1 teaspoon of ground cinnamon, and ½ teaspoon of salt. Make sure they mix well. This mixture adds flavor and helps the scones rise.
Incorporating Butter
Next, add ½ cup of chilled unsalted butter, diced into small cubes. Use your fingertips or a pastry cutter to blend the butter into the flour mix. You want it to look like coarse crumbs. Leave some pea-sized bits of butter. These bits create a flaky texture.
Combining Wet Ingredients
In a separate bowl, mix the wet ingredients. Combine ¾ cup of heavy cream, 1 teaspoon of pure vanilla extract, and 1 large egg. Whisk until smooth. This mix adds moisture and flavor to your scones.
Merging Wet and Dry Mixtures
Now, pour the wet mix into the dry ingredients. Use a wooden spoon or spatula to gently fold them together. Be careful not to overmix. The dough should still be a bit sticky. This stickiness helps keep the scones tender.
Shaping and Baking the Scones
Turn the dough onto a floured surface. Gently pat it into a round disc, about 1 inch thick. Use a sharp knife to cut the circle into 8 wedges. Place the wedges on your baking sheet, leaving space between them. Brush the tops with extra heavy cream for a golden finish. If you like, sprinkle coarse sugar on top. Bake for 15-18 minutes until golden brown. A toothpick should come out clean when done. Let them cool slightly on a wire rack. Enjoy your fresh scones!
Tips & Tricks
Achieving the Perfect Scone Texture
To get the best scone texture, you want them light and flaky. Start with cold butter. When you cut it into the flour, aim for pea-sized pieces. This step helps create those perfect layers. Don’t overmix the dough; it should be slightly sticky when you shape it. Remember, a gentle touch keeps the scones tender.
Common Mistakes to Avoid
One common mistake is overworking the dough. This can lead to tough scones. Another is not using enough flour when shaping. Your dough should not stick too much to your hands. Also, don’t forget to preheat your oven! This ensures a nice rise and golden color. Lastly, skip the extra sugar on top at your own risk—it adds a lovely crunch.
Best Tools for Making Scones
Having the right tools makes scone-making easier. A good mixing bowl is key for combining ingredients. Use a pastry cutter or your fingers to work in the butter. A sharp knife helps cut the scones into even wedges. A baking sheet lined with parchment paper prevents sticking. Don’t forget a wire rack for cooling; it keeps them crisp!
Variations
Flavor Variations (e.g., Chocolate Chip, Fruit-Infused)
You can mix this recipe up in fun ways. Try adding chocolate chips for a sweet twist. About 1 cup works well. You can also use fruit, like blueberries or cranberries. About 1 cup of fresh or dried fruit fits perfectly. These choices give the scones a new taste. You can even blend flavors. Imagine chocolate and orange zest together. That creates a delightful treat!
Gluten-Free Alternatives
For a gluten-free option, swap all-purpose flour for a gluten-free blend. Many brands work well, but look for ones that include xanthan gum. This helps bind the ingredients. Use the same amount, about 2 cups. Check that your baking powder is gluten-free too. This way, everyone can enjoy your scones!
Dairy-Free Modifications
If you want dairy-free scones, replace the butter with coconut oil or vegan butter. Both options keep the scones moist and tasty. Use the same amount, 1/2 cup. For the heavy cream, try almond milk or coconut cream. Use 3/4 cup, plus a touch of extra for brushing. These swaps keep the flavor and texture just right. Enjoy your scones with no dairy worries!
Storage Info
How to Store Scones for Freshness
To keep your scones fresh, place them in an airtight container. This keeps moisture in and air out. You can store them at room temperature for up to two days. If you want them to last longer, consider refrigerating them. Just make sure they are in a sealed bag or container. This method can keep them fresh for about a week.
Reheating Instructions
When you’re ready to enjoy your scones again, reheating is simple. Preheat your oven to 350°F (175°C). Place the scones on a baking sheet. Heat them for about 5 to 10 minutes. This will warm them up and restore some of their original texture. You can also microwave them for about 15 seconds, but they may not be as crispy.
Freezing Scones for Later Use
Freezing scones is a great way to save them for later. First, let them cool completely. Then, wrap each scone tightly in plastic wrap. Place the wrapped scones in a freezer-safe bag. They can last up to three months in the freezer. When you want to eat one, just thaw it overnight in the fridge. Reheat as described above for a fresh taste.
FAQs
What can I use instead of heavy cream?
You can use whole milk or half-and-half. They work well but may yield less richness. For a thicker texture, try using coconut cream or a mix of milk and butter. Each option brings a unique flavor to the scone.
How do I know when my scones are done?
Scones are done when they turn golden brown. Insert a toothpick in the center; it should come out clean. If they look pale, give them a few more minutes. Watch them closely to avoid overbaking.
Can I make the dough ahead of time?
Yes, you can make the dough and chill it for up to 24 hours. Wrap it tightly in plastic wrap. When ready, just shape and bake. This can enhance the flavor and texture of the scones.
What’s the best way to serve scones?
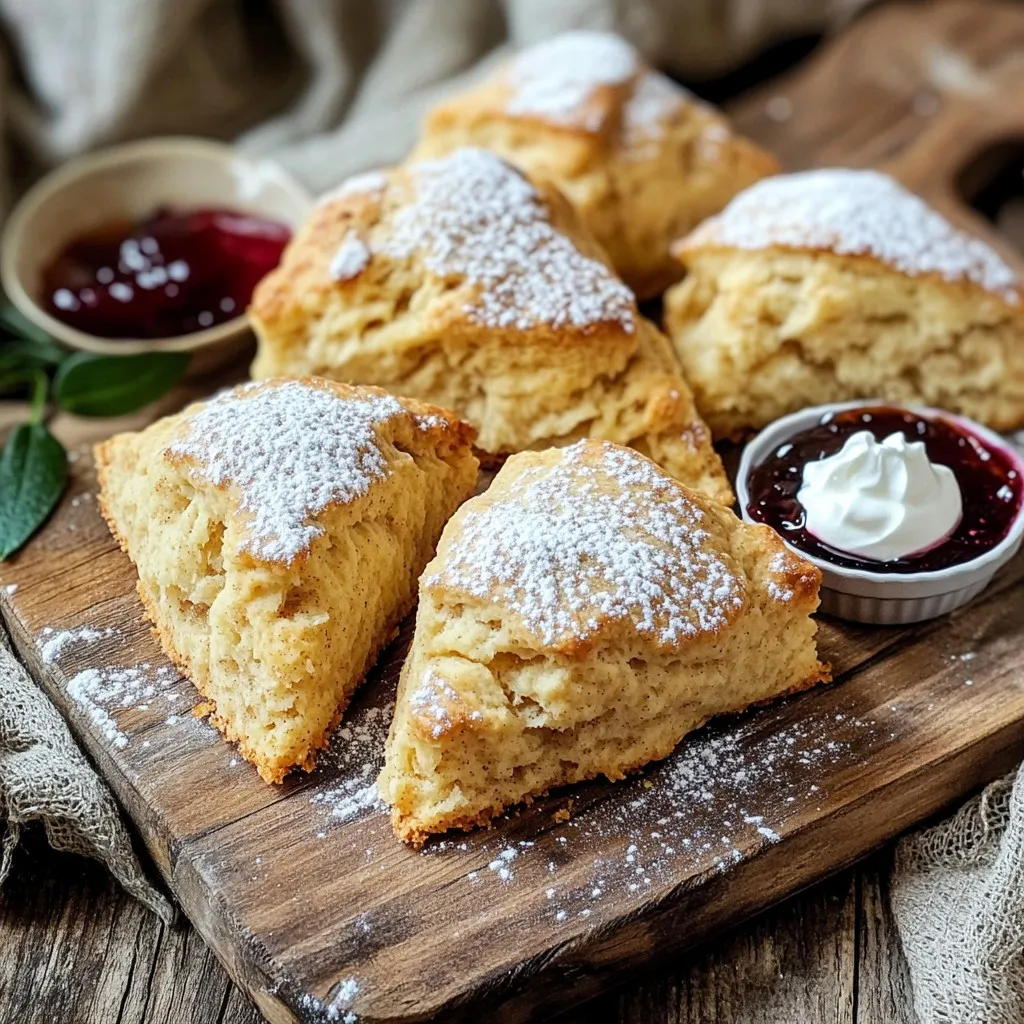
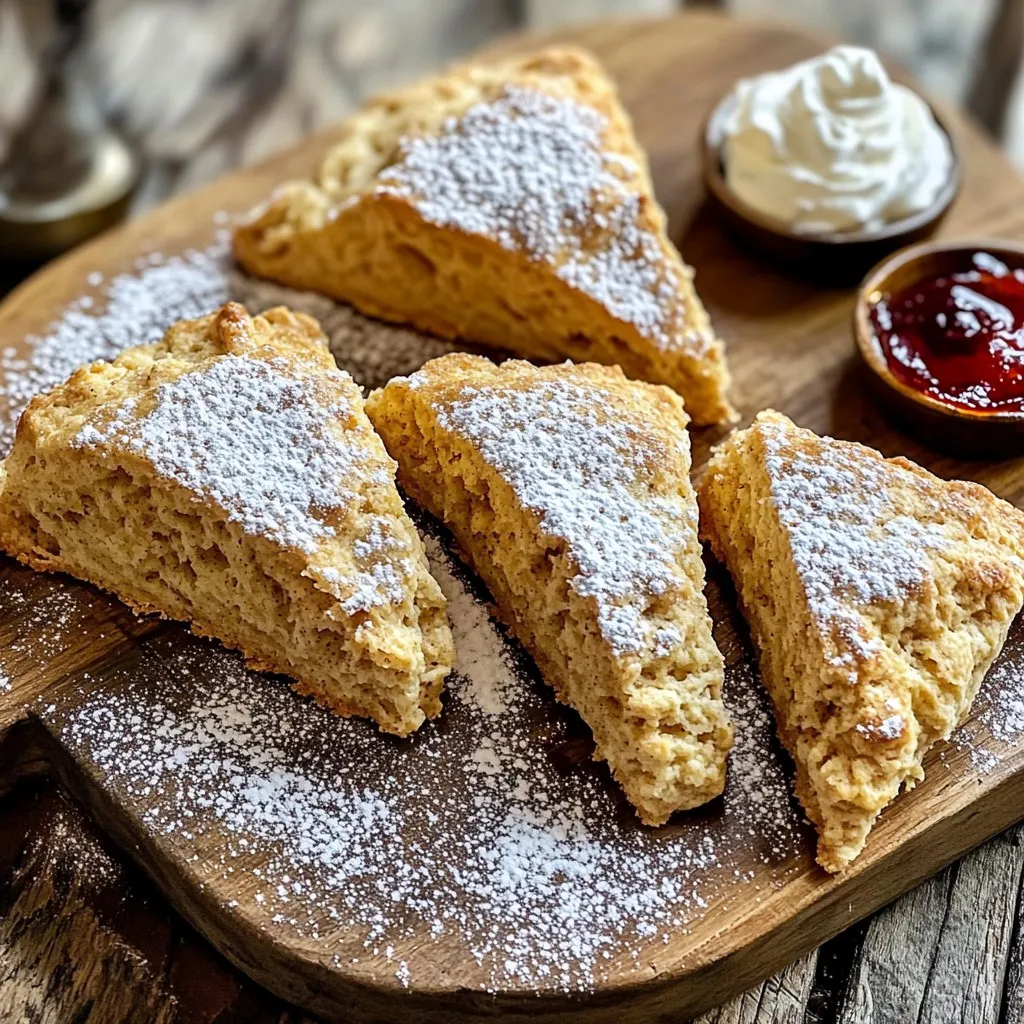
Serve scones warm on a rustic wooden board. Add a dusting of powdered sugar on top. Pair them with whipped cream or fruit preserves for extra flavor. Enjoy them alongside your favorite tea or coffee.
How long do scones last?
Freshly baked scones last about 2 days at room temperature. For longer storage, place them in an airtight container in the fridge for up to a week. You can also freeze them for up to three months.
You learned how to bake great scones in this post. We covered key ingredients, step-by-step instructions, and tips for success. Quality matters, so choose your ingredients wisely. Remember to avoid common mistakes and use the right tools. You can also try fun flavor variations and modifications. Proper storage keeps your scones fresh for later. With these tips, you’ll make scones that everyone loves. Happy baking!
