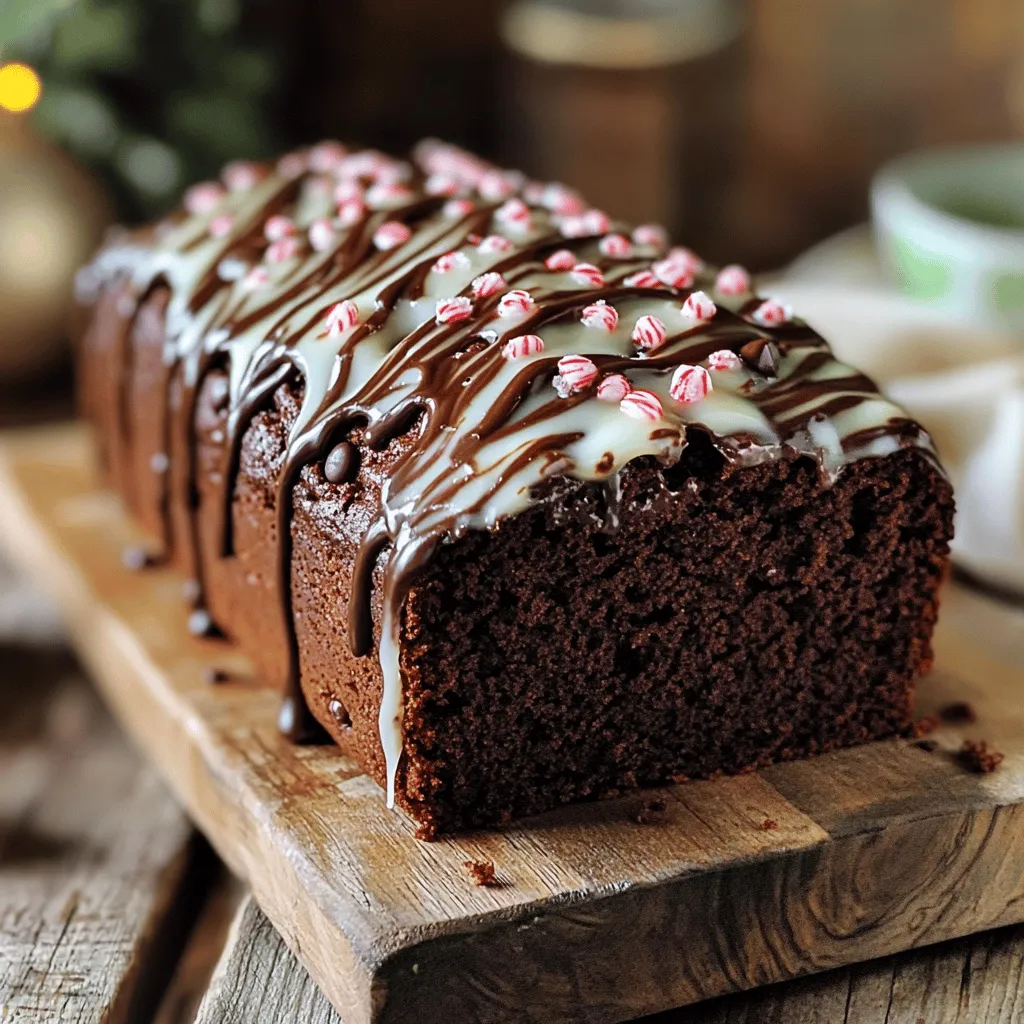
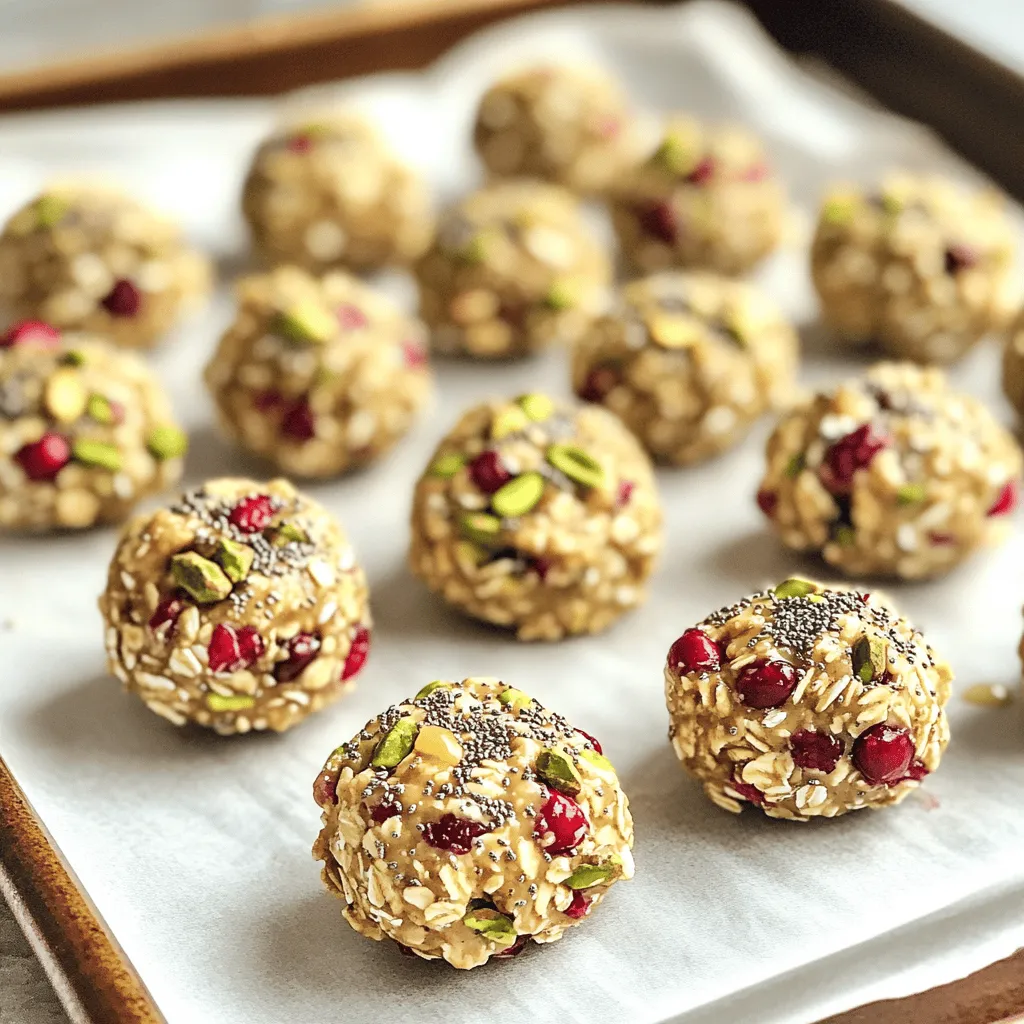
Desserts

Here’s what you need to make baked apple cider donuts. Each ingredient adds to the flavor and texture. - 1 cup apple cider - 2 cups all-purpose flour - 1 teaspoon baking powder - 1/2 teaspoon baking soda - 1 teaspoon ground cinnamon - 1/2 teaspoon ground nutmeg - 1/2 teaspoon salt - 1/2 cup granulated sugar - 1/4 cup brown sugar, packed - 1/4 cup unsweetened applesauce - 2 large eggs - 1/4 cup vegetable oil - 1 teaspoon vanilla extract - Cinnamon sugar for coating: mix 1/4 cup granulated sugar with 1 teaspoon ground cinnamon Using fresh apple cider gives these donuts a rich taste. The spices like cinnamon and nutmeg make them warm and cozy. The applesauce keeps them moist. You can find the full recipe along with tips to make them perfect. Enjoy your baking! - Preheat your oven to 350°F (175°C). Prepare a donut pan by greasing it well. - Pour 1 cup of apple cider into a small saucepan. Heat on medium until it boils. Reduce to low and let it simmer. This will take about 10-15 minutes. You want the cider to reduce to about 1/2 cup. Remove from heat and let it cool. - In a large bowl, mix 2 cups of all-purpose flour, 1 teaspoon of baking powder, 1/2 teaspoon of baking soda, 1 teaspoon of ground cinnamon, 1/2 teaspoon of ground nutmeg, and 1/2 teaspoon of salt. Whisk these dry ingredients well. - In another bowl, whisk together 1/2 cup of granulated sugar, 1/4 cup of packed brown sugar, 1/4 cup of unsweetened applesauce, 2 large eggs, 1/4 cup of vegetable oil, and 1 teaspoon of vanilla extract. Mix until smooth. - Add the cooled, reduced apple cider to the wet mixture. Stir until everything is blended. - Gradually pour the wet mixture into the bowl of dry ingredients. Mix gently until just combined. Do not overmix; the batter should be thick and slightly lumpy. - Spoon the batter into the prepared donut pan, filling each space about 3/4 full. - Place the pan into the preheated oven and bake for 10-12 minutes. The donuts are ready when a toothpick inserted in the center comes out clean. Let them cool in the pan for about 5 minutes before moving them to a wire rack. - While still warm, roll each donut in cinnamon sugar for a delightful coating. These simple steps will lead to delicious Baked Apple Cider Donuts. For the full recipe, check the original instructions. Enjoy! - Avoiding overmixing: Mixing too much makes donuts tough. Mix just until wet and dry ingredients blend. It’s okay if the batter is a bit lumpy. - Ensuring even cooking: Fill each donut cavity to about 3/4 full. This helps them bake evenly. Rotate the pan halfway through baking for best results. - Arranging donuts beautifully: Place the donuts on a decorative platter. You can stack them or spread them out for a lovely look. - Garnishing suggestions: Drizzle leftover apple cider reduction over the donuts. Sprinkle extra cinnamon sugar on top for a nice touch. - Additional spices and toppings: Try adding nutmeg or cloves for more flavor. Chopped nuts or chocolate chips also make great toppings. - Pairing suggestions with drinks: Serve these donuts with hot coffee or spiced tea. The warm drinks balance the sweet taste of the donuts perfectly. For the full recipe, check out the complete instructions above. {{image_4}} You can get creative with baked apple cider donuts. One fun idea is to add chocolate chips. The sweetness of the chocolate pairs well with the spices. Just fold in a cup of chocolate chips into your batter before spooning it into the pan. For a different twist, try glazed apple cider donuts. After baking, mix powdered sugar with a bit of milk to make a glaze. Dip each warm donut in the glaze for a sweet finish. If you need gluten-free options, use a gluten-free flour blend. This swap keeps the taste while making the recipe safe for those with gluten sensitivities. You can also replace the eggs with flaxseed meal for a vegan option. Mix one tablespoon of flaxseed meal with three tablespoons of water, let it sit for a few minutes, and then add it to your wet ingredients. For butter-free options, substitute vegetable oil with melted coconut oil. These changes let everyone enjoy these tasty treats! For the full recipe, check out the details above! You can store baked apple cider donuts at room temperature or in the fridge. If you choose room temperature, place them in an airtight container. This keeps them fresh for a few days. For longer storage, use the fridge. Wrap each donut in plastic wrap before placing them in a container. This helps prevent them from drying out. Baked apple cider donuts last about 3 days at room temperature. In the fridge, they can last up to a week. If you want to enjoy them later, consider freezing them. To reheat, simply pop them in the microwave for about 10-15 seconds. This keeps them warm and soft. You can also reheat them in a toaster oven for a few minutes. This method makes them slightly crispy on the outside. These tips will help you savor every bite of your delicious treats! For the full recipe, check out the details above. What is the best way to measure flour? To measure flour, use the spoon and level method. First, spoon flour into your measuring cup. Then, level it off with a straight edge. This prevents too much flour in your mix. Can I use fresh apple juice instead of cider? Yes, you can use fresh apple juice. However, cider has a deeper flavor. You may need to add a bit more spice to match the taste. How can I tell when my donuts are done baking? Donuts are done when a toothpick comes out clean from the center. They should also spring back when touched lightly. How to prevent sticking in the donut pan? To prevent sticking, grease the donut pan well. You can use cooking spray or butter. Ensure you cover every part of the pan. Can these donuts be frozen? Yes, these donuts can be frozen. Place them in an airtight container or a freezer bag. They will stay fresh for about three months. In this blog post, we explored how to make delicious apple cider donuts. We covered the key ingredients, the step-by-step baking process, and tips for the best results. We also discussed flavor variations and how to store your donuts. Now you’re ready to enjoy fresh apple cider donuts at home. Baking can be fun and rewarding. Share your creations with family and friends!
Baked Apple Cider Donuts Tasty Fall Treat Idea
Fall is the perfect time to enjoy the warm, cozy flavors of baked apple cider donuts! These donuts are not only delicious but also easy
To create the best double chocolate espresso muffins, you need some key ingredients. Here’s a list to get you started: - 1 cup all-purpose flour - 1/2 cup unsweetened cocoa powder - 1 teaspoon baking soda - 1/2 teaspoon salt - 3/4 cup granulated sugar - 1/4 cup brown sugar, packed - 1/2 cup unsweetened applesauce - 1/4 cup vegetable oil - 2 large eggs - 1 teaspoon pure vanilla extract - 1/2 cup brewed espresso, cooled (or strong coffee) - 1 cup semi-sweet or dark chocolate chips These ingredients work together to create a rich flavor and moist texture. The cocoa powder gives a deep chocolate taste. The espresso adds a nice kick and enhances the chocolate flavor. Applesauce keeps the muffins moist and adds a hint of sweetness. You can customize your muffins with a few optional add-ins. Consider these for extra flavor and texture: - Chopped walnuts for crunch - Different types of chocolate chips (like white chocolate or milk chocolate) These add-ins can take your muffins to the next level. Walnuts add a nice crunch and contrast to the soft muffins. Different chocolate chips can create fun flavor surprises in each bite. For the full recipe, check out the detailed instructions. Enjoy baking these delightful treats! First, preheat your oven to 350°F (175°C). This step is key for even baking. Next, prepare your muffin tin by either lining it with paper liners or greasing each muffin cup. This prevents your muffins from sticking. Now, let’s mix the dry ingredients. In a medium bowl, whisk together 1 cup of all-purpose flour, 1/2 cup of unsweetened cocoa powder, 1 teaspoon of baking soda, and 1/2 teaspoon of salt. Make sure to combine them well. No lumps should remain. This blend creates a rich base for our muffins. Next, we’ll combine the wet ingredients. In a large bowl, mix together 3/4 cup of granulated sugar, 1/4 cup of brown sugar, 1/2 cup of unsweetened applesauce, 1/4 cup of vegetable oil, 2 large eggs, 1 teaspoon of pure vanilla extract, and 1/2 cup of cooled espresso. Stir until the mixture is smooth and uniform. This mixture adds moisture and flavor to the muffins. Now it’s time to finalize the batter. Gently add the dry ingredients to the wet mixture. Stir with a spatula or wooden spoon. Mix just until everything combines. It’s okay if a few small lumps remain; avoid overmixing. This keeps our muffins soft and airy. Next, carefully fold in 1 cup of chocolate chips. If you want some crunch, add 1/4 cup of chopped walnuts as well. Make sure they are evenly spread throughout the batter without overmixing. Using a scoop or spoon, fill each muffin cup about two-thirds full. This allows space for the muffins to rise nicely. Now, you're all set for baking. For the final touch, bake the muffins for 18-20 minutes. They are done when a toothpick inserted into the center comes out clean or with a few moist crumbs attached. Enjoy the warm, delightful aroma filling your kitchen as they bake! To bake muffins evenly, fill each muffin cup to about two-thirds full. This allows room for rising without spilling over. Rotate the muffin tin halfway through baking. This helps all muffins brown nicely. To test for doneness, use a toothpick. Insert it into the center of a muffin. If it comes out clean or with a few crumbs, your muffins are ready. If there is wet batter, bake them a few more minutes. To keep your muffins fresh, store them in an airtight container. Place a paper towel in the container to absorb moisture. This helps prevent sogginess. Enjoy the muffins within three days for the best taste. You can freeze muffins for later. Once they cool, wrap each muffin tightly in plastic wrap. Place them in a zip-top bag. Freeze for up to three months. Thaw at room temperature or warm them in the oven. For a delightful presentation, serve muffins warm. Lightly dust them with powdered sugar for a beautiful look. Pair these muffins with a small cup of espresso. The rich flavors complement each other perfectly. Enjoy your sweet treat with your favorite drink! {{image_4}} You can make your muffins healthier by using whole wheat flour instead of all-purpose flour. This flour adds fiber and nutrients. You can also cut down on sugar. Use sugar substitutes like stevia or monk fruit sweetener. These options let you enjoy sweet flavors with fewer calories. For a dairy-free choice, try almond or oat milk instead of regular milk. You can also swap eggs for a mix of ground flaxseed and water. This mix binds the ingredients while keeping your muffins moist. To boost the flavor, add spices like cinnamon or nutmeg. Just a pinch can change the taste. You can also mix in fruits like raspberries or cherries. They add a fresh twist and a pop of color. These choices make each bite exciting and unique. If you want bite-sized treats, make mini muffins. They bake faster and are fun to share. You can use the same batter but adjust the baking time. Try different flavor profiles too. Mocha muffins blend chocolate and coffee for a rich taste. You can also add almond flavor for a mocha almond twist. This adds depth and makes your muffins stand out. For the full recipe, check above. Yes, you can use coffee. The main difference is the flavor. Espresso is stronger and richer. It gives the muffins a deeper taste. Coffee has a lighter flavor. If you want a bold muffin, stick with espresso. If you prefer a milder taste, coffee works just fine. To prevent sticking, grease the muffin tin well. Use butter or cooking spray. Make sure to coat every inch of the cups. You can also line them with paper liners. This makes removing the muffins easy. Let them cool for a few minutes before removing. This helps them release easily. For a vegan option, use unsweetened applesauce. Replace each egg with 1/4 cup of applesauce. You can also use flaxseed meal. Mix 1 tablespoon of flaxseed with 2.5 tablespoons of water. Let it sit for a few minutes. This will thicken and work like an egg. Another option is mashed banana. Use 1/4 cup of mashed banana for each egg. This recipe makes 12 rich and moist muffins. Here’s what you need: - 1 cup all-purpose flour - 1/2 cup unsweetened cocoa powder - 1 teaspoon baking soda - 1/2 teaspoon salt - 3/4 cup granulated sugar - 1/4 cup brown sugar, packed - 1/2 cup unsweetened applesauce - 1/4 cup vegetable oil - 2 large eggs - 1 teaspoon pure vanilla extract - 1/2 cup brewed espresso, cooled (or strong coffee) - 1 cup semi-sweet or dark chocolate chips - 1/4 cup chopped walnuts (optional) These muffins are perfect for breakfast or a snack. They have rich chocolate flavor with a hint of coffee. This recipe is easy and quick, taking only about 35 minutes. To start, preheat your oven to 350°F (175°C). Prepare your muffin tin by lining it with paper liners or greasing it well. Next, mix the dry ingredients. Whisk the flour, cocoa powder, baking soda, and salt in a medium bowl. In another large bowl, combine the sugars, applesauce, oil, eggs, vanilla, and cooled espresso. Stir this mixture until it is smooth. Now, add the dry ingredients to the wet ones. Mix gently until just combined. It's okay if you see a few lumps; do not overmix. Next, fold in the chocolate chips and optional walnuts. Then, fill each muffin cup about two-thirds full with the batter. Bake for 18-20 minutes. Check for doneness by inserting a toothpick. If it comes out clean, the muffins are ready. Let them cool in the tin for 5 minutes before moving them to a wire rack. Enjoy your delicious Double Chocolate Espresso Muffins! In this article, we explored the delicious world of double chocolate espresso muffins. We covered essential ingredients, optional add-ins, and step-by-step instructions. I shared tips for baking and storing your muffins. Variations explored healthier substitutes and exciting flavor twists. With these insights, you can create muffins that impress. Enjoy baking and let your creativity shine in the kitchen. Happy baking!
Double Chocolate Espresso Muffins for Rich Flavor
If you’re craving a rich, chocolatey treat that offers a kick of coffee flavor, you’re in the right place! My Double Chocolate Espresso Muffins combine
- 1 cup unsalted butter - 1 cup packed brown sugar - 1/2 cup granulated sugar - 1 cup pure pumpkin puree - 1 large egg - 1 teaspoon pure vanilla extract - 2 cups all-purpose flour - 1 teaspoon baking soda - 1 teaspoon baking powder - 1 teaspoon ground cinnamon - 1/2 teaspoon ground nutmeg - 1/4 teaspoon ground ginger - 1/2 teaspoon salt - 1 cup semi-sweet chocolate chips (or chopped nuts) You can easily change this recipe to fit your taste. Try adding: - White chocolate chips for a creamy touch - Chopped nuts for crunch - Dried cranberries for a tart flavor - Extra spices like cloves or allspice for warmth The quality of your ingredients really matters. Always choose: - Fresh pumpkin puree, not pumpkin pie filling - Real vanilla extract for the best flavor - Good chocolate chips, as they melt nicely - Fresh spices, as old ones lose their taste Using high-quality ingredients ensures your cookies taste amazing and stay chewy. To start, you need to make brown butter. Take 1 cup of unsalted butter and melt it in a medium saucepan over medium heat. Keep stirring it. In about 5-7 minutes, the butter will bubble and turn golden-brown. You will smell a nutty aroma. This is good! Once it looks perfect, remove it from the heat and let it cool for a few minutes. Now, grab a large mixing bowl. Pour the slightly cooled brown butter into the bowl. Add 1 cup of packed brown sugar and 1/2 cup of granulated sugar. Mix these until smooth and creamy. Next, add 1 cup of pure pumpkin puree, 1 large egg, and 1 teaspoon of pure vanilla extract. Beat everything together until combined. In another bowl, whisk 2 cups of all-purpose flour, 1 teaspoon of baking soda, 1 teaspoon of baking powder, 1 teaspoon of ground cinnamon, 1/2 teaspoon of ground nutmeg, 1/4 teaspoon of ground ginger, and 1/2 teaspoon of salt. Make sure they are mixed well. Now it’s time to combine the wet and dry mixtures. Slowly add the dry mix to the wet mix. Stir gently until just combined. A few streaks of flour are okay. If you like, fold in 1 cup of semi-sweet chocolate chips or chopped nuts. Cover the bowl with plastic wrap and chill the dough in the refrigerator for at least 30 minutes. Chilling makes the cookies hold their shape and boosts the flavor. While the dough chills, preheat your oven to 350°F (175°C). Line a baking sheet with parchment paper. Once the dough is ready, use a cookie scoop to drop rounded balls of dough onto the sheet, leaving space between them. Bake the cookies for 10-12 minutes. The edges should feel firm while the centers stay soft. They will firm up as they cool. Let them cool on the baking sheet for 5 minutes before moving them to a wire rack. Enjoy your chewy pumpkin cookies with brown butter delight! For the full recipe, click here. To get chewy cookies, you need the right balance of moisture and fat. Use brown sugar, as it adds moisture. Brown butter also helps with texture. The cooling step is key. Chilling the dough for at least 30 minutes keeps the cookies thick. Avoid overmixing when combining wet and dry ingredients. A few flour streaks are okay. This keeps the cookies soft and chewy. You can adjust this recipe to fit your needs. For gluten-free cookies, swap all-purpose flour with a gluten-free blend. If you're vegan, replace the egg with a flax egg or applesauce. Use coconut oil instead of butter for a dairy-free option. For a nut-free version, skip the nuts or chocolate chips. These changes keep the cookies tasty and enjoyable for everyone. Uniform cookies look nice and bake evenly. Use a cookie scoop to help with size. This tool helps you get even portions. Space the dough balls about 2 inches apart on your baking sheet. This allows for even spreading. If you want them round, roll the dough in your hands before placing them on the sheet. Try to keep everything consistent for the best results. For the full recipe, check out the Chewy Pumpkin Cookies with Brown Butter. {{image_4}} You can make these cookies your own. Do you love chocolate? Use semi-sweet chocolate chips for a rich taste. If you want something crunchy, swap the chocolate for chopped nuts. Walnuts or pecans work well and add great texture. Both options give a nice twist to the classic cookie. Want to amp up the flavor? Try adding more spices. A pinch of allspice or cloves gives a warm kick. You can also increase the cinnamon for more warmth. Just remember, start with small amounts. You can always add more, but you can't take it out! Seasonal add-ins can make your cookies even more special. During the fall, dried cranberries add a nice tartness. If you love sweet, white chocolate chips mix in well too. They melt into the cookie, making it extra creamy. These little changes keep your cookies fresh and exciting. For the full recipe, try these variations for a delightful twist! To keep your chewy pumpkin cookies fresh, store them in an airtight container. Make sure they are completely cool before you seal them. This helps maintain their soft texture. You can keep them at room temperature for up to a week. If you want to enjoy them longer, refrigeration is a good option. Just remember that cold storage can slightly change their texture. Freezing is a great way to extend the life of your cookies. You can freeze the baked cookies or the dough. To freeze baked cookies, let them cool completely, then place them in a freezer bag. They can last up to three months in the freezer. For dough, scoop it into balls and freeze them on a baking sheet first. Once frozen, transfer the dough balls to a bag and keep them for up to three months. This method allows you to bake fresh cookies whenever you want. When you want to enjoy your cookies, reheating can help them taste fresh. For baked cookies, place them on a baking sheet in a preheated oven at 350°F (175°C) for about 5 minutes. This warms them up and revives their chewy texture. If you are using frozen dough, bake them straight from the freezer. Just add a couple of minutes to the baking time. This way, you can have warm, gooey cookies anytime! For the full recipe, check out the details above. To make gluten-free chewy pumpkin cookies, start by substituting all-purpose flour with gluten-free flour. Look for a blend that includes xanthan gum. This helps mimic the texture of regular flour. You can also use almond flour or oat flour, but the texture may change. Always check that your other ingredients, like baking powder, are gluten-free too. This way, you keep your cookies tasty and safe for gluten-free diets. Yes, you can make these cookies vegan! Replace the egg with a flax egg. To do this, mix one tablespoon of ground flaxseed with three tablespoons of water. Let it sit for five minutes until it thickens. For butter, use a plant-based alternative like coconut oil or vegan butter. Ensure your chocolate chips are dairy-free. These swaps will keep your cookies both chewy and delicious! You’ll know the cookies are done when the edges are firm. The centers should look soft and slightly underbaked. They will firm up as they cool. For a precise check, use a toothpick. Insert it into the center of a cookie; if it comes out with a few moist crumbs, they are ready. This balance gives you the perfect chewy texture. Enjoy making these cookies from the Full Recipe! In this post, I covered essential ingredients, detailed steps, and useful tips for baking cookies. I showed you how to prepare brown butter and mix dry and wet ingredients. You learned about different variations, storage tips, and ways to make diets work. Baking cookies can be fun and tasty. With the right ingredients and techniques, you can make cookies everyone loves. Enjoy your baking journey and share your delicious results!
Chewy Pumpkin Cookies with Brown Butter Delight
Welcome to your new favorite fall treat: Chewy Pumpkin Cookies with Brown Butter Delight! These cookies are soft, packed with rich pumpkin flavor, and enhanced
To make your chocolate chip pumpkin bread, gather these simple ingredients: - 1 ½ cups all-purpose flour - 1 teaspoon baking soda - ½ teaspoon baking powder - ½ teaspoon salt - 1 teaspoon ground cinnamon - ½ teaspoon ground nutmeg - ¼ teaspoon ground ginger - ½ cup granulated sugar - ½ cup packed brown sugar - ½ cup vegetable oil - 1 cup pumpkin puree - 2 large eggs - 1 teaspoon vanilla extract - 1 cup chocolate chips - ½ cup chopped walnuts (optional) You'll notice this recipe uses pumpkin puree, not pumpkin pie filling. The puree gives the bread a rich flavor and moist texture. I love how the spices blend in to create that warm, cozy taste. Feel free to play with the ingredients. For example, you can swap in different types of sugar. You can also add nuts for crunch. Just remember, the chocolate chips are the star here! For the full recipe, you can find it above. Let’s get baking! - Preheat the oven to 350°F (175°C). - Prepare a 9x5-inch loaf pan with grease or parchment paper. - In a medium bowl, whisk together: - 1 ½ cups all-purpose flour - 1 teaspoon baking soda - ½ teaspoon baking powder - ½ teaspoon salt - 1 teaspoon ground cinnamon - ½ teaspoon ground nutmeg - ¼ teaspoon ground ginger This will mix the dry ingredients well. It helps create a light bread with great flavor. - In a larger bowl, mix: - ½ cup granulated sugar - ½ cup packed brown sugar - ½ cup vegetable oil Use a whisk or mixer to make this smooth. Next, add: - 1 cup pumpkin puree - 2 large eggs - 1 teaspoon vanilla extract Mix well until everything blends into a creamy batter. - Gradually add the dry mix into the wet mix. Stir gently. - Fold in: - 1 cup chocolate chips - ½ cup chopped walnuts (optional) Make sure the chocolate chips and walnuts are evenly spread in the batter. - Pour the batter into the loaf pan. Smooth the top with a spatula. - Bake for 60-70 minutes. - To check if it’s done, insert a toothpick. It should come out clean or have a few moist crumbs. For the full recipe, refer to the earlier section. Enjoy baking this delightful treat! To keep your chocolate chip pumpkin bread light and fluffy, avoid overmixing. When you mix the wet and dry ingredients, stir gently. Overmixing can make the bread dense. Aim for just a few strokes until you don't see flour streaks. This simple step will make a big difference. For the richest taste, use fresh pumpkin puree. It gives the bread a natural sweetness and depth. If you use canned pumpkin, make sure it's pure pumpkin puree. Avoid pumpkin pie filling, as it has added sugars and spices that may change your bread's flavor. For a stunning presentation, slice the bread into thick pieces. Arrange them on a rustic wooden board. Dust the top with powdered sugar for a pretty finish. Serve with a dollop of whipped cream or a scoop of vanilla ice cream. This adds a creamy touch that complements the pumpkin and chocolate. {{image_4}} You can make this bread even better by adding nuts. Walnuts or pecans bring extra crunch and flavor. Just chop them up and fold them into the batter with the chocolate chips. This gives each bite a delightful texture. Want a gluten-free version? No problem! Simply swap out the all-purpose flour for a gluten-free blend. Many brands work well for baking. Just check that it includes xanthan gum for the best results. This way, everyone can enjoy a slice of this tasty bread. Feel like trying something new? Mix in dried cranberries for a fruity kick. You can also add a bit of orange zest. This will brighten the flavor and add a nice aroma. Both of these options make your chocolate chip pumpkin bread unique and fun to share. For the full recipe, check out the details above. Keep your chocolate chip pumpkin bread in an airtight container at room temperature. It stays fresh for up to 3 days. This will help keep the bread moist and tasty. If you notice any mold, discard it right away. You can freeze the bread for later enjoyment. Wrap it tightly in plastic wrap and then in foil. It will stay good for up to 3 months. This is a great way to save some for a busy day. Just remember to label it with the date. When you’re ready to eat your frozen bread, thaw it overnight in the refrigerator. This helps keep the texture nice. Once it’s thawed, you can slice and serve it as you like. Enjoy your delicious treat! Yes, it’s best to use pumpkin puree not pumpkin pie filling. Pumpkin puree gives the bread a rich and natural flavor. Ensure you check the label. You want plain pumpkin puree for the best results. Use a toothpick; it should come out clean or with a few moist crumbs. Insert it into the center of the bread. If it comes out clean, your bread is ready. This simple test helps avoid underbaking. Use flaxseed meal or applesauce for a vegan option. For one egg, mix one tablespoon of flaxseed meal with three tablespoons of water. Let it sit for a few minutes until it thickens. Applesauce can also replace eggs and add moisture. Yes, it can be made a day in advance for better flavors. The bread tastes even better after sitting. Store it in an airtight container. This allows the spices to blend and enhance the taste. It contains pumpkin which is nutritious, but moderate consumption is recommended. Pumpkin is full of fiber and vitamins. Still, remember the sugars and fats in the recipe. Enjoy this treat in moderation for a balanced diet. You now have all the steps to make delicious chocolate chip pumpkin bread. We covered the ingredients, mixing methods, and baking tips. Remember, using fresh pumpkin puree and avoiding overmixing keeps your bread fluffy. You can even adapt the recipe to fit your taste. Whether you eat it warm or freeze it for later, this bread is sure to please. Enjoy sharing your creation with friends and family!
Chocolate Chip Pumpkin Bread Flavorful and Easy Recipe
Are you looking for a cozy treat that combines the flavors of fall with the sweetness of chocolate? This Chocolate Chip Pumpkin Bread is both
For the best apple crisp, you need: - 6 cups Granny Smith apples, peeled, cored, and thinly sliced - 1 tablespoon fresh lemon juice - 1 cup rolled oats - 1 cup packed brown sugar - 1/2 cup all-purpose flour - 1 teaspoon ground cinnamon - 1/2 teaspoon ground nutmeg - 1/4 teaspoon salt - 1/2 cup unsalted butter, melted These ingredients come together to create a warm, sweet treat. The tartness of the Granny Smith apples balances perfectly with the sweetness of the brown sugar. To add some crunch and texture, consider these optional ingredients: - 1/2 cup chopped pecans or walnuts Adding nuts gives your apple crisp a delightful crunch. It also enhances the flavor, making each bite more enjoyable. - Choosing Apples: Use tart apples like Granny Smith. They hold their shape well when baked. - Lemon Juice: This helps keep the apples fresh and brightens their flavor. - Butter: Use unsalted butter for better control over the saltiness. These simple tips can make a big difference in your apple crisp. Focus on quality ingredients for the best results. For the full recipe, check out the details above! Start by preheating your oven to 350°F (175°C). This makes sure your apple crisp bakes evenly. Next, take 6 cups of Granny Smith apples. Peel them, core them, and slice them thin. In a large bowl, mix the apple slices with 1 tablespoon of fresh lemon juice. This juice helps keep the apples fresh and bright. Toss the apples gently to coat them well. Then, pour the coated apples into a greased 9x13 inch baking dish. Spread the apples evenly for the best baking. Now, let’s make the topping. In another bowl, combine 1 cup of rolled oats, 1 cup of packed brown sugar, 1/2 cup of all-purpose flour, 1 teaspoon of ground cinnamon, 1/2 teaspoon of ground nutmeg, and 1/4 teaspoon of salt. Whisk these ingredients together until they blend well. This mixture will create a nice, crunchy topping. Next, pour in 1/2 cup of melted unsalted butter. Use a fork to mix everything until it gets crumbly. If you want extra crunch, fold in 1/2 cup of chopped pecans or walnuts. Evenly sprinkle the crisp topping over the apples in your baking dish. Make sure all the apples are well covered. Place the dish in the preheated oven. Bake for 35-40 minutes. The topping should turn golden brown, and the apples will be tender. You’ll know it’s done when your home smells amazing! After baking, let the apple crisp cool for about 10 minutes. This helps it set and makes it easier to serve. For the full recipe, check out the complete steps and tips. When picking apples, aim for Granny Smith. They balance sweet and tart well. Look for firm apples without bruises. The skin should be bright green. Fresh apples have a crisp bite. If you can, smell the apple. It should have a sweet scent. Always preheat your oven to 350°F (175°C). This step helps the crisp bake evenly. Use a 9x13 inch baking dish for best results. Spread apples evenly for perfect cooking. Mix your topping until crumbly. This ensures a nice crunch. Bake until golden brown and the apples are soft. This usually takes about 35-40 minutes. Serve your apple crisp in warm ramekins. This adds a lovely touch to your table. Top each serving with vanilla ice cream. The warm apple and cold ice cream taste amazing together. You can also use whipped cream if you prefer. A sprinkle of cinnamon on top makes it look fancy. Enjoy sharing this dish with friends and family! For the full recipe, check out Best Ever Apple Crisp. {{image_4}} You can make this apple crisp lighter. Use less sugar or swap it for honey. Instead of butter, try coconut oil or applesauce. These changes keep it tasty while cutting calories. You can also reduce the oats and add more nuts for healthy fats. To boost the flavor, add spices like ginger or cloves. These spices give a warm kick. You can also mix in dried fruits, like cranberries or raisins, for extra sweetness. For a unique twist, try adding a splash of vanilla or almond extract to the apples. You can change the fruit based on the season. In the fall, use pears with your apples. In summer, try peaches or berries for a refreshing twist. Each season brings different flavors to this dish. Use what’s fresh for the best taste. Check out the [Full Recipe] for the base and get creative! After you enjoy your best ever apple crisp, save any leftovers. Place them in an airtight container. This keeps the crisp fresh for about three days in the fridge. Make sure to let it cool before you seal it up. If you have a lot left, consider splitting it into smaller portions. This way, you can enjoy it later without losing flavor. When you're ready to eat your leftovers, reheating is simple. Preheat your oven to 350°F (175°C). Place the apple crisp in a baking dish. Cover it with foil to keep moisture in. Heat for about 15-20 minutes. If you prefer a softer topping, this method works great. If you want it crispy again, uncover the dish for the last 5 minutes. Enjoy warm with ice cream or whipped cream! You can freeze apple crisp if you want to save some for later. First, let it cool completely. Cut it into portions and wrap each piece tightly in plastic wrap. Then, place the wrapped pieces in a freezer bag or container. This helps prevent freezer burn. You can freeze it for up to three months. When you’re ready to enjoy it, thaw it overnight in the fridge, then reheat as mentioned above. You’ll still have that great taste! For the full recipe, check out the earlier section. I love using Granny Smith apples for apple crisp. They are tart and firm. Their tartness balances the sweet topping. Other good options are Honeycrisp and Braeburn. Both add a nice flavor and texture. Avoid soft apples like Red Delicious. They turn mushy when baked. Yes, you can prepare your apple crisp ahead of time. Just follow the recipe but stop before baking. Cover the dish and store it in the fridge. When you’re ready to bake, take it out and let it sit for 15 minutes. Then bake as usual. This makes it easy for busy days. Absolutely! To make a gluten-free apple crisp, swap all-purpose flour for gluten-free flour. You can also use oats labeled gluten-free. This will keep the texture and taste just right. It’s a simple change that makes a big difference. To cut down on sugar, you can use less brown sugar. Try using half a cup instead of a cup. You can also add a touch of cinnamon for sweetness. Another option is to use apples that are sweeter, like Fuji or Gala. This way, you can enjoy the crisp without too much sugar. For the full recipe, check out Best Ever Apple Crisp! In this blog post, we explored how to make the best apple crisp. We discussed key ingredients, simple steps, and helpful tips. I shared ways to enhance textures and flavors, plus ideas for healthier options. You'll now know how to store and reheat leftovers, ensuring your crisp stays tasty. Remember, making apple crisp is fun and easy. With these tips, you can impress anyone with your baking skills. Enjoy creating your perfect apple crisp!
Best Ever Apple Crisp Irresistible and Simple Dessert
Are you ready to whip up a delightful treat that everyone loves? This Best Ever Apple Crisp recipe is my go-to for a simple and
To make Mom's famous pumpkin cake, you need a specific set of ingredients. Each one plays a key role in getting the flavors and texture just right. - 2 cups all-purpose flour - 1 ½ teaspoons baking powder - 1 teaspoon baking soda - 1 teaspoon ground cinnamon - ½ teaspoon ground nutmeg - ½ teaspoon ground ginger - ½ teaspoon salt - 1 cup granulated sugar - ½ cup packed brown sugar - 1 cup vegetable oil - 4 large eggs - 2 cups pure pumpkin puree - 1 teaspoon vanilla extract - 1 cup chopped walnuts (optional) - Cream cheese frosting (for topping) Each ingredient adds something special. The all-purpose flour gives structure. Baking powder and baking soda help the cake rise. The spices—cinnamon, nutmeg, and ginger—bring warmth and a cozy fall flavor. Both sugars add sweetness, with brown sugar giving a slight hint of caramel. Vegetable oil keeps the cake moist, while eggs help bind everything together. Pumpkin puree is the star. It adds flavor and moisture. Vanilla extract rounds out the taste. If you like a bit of crunch, add chopped walnuts. For a rich finish, top the cake with cream cheese frosting. You can find the full recipe above to guide you through every step! Start by preheating your oven to 350°F (175°C). Next, prepare your 9x13 inch baking pan. Grease it well with butter or oil. Then, dust it with flour or line it with parchment paper. This helps the cake come out easily. In a medium bowl, add the flour, baking powder, baking soda, ground cinnamon, ground nutmeg, ground ginger, and salt. Whisk them together well. This step is key for even flavor and texture in your cake. Now, grab a large bowl. Combine the granulated sugar and brown sugar with the vegetable oil. Mix until it is smooth. Then, add the eggs one at a time. Make sure to mix each egg well before adding the next. Finally, stir in the pumpkin puree and vanilla extract until it’s all smooth. Take the bowl with your dry mix. Gradually add it to the wet mix. Fold them together gently using a spatula. Do not overmix! A few small lumps are fine. If you want, add the chopped walnuts now and fold them in evenly. Carefully pour the batter into your prepared pan. Use your spatula to spread it evenly. Place it in the oven and bake for 30-35 minutes. Check it with a toothpick. If it comes out clean, the cake is ready. After baking, let the cake cool in the pan for about 10 minutes. Then, transfer it to a wire rack to cool completely. Once cool, spread cream cheese frosting on top. Add extra chopped walnuts if you like. Enjoy your delicious cake! For the complete recipe, see the Full Recipe section. To avoid overmixing, gently fold the ingredients. Use a spatula to combine wet and dry mixes. Stop mixing when you see a few lumps. This keeps your cake light and fluffy. Overmixing makes the cake dense, which we don’t want. Each oven is unique, so check your cake early. Start at 30 minutes, then check for doneness. Insert a toothpick into the center of the cake. If it comes out clean, your cake is ready. If not, bake for a few more minutes. To make the frosting smooth, use softened cream cheese. Mix it with butter until creamy. Add vanilla and sugar gradually. Taste your frosting to adjust the sweetness. For a richer flavor, add a pinch of salt. Serve slices on a pretty platter for visual appeal. Lightly sprinkle cinnamon on the frosting for warmth. Add walnut halves for crunch. A dollop of whipped cream on the side makes it special. These touches make your cake memorable and festive. For the full recipe, check out Mom's Delicious Pumpkin Cake. {{image_4}} You can enjoy this pumpkin cake gluten-free! Swap the all-purpose flour with a gluten-free blend. Look for a mix that has xanthan gum. This will help keep the texture right. Follow the same recipe steps, and you’ll have a yummy gluten-free treat. To make a dairy-free version, use plant-based milk instead of regular milk. Almond milk or oat milk works well. For the cream cheese frosting, choose a dairy-free cream cheese. Many brands offer great alternatives that taste just as good. If you want to cut down on sugar, try using honey or maple syrup. You can replace granulated sugar with these natural sweeteners. Start with ¾ cup of honey or ½ cup of maple syrup. Adjust the wet ingredients by cutting back on the oil by ¼ cup. This will keep your cake moist and sweet without the extra sugar. For the full recipe, check out Mom's Delicious Pumpkin Cake. To keep your pumpkin cake fresh, store it in an airtight container. This helps lock in moisture and flavor. If you don’t have a container, wrap the cake tightly in plastic wrap. Place it in a cool, dry spot like the kitchen counter. It will stay fresh for up to three days. You can freeze the pumpkin cake if you want to keep it longer. First, let the cake cool completely. Then, cut it into slices or keep it whole. Wrap each slice or the whole cake in plastic wrap. After that, place it in a freezer-safe bag. The cake can last up to three months in the freezer. When you’re ready to enjoy it, just thaw it in the fridge overnight. To reheat your pumpkin cake, preheat the oven to 350°F (175°C). Place the cake on a baking sheet. Heat it for about 10-15 minutes. This warms it up without drying it out. If you have leftover cream cheese frosting, serve it on top when it’s warm. Enjoying a slice of warm pumpkin cake is pure bliss! Yes, you can use fresh pumpkin. Start by roasting a sugar pumpkin. Cut it in half, remove the seeds, and bake it at 350°F for about 45 minutes. Let it cool, then scoop out the flesh. Blend it until smooth. Use this puree in place of canned pumpkin. Fresh pumpkin can add a richer flavor to your cake. To boost flavor, try adding more spices. You can increase the cinnamon, nutmeg, and ginger. Consider using a mix of spices, like allspice or cloves, for extra warmth. Add vanilla extract for a sweet note. You can also fold in chocolate chips or dried fruit, like cranberries or raisins, for a tasty twist. If you want to replace oil, use applesauce or mashed banana. These options keep the cake moist while adding natural sweetness. You can also use melted butter for a richer taste. Substitute the same amount as the oil in the recipe. The pumpkin cake stays fresh in the fridge for about five days. Store it in an airtight container to keep it moist. If you have leftover frosting, keep it separate to avoid sogginess. Yes, kids can help with many steps. They can mix dry ingredients and pour the batter into the pan. Supervise when using the mixer and oven. It’s a fun way to teach kids about baking and enjoy time together. Plus, they will love the tasty results! This blog post shared easy steps to bake a delicious pumpkin cake. You learned about the key ingredients, from spices to optional add-ins. The instructions guide you through every stage of baking. Tips help you avoid common mistakes, ensuring a perfect result. Variations let you adapt the recipe for different diets, making it accessible. In the end, this pumpkin cake is fun to make and tastes great. I hope you enjoy baking it as much as I do. Happy baking!
Mom’s Famous Pumpkin Cake Delightful Fall Dessert
Fall is here, and what better way to celebrate than with my mom’s famous pumpkin cake? This delightful dessert bursts with warm spices and sweet
To make these delicious apple cider cookies, gather the following items: - 1 cup apple cider - 1 ½ cups all-purpose flour - ¾ cup brown sugar, packed - ½ cup granulated sugar - ½ cup unsalted butter, softened - 1 large egg - 1 teaspoon baking soda - 1 teaspoon ground cinnamon - ½ teaspoon ground nutmeg - ¼ teaspoon salt - 1 teaspoon vanilla extract You can add some fun twists to your cookies by including: - 1 cup chopped dried apples - ½ cup chopped walnuts or pecans Each cookie has around 100 calories. They contain: - 5 grams of fat - 15 grams of carbs - 1 gram of protein These cookies are a tasty treat for fall. Enjoy them fresh from the oven! If you want to try making them, check out the Full Recipe. Start by pouring 1 cup of apple cider into a small saucepan. Heat it over medium-high heat until it boils. Once it boils, lower the heat and let it simmer. This should take about 15-20 minutes. You want the cider to thicken and reduce to about ¼ cup. After that, let it cool completely. In a medium bowl, whisk together 1 ½ cups of all-purpose flour, 1 teaspoon of baking soda, 1 teaspoon of ground cinnamon, ½ teaspoon of ground nutmeg, and ¼ teaspoon of salt. Make sure everything is well mixed. Set this bowl aside for later. In a larger bowl, use an electric mixer to cream together ½ cup of softened unsalted butter, ¾ cup of brown sugar, and ½ cup of granulated sugar. Mix for about 3-4 minutes. You want it to look light and fluffy. - Combining Wet and Dry Ingredients Next, add 1 large egg, the cooled apple cider, and 1 teaspoon of vanilla extract to the creamed mixture. Mix until it is smooth. - Scooping and Placing Cookies on Baking Sheet Slowly add the dry mix to the wet mix, stirring gently. Be careful not to overmix. If you like, fold in 1 cup of chopped dried apples or ½ cup of chopped nuts for extra crunch. Use a cookie scoop or two tablespoons to drop mounds of dough onto a baking sheet lined with parchment paper. Space them about 2 inches apart to let them spread. Now you're ready to bake! To make the best apple cider cookies, start with fresh apple cider. The flavor shines through. Reducing the cider thickens it and brings out the sweetness. This step is key! Use room temperature butter for a light and fluffy texture. Cream it well with both sugars. This adds air, making your cookies soft. When mixing wet and dry ingredients, mix just until combined. Overmixing can lead to tough cookies. If you want extra flavor, fold in chopped dried apples or nuts. They add great texture and taste. One common mistake is not measuring ingredients correctly. Use measuring cups and spoons for accuracy. Too much flour or sugar can change the texture. Another mistake is not letting the cookies cool. They may fall apart if you move them too soon. Be patient; let them cool for at least five minutes on the baking sheet. Avoid opening the oven door too often. This lets heat escape and can affect baking time. Stick to the recommended bake time of 10-12 minutes for the best results. To make baking easier, gather some essential tools. Here’s what you need: - Mixing bowls - Electric mixer - Measuring cups and spoons - Baking sheet - Parchment paper - Cookie scoop or spoons - Wire cooling rack These tools help you work efficiently and create perfect cookies every time. For more details, check the Full Recipe for guidance on making these delicious treats! {{image_4}} You can make these cookies gluten-free. Just swap the all-purpose flour for a gluten-free blend. Look for a mix that includes xanthan gum. This helps keep the cookie texture light and chewy. Use the same measurement as the original flour. The other ingredients remain the same. To make vegan apple cider cookies, replace the egg. Use ¼ cup of unsweetened applesauce instead. It binds the dough well. For the butter, use vegan butter or coconut oil. Both work great in this recipe. Your cookies will still taste delicious and warm. You can customize these cookies to your taste. Try adding spices like ginger or cloves for extra warmth. For a nutty crunch, toss in walnuts or pecans. If you want a fruity twist, mix in dried cranberries or raisins. These additions make each bite unique. Feel free to experiment and find your favorite mix! After you bake your apple cider cookies, let them cool completely. Once cooled, place them in an airtight container. You can keep them at room temperature for about a week. If you want to keep them longer, you can move them to the fridge. Just remember, the cookies may dry out a bit in the fridge. You can freeze the cookie dough for later use. First, scoop the dough into balls and place them on a baking sheet. Freeze them for about an hour until firm. Then, transfer the dough balls into a freezer-safe bag. They can stay frozen for up to three months. When you’re ready to bake, just add a couple of extra minutes to the baking time. Baked apple cider cookies last about a week at room temperature. If you store them in the fridge, they can last up to two weeks. For the best taste, eat them fresh within the first few days. The flavors are best right after baking! For more details, check the Full Recipe. Yes, you can use store-bought apple cider. It saves time and still tastes great. Just make sure it is 100% apple cider without added sugars or preservatives. To boost flavor, add spices like ginger or cloves. You can also mix in some orange zest for a fresh twist. Another idea is to use brown butter instead of regular butter for a nutty taste. If you want to skip nuts, try adding seeds like sunflower or pumpkin seeds. You could also use more dried apples or chocolate chips for extra sweetness. - How do I know when the cookies are done baking? The cookies are done when the edges turn golden brown. The centers might look soft, but they will firm up as they cool. - Can I use fresh apples instead of dried? Yes, you can use fresh apples, but chop them small to prevent too much moisture. You may need to adjust the baking time since fresh apples can add more liquid to the dough. For more details on how to make these delightful treats, check out the Full Recipe. We explored the key ingredients and steps to make delicious apple cider cookies. You learned how to mix and bake while avoiding common mistakes. Using tips and variations, you can customize your cookies to fit your needs. Remember, storing them properly ensures they last longer. Enjoy experimenting with flavors and share your tasty results. Baking cookies is fun and brings warm joy, so dive in and savor each bite!
Delicious Apple Cider Cookies Easy Fall Treat
Fall brings the cozy scent of apple cider, and what better way to celebrate than with Apple Cider Cookies? These easy-to-make treats blend warmth and
- 2 large apples (such as Granny Smith or Honeycrisp), peeled and diced - 1/2 cup brown sugar, divided - 1/2 cup granulated sugar - 1/2 cup unsalted butter, melted - 2 large eggs - 1 teaspoon vanilla extract The apples bring a fresh, fruity bite to the bread. I love using Granny Smith for their tartness or Honeycrisp for their sweet crunch. Both work great for this recipe. The sugars add depth and sweetness, making every bite delightful. Unsalted butter keeps the flavor pure and rich. The eggs help bind all the ingredients together, giving the bread a nice structure. Lastly, vanilla extract adds a lovely aroma and enhances the apple flavor. - 2 cups all-purpose flour - 1 tablespoon baking powder - 1 teaspoon ground cinnamon, plus extra for coating apples - 1/2 teaspoon ground nutmeg - 1/4 teaspoon salt All-purpose flour forms the base of our bread, giving it a soft texture. Baking powder acts as a leavening agent, making the bread rise. Ground cinnamon and nutmeg add warm spice notes, perfect for the fall. A pinch of salt balances the sweetness and enhances all the flavors. - 1/2 cup chopped walnuts or pecans - 1/2 cup milk Chopped nuts add a nice crunch and flavor contrast. Walnuts or pecans are both good choices. Milk helps create a softer crumb in the bread. It makes the batter easier to mix and keeps the bread moist. You can adjust these additions based on your taste. For the full recipe, check out the details above. - Preheat the Oven: Start by preheating your oven to 350°F (175°C). This step is key for even baking. - Greasing the Loaf Pan: Generously grease a 9x5-inch loaf pan. You can use butter or non-stick spray. This will help the bread come out easily after baking. - Preparing the Apples: Dice 2 large apples, like Granny Smith or Honeycrisp. Toss them in a bowl with 1/4 cup of brown sugar and 1 teaspoon of cinnamon. Let this sit for about 10 minutes. This helps the apples soak up the sweet flavors. - Combining Wet Ingredients: In a large bowl, whisk together 1/2 cup melted butter, 1/4 cup brown sugar, 1/2 cup granulated sugar, 2 eggs, and 1 teaspoon vanilla extract. Mix until smooth and creamy, with no lumps. - Incorporating Dry Ingredients: In a separate bowl, mix 2 cups of flour, 1 tablespoon baking powder, 1/2 teaspoon nutmeg, and 1/4 teaspoon salt. Gradually add this to the wet mix, alternating with 1/2 cup of milk. Start and end with the dry mix. Stir gently to avoid overmixing. - Pouring Batter into Pan and Baking Time: Fold in the prepared apples and nuts if using. Pour the batter into the greased loaf pan. Level the top with a spatula. Bake for 50-60 minutes. Check doneness by inserting a toothpick. If it comes out clean, your bread is ready! Avoiding Overmixing To get the best texture, mix the batter gently. Overmixing makes the bread tough. Once the flour is added, stir just until no dry spots remain. This keeps the bread light and fluffy. Checking Doneness To check if your bread is done, use a toothpick. Insert it into the center of the loaf. If it comes out clean, your bread is ready. If it has batter on it, bake a bit longer. If the top browns too fast, cover it with foil. Adding Spices or Nuts You can boost flavor by adding spices. Try a pinch of ginger or a bit more cinnamon. Nuts like walnuts or pecans add crunch and taste. Fold them in with the apples for extra texture. Creative Glazing Options A glaze can make your bread shine. Mix powdered sugar with milk for a simple glaze. For a twist, add vanilla or a splash of maple syrup. Drizzle this over the warm bread for a sweet touch. Serving Suggestions Serve your apple fritter bread warm. Slice it thick and arrange on a rustic wooden board. Sprinkle some cinnamon on top for flair. You can also add a few apple slices for color. Pairing with Beverages Pair this bread with warm cider or a cup of coffee. The flavors match perfectly. For a cozy feel, serve it with a dollop of whipped cream on the side. Enjoy this treat with your favorite drink! {{image_4}} You can make your apple fritter bread even more exciting by using other fruits. Pears and peaches are great options. They add a sweet and juicy twist to the recipe. Just like apples, these fruits will soak up the flavors of the spices. You can also mix in seasonal fruits. In autumn, try using ripe pears. In summer, fresh peaches bring a burst of flavor. The choice is yours! Making this bread healthier is simple. You can use whole wheat flour instead of all-purpose flour. Whole wheat adds fiber and nutrients. It also gives a nutty flavor that pairs well with the fruit. Reducing sugar is another option. You can cut down the brown and granulated sugar by a third. This keeps the bread tasty while lowering calories. You can also use natural sweeteners like honey or maple syrup. If you want a vegan version, you can replace the eggs. Use flaxseed meal mixed with water as an egg substitute. One tablespoon of flaxseed mixed with three tablespoons of water works well. For a gluten-free option, choose gluten-free flour blends. They work great in this recipe. Just make sure to check the package for the right measurements. Both adjustments help everyone enjoy this delicious bread! For the full recipe, check out the Country Apple Fritter Bread details above. - Store at Room Temperature: Keep your Country Apple Fritter Bread in an airtight container. It stays fresh for up to three days. Make sure to place it in a cool, dry spot. - Refrigeration Tips: If you want to keep it longer, store the bread in the fridge. Wrap it tightly in plastic wrap or foil. It can last up to a week this way. - How to Freeze Properly: To freeze, let the bread cool completely. Then, wrap it in plastic wrap and place it in a freezer bag. This keeps out air and prevents freezer burn. You can freeze it for up to three months. - Thawing Tips for Best Texture: When you're ready to eat it, take the bread out of the freezer. Let it thaw in the fridge overnight. For a warm treat, pop slices in the toaster or microwave for a few seconds. - Freshness Guidelines: The bread is best enjoyed fresh but can be stored for a few days at room temperature or up to a week in the fridge. - Signs of Spoilage: Look for mold or an off smell. If the bread feels dry or hard, it’s time to toss it. Always trust your senses to decide if it's still good to eat. Country Apple Fritter Bread has roots in American cuisine. This tasty treat combines classic apple fritters with the simple charm of homemade bread. Many families have passed down their recipes for generations. It's often made in the fall when apples are fresh and plentiful. The cultural significance lies in its warmth and comfort, bringing loved ones together. People enjoy this bread at breakfast or as a sweet snack. Yes, you can use many types of apples. Granny Smith and Honeycrisp are great choices. They provide a nice balance of sweetness and tartness. You can also try Fuji or Gala apples for a sweeter flavor. Each apple variety offers a unique taste and texture. Experimenting with different apples can lead to fun results! Check the bread by inserting a toothpick into the center. If it comes out clean, the bread is ready. Another way to test is to lightly press the top; it should spring back. If the top browns too quickly, cover it with foil to prevent burning. Following these tips will help you achieve a perfect bake every time! You learned how to make delicious Country Apple Fritter Bread from scratch. We covered key ingredients like apples and spices. We also shared helpful tips for perfect texture and flavor. You even saw variations to try and storage tips to keep your bread fresh. Now, it’s time to bake and enjoy this treat! Experiment with flavors and share it with friends. The joy of baking is in the adventure. Happy baking!
Country Apple Fritter Bread Delightful Homemade Recipe
If you love warm, fresh desserts, you’re in for a treat! This delightful Country Apple Fritter Bread recipe brings the cozy taste of apples right
To make the Fluffy Tiramisu Cake, you will need: - 2 cups all-purpose flour - 1 cup granulated sugar - 1/2 cup unsalted butter, softened to room temperature - 4 large eggs, at room temperature - 1 cup strong brewed coffee, cooled to room temperature - 1 teaspoon vanilla extract - 1 teaspoon baking powder - 1/2 teaspoon salt - 1 1/2 cups mascarpone cheese, softened - 1 cup heavy cream, chilled - 1/2 cup powdered sugar - Unsweetened cocoa powder (for dusting) - Chocolate shavings (for garnish) You can swap some ingredients if needed. Use coconut oil instead of butter for a dairy-free option. For a lighter cake, try using egg whites only. If you can’t find mascarpone, cream cheese works in a pinch. You may also replace granulated sugar with coconut sugar or a sugar substitute. Using fresh, high-quality ingredients makes a big difference. Fresh eggs and real vanilla extract enhance flavor. Quality coffee adds depth to the cake. Always choose mascarpone that is creamy and rich. Good ingredients lead to a delightful dessert. Trust me; it’s worth it! To make the Fluffy Tiramisu Cake, you start with the right tools. Gather your ingredients and tools before you begin. You'll need two 8-inch round cake pans, mixing bowls, an electric mixer, and a spatula. This will make your baking smooth and fun! 1. Preheat your oven to 350°F (175°C). Grease your cake pans. Use butter or cooking spray. Line the bottoms with parchment paper. This helps the cakes come out easily. 2. In a bowl, mix softened butter and granulated sugar. Beat them for 3-5 minutes until light and fluffy. 3. Add eggs one at a time, mixing well after each. Stir in the vanilla extract next. 4. In another bowl, whisk flour, baking powder, and salt together. Gradually add this to the butter mix, alternating with coffee. Start and end with the dry mix. Stir gently to avoid overmixing. 5. Divide the batter between the pans. Smooth the tops with a spatula. Bake for 25-30 minutes. Use a toothpick to check if they are done. 1. While the cakes cool, whisk the mascarpone cheese in a bowl until creamy. 2. In a separate bowl, whip the heavy cream and powdered sugar until soft peaks form. 3. Gently fold the whipped cream into the mascarpone. Mix until fluffy. Now, you will layer the cake. Place one cake layer on your serving plate. Spread half of the mascarpone filling on top. Add the second layer and cover it with the rest of the filling. Chill the cake in the fridge for at least 4 hours, or overnight for the best taste. Before serving, dust the top with cocoa powder and add chocolate shavings. Your Fluffy Tiramisu Cake is ready to impress! For the complete recipe, check out the Full Recipe. To make your tiramisu cake fluffy, focus on the mixing process. Start by creaming the butter and sugar until it is light. This usually takes about three to five minutes. When you add eggs, do it one at a time. Mix well after each egg. This step adds air and creates a lighter cake. Another key is to fold the whipped cream into the mascarpone gently. Use a spatula and a gentle motion. This keeps the mixture airy. If you stir too hard, the cream loses its fluffiness. One common mistake is overmixing the batter. Mix just until the dry ingredients are combined. If you overmix, the cake will be dense. Also, make sure your ingredients are at room temperature. Cold eggs and butter can affect the texture. Another pitfall is not chilling the cake long enough. Refrigerate it for at least four hours. This helps the flavors meld together. It also allows the cake to set properly. For serving, slice the cake with a sharp knife. Clean the knife between cuts for neat pieces. You can dust the top with cocoa powder right before serving. This adds a lovely contrast and flavor. I love to add chocolate shavings on top. They make the cake look fancy and taste great. Pair it with a small cup of espresso. The coffee flavor in the cake goes well with it. You can find the full recipe for this fluffy tiramisu cake, and it will guide you step-by-step. Enjoy your baking! {{image_4}} You can change the flavor of your Fluffy Tiramisu Cake easily. Add some orange zest for a bright twist. You can also try using different coffee types, like hazelnut or vanilla. For a richer taste, consider adding a splash of coffee liqueur to the batter. If you want a fruity touch, layer in some fresh berries between the cake and cream. How you present your cake can make it even more special. Instead of a full cake, try making cupcakes. Use the same batter and mascarpone filling for mini treats. You can also make a trifle by layering cake pieces, cream, and cocoa powder in a glass dish. This makes a fun and easy dessert for gatherings. You can adapt this recipe to fit different diets. For a gluten-free option, use a gluten-free flour blend. If you need a dairy-free version, try using coconut cream instead of mascarpone. For a lower-sugar option, substitute granulated sugar with a sugar alternative like monk fruit sweetener. These adjustments keep the flavors while fitting your needs. For the full recipe, check out the details above! To keep your fluffy tiramisu cake fresh, wrap it tightly in plastic wrap. This helps prevent it from drying out. You can also place it in an airtight container. Always store it in the fridge. The cool air keeps the cake moist and tasty. Avoid leaving it at room temperature for too long. You can freeze tiramisu cake for later enjoyment. First, let the cake cool completely. Then, slice it into portions. Wrap each slice in plastic wrap, then place them in a freezer-safe bag. Label the bag with the date. The cake can stay fresh in the freezer for up to three months. When ready to eat, thaw it in the fridge overnight. Your tiramisu cake will stay good in the fridge for about five days. To enjoy the cake again, do not heat it. Tiramisu is best served cold. If you want to refresh the flavors, dust a bit of cocoa powder on top before serving. This little touch makes it look great and taste even better. For more detailed steps, refer to the Full Recipe. The secret lies in the mixing. You need to whip the butter and sugar well. This adds air to your batter. Use room temperature eggs for better volume. When you combine wet and dry ingredients, mix gently. Overmixing can lead to a dense cake. Yes, you can. In fact, making the cake a day ahead improves the flavors. Just follow the Full Recipe and chill it overnight. This allows the cake to set and the flavors to blend perfectly. To check if the cake is done, insert a toothpick into the center. If it comes out clean, the cake is ready. You can also gently press the top; it should spring back. If it leaves a dent, it needs more time. If you can’t find mascarpone, you can use cream cheese as a substitute. Mix it with a bit of heavy cream for a smoother texture. Another option is to blend ricotta cheese with some heavy cream. This gives a nice, creamy consistency too. In this post, we covered key ingredients and simple steps to make a perfect tiramisu cake. Quality matters, so choose fresh ingredients for the best flavor. I shared tips to avoid common mistakes and achieve that fluffy texture. You can also explore fun flavor variations and presentation ideas. Remember to store leftovers properly to enjoy them later. Baking can be easy and fun with the right approach. Now, you are ready to create your own delicious tiramisu cake. Enjoy your baking adventure!
Fluffy Tiramisu Cake Irresistible Dessert Delight
Get ready to indulge in a fluffy tiramisu cake that will make your taste buds dance! This dessert combines rich coffee flavors with a light,
To make Mimi's Famous Skillet Blackberry Cobbler, you'll need these key ingredients: - 2 cups fresh, ripe blackberries - 1 cup granulated sugar, divided - 1 tablespoon fresh lemon juice - 1 tablespoon cornstarch - 1 teaspoon pure vanilla extract - 1 cup all-purpose flour - 1 ½ teaspoons baking powder - ½ teaspoon fine salt - ½ cup unsalted butter, melted and slightly cooled - ¾ cup whole milk - 1 teaspoon ground cinnamon These ingredients work together to create a sweet and fruity treat. The blackberries bring a tart flavor, while the sugar balances it perfectly. The butter and milk make the batter rich and creamy. Using high-quality ingredients is key to a great cobbler. Fresh blackberries taste much better than old or frozen ones. They also provide a nice texture. Good butter adds richness, while pure vanilla enhances the flavor. When you choose top-notch items, your dish will shine. It is worth the extra effort to find the best. If you have dietary needs, there are swaps you can make. For gluten-free options, use a gluten-free flour blend instead of all-purpose flour. If you want a dairy-free version, swap the butter for coconut oil and use almond milk instead of whole milk. These changes work well while still keeping the spirit of the recipe. You can still enjoy a delicious cobbler that fits your diet. For the full recipe, check out the detailed instructions. Start by preheating your oven to 350°F (175°C). This step is key for a great cobbler. While the oven heats, grab a medium bowl. Add 2 cups of fresh blackberries, ½ cup of sugar, lemon juice, cornstarch, and vanilla extract. Gently mix until the blackberries are well-coated. Set this bowl aside to let the flavors blend. Next, take a large bowl. In this bowl, whisk together 1 cup of all-purpose flour, 1½ teaspoons of baking powder, ½ teaspoon of fine salt, and 1 teaspoon of ground cinnamon. Make sure to mix these dry ingredients well. This mix will give your cobbler the right rise and flavor. Now, in a separate bowl, whisk together ½ cup of melted unsalted butter and ¾ cup of whole milk. Make sure the butter is slightly cooled before you mix. Once fully combined, pour this wet mix into the bowl with the dry ingredients. Stir gently until they just come together. Avoid over-mixing to keep the texture light. Carefully pour the batter into a 10-inch cast iron skillet. Spread it evenly across the bottom. Then, spoon the blackberry mixture over the batter, ensuring every bite has berries. Sprinkle the remaining ½ cup of sugar on top. This sugar will caramelize and form a nice crust while baking. Place the skillet in the preheated oven. Bake for 30-35 minutes. Check for a golden brown color and use a toothpick to test doneness. Once done, let it cool for a bit before serving. For the full recipe, check the details above. To get the best texture in your cobbler, mix gently. Over-mixing can make it tough. When you combine the wet and dry ingredients, stop as soon as you see no dry flour. This keeps the cobbler soft and fluffy. Also, using a cast iron skillet helps. It holds heat well, giving your cobbler a nice, even cook. To boost flavor, try adding a pinch of nutmeg or cardamom. These spices pair well with blackberries. You can also use brown sugar instead of white sugar for a caramel-like taste. A splash of almond extract adds a sweet twist. For an extra kick, mix in a splash of bourbon or whiskey with the blackberries. Serve your cobbler warm from the skillet. It looks great and tastes even better. A scoop of vanilla ice cream on top is a must. The cold ice cream melts into the warm cobbler, creating a perfect mix. You can add a sprig of mint for color and freshness. This simple touch makes your dish pop and impresses your guests. Want to make it special? Drizzle a bit of honey or chocolate sauce on top. For the full recipe, check out Mimi's Delightful Skillet Blackberry Cobbler. {{image_4}} You can change the blackberries for other fruits. Try fresh peaches, blueberries, or cherries. Each fruit adds a new flavor. Mix and match your favorites for fun. For a tart twist, use raspberries. They work great in this recipe. To make a vegan version, swap butter for coconut oil. Use almond milk instead of regular milk. Replace sugar with maple syrup for sweetness. For a gluten-free option, use almond or oat flour. This way, everyone can enjoy the cobbler. Serve the cobbler warm from the skillet. A scoop of vanilla ice cream on top is perfect. Try adding a drizzle of caramel sauce for extra sweetness. You can also serve it with whipped cream or yogurt. For a crunchy touch, sprinkle some nuts on top. These ideas make your dessert even more delightful. To keep leftover cobbler fresh, store it in an airtight container. If you do not have one, cover the skillet tightly with plastic wrap or aluminum foil. Place it in the fridge. This helps keep moisture in and prevents the cobbler from drying out. Leftover cobbler can last up to four days in the fridge. When you're ready to enjoy your cobbler again, preheat your oven to 350°F (175°C). Place the cobbler in the oven for about 10-15 minutes. This warms it up nicely and keeps the crust crisp. If you want a quick option, you can use the microwave. Heat it for 30 seconds, but be careful not to overheat. This might make the cobbler chewy. If you want to save your cobbler for later, freezing is a great option. Let the cobbler cool completely first. Then, cut it into pieces. Wrap each piece in plastic wrap. For extra protection, place the wrapped pieces in a freezer bag. Label it with the date. Your cobbler can stay fresh for up to three months in the freezer. When you’re ready to eat it, thaw it in the fridge overnight, then reheat as needed. For the full recipe, refer back to the earlier section. You can tell the cobbler is done when it turns golden brown on top. Insert a toothpick in the center. If it comes out clean, the cobbler is ready. The sides should also pull away slightly from the skillet. This shows that it has baked through well. Yes, you can use frozen blackberries. They work well in this recipe. Just remember to thaw them first and drain any excess juice to avoid a soggy cobbler. They may release more water than fresh ones. So, adjust the sugar if needed to balance flavors. Mimi's Famous Skillet Blackberry Cobbler stands out for its use of a cast iron skillet. This method gives the cobbler a crispy edge while keeping the middle soft and moist. The combination of fresh blackberries and a hint of lemon juice brightens the flavor. Plus, it’s quick and easy to make! This recipe has roots in Southern cooking traditions. It captures the spirit of homemade comfort food. Many families have their versions, but Mimi's has a special twist that keeps it popular. The use of fresh blackberries adds a personal touch, making it a family favorite. For the full recipe, check out the details above. This blog post covered the essentials for making Mimi's Famous Skillet Blackberry Cobbler. We discussed key ingredients, the steps to bake, tips for the best texture, and fun variations. Remember, using quality ingredients makes a big difference. You can modify the recipe for dietary needs and try new flavors too. Enjoying your cobbler warm with ice cream will elevate your dessert game. With these tips, you can create a delicious treat every time. Now, it's your turn to get baking and enjoy your homemade cobbler!
Mimi’s Famous Skillet Blackberry Cobbler Easy Recipe
Ready to try a dessert that’s both comforting and delicious? Mimi’s Famous Skillet Blackberry Cobbler is just what you need! This easy recipe brings together