DESSERTS
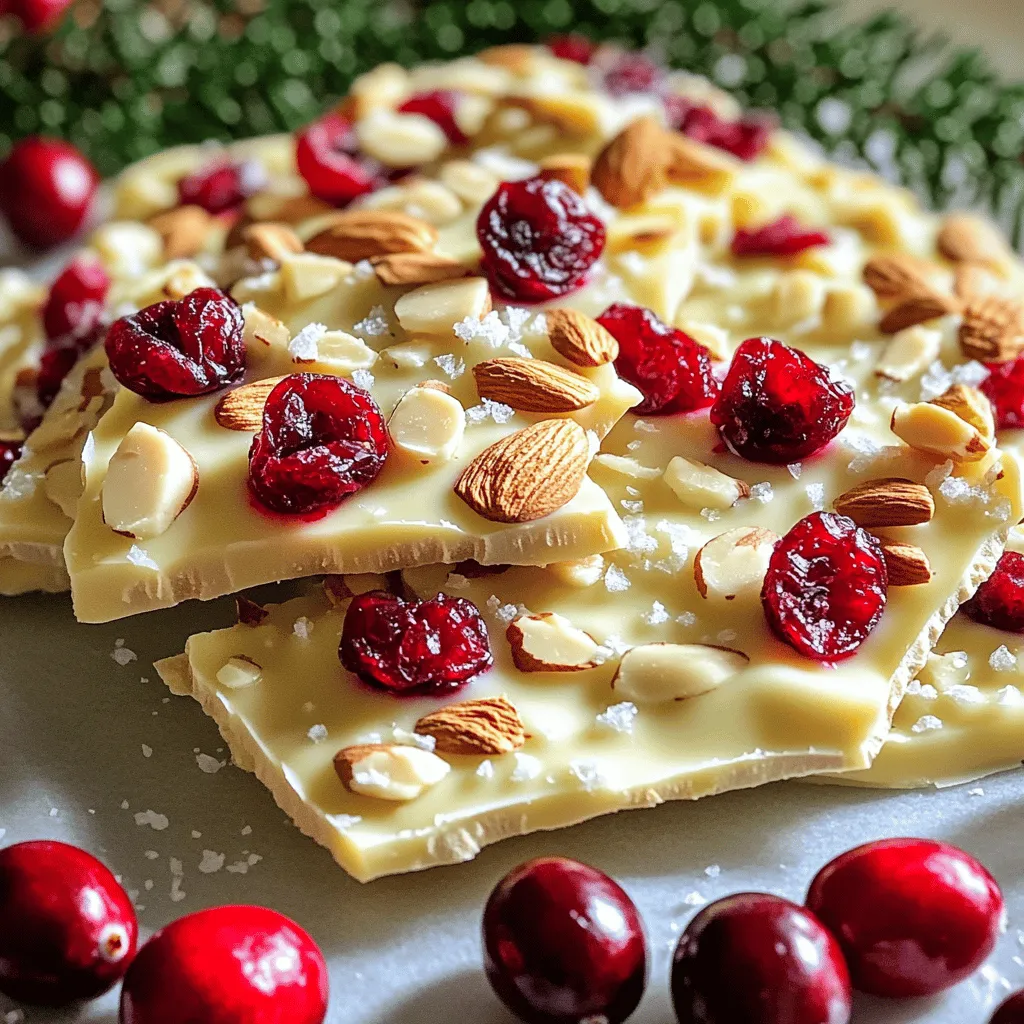
No-Bake White Chocolate Cranberry Bark Delight
Ready to whip up a sweet treat that requires zero baking? In this post, I’ll show you how to make...
READ MORE →Explore our collection of desserts recipes
Ready to whip up a sweet treat that requires zero baking? In this post, I’ll show you how to make...
READ MORE →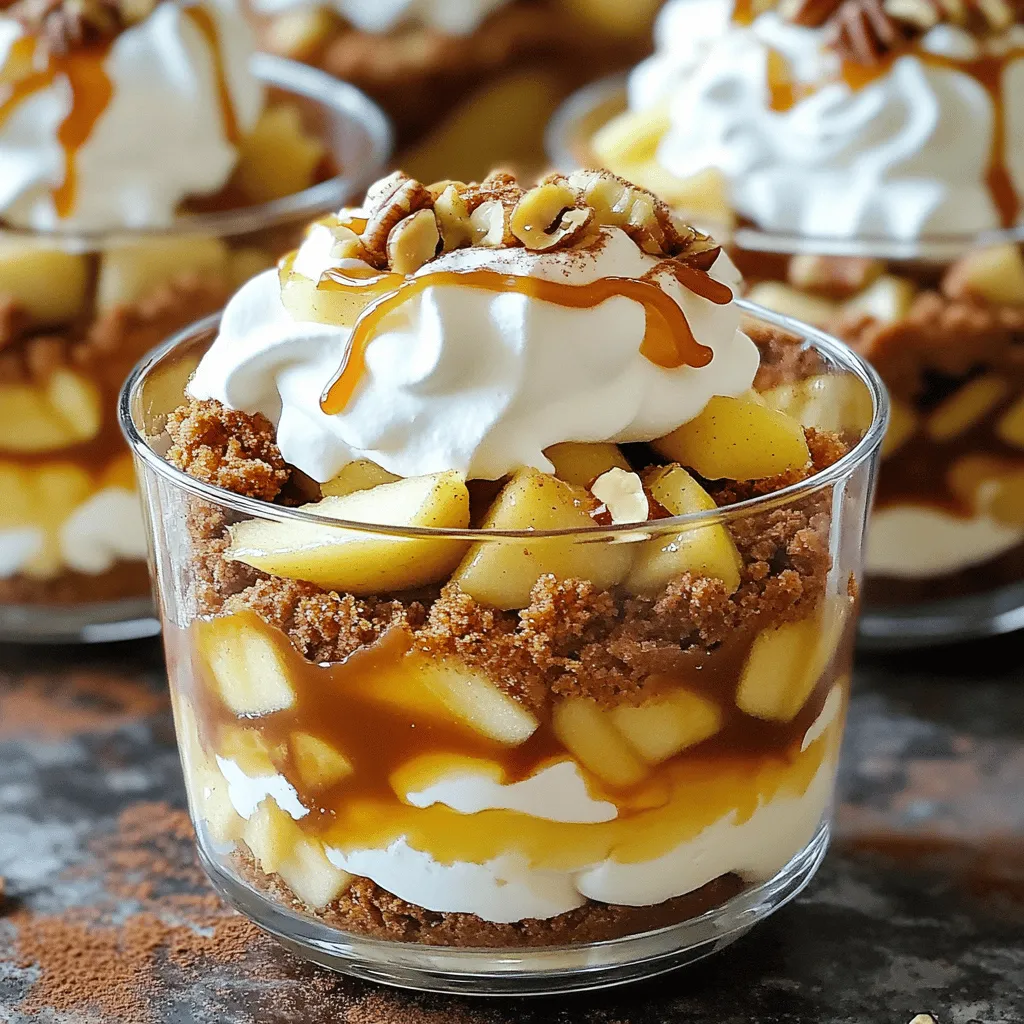
Get ready to indulge in a dessert that’s as fun to make as it is to eat! My Caramel Apple...
READ MORE →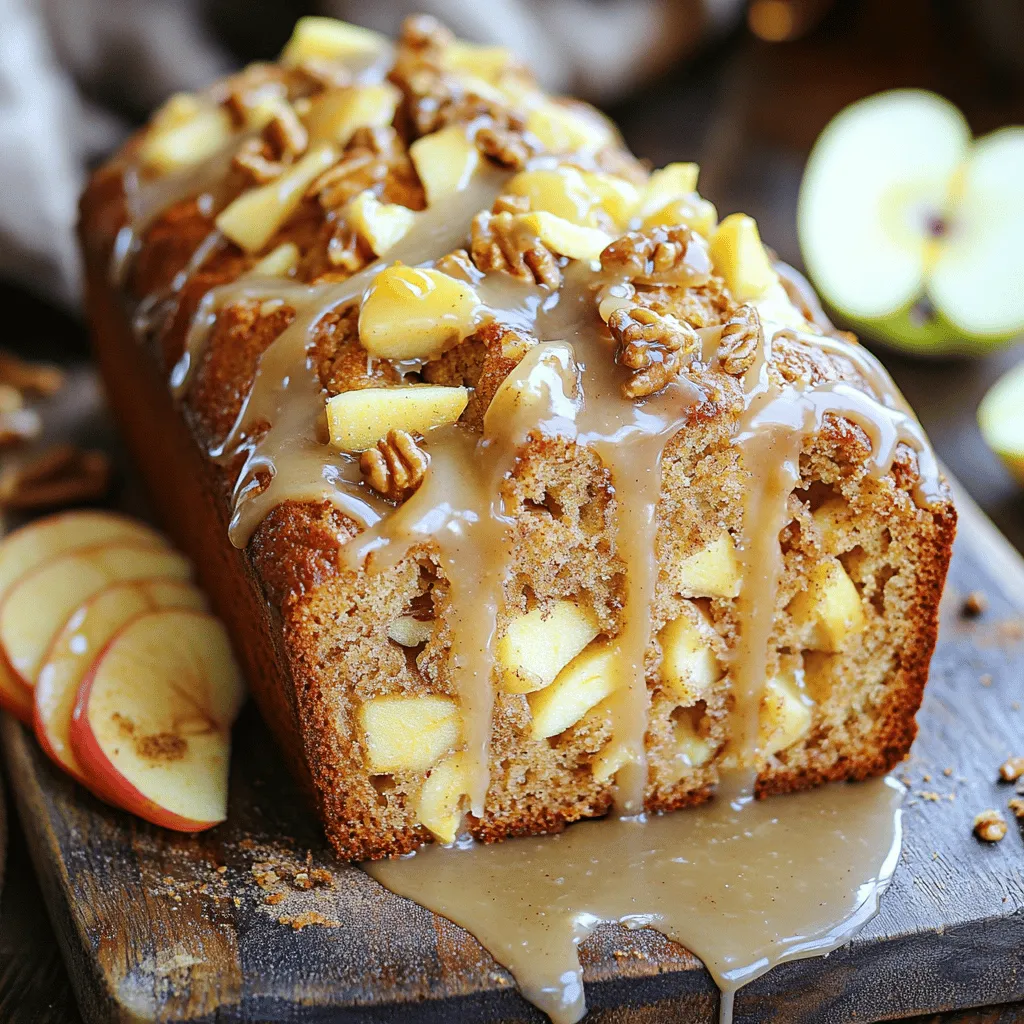
Do you love sweet and fragrant baked goods? If so, you’ll adore this Cinnamon Apple Bread with Glaze! It’s a...
READ MORE →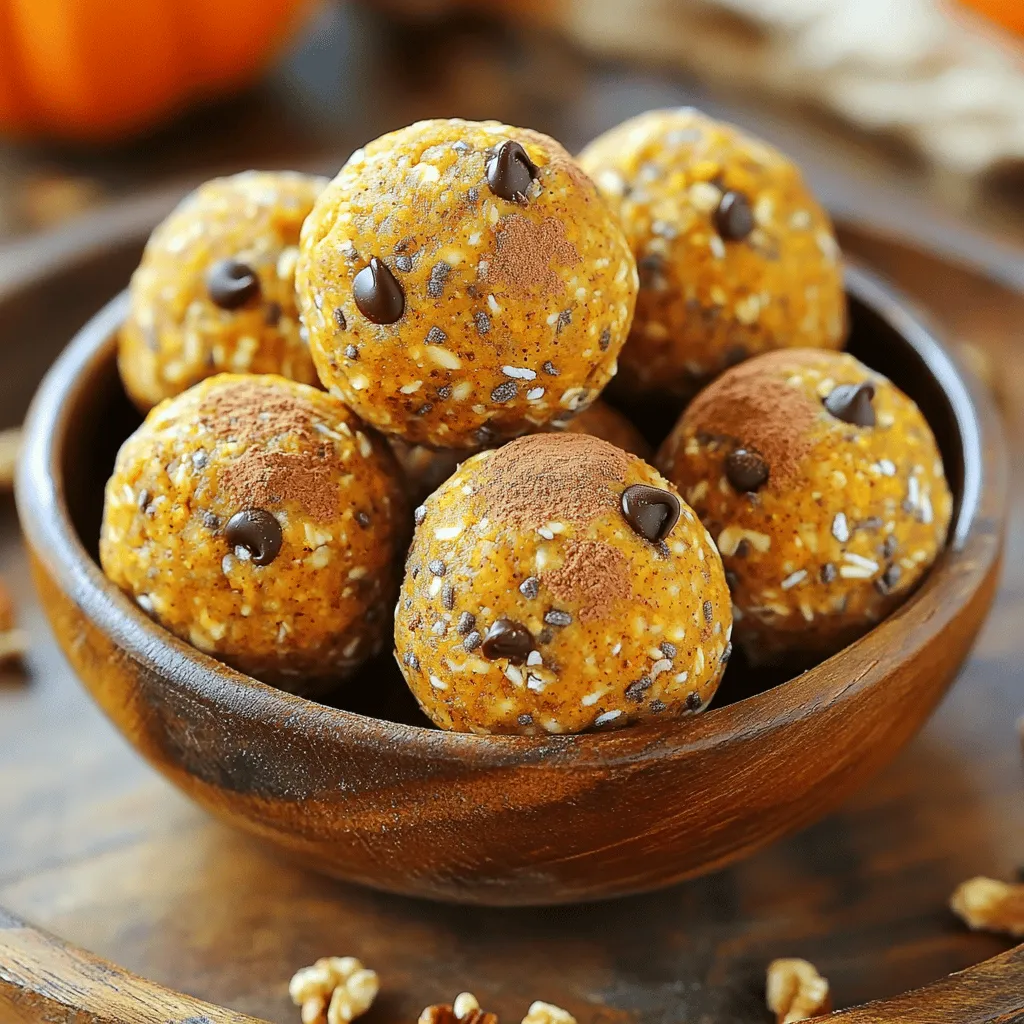
Looking for a tasty snack that packs a protein punch? You’ll love these Pumpkin Pie Protein Balls! They’re easy to...
READ MORE →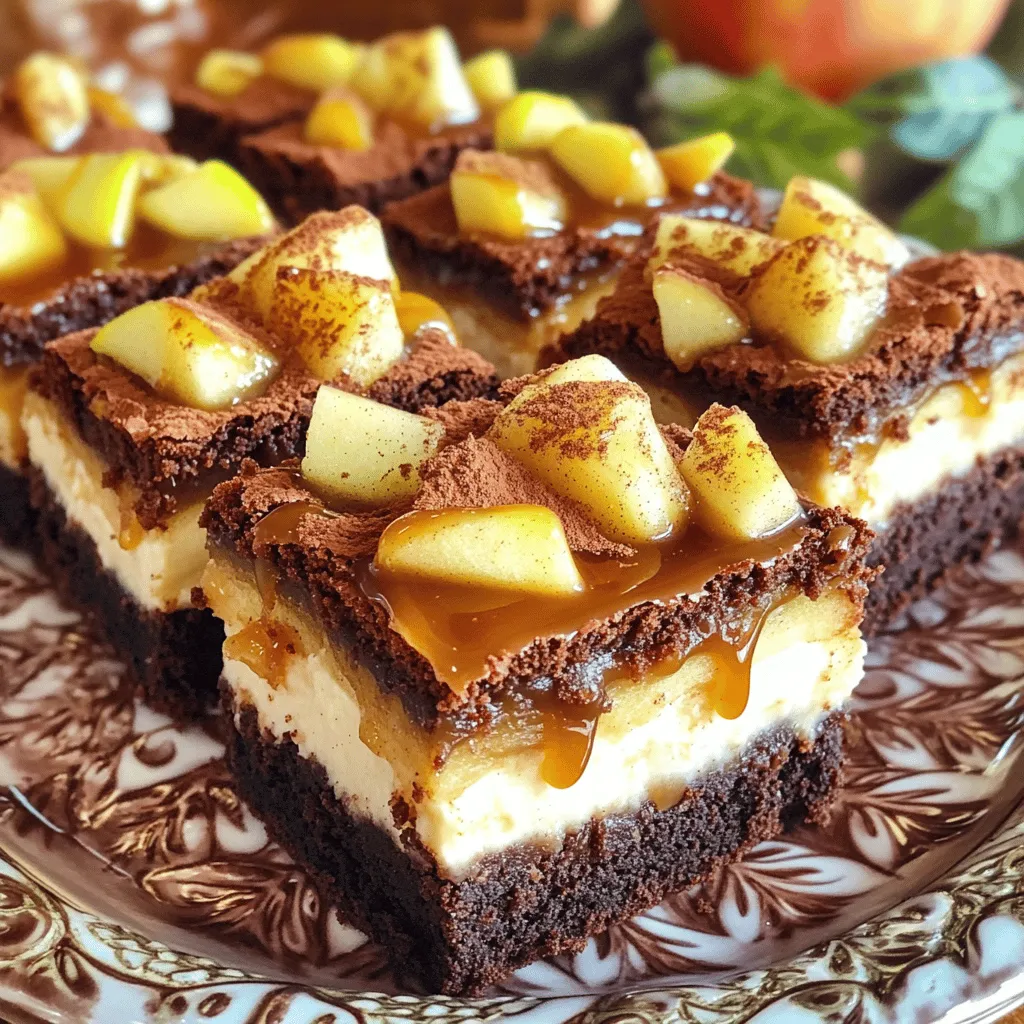
If you love desserts, you need to try my Caramel Apple Cheesecake Brownies. These brownies combine the sweet flavors of...
READ MORE →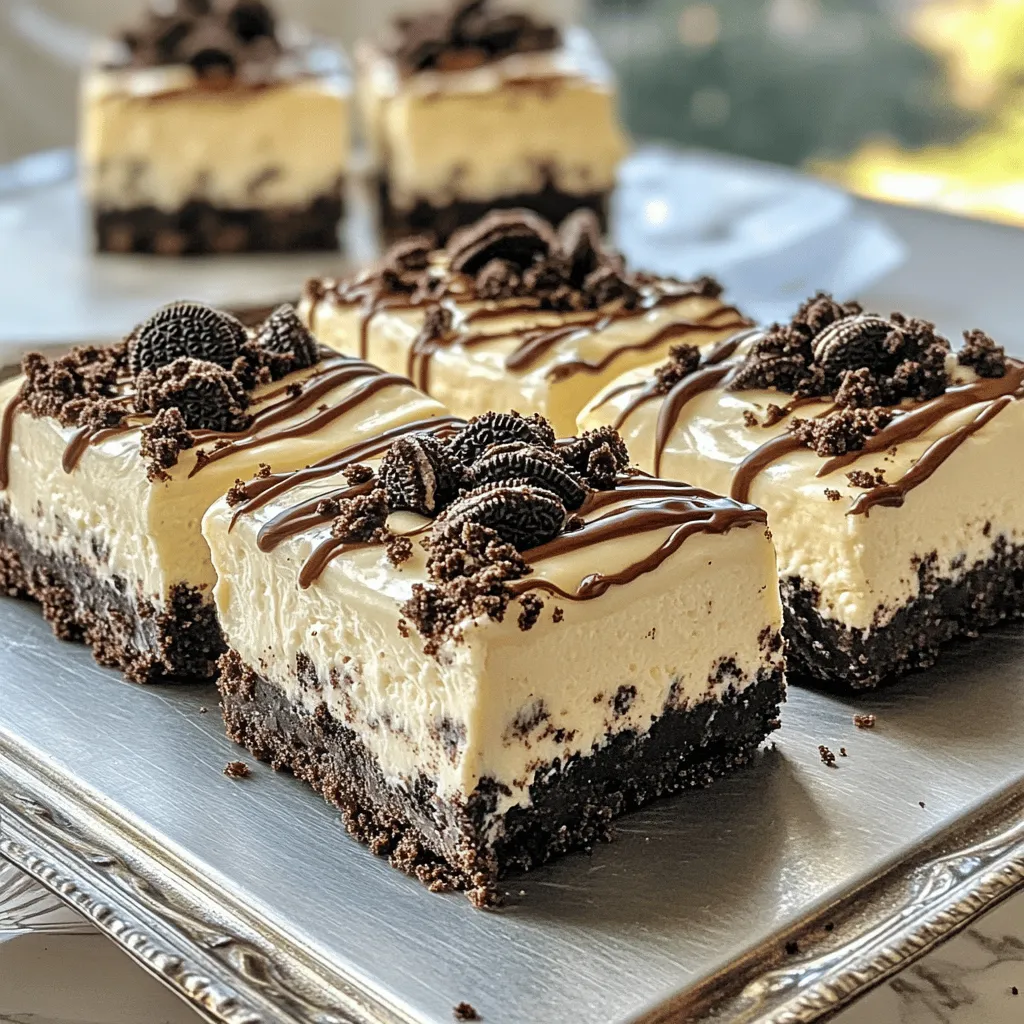
Are you ready to satisfy your sweet tooth with a simple delight? These No Bake Oreo Cheesecake Dream Bars are...
READ MORE →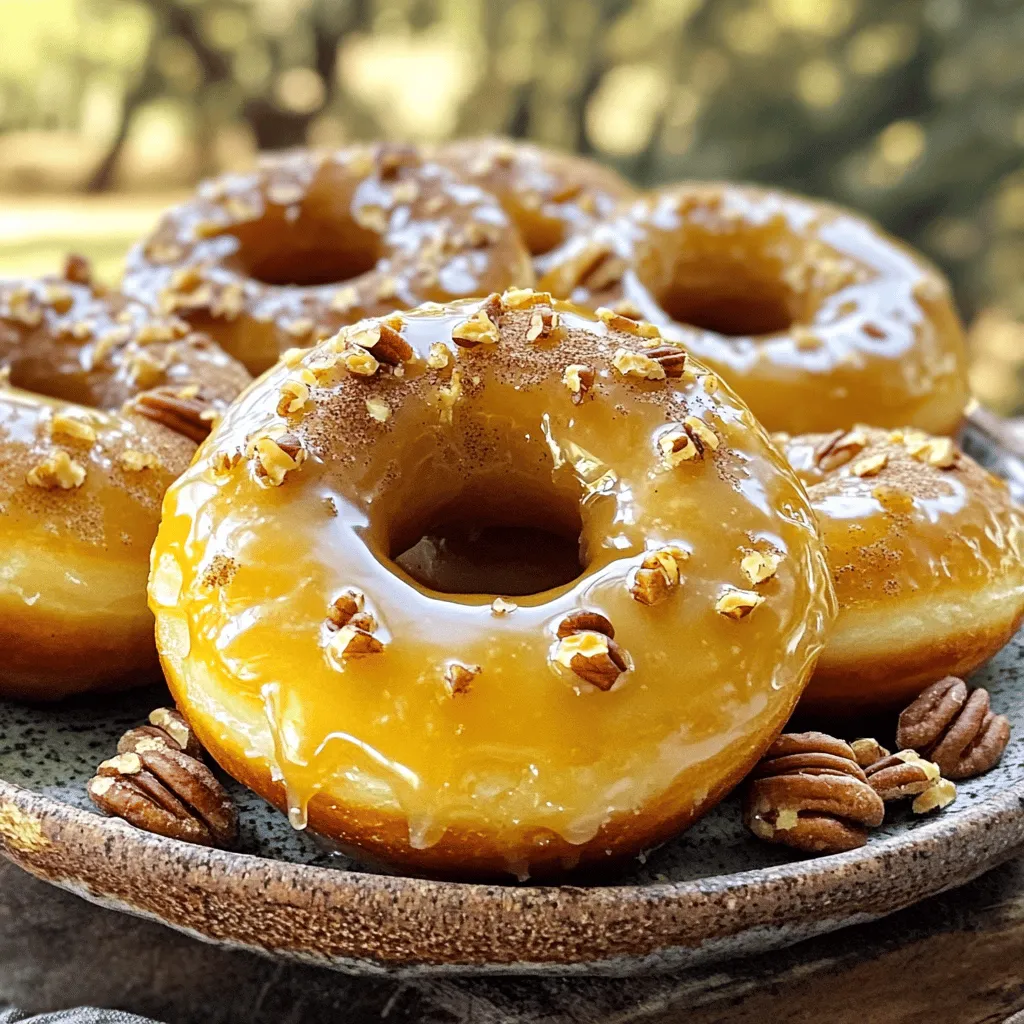
If you love sweet, fluffy treats, you need to try my Maple Glazed Donuts! This easy homemade recipe combines warm...
READ MORE →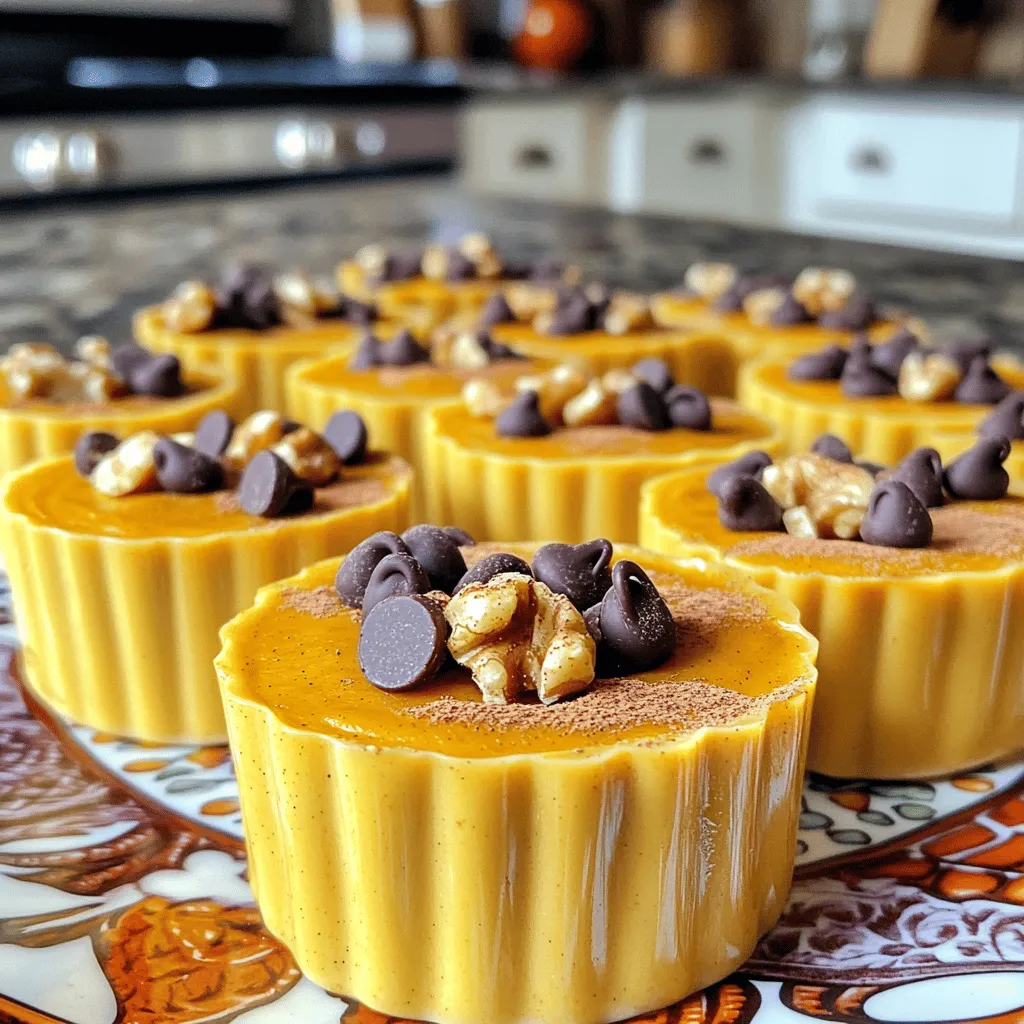
Looking for a quick, healthy snack? Try these No-Bake Pumpkin Spice Protein Cups! Packed with flavor and nutrients, they make...
READ MORE →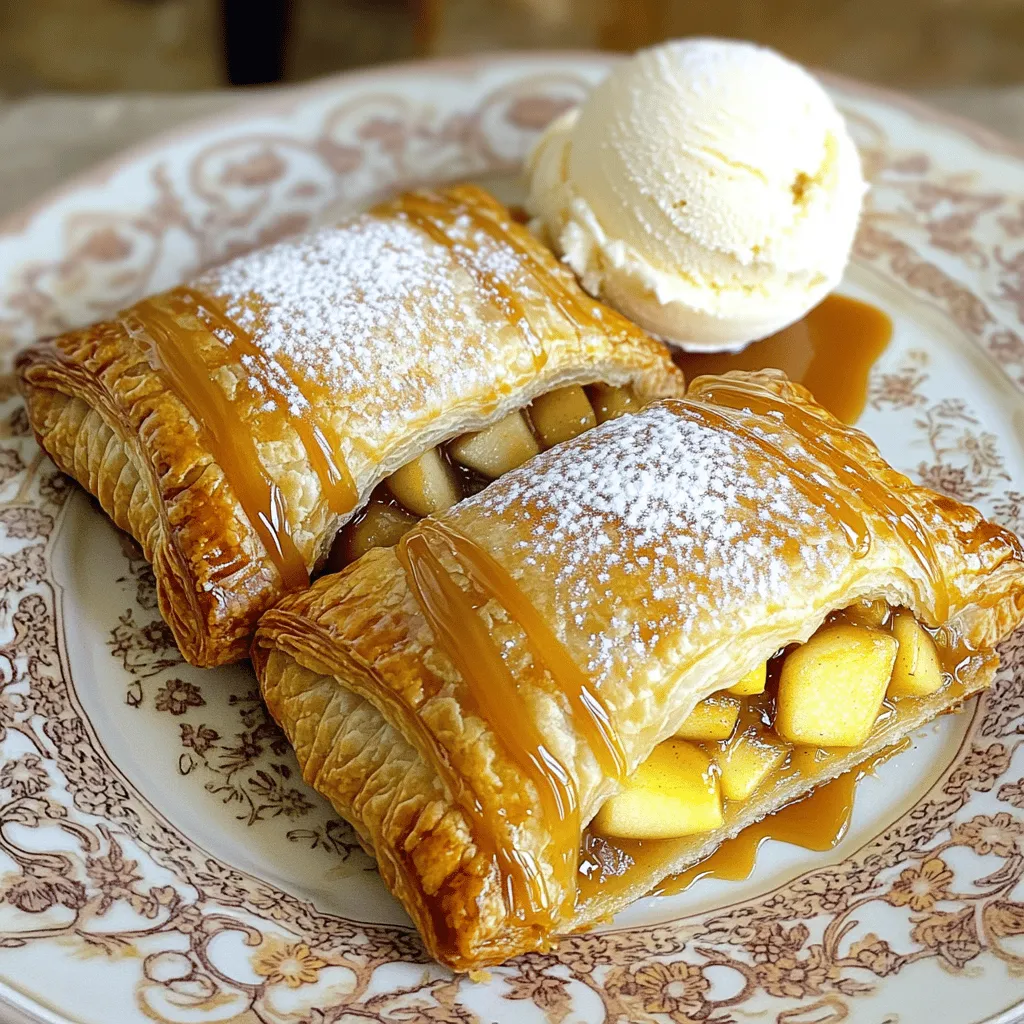
If you love sweet treats, you’ll adore these Caramel Apple Turnovers. They are warm, flaky, and filled with juicy apples...
READ MORE →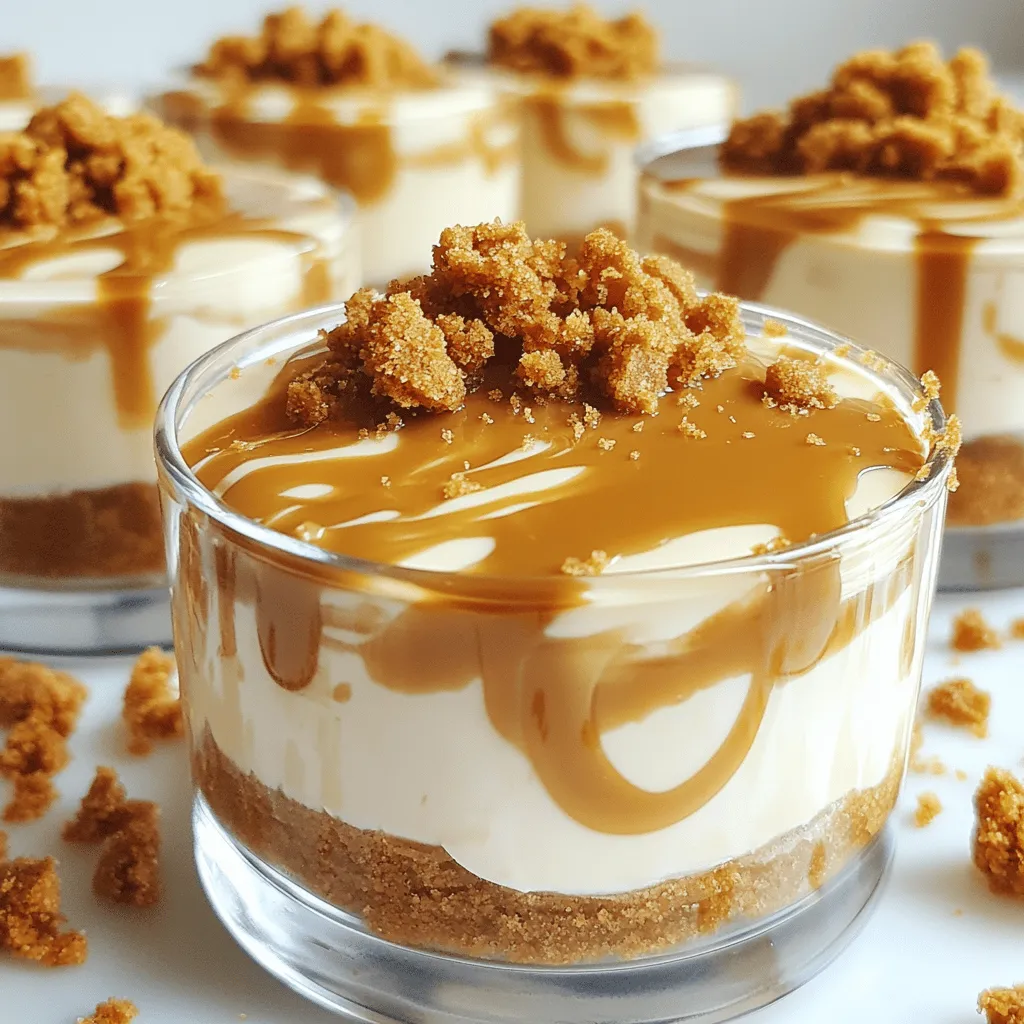
Craving a sweet treat that’s both easy to make and delicious? Look no further! This No-Bake Biscoff Cheesecake Cups recipe...
READ MORE →