DESSERTS
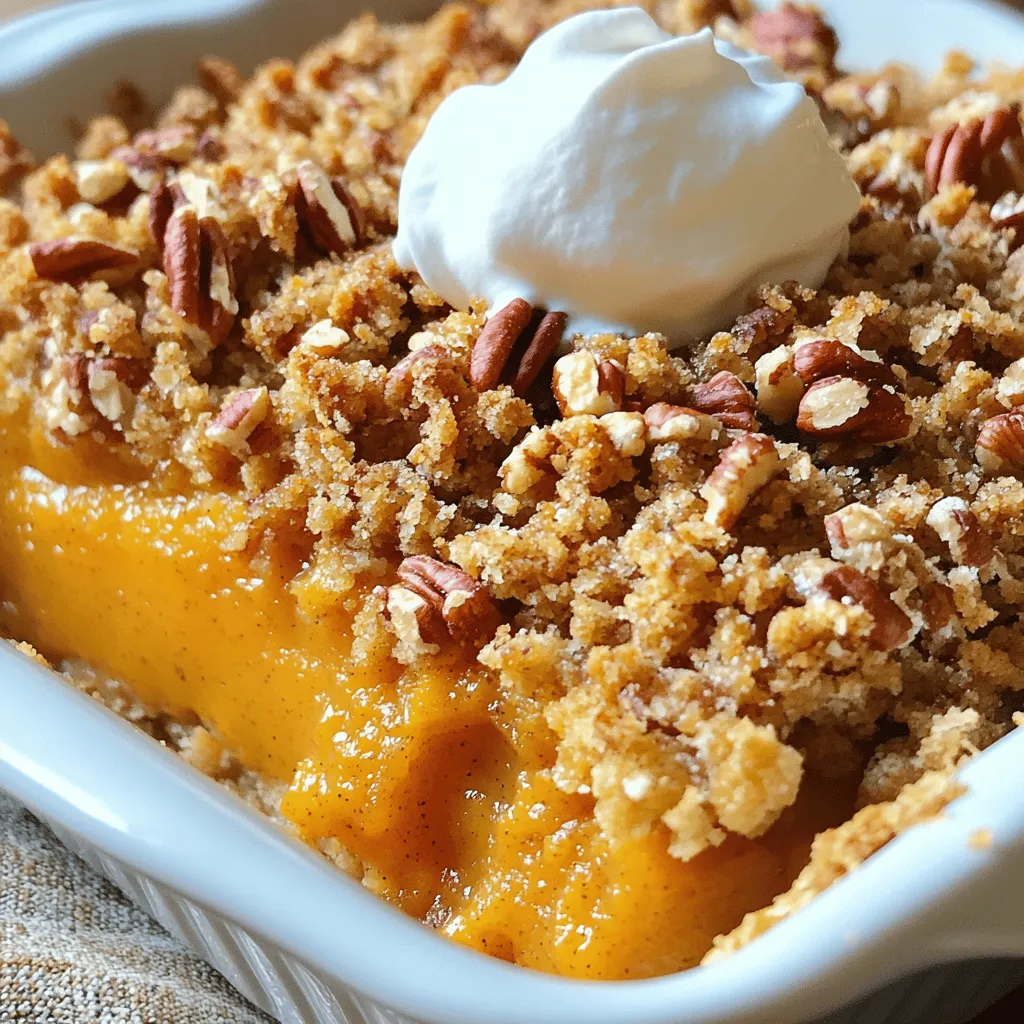
Pumpkin Pie Crisp Delightful Fall Dessert Recipe
Fall is here, and that means it’s time for pumpkin treats! If you love pumpkin pie but crave something a...
READ MORE →Explore our collection of desserts recipes
Fall is here, and that means it’s time for pumpkin treats! If you love pumpkin pie but crave something a...
READ MORE →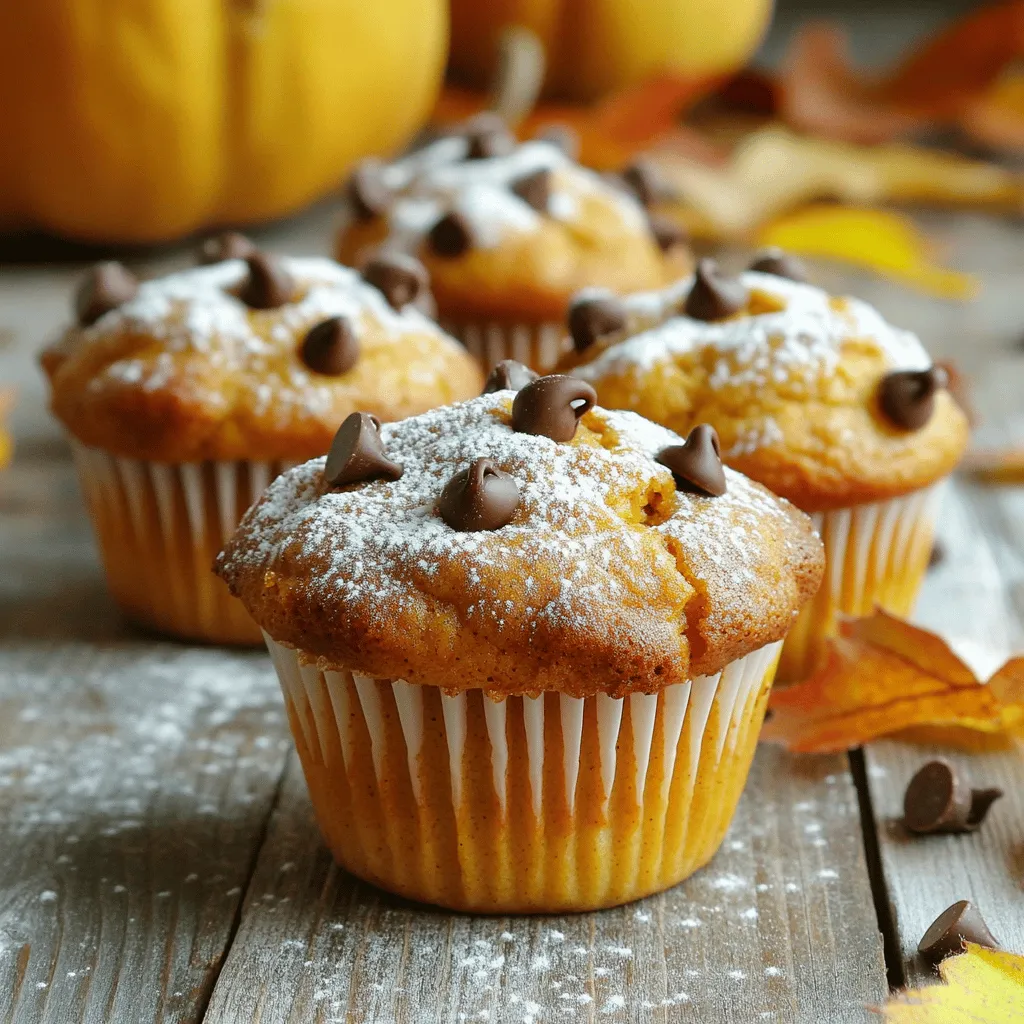
Get ready to bake the best ever pumpkin muffins with my simple and delicious recipe! These muffins are moist, flavorful,...
READ MORE →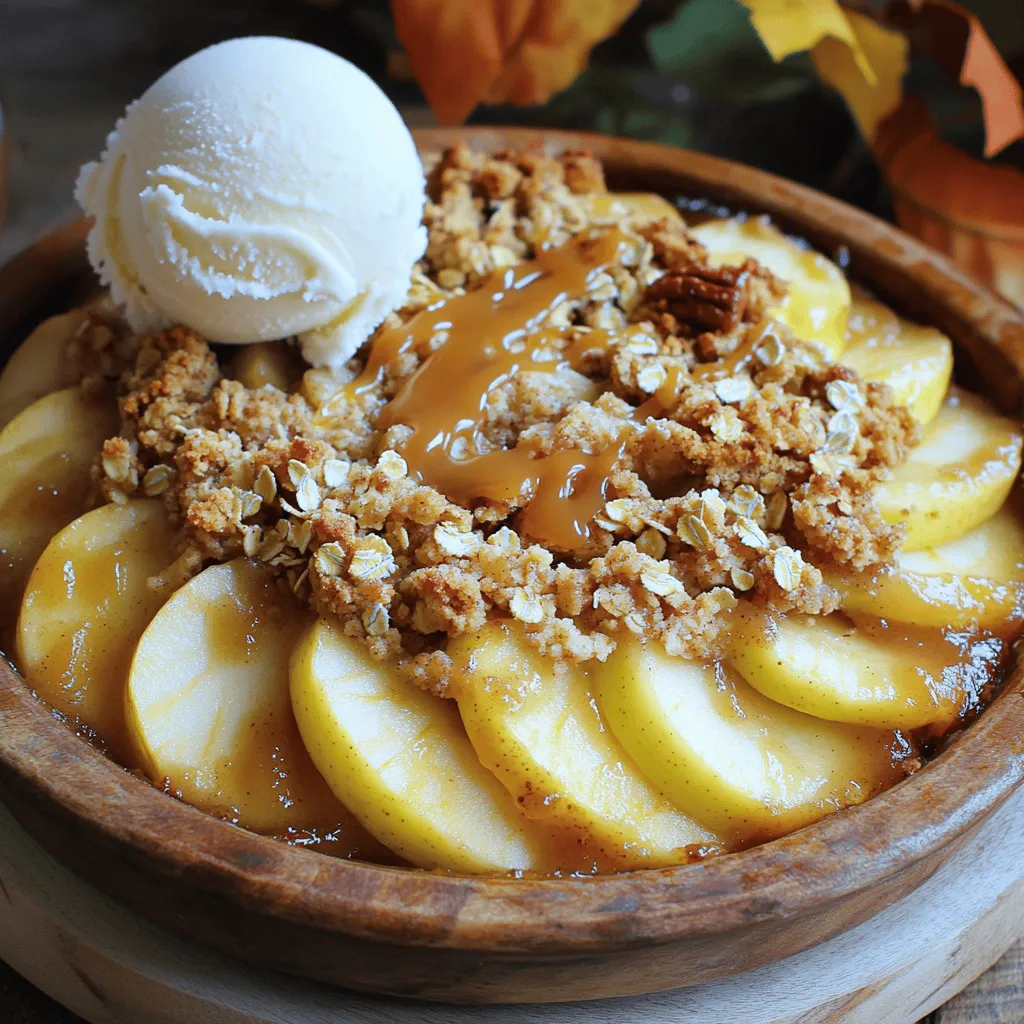
If you crave a warm and tasty dessert, this Easy Apple Crumble recipe is for you! I’ll share all the...
READ MORE →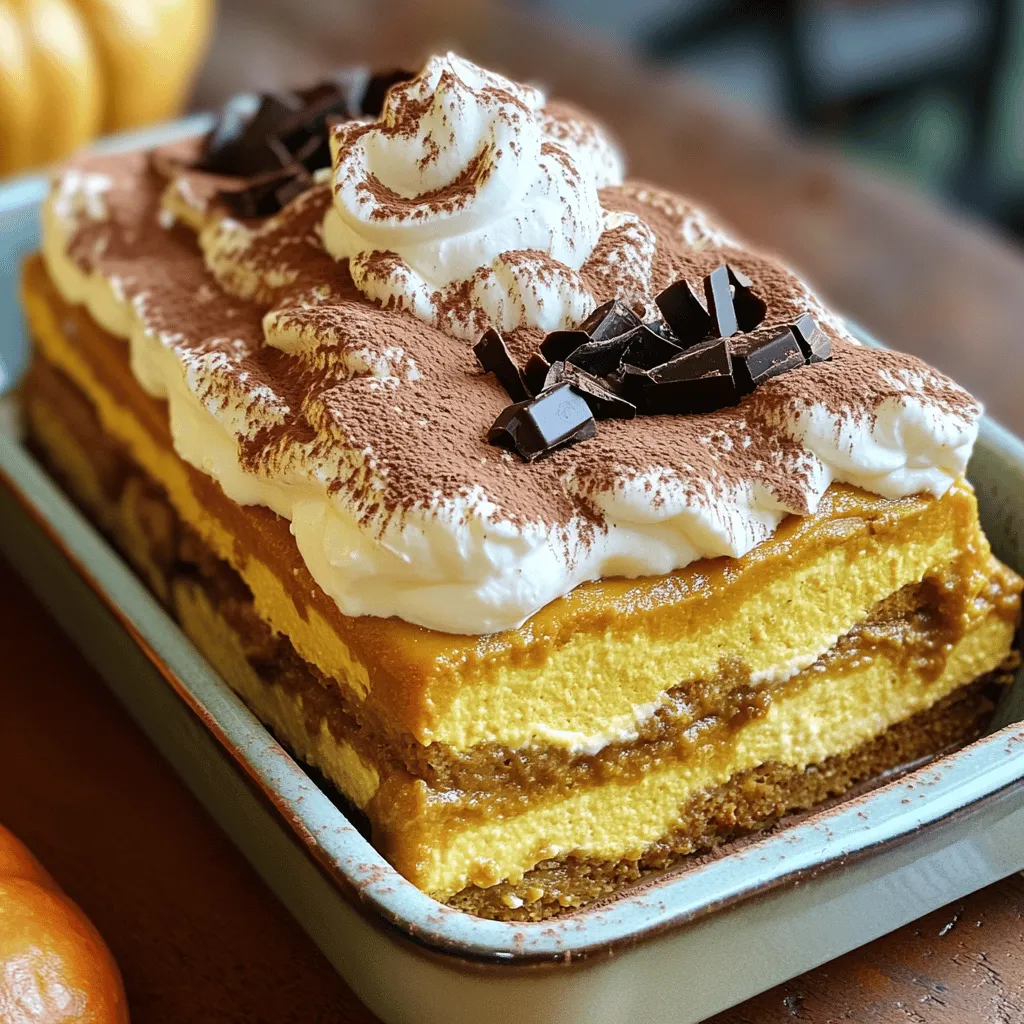
Craving a dessert that perfectly blends fall flavors? Look no further than Pumpkin Spice Tiramisu! This delightful recipe combines rich...
READ MORE →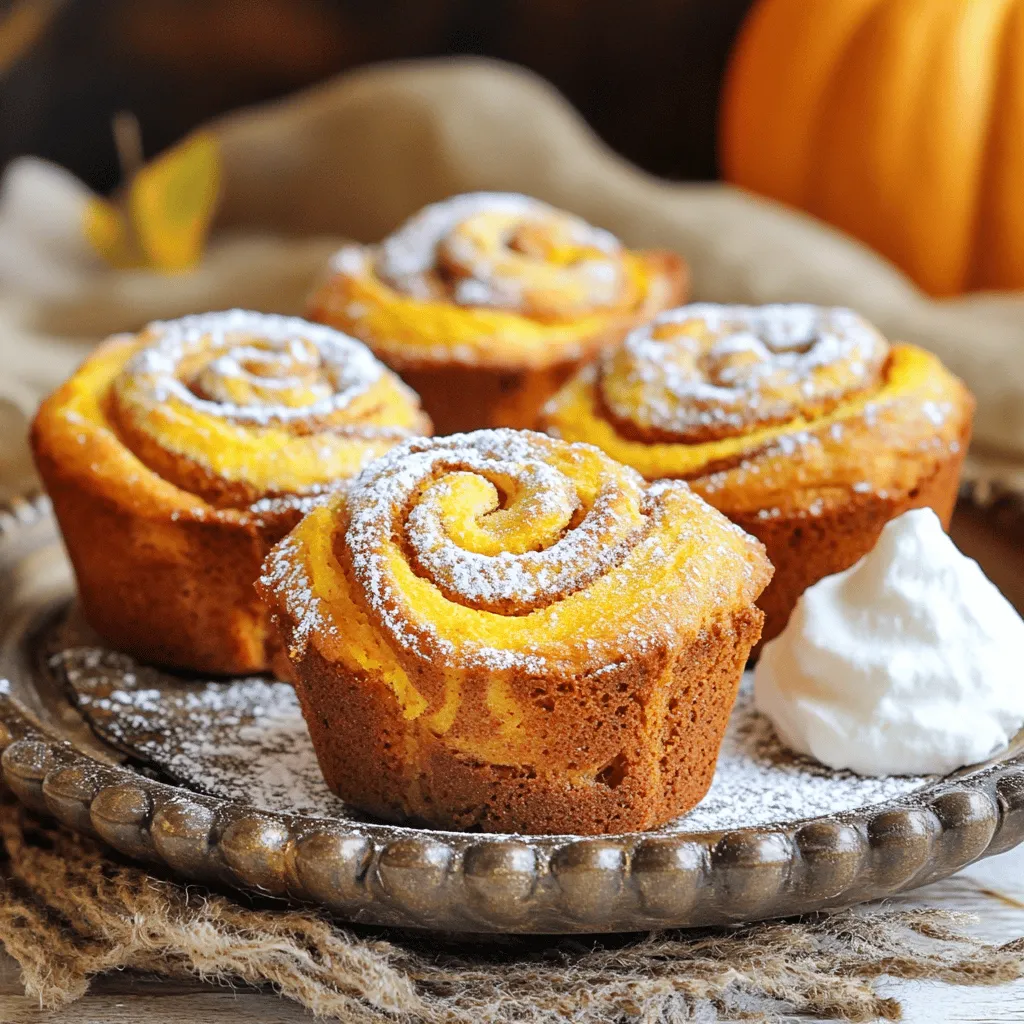
Looking for a cozy fall treat? You’ll love my Mini Pumpkin Bread with Cinnamon Swirl! This delightful recipe packs rich...
READ MORE →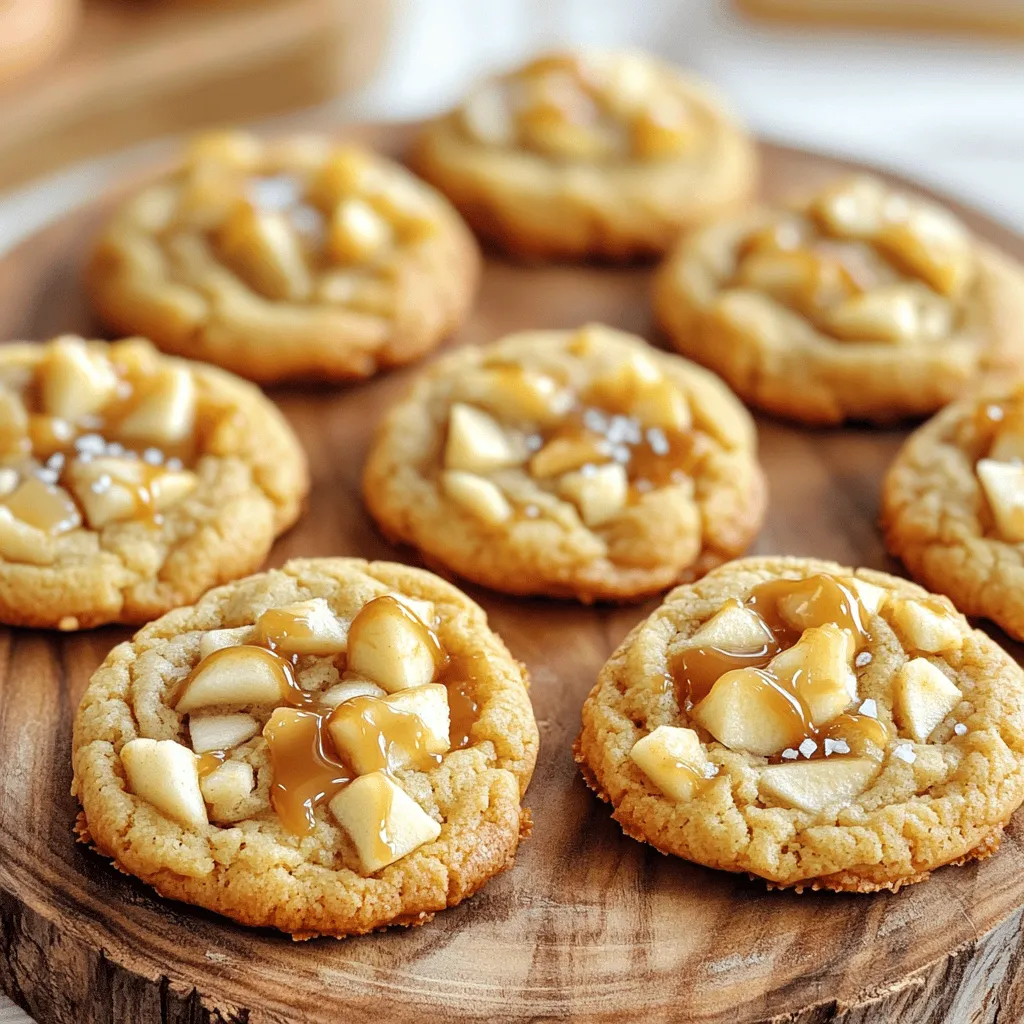
Ready to bake a sweet treat that captures the essence of fall? My Caramel Apple Cookies are the perfect blend...
READ MORE →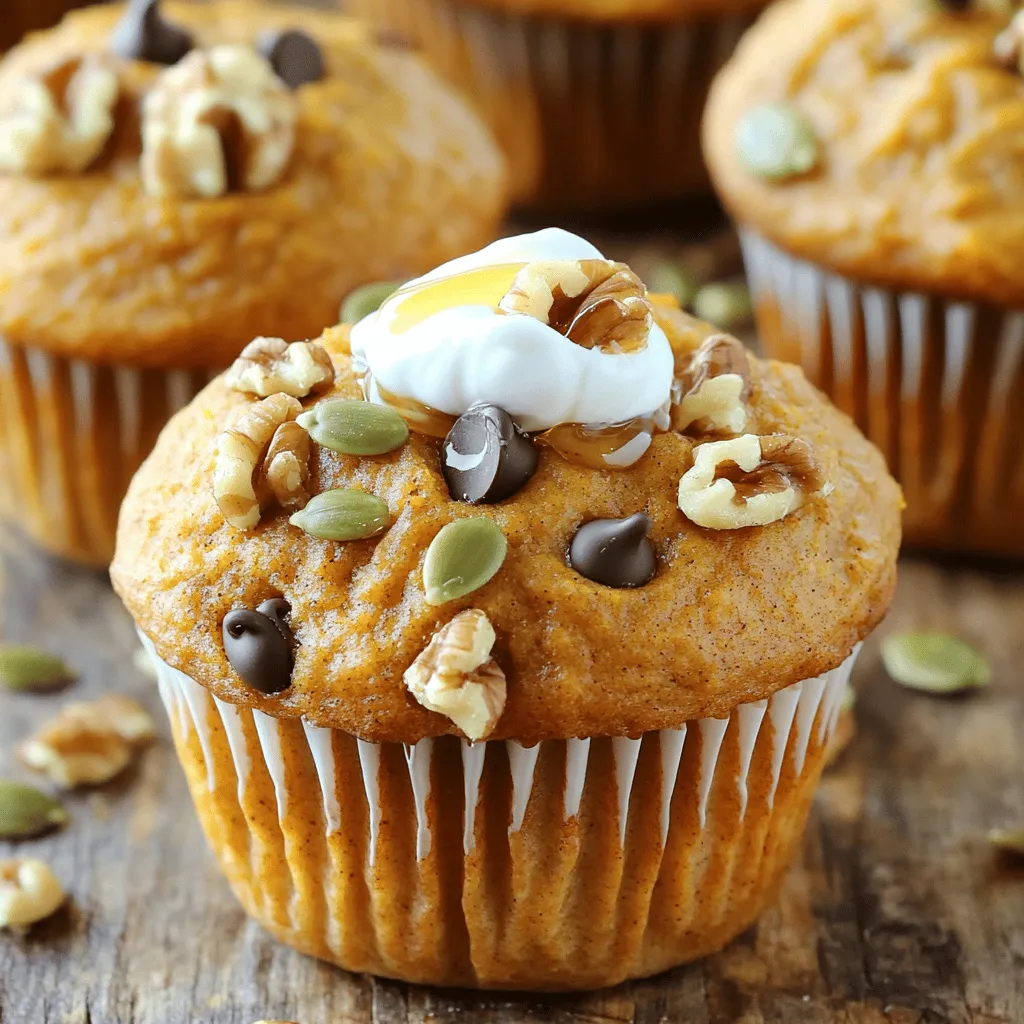
Have you tried Protein Packed Greek Yogurt Pumpkin Muffins? If not, you’re in for a treat! These muffins are tasty...
READ MORE →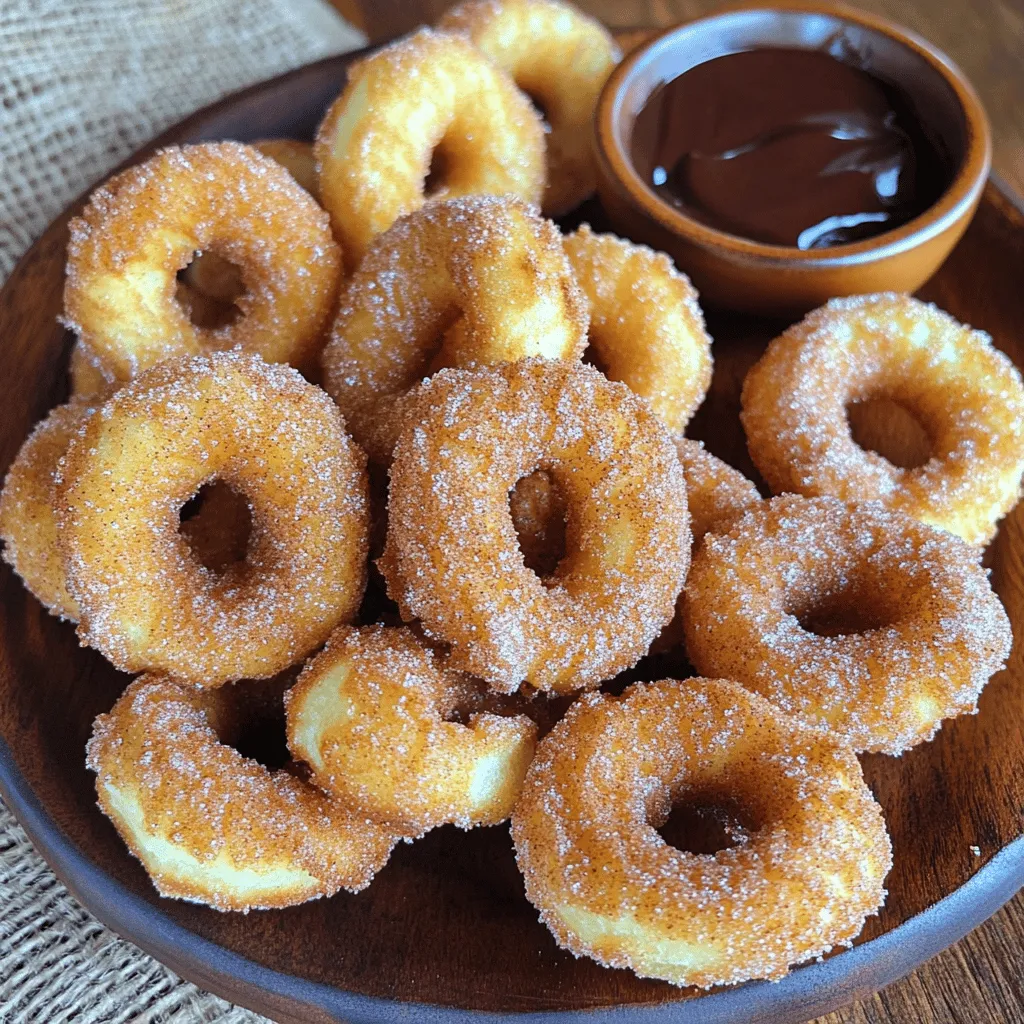
Looking for a dessert that’s sure to please everyone? Look no further! Churro Donut Bites blend the best of both...
READ MORE →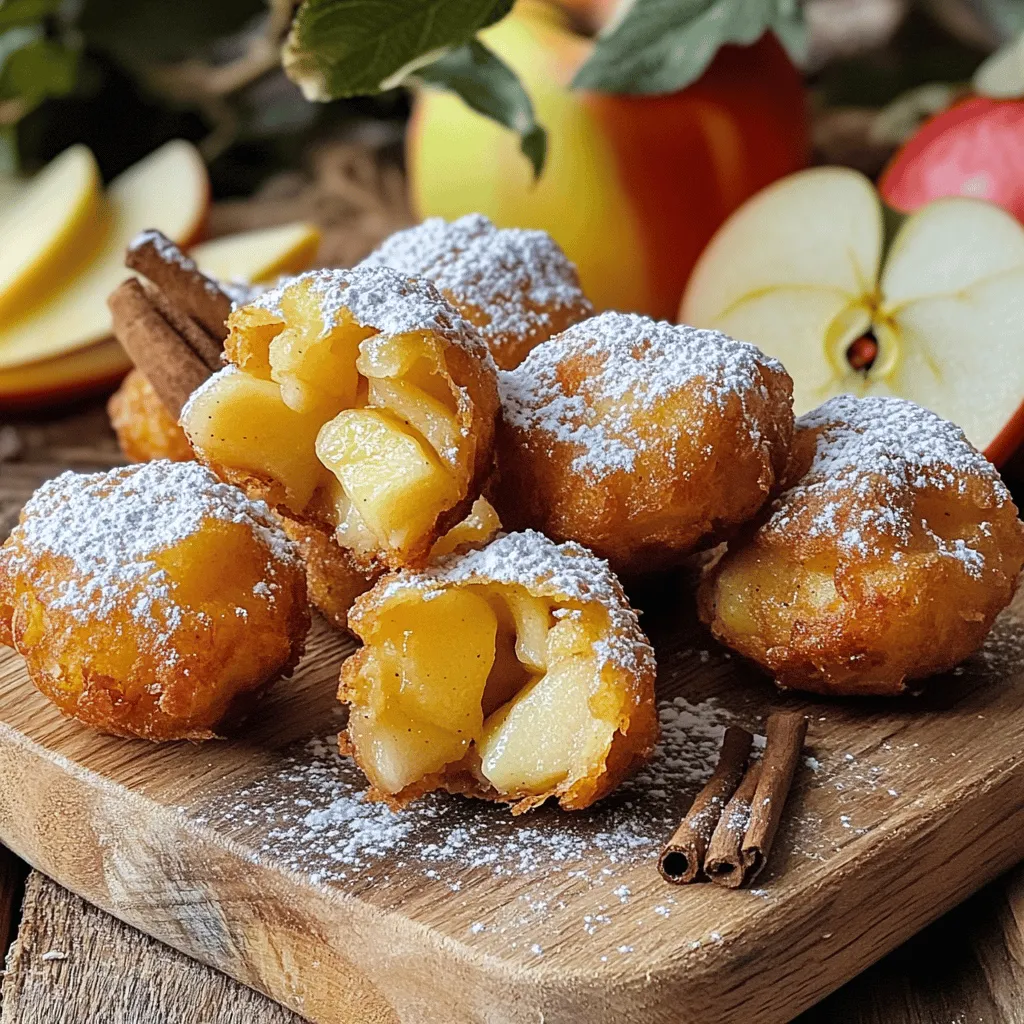
Are you ready to indulge in a warm, crispy treat that’s bursting with flavor? Apple Fritter Bites bring the joy...
READ MORE →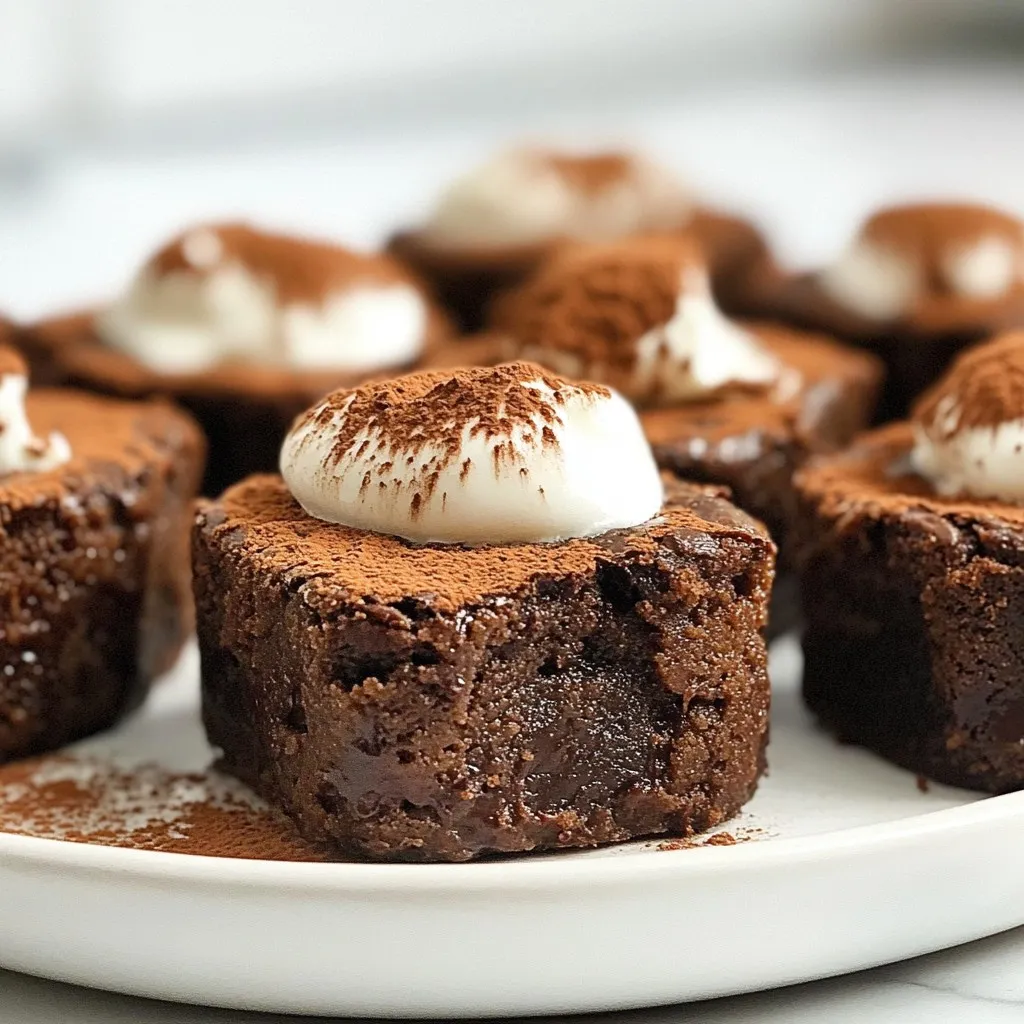
Looking for a sweet yet healthy snack? These Chocolate Protein Brownie Bites are simple to make and bursting with flavor....
READ MORE →