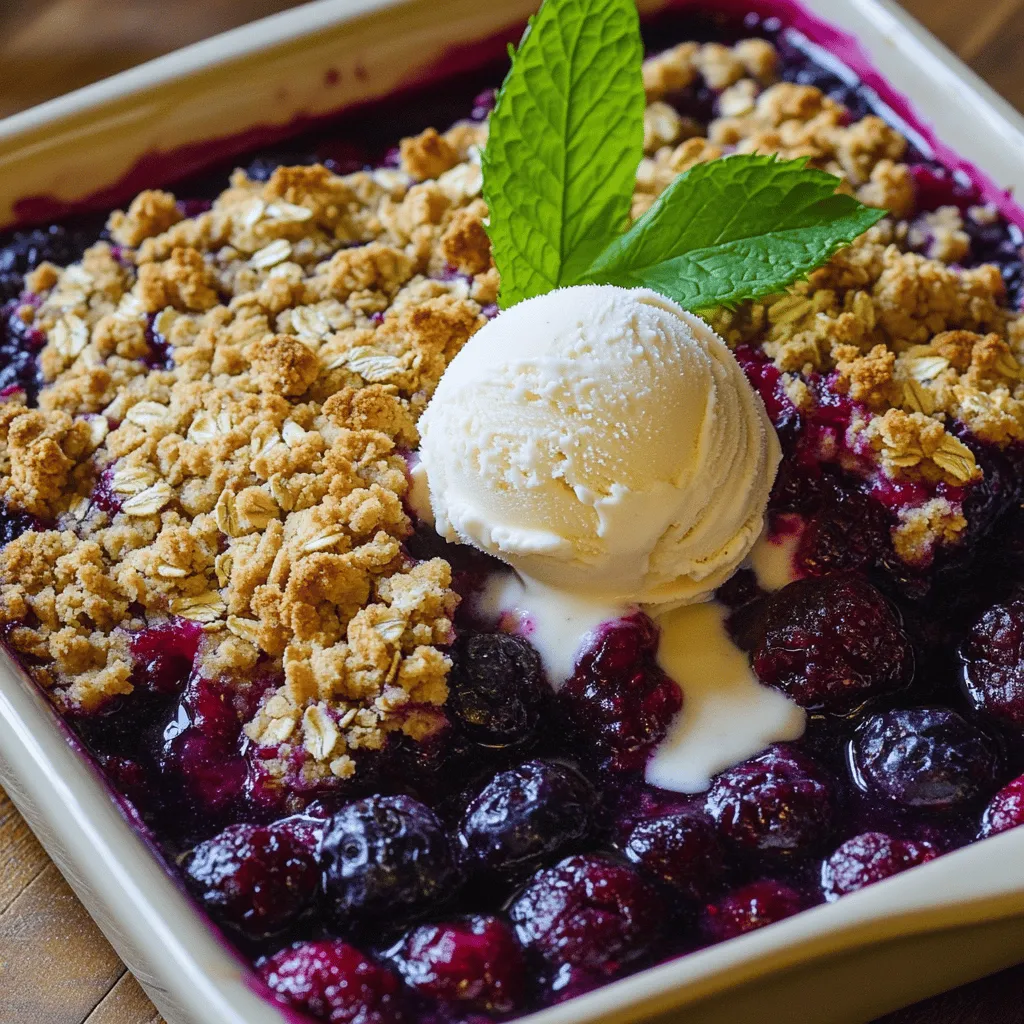
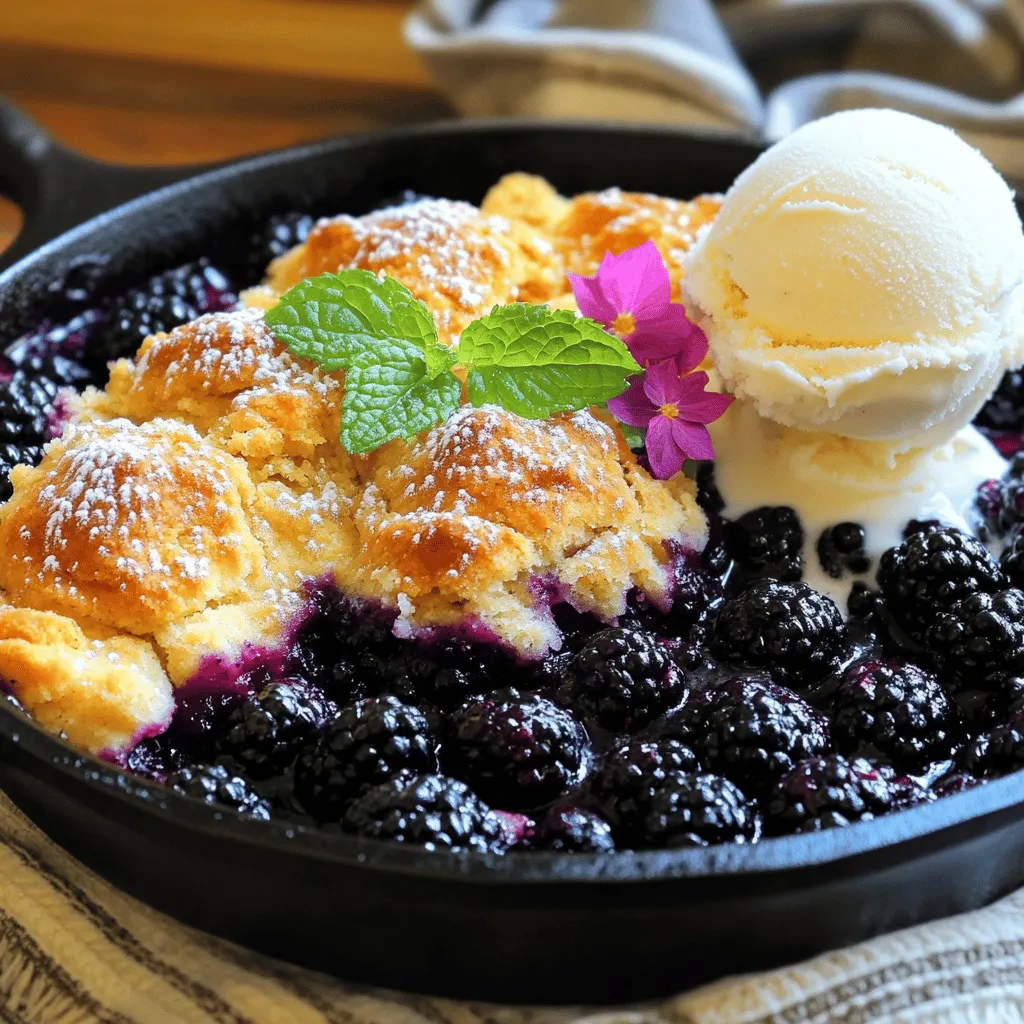
Desserts

For this pie, you need fresh strawberries. Use 2 cups of ripe strawberries. Make sure they are hulled and halved. This gives each bite a sweet, juicy burst. You have choices for the pie crust. You can use a pre-made pie crust for ease. Store-bought options save time. If you prefer, make your own crust from scratch. Both work great for this recipe. You will also need a few more ingredients: - 1 cup granulated sugar - 2 tablespoons cornstarch - 1 teaspoon fresh lemon juice - 1 tablespoon unsalted butter, cut into small pieces - Whipped cream for topping (optional) These ingredients blend well together. The sugar sweetens the strawberries, while cornstarch thickens the filling. Lemon juice adds a bright touch. Butter enhances the flavor as it bakes. If you like, add whipped cream for a creamy finish. For the full recipe, check the details above. First, you need to preheat your oven to 400°F (200°C). This step is key. A hot oven helps the crust become crisp and golden. Next, grab a medium saucepan. Combine 1 cup of the hulled and halved strawberries, sugar, cornstarch, and lemon juice. Stir well to mix everything. This keeps the cornstarch from clumping. Place the saucepan over medium heat. Cook the mixture while stirring constantly. You want it to thicken and bubble, which takes about 5 to 7 minutes. Once it thickens, take it off the heat. Let it cool for a few minutes. After it cools, fold in the remaining strawberries gently. Be careful not to crush them. Now, pour your vibrant strawberry filling into the pre-made pie crust. Spread it out evenly. Dot the top with small pieces of butter to add flavor. Place the pie in your preheated oven. Bake for 15 to 20 minutes, or until the crust looks golden brown. When done, let the pie cool at room temperature for at least 30 minutes. This helps the filling set just right. If you like, serve each slice with whipped cream for a sweet touch. Enjoy this fresh and easy strawberry pie! For more details, check the Full Recipe. When picking strawberries, look for bright red ones. They should be firm but not hard. Check for a sweet smell; this shows they are ripe. Avoid any that are soft or have dark spots. Fresh berries make your pie taste better. A good pie crust is key to a great pie. If you use a store-bought crust, choose one that is ready to bake. If you make your own, keep your butter cold. This helps create a flaky texture. Roll the dough evenly and crimp the edges for style. Pre-bake the crust for a few minutes to avoid sogginess. You can boost flavor by adding zest from a lemon or orange. A little vanilla extract also adds depth. For a twist, mix in some basil or mint with the strawberries. These herbs bring a fresh taste to your pie. Don't forget the whipped cream on top for extra joy. For the full recipe, check out the detailed steps provided. {{image_4}} You can mix sweet strawberries with tart rhubarb for a fun twist. This combo gives you the best of both worlds. Use equal parts strawberries and rhubarb for great flavor. The sweetness of strawberries balances the tang of rhubarb. Make sure to adjust the sugar. You may need more sugar for the rhubarb to taste great. Do you love chocolate? Then, this pie is for you! You can add melted dark chocolate to the filling. Just mix it in after you thicken the strawberry filling. The rich chocolate enhances the sweet flavor of strawberries. For an extra treat, layer some chocolate ganache on the crust before adding the strawberries. You can easily make a vegan version of this pie. Use a vegan pie crust instead of a regular one. Replace butter with coconut oil or a vegan butter alternative. For sweetening, use maple syrup or agave instead of sugar. This way, everyone can enjoy this sweet delight without worry. Try these variations to add fun to your Easy Fresh Strawberry Pie. They can change the flavor but keep the joy of summer alive. For the full recipe, check the link provided. To keep your leftover pie fresh, cover it with plastic wrap. You can also use aluminum foil. Place it in the fridge. This keeps the pie from drying out. Enjoy the pie within three days for the best taste. If you have whipped cream on top, add it just before serving. This keeps it fresh and fluffy. You can freeze strawberry pie for later. First, let the pie cool completely. Wrap it tightly in plastic wrap. Then, cover it with aluminum foil. This prevents freezer burn. Label the pie with the date. It can stay in the freezer for up to two months. To enjoy, thaw it in the fridge overnight before serving. Reheat your pie in the oven for the best taste. Preheat the oven to 350°F (175°C). Remove any plastic wrap or foil. Place the pie on a baking sheet. Heat it for about 10 to 15 minutes. This warms the pie without making it soggy. Serve warm for a delightful treat! If you love whipped cream, add it on top after reheating for a tasty touch. Yes, you can use frozen strawberries. Just thaw them first and drain excess juice. This step helps keep your pie from getting soggy. Frozen berries may change the texture slightly but still taste great. They can work well in a pinch if fresh strawberries are not available. Your pie is done when the crust turns golden brown. The filling should bubble slightly, which shows it is hot and set. A good way to check is to look for a golden edge on the crust. If it looks nice and brown, it’s ready! You can serve your pie with whipped cream for a rich touch. Vanilla ice cream also pairs well with the sweet strawberries. Fresh mint leaves can add a nice pop of color and flavor. You can even drizzle some chocolate sauce for an extra treat! For more fun ideas, check the Full Recipe. This blog post covered how to make an easy fresh strawberry pie. We explored fresh strawberries, pie crusts, and tasty extras. You learned step-by-step how to prepare and bake your pie. I shared tips for picking ripe strawberries and making a great crust. We also looked at fun variations, storage tips, and common questions. Now, you have everything you need to bake a delicious pie. Enjoy every slice and share with friends!
Easy Fresh Strawberry Pie Delicious Summer Delight
Looking for a sweet treat that screams summer? My Easy Fresh Strawberry Pie delivers fresh flavors and simple steps. With juicy strawberries and a flaky
Here is a complete list of the ingredients you need for peach crisp. Each item plays a big role in making this dessert tasty. - 4 cups ripe peaches, peeled and sliced - 1/2 cup granulated sugar - 1 tablespoon fresh lemon juice - 1 teaspoon ground cinnamon - 1 cup rolled oats - 1/2 cup all-purpose flour - 1/2 cup packed brown sugar - 1/2 cup cold unsalted butter, cubed - 1/4 teaspoon fine salt - 1/4 cup chopped pecans (optional) You want to use ripe peaches. They should be sweet and juicy. The granulated sugar helps to sweeten the peaches. The lemon juice adds a nice zing. Ground cinnamon gives a warm flavor that pairs well with the fruit. For the topping, rolled oats are key. They add texture and heartiness. All-purpose flour helps bind the topping. Brown sugar adds a rich flavor. Cold butter is crucial for a nice crumble. It gives the topping a flaky feel when baked. If you like nuts, add chopped pecans for crunch. They enhance the taste and give it a rustic feel. For the Full Recipe, check out the next section where I guide you through each step of making this delightful dessert. Start by preheating your oven to 350°F (175°C). This step is key for even baking. In a large bowl, mix the sliced peaches, granulated sugar, lemon juice, and ground cinnamon. Toss gently until the peaches are coated well. Once mixed, spread the peach filling evenly in a greased 9x13-inch baking dish. In a separate bowl, combine rolled oats, all-purpose flour, brown sugar, and fine salt. Add the cold, cubed unsalted butter. Use your fingers or a pastry cutter to mix until it looks like coarse crumbs. Keep some small butter chunks for that perfect texture. If you like, add chopped pecans to your topping mixture for extra crunch. Evenly sprinkle the oat mixture over the peach filling in the baking dish. Make sure to cover all the peaches. Put the dish in your preheated oven. Bake for about 35-40 minutes. Look for a golden-brown topping and bubbling peaches around the edges. After baking, let your peach crisp cool slightly. Serve it warm in bowls. A scoop of vanilla ice cream on the side makes it even better. Drizzle with honey and sprinkle some cinnamon for extra flavor. Enjoy! For the full recipe, refer to the Peachy Dream Crisp. To get the best crisp, aim for a mix of textures. Use ripe peaches for sweetness. When you slice them, make sure they are not too thin. This keeps them juicy. For the topping, use cold butter. It helps create a nice crumble. Mix until you see some small chunks of butter. This adds to the crispiness. When picking peaches, feel them gently. They should have a slight give. Look for peaches that are golden and fragrant. Avoid peaches with bruises or dark spots. Freestone peaches are easier to slice. They separate from the pit cleanly. Clingstone peaches can work too, but they can be trickier to slice. Try adding a pinch of nutmeg or ginger for a twist. These spices add warmth and depth to the flavor. If you love a bit of crunch, sprinkle in some chopped pecans or walnuts. They pair well with peaches. You can also try adding a splash of vanilla extract to the peach mix. It brings out the sweet taste even more. Taste your peaches before adding sugar. If they are sweet, use less sugar. If they are tart, add more. You want to balance the flavors. After mixing in the sugar, let the peach filling sit for a few minutes. This helps the juices to flow, making the crisp even better. For a fun twist, you can swap granulated sugar with honey or maple syrup. {{image_4}} You can easily make this peach crisp gluten-free. Swap the all-purpose flour for almond flour or gluten-free flour. These options work well and keep the crisp delicious. Ensure your oats are certified gluten-free to avoid any cross-contamination. With these simple swaps, you can enjoy the same great taste without the gluten. Want to mix things up? You can add other fruits like blueberries, raspberries, or apples. Each fruit brings a unique flavor, making your crisp even better. You can also try different nuts. Walnuts or almonds add a nice crunch and flavor. Just remember to adjust the sugar if you use sweeter fruits. Cinnamon is a classic choice, but feel free to experiment. Try nutmeg or ginger for a warm twist. These spices can enhance the peach flavor and give it a new twist. You can even add a splash of vanilla extract or almond extract for a lovely aroma. Each option offers a new taste adventure with every bite. After enjoying your Peachy Dream Crisp, let it cool completely. Transfer any leftovers to an airtight container. Store the container in the fridge for up to four days. This keeps the crisp fresh and tasty. Make sure to cover it well to prevent drying out. You can also keep the peach filling and topping separate if you prefer. If you want to save your Peach Crisp for later, freezing is a great option. First, let it cool down to room temperature. Wrap the dish tightly in plastic wrap, then cover with aluminum foil. This will help prevent freezer burn. You can freeze it for up to three months. When you’re ready to enjoy it, just thaw it overnight in the fridge. To reheat your Peach Crisp, preheat your oven to 350°F (175°C). Remove any plastic wrap before placing it in the oven. Bake for about 20 minutes, or until it’s hot all the way through. You can also microwave individual servings for quicker heating. Just be careful not to overheat, as this can make the topping soggy. Enjoy your crisp warm for the best taste! Yes, you can use canned or frozen peaches. If using canned, drain them well. For frozen peaches, thaw and drain excess water. This ensures the crisp won't be too watery. Both options can taste great, but fresh peaches give the best flavor. Peach Crisp can last 3 to 5 days in the fridge. Make sure to store it in an airtight container. It tastes good even after a few days, but the topping may lose some crunch. Yes, you can prepare the Peach Crisp ahead of time. Assemble it the day before and store it in the fridge. Just bake it when you are ready to serve. This makes it easy for gatherings or busy days. Peach Crisp pairs well with vanilla ice cream or whipped cream. You can also serve it with yogurt for a lighter option. A drizzle of honey or a sprinkle of cinnamon enhances the flavor even more. You can tell if Peach Crisp is done by looking at the topping. It should be golden brown and crispy. You will also see bubbles around the edges. This usually takes about 35 to 40 minutes in the oven. This blog post covers how to make a delicious peach crisp. We explored the simple ingredients, from ripe peaches to the perfect topping. I shared step-by-step instructions that guide you through baking it right. Tips on texture and flavor helped you elevate your dish. We even discussed variations and storage. In the end, peach crisp is an easy dessert that is sure to please. You can enjoy it warm or with ice cream. Whether you stick to the recipe or try your own twist, enjoy every bite!
Peach Crisp Recipe Simple and Delicious Dessert
Craving a treat that’s both simple and delicious? This Peach Crisp recipe brings the flavors of summer right to your table. With juicy peaches and
To bake a Vintage Green Tomato Cake, gather these main ingredients: - 2 cups finely grated green tomatoes - 2 cups all-purpose flour - 1 ½ cups granulated sugar - 1 cup vegetable oil - 3 large eggs - 1 teaspoon vanilla extract - 1 teaspoon baking soda - 1 teaspoon baking powder - ½ teaspoon salt - 1 teaspoon ground cinnamon - ½ teaspoon ground nutmeg These ingredients create a moist and flavorful cake. The green tomatoes add a unique twist. You can personalize your cake with these optional ingredients: - 1 cup chopped walnuts - 1 cup shredded coconut Adding walnuts gives a nice crunch. Coconut adds sweetness and a tropical touch. Feel free to mix and match based on your taste. If you want to adapt this recipe, here are some ideas: - Swap vegetable oil for applesauce for a healthier option. - Use flaxseed meal mixed with water as an egg replacement. - Replace all-purpose flour with a gluten-free blend if needed. These swaps allow everyone to enjoy this delightful cake. Don't hesitate to experiment and find what works best for you. For the complete recipe, check the Full Recipe. 1. Preheat the Oven: Start by setting your oven to 350°F (175°C). Grease two 9-inch round cake pans with butter or cooking spray. Then dust them with flour to keep the cakes from sticking. 2. Mix Sugar and Oil: In a large bowl, pour in 1 ½ cups of granulated sugar and 1 cup of vegetable oil. Use a whisk or mixer to blend these together until smooth. 3. Incorporate Eggs: Crack in 3 large eggs one by one. Mix well after adding each egg. Then, add 1 teaspoon of vanilla extract and stir to combine. 4. Combine Dry Ingredients: In another bowl, whisk together 2 cups of finely grated green tomatoes, 1 teaspoon of baking soda, 1 teaspoon of baking powder, ½ teaspoon of salt, 1 teaspoon of ground cinnamon, and ½ teaspoon of ground nutmeg. Make sure these ingredients are well mixed. 5. Combine Wet and Dry Mixtures: Slowly fold the dry mixture into the wet mixture. Use a spatula to stir gently. Mix until the batter comes together but don't overmix. 6. Add Optional Ingredients: If you like, fold in 1 cup of chopped walnuts and 1 cup of shredded coconut. This adds a nice crunch and flavor to your cake. 7. Fill the Pans: Divide the batter evenly between the two prepared pans. Smooth the tops with a spatula for even baking. 8. Bake: Place the pans in the oven. Bake for 30-35 minutes. To check if they’re done, insert a toothpick into the center. It should come out clean or with a few crumbs. 9. Cool the Cakes: After baking, take the pans out of the oven. Let the cakes cool in the pans for about 10 minutes. Then turn them out onto wire racks to cool completely. 10. Frost the Cake: Once the cakes are cool, you can frost them. Use cream cheese frosting or any other frosting you like. This adds a rich finish to your cake. This Vintage Green Tomato Cake is simple to make and delicious to share. For the full recipe, check the earlier section. Enjoy each bite! Grating tomatoes can be tricky. Here’s how to do it right. First, wash the tomatoes well. Remove any stems or bad spots. Use a box grater or a food processor. If using a grater, hold it over a bowl. Grate the tomatoes on the largest holes. This keeps the texture nice. If you use a food processor, pulse gently. You want small pieces, not puree. A dense cake can be a letdown. Here are some ways to keep it light. Always measure your ingredients carefully. Too much flour or sugar can weigh the cake down. Mix your wet and dry ingredients separately first. When you combine them, do it gently. Overmixing can lead to a tough cake. Make sure your baking powder and soda are fresh. Old leavening agents can make your cake dense, too. Choosing the right frosting can elevate your cake. Cream cheese frosting pairs well with vintage green tomato cake. It adds a tangy flavor. You can also try a simple vanilla buttercream. For a fun twist, add a bit of lemon zest to it. To frost your cake, let it cool completely. Use a spatula to spread the frosting evenly. You can add chopped nuts or coconut on top for extra flair. For a rustic look, use a knife to create swirls in the frosting. These tips will help you master the art of making vintage green tomato cake. For the full recipe, check out the detailed instructions above. {{image_4}} You can choose different frostings to match your taste. Cream cheese frosting is a classic choice. It adds a tangy flavor that pairs well with the cake. You can also try chocolate frosting for a rich twist. For a lighter option, use whipped cream. You can flavor the whipped cream with vanilla or almond extract. Each frosting gives a unique touch to the cake. If you want to change the taste, add spices like ginger or cloves. These spices will give the cake a warm flavor. You can also mix in dried fruits like raisins or cranberries for added sweetness. If you do not like nuts, leave out the walnuts. You can swap them for seeds like sunflower seeds or pumpkin seeds. This keeps the crunch while changing the flavor. To make this cake gluten-free, use a gluten-free flour mix. Many blends work well in baking. Just make sure it has a good rise. You can also add a bit of xanthan gum to help with texture. This will keep your cake light and fluffy. Follow the same instructions in the Full Recipe for the best results. To keep your Vintage Green Tomato Cake fresh, wrap it tightly in plastic wrap. You can also place it in an airtight container. Store the cake at room temperature for up to three days. If you want to keep it longer, refrigeration is a good option. Just remember, chilled cake can dry out faster. You can freeze this cake to enjoy later. First, let the cake cool completely. Then, wrap each layer in plastic wrap. Place the wrapped layers in a freezer-safe bag or container. This cake will stay good for up to three months in the freezer. When you're ready to eat, thaw it in the fridge overnight. To reheat your cake, preheat the oven to 350°F (175°C). Remove any frosting and place the cake on a baking sheet. Heat for about 10 to 15 minutes. Keep an eye on it to avoid drying out. If you want, you can add fresh frosting after reheating for extra flavor. Enjoy your cake warm or at room temperature! Vintage Green Tomato Cake is a unique dessert. It uses green tomatoes as the main ingredient. This cake is sweet, moist, and full of flavor. The green tomatoes add a slight tang, which makes the cake special. It is often spiced with cinnamon and nutmeg. This gives it a warm, cozy taste. Many people enjoy this cake for its surprise ingredient and great taste. You can find the Full Recipe above. Using ripe tomatoes can change the cake a lot. Ripe tomatoes are sweeter and less tangy. This means your cake might taste different. It may also be more watery, affecting the texture. I recommend sticking to green tomatoes for the best flavor. Green tomatoes keep the cake moist and add a unique twist. To check if the cake is done, use a toothpick. Stick it in the center of the cake. If it comes out clean or with a few crumbs, the cake is ready. This usually takes about 30 to 35 minutes. If the toothpick has wet batter, bake it a bit longer. Always keep an eye on the cake as it bakes for the best results. We covered the key steps to make a Vintage Green Tomato Cake. You learned about ingredients, preparation, baking, and storage. I shared tips and tricks to avoid common mistakes. You can also explore fun variations and frosting ideas. Remember, baking is about experimenting and having fun. Enjoy your cake and share it with others. Happy baking!
Vintage Green Tomato Cake Delightful and Simple Recipe
Have you ever thought about using green tomatoes in a cake? Vintage Green Tomato Cake is a fun twist on a classic dessert. This delightful
When I think about summer picnics, I picture bright colors and fresh flavors. Desserts should be light and fun. Here are some ideas for your picnic: - Chilled Lemon Basil Sorbet - Strawberry Coconut Popsicles - Raspberry Lemonade Cupcakes These desserts are not just tasty; they are easy to make too. Each one brings a touch of summer to your picnic. You can make them ahead of time, so you can relax and enjoy the day. Summer is about fun, not stress. Easy recipes let you enjoy your time outside. You want to spend more time with friends and family and less time in the kitchen. Simple recipes are quick and need few steps. For example, the Chilled Lemon Basil Sorbet takes only 15 minutes to prep. You only need to freeze it afterward. This way, you can prepare dessert while making other picnic plans. Choosing the right desserts for a picnic is key. Here are some tips to help you decide: - Think about the weather: Choose desserts that won't melt or spoil easily. Popsicles are great for hot days. - Make it portable: Cupcakes and sorbets can travel well in containers. - Keep it small: Bite-sized treats are fun and easy to share. Remember, you want desserts that are easy to pack and serve. Keep these tips in mind, and your picnic will be a hit! When planning your summer picnic, you need some key ingredients for tasty desserts. Here’s a list for three delightful recipes: Chilled Lemon Basil Sorbet - 2 cups water - 1 cup granulated sugar - Zest of 2 medium lemons - 1 cup freshly squeezed lemon juice - 10 fresh basil leaves, finely chopped - Pinch of sea salt Strawberry Coconut Popsicles - 2 cups fresh strawberries, hulled and sliced - 1 cup creamy coconut milk - 2 tablespoons honey or agave syrup - 1 teaspoon pure vanilla extract - Optional: shredded coconut for garnish Raspberry Lemonade Cupcakes - 1 1/2 cups all-purpose flour - 1 cup granulated sugar - 1 teaspoon baking powder - 1/2 teaspoon baking soda - 1/4 teaspoon fine sea salt - 1/2 cup unsalted butter, softened - 2 large eggs - 1/2 cup buttermilk - Zest of 1 medium lemon - 1/4 cup freshly squeezed lemon juice - 1 cup fresh raspberries, lightly mashed You can easily swap out some ingredients. For those who need gluten-free options, try using almond or coconut flour instead of all-purpose flour in cupcakes. Use maple syrup instead of honey for a vegan option in popsicles. If you have a dairy allergy, coconut milk works great in the sorbet too! Always check labels to stay safe. Fresh ingredients make a big difference. Visit local farmers' markets for vibrant strawberries, lemons, and fresh herbs. Look for organic options when possible. Fresh produce not only tastes better but also supports local farmers. Enjoy the season’s best by choosing what’s ripe and ready. You’ll notice the flavor in every bite of your picnic desserts! 1. In a medium saucepan, mix 2 cups of water, 1 cup of sugar, and the zest of 2 lemons. 2. Heat over medium, stirring until the sugar dissolves and it starts to simmer. 3. Remove from heat and let it cool to room temperature. 4. Stir in 1 cup of lemon juice, 10 chopped basil leaves, and a pinch of salt. 5. Pour the mixture into a shallow dish and freeze it. 6. After 1 hour, stir with a fork to break up ice crystals. 7. Repeat stirring every 30 minutes for about 3-4 hours. 8. Once fluffy, scoop into bowls and top with a basil leaf, if desired. [Full Recipe] 1. Blend 2 cups of hulled strawberries, 2 tablespoons of honey, and 1 teaspoon of vanilla until smooth. 2. Pour the mixture into a bowl and set aside. 3. Blend 1 cup of coconut milk until smooth. 4. In popsicle molds, layer the strawberry mix halfway, then add coconut milk on top. 5. Insert sticks and freeze for at least 4 hours. 6. To remove the popsicles, run warm water over the molds for a few seconds. 7. Enjoy with shredded coconut for a fun touch! 1. Preheat your oven to 350°F and line a cupcake tray with liners. 2. In a bowl, whisk together 1.5 cups flour, 1 cup sugar, 1 teaspoon baking powder, 0.5 teaspoon baking soda, and 0.25 teaspoon salt. 3. In another bowl, cream 0.5 cup butter until fluffy. 4. Mix in 2 eggs, 0.5 cup buttermilk, the zest from 1 lemon, and 0.25 cup lemon juice. 5. Slowly add the dry mix and stir until just combined. 6. Gently fold in 1 cup of lightly mashed raspberries. 7. Fill cupcake liners 2/3 full and bake for 18-20 minutes. 8. Cool on a rack and top with whipped cream or whole raspberries for a treat! {{image_4}} Packing desserts for a picnic needs some thought. Keep things simple and safe. Use airtight containers to prevent spills. Choose sturdy, lightweight options. This makes carrying easier. Here are some tips: - Use small jars for layered desserts. They look great and are easy to serve. - Pack cupcakes in a cupcake carrier. It keeps them safe and neat. - For popsicles, use insulated bags. This helps keep them frozen longer. Serve desserts with style. Make each bite special. Here are some ideas: - Bring small plates and forks. This makes sharing fun. - Use colorful napkins for a cheerful touch. They brighten up any picnic. - Add fresh mint or basil to desserts. It gives a pop of color and flavor. Keeping desserts fresh is key. Here are ways to ensure they stay tasty: - Use ice packs in your cooler. This keeps everything cold. - Avoid direct sunlight. Find a shaded spot for your dessert table. - Keep whipped cream and frostings in separate containers. Add them just before serving. For a refreshing choice, try the chilled lemon basil sorbet. It’s bright and perfect for hot days. Check the full recipe for details! You can change the flavors of sorbet to fit your taste. Instead of lemon, try using fresh berries, like strawberries or blueberries. Combine watermelon and mint for a refreshing twist. For a tropical flavor, mix mango with lime. Each of these options brings a new zest to your picnic. Popsicles are fun and easy to make. Besides strawberries and coconut, you can use other fruits. Blend ripe peaches with yogurt for a creamy treat. Mix kiwi and pineapple for a sweet and tangy flavor. For a refreshing option, use cucumber and mint. These fruity combinations will keep everyone cool on a hot day. Cupcakes are perfect for summer. Change the frosting to match your cupcake flavor. For raspberry lemonade cupcakes, try lemon cream cheese frosting. If you make chocolate cupcakes, a light vanilla frosting pairs well. For a fun touch, add sprinkles or fresh fruit on top. Each frosting option can make your cupcakes look and taste amazing. Try these variations to make your picnic desserts stand out. You can find the full recipe for Chilled Lemon Basil Sorbet, Strawberry Coconut Popsicles, and Raspberry Lemonade Cupcakes in the previous sections. These desserts usually last about 2 to 3 days. If you store them in the fridge, they stay fresh. For the sorbet, keep it in the freezer. It can last up to a week when well-covered. Yes, making these desserts ahead is a great idea! Most of them taste better after a day in the fridge. You can whip up the strawberry coconut popsicles the night before. Just freeze them overnight for the best results. Use airtight containers for the best results. For cupcakes, a cupcake carrier works great. For sorbets or popsicles, a cooler with ice packs keeps them frozen longer. Make sure the lids fit snugly to avoid spills. Check out the Full Recipe to learn how to make these delicious desserts! As we wrap up, remember these 38 desserts make your summer picnic special. Easy-to-prepare recipes keep it simple, and tips help you choose and pack the best treats. Fresh summer ingredients boost flavor, and the step-by-step guide ensures success. Variations let you customize your favorites. Enjoy these sweet moments with friends and family. Keep dessert delicious and fun, and your picnic will surely be a hit.
38 Desserts Perfect for a Summer Picnic Feast
Summer picnics call for tasty bites that cool us down and bring joy. I’ve gathered 38 delicious desserts perfect for your next outdoor feast. From
For a tasty peach crumble, you will need: - 6 ripe peaches, pitted and sliced - 1/4 cup granulated sugar - 1 tablespoon fresh lemon juice - 1 teaspoon pure vanilla extract - 1 teaspoon ground cinnamon - 1 cup rolled oats - 1/2 cup all-purpose flour - 1/2 cup packed brown sugar - 1/4 teaspoon sea salt - 1/2 cup unsalted butter, melted - 1/2 teaspoon ground nutmeg Each ingredient plays a key role in your peach crumble: - Peaches bring sweetness and juiciness. - Granulated sugar adds sweetness and helps caramelize the fruit. - Lemon juice balances the sweetness with a bit of tartness. - Vanilla extract adds depth to the flavor. - Cinnamon gives warmth and spice. - Rolled oats create a hearty crumble topping. - All-purpose flour helps bind the topping together. - Brown sugar adds moisture and richness. - Sea salt enhances all the flavors. - Unsalted butter creates a rich and crumbly texture. - Nutmeg adds a hint of warmth and depth. You can easily swap some ingredients for different flavors: - Use nectarines instead of peaches for a similar taste. - Replace granulated sugar with honey or maple syrup for a unique sweetness. - If you don't have lemon juice, try lime juice for a different zing. - For a nutty flavor, use almond extract instead of vanilla. - Substitute rolled oats with quick oats if that's what you have. - For a gluten-free option, use almond flour or a gluten-free flour blend. - You can also use coconut oil instead of butter for a dairy-free version. With these ingredients, you can create a simple yet delicious peach crumble. Check out the Full Recipe for more details on how to put it all together. Start by washing your peaches. Use ripe peaches for the best flavor. Cut them in half, remove the pit, and slice them. You need about six peaches. In a large bowl, mix the sliced peaches with 1/4 cup of granulated sugar. Add one tablespoon of fresh lemon juice and one teaspoon of pure vanilla extract. Sprinkle in one teaspoon of ground cinnamon. Gently stir until all the peaches are coated. Pour this mixture into a greased 9x9 inch baking dish. In another bowl, mix together one cup of rolled oats, 1/2 cup of all-purpose flour, 1/2 cup of packed brown sugar, and 1/4 teaspoon of sea salt. Add 1/2 teaspoon of ground nutmeg for extra flavor. Then, pour in 1/2 cup of melted unsalted butter. Use a fork or your hands to mix until it becomes crumbly. This is your topping. Now, sprinkle the crumble topping over the peaches in the baking dish. Make sure to cover all the fruit. Preheat your oven to 350°F (175°C). Place the baking dish in the oven and bake for 35 to 40 minutes. Look for a golden-brown topping and bubbling juices as signs that it’s ready. Once done, take it out and let it cool for 10 minutes before serving. For a treat, serve it warm with vanilla ice cream. You can find the full recipe to guide you through this delicious dish. When picking peaches, look for ones that feel heavy for their size. They should have a slight give when you press them gently. A sweet aroma means they are ripe and ready to eat. Avoid peaches with green spots, as they are not ripe yet. The best peaches will have a rich color, often a golden yellow or deep red. Adding spices can take your peach crumble to the next level. Cinnamon adds warmth and sweetness. Nutmeg offers a nutty, sweet flavor that pairs well with peaches. You can also try cardamom for a floral note or ginger for a hint of spice. Just a pinch can make a big difference in taste. Serve your peach crumble warm for the best experience. A scoop of vanilla ice cream on top adds creaminess and balances the warmth. You can also sprinkle some chopped nuts for extra crunch. For a fresh touch, garnish with mint leaves. Enjoy it with family or friends for a cozy dessert night. For the complete recipe, check out the full recipe section. {{image_4}} You can make your peach crumble even better. Add a cup of fresh berries. Blueberries or raspberries work great. Mix them in with the peaches before you bake. This extra fruit gives a burst of flavor. It also adds nice color to your dish. If you need a gluten-free version, it's simple! Swap the all-purpose flour with gluten-free flour. Use oats that are certified gluten-free as well. The rest of the recipe stays the same. You’ll still get that crunchy topping and sweet peaches. This option lets everyone enjoy the crumble. To make a vegan peach crumble, just change a few things. Use coconut oil instead of butter. Replace granulated sugar with coconut sugar or maple syrup. Ensure your oats are vegan-friendly. This way, you keep all the yummy flavors without any animal products. Enjoy a guilt-free dessert that tastes amazing! For the full recipe, check out the Peach Paradise Crumble! After enjoying your peach crumble, let it cool completely. Place any leftovers in an airtight container. Store it in the fridge for up to three days. If you want to keep it longer, freezing is a great option. To reheat your peach crumble, preheat your oven to 350°F (175°C). Place the crumble in an oven-safe dish. Cover it with foil to keep it moist. Bake for about 15-20 minutes. Check if it's heated through. You can also use a microwave for a quicker option. Heat in short bursts, stirring in between. To freeze your peach crumble, make sure it’s completely cool. Wrap it tightly in plastic wrap and then aluminum foil. Label it with the date. It can last in the freezer for up to three months. When you’re ready to enjoy it, thaw overnight in the fridge before reheating. This way, you savor that fresh flavor all over again! For the Full Recipe, check the details above! Yes, you can use frozen peaches! Just let them thaw first. Drain any extra juice to keep the crumble from being too watery. This change keeps the dish tasty and easy. Fresh peaches give the best flavor, but frozen works well too. Peach crumble lasts about three to four days in the fridge. Store it in an airtight container to keep it fresh. You can reheat it in the oven or microwave when you want a warm treat. You can serve peach crumble with vanilla ice cream or whipped cream. Both add creaminess to the warm, sweet crumble. Fresh mint leaves also make a nice touch. You can even add a drizzle of caramel sauce for extra flavor. For the full recipe, check out Peach Paradise Crumble. You now have all the tips to make a delightful peach crumble. We covered ingredients, step-by-step actions, and smart storage ideas. Plus, we explored fun variations and flavors to boost your dish. Remember, choosing ripe peaches makes a huge difference. Don't hesitate to get creative with spices and toppings. This recipe is easy and allows for lots of personal touch. Enjoy your baking, and share your tasty results with friends and family!
Peach Crumble Recipe Simple and Flavorful Dish
Are you ready to enjoy a delicious Peach Crumble? This simple and flavorful dish is perfect for any occasion. With juicy peaches and a crunchy
- 1 cup unsalted butter, softened - 1 cup granulated sugar - 1 large egg - Zest of 1 large lemon - 2 cups all-purpose flour - 1 teaspoon baking powder - ½ teaspoon baking soda - ½ teaspoon fine sea salt - 1 cup fresh raspberries - ½ cup powdered sugar for icing - 2 tablespoons fresh lemon juice for icing To make Raspberry Lemon Cookies, you'll need a few key ingredients. Each item plays a role in creating that perfect balance of sweet and tart. - Unsalted butter: You can use coconut oil or a plant-based butter. Both will keep the cookies moist. - Granulated sugar: Coconut sugar is a great alternative. It adds a hint of caramel flavor. - Egg substitutes: Use a flax egg or applesauce for a vegan option. One tablespoon of flaxseed mixed with three tablespoons of water works well. Using these substitutes can help you enjoy these cookies without missing out on flavor or texture. You can find the full recipe for Raspberry Lemon Cookies in the article. 1. Preheat the oven to 350°F (175°C). Line a baking sheet with parchment paper. This keeps the cookies from sticking. 2. Mix the butter and sugar. In a large bowl, cream the softened butter and sugar. Use an electric mixer on medium speed. Mix until light and fluffy, about 3-4 minutes. 3. Incorporate the wet and dry ingredients. Add the egg, vanilla, and lemon zest to the bowl. Beat until smooth. In another bowl, whisk together the flour, baking powder, baking soda, and salt. Slowly add this to the butter mix. Mix on low speed until just combined. Be careful not to overmix. 1. Fold in the raspberries. Use a spatula to gently mix in the fresh raspberries. This keeps them whole for bursts of flavor. The dough should feel thick yet easy to handle. 2. Shape the cookies. Use a tablespoon to scoop mounds of dough. Place them on the baking sheet, leaving 2 inches between each cookie. This gives them room to spread. 3. Bake and check for doneness. Bake for 12-15 minutes. Look for golden edges and set centers. They may seem soft but will firm up as they cool. For the full recipe, check the section above. Enjoy the fun of baking these delightful raspberry lemon cookies! To make the best raspberry lemon cookies, avoid overmixing the dough. Mixing too much makes cookies tough. Mix just until blended for a soft texture. To get a golden edge without drying out the cookie, watch the baking time closely. Remove them when the edges look golden but the middle seems soft. They will firm up as they cool. Decorating with icing adds a lovely touch. Drizzle the icing over the cooled cookies for a sweet finish. You can use a spoon or piping bag for fun shapes. For garnishing, add fresh raspberries and a sprinkle of lemon zest. This makes your cookies look bright and inviting. A stack of cookies on a decorative plate makes a beautiful display. {{image_4}} You can make raspberry lemon cookies even more exciting by changing the flavors. Here are a few ideas: - Different Citrus Zest: Try adding orange or lime zest. Each zest gives a unique twist. Orange adds sweetness, while lime gives a zesty kick. - Other Berries: Swap raspberries for blueberries or strawberries. Blueberries bring a juicy burst, and strawberries add a sweet touch. Both will make your cookies colorful and fun! If you have specific dietary needs, you can still enjoy these treats. Here’s how: - Gluten-Free Flour: Use a gluten-free flour blend. This way, you can still enjoy cookies without gluten. Look for blends that include xanthan gum for the best texture. - Vegan Version: Substitute butter with coconut oil or vegan butter. Replace the egg with flaxseed meal mixed with water or a store-bought egg replacer. These changes keep the cookies delicious and plant-based. Feel free to explore these variations to make your raspberry lemon cookies just how you like them! For the full recipe, check out the detailed instructions above. To keep your raspberry lemon cookies fresh, store them in an airtight container. This will prevent them from becoming dry or stale. I recommend using a cookie jar or a sealable plastic bag. If you use a container, add a piece of bread inside. This helps keep the cookies soft. For the best taste, enjoy them within a week. You can freeze the raw cookie dough for later use. To do this, scoop the dough onto a baking sheet. Place it in the freezer for about an hour. Once firm, transfer the dough balls to a freezer bag. Label the bag with the date and type of cookie. When you're ready to bake, just take out how many you need. For baked cookies, let them cool completely first. Then, wrap each cookie in plastic wrap. Put them in a freezer-safe bag. To thaw, simply leave the cookies on the counter for a few hours. You can also warm them in the oven at 350°F for about 5 minutes. Enjoy a fresh-tasting cookie anytime! For the full recipe, check out the earlier section. How do I know when the cookies are done baking? You can tell the cookies are done when the edges turn golden brown. The centers should look set but may appear slightly soft. They will firm up as they cool. Can I use frozen raspberries instead of fresh? Yes, you can use frozen raspberries! Just make sure to thaw them and drain any excess liquid. This way, they won't make your dough too wet. How long do these cookies last? These cookies can last up to a week if stored in an airtight container. Keep them in a cool, dry place for the best freshness. What can I serve with raspberry lemon cookies? These cookies pair well with a cup of tea or coffee. You can also serve them with a scoop of vanilla ice cream for a tasty dessert. Are raspberry lemon cookies healthy? While they are a treat, raspberry lemon cookies do contain sugar and butter. However, they have fresh fruit, which adds some vitamins. Enjoy them in moderation for a balanced diet. What's the best way to incorporate fruit into cookie recipes? The best way to add fruit is to gently fold it into the dough. This keeps the fruit intact and adds bursts of flavor in every bite. Can I make these cookies without baking powder? You can make these cookies without baking powder, but they may not rise as much. You could use baking soda or another leavening agent as a substitute. In this article, we covered how to make delicious raspberry lemon cookies. You learned about the key ingredients, substitutes for different diets, and step-by-step baking instructions. We shared tips for perfect texture and presentation ideas. I also included different flavor and dietary variations, plus storage and freezing methods. Try these cookies for a fresh twist on your dessert. They are easy to make and fun to enjoy. Happy baking!
Raspberry Lemon Cookies Simple and Tasty Treats
Are you ready to bake some joy? Raspberry lemon cookies are a perfect blend of sweet and tangy. In just a few simple steps, you
- 4 large ripe peaches, sliced into wedges - 2 cups fresh strawberries, hulled and halved - 1/4 cup granulated sugar - 1 tablespoon fresh lemon juice - 1 cup rolled oats - 1/2 cup all-purpose flour - 1/3 cup packed brown sugar - 1 teaspoon ground cinnamon - 1/4 teaspoon salt - 1/2 cup unsalted butter, melted - Vanilla ice cream (for serving) Using ripe peaches and sweet strawberries makes the best crisp. The fruit mix shines with just a hint of sugar and lemon juice. The lemon adds a zesty kick that brightens the dish. For the topping, I love using rolled oats. They give a nice crunch. Brown sugar and cinnamon add warmth and depth. Melting the butter helps create that perfect crumble. When you serve this crisp, a scoop of vanilla ice cream is a must. The cold ice cream melts into the warm fruit, creating a delightful treat. This recipe is great for summer gatherings or cozy nights at home. Check out the Full Recipe for all the details! - Preheat the oven to 350°F (175°C). - In a bowl, combine the peaches and strawberries with sugar and lemon juice. I love the sweet smell of ripe peaches and strawberries. It reminds me of summer days. These fruits shine in this dish. Make sure to slice the peaches into wedges. Halving the strawberries helps their flavor mix well with the peaches. The sugar brings out their natural sweetness. The lemon juice adds a nice zing. - Mix oats, flour, brown sugar, cinnamon, and salt in a bowl. - Pour melted butter into the dry mixture and stir. The topping is what makes this crisp special. I use rolled oats for a chewy texture. The flour binds everything together. Brown sugar adds a rich flavor, while cinnamon lifts the taste. Don’t forget the salt; it balances the sweetness. Once you mix the dry ingredients, pour in the melted butter. Stir gently until it forms a crumbly mixture. - Layer the fruit mixture in a greased baking dish. - Distribute the crumbly topping evenly over the fruit. Now comes the fun part! Take a greased baking dish and add the fruit mix. Spread it out evenly. Next, sprinkle the topping over the fruit. Use your fingers to break it up if needed. This helps the topping get crispy while baking. - Bake for 30-35 minutes until golden brown. - Allow to cool before serving. Place your dish in the oven and watch it transform. The top will turn a lovely golden brown, while the fruit bubbles below. This smell will fill your kitchen! After baking, let it cool a bit. This step helps the crisp set nicely. You want to serve it warm, maybe with a scoop of vanilla ice cream. For the full recipe, check out the complete details! - Ensure the butter is fully melted for optimal crumb. - Don’t overmix the topping to maintain texture. To get the best texture, melted butter is key. It helps the crisp become golden and crunchy. If the butter is not melted, the topping may clump. It will not spread well and bake evenly. Keep an eye on your mixing. Overmixing can make the topping tough. You want a crumbly feel for that perfect bite. - Add a pinch of nutmeg for extra warmth. - Experiment with additional spices like ginger. To boost flavor, try adding a pinch of nutmeg. It gives warmth and depth to the dish. You can also mix in a bit of ginger for a spicy kick. This small change can make your crisp stand out. You will taste the difference! - Top with fresh mint or cream for visual appeal. - Pair with different ice cream flavors for variety. When serving, think about the looks. A sprig of fresh mint adds color and charm. A light drizzle of cream can elevate your dish. Ice cream is a must! You can choose vanilla, chocolate, or even strawberry flavors. Each adds its own twist to the warm crisp. For the full recipe, check out the Peach & Strawberry Crisp recipe section. {{image_4}} You can switch fruits for a new taste. Substitute blueberries or raspberries for a fun change. These berries add a burst of flavor and color. You can also try using mixed berries for a fruity medley. This mix gives you a unique blend of tastes. If you need a gluten-free option, use gluten-free oats and flour. This change keeps the crisp tasty while meeting dietary needs. For a dairy-free version, replace butter with coconut oil. This swap keeps the crisp moist and flavorful. You can adjust the sweetness to your liking. Use honey or maple syrup as a natural sweetener. These options add depth without the processed taste of sugar. If you prefer less sweetness, simply reduce the sugar. The fruit will still shine through with its natural taste. After enjoying your peach and strawberry crisp, store leftovers in an airtight container. You can keep it at room temperature for up to 3 days. If you want it to last longer, put it in the fridge. It will stay fresh for up to 1 week. When it’s time to enjoy your crisp again, warm it in the oven. Set your oven to 350°F and heat for about 10-15 minutes. If you need a quicker option, use the microwave. Just heat it in short increments until warm. Want to save some for later? You can freeze the peach and strawberry crisp. Use a well-sealed container and freeze it for up to 3 months. When you're ready to eat it, thaw it in the fridge overnight. After thawing, reheat it to enjoy! For the full recipe, check out the detailed instructions above. Yes, you can use frozen peaches and strawberries. Just adjust the baking time. Frozen fruit may release more juice. Check the crisp after 25 minutes. If it's too juicy, bake a bit longer. This keeps your crisp delicious without losing its texture. You can prepare the crisp and toppings separately. Store them in the fridge. Assemble the dish just before baking. This way, you keep the topping fresh and crunchy. It also saves you time on busy days. I love serving it with vanilla ice cream, whipped cream, or a drizzle of caramel. These choices add a creamy touch. They also balance the tartness of the fruit. You can mix and match to find your favorite pairing. Absolutely! Just replace the butter with a plant-based alternative. You can use coconut oil or vegan butter. Also, avoid honey and stick to maple syrup or agave if you want extra sweetness. Your crisp will still taste amazing! For the full recipe, check out the detailed instructions to get started! This blog post details a simple yet delicious recipe for Peach and Strawberry Crisp. We covered ingredients, preparation steps, tips, variations, and storage information. You can easily make this dessert your own with different fruits and sweeteners. Enjoying it with vanilla ice cream makes it even better. Whether you share it with friends or savor it alone, this dish brings warmth to any table. Try it today and delight in every bite!
Peach & Strawberry Crisp Delicious Summer Delight
Summer is here, and there’s nothing quite like the bright flavors of peach and strawberry! This Peach & Strawberry Crisp is an easy and tasty
Gather these simple ingredients to make your Peach Pie Crumble Bars shine: - 2 cups all-purpose flour - 1 cup rolled oats - 1/2 cup brown sugar, packed - 1/2 cup granulated sugar - 1 teaspoon baking powder - 1/2 teaspoon salt - 1 cup unsalted butter, softened, cut into small cubes - 2 cups fresh peaches, peeled and diced - 1 tablespoon fresh lemon juice - 2 tablespoons cornstarch - 1 teaspoon ground cinnamon - 1/2 teaspoon ground nutmeg - 1/2 teaspoon vanilla extract Each item plays a key role in creating the perfect blend of flavors and textures. The all-purpose flour and oats give a hearty base. The brown and granulated sugars add sweetness and depth. Baking powder helps the bars rise, while salt balances the flavors. Fresh peaches are the star of this dish. The lemon juice brightens their sweetness. Cornstarch thickens the peach filling, ensuring it stays juicy but not runny. Cinnamon and nutmeg bring warmth and spice, while vanilla rounds out the flavor. You can find the complete recipe to guide you through the steps, making this treat even more enjoyable! 1. Preheat oven and prepare baking dish: Start by preheating your oven to 350°F (175°C). Grease a 9x13 inch baking dish or line it with parchment paper. Leave some paper hanging over the sides; this helps with easy removal later. 2. Mix dry ingredients and prepare crumble: In a large bowl, combine 2 cups of all-purpose flour, 1 cup of rolled oats, 1/2 cup of brown sugar, 1/2 cup of granulated sugar, 1 teaspoon of baking powder, and 1/2 teaspoon of salt. Mix these dry ingredients well. Now, add 1 cup of softened unsalted butter cut into small cubes. Use a pastry cutter or your hands to mix until the texture looks like coarse crumbs. Save about 1 cup of this mixture for the topping. 3. Prepare peach mixture with seasonings: In another bowl, place 2 cups of peeled and diced fresh peaches. Add 1 tablespoon of fresh lemon juice, 2 tablespoons of cornstarch, 1 teaspoon of ground cinnamon, 1/2 teaspoon of ground nutmeg, and 1/2 teaspoon of vanilla extract. Gently toss until the peaches are well coated. 4. Layering the mixture in the baking dish: Take the remaining crumb mixture and press it evenly into the bottom of the prepared baking dish. This creates a solid base layer. Pour the peach mixture over this base, spreading it out evenly. 5. Baking time and temperature: Now, sprinkle the reserved crumble mixture over the peach filling. Bake in your preheated oven for 30 to 35 minutes. You want the topping to turn a lovely golden brown and see the peach filling bubbling through. 6. Cooling time before slicing: Once the bars are baked, take them out of the oven. Let them cool in the pan for at least 30 minutes. This cooling time is key to slicing them easily. 7. Presentation suggestions: Cut the bars into squares. For a pretty touch, dust them lightly with powdered sugar. If you want to make it extra special, serve warm with a scoop of vanilla ice cream on top. Enjoy your Peach Pie Crumble Bars! To get that great crumble texture, mix the butter and dry ingredients well. Use your fingers or a pastry cutter. This helps create the nice, crumbly feel. Keep some larger lumps for a good bite. Press the mix firmly into the pan base, so it holds well. Bake until it turns golden brown. This color means it is perfectly cooked. When picking ripe peaches, look for ones that are slightly soft. They should smell sweet. Avoid ones that are hard or have dark spots. If fresh peaches are not available, canned or frozen peaches work too. Just drain them well and adjust the sugar if they are sweetened. Add spices like nutmeg or a hint of ginger for extra flavor. A bit of lemon zest brightens the peaches nicely. For a yummy treat, serve the bars warm with vanilla ice cream or whipped cream. This combo makes the dessert even more delightful. For the Full Recipe, check the detailed instructions to create your bars. {{image_4}} You can easily swap peaches for other fruits. Blueberries, cherries, or even apples work well. Each fruit brings its own charm to the bars. For a fun twist, mix different fruits together. This combo gives you a burst of flavors in each bite. If you need a gluten-free option, use gluten-free flour instead of all-purpose flour. This change keeps the bars tasty without gluten. You can also reduce sugar in the recipe. Try using natural sweeteners like honey or maple syrup. These options keep the sweetness while being healthier. For a festive touch, add spices like nutmeg or ginger for holiday-themed bars. You can also fold in nuts or chocolate chips. These additions make each bite even more exciting. You can personalize your peach pie crumble bars to fit any season or occasion! To keep your Peach Pie Crumble Bars fresh, refrigerate them. Place the bars in an airtight container. This helps to prevent the bars from drying out or absorbing other smells in the fridge. Make sure to let them cool completely before sealing. You can also wrap them in plastic wrap for extra protection. Freezing is a great way to save extra bars. First, cut the bars into squares. Then, place them on a baking sheet. Freeze them for about an hour until firm. After that, pack them in a freezer bag or container. Squeeze out the air to avoid freezer burn. For best flavor, use them within three months. To warm up your bars, preheat your oven to 350°F (175°C). Place the bars on a baking sheet. Heat them for about 10-15 minutes until warm. This helps keep the crumble texture nice and crunchy. If you prefer, you can also microwave a single bar for about 20-30 seconds. Enjoy your Peach Pie Crumble Bars warm for the best taste! Making Peach Pie Crumble Bars takes about 1 hour and 5 minutes. You will need 15 minutes for prep and 30-35 minutes for baking. Then, allow them to cool for 30 minutes before slicing. This timing helps create the best flavor and texture. Yes, you can use canned or frozen peaches. Just make sure to drain canned peaches well. If using frozen, thaw them first and pat them dry. This keeps the bars from getting too watery. These bars pair wonderfully with vanilla ice cream or whipped cream. A scoop of ice cream adds a rich, creamy texture that complements the sweet peaches. You could also serve them with a sprinkle of powdered sugar for a nice touch. The bars are done when the topping is golden brown and the peach filling bubbles. If you see bubbling, it’s a good sign that the filling is cooked. Yes, you can make these bars ahead of time. Just store them in an airtight container after they cool. They stay good in the fridge for about 3-4 days. You can also freeze them for up to 2 months. To make the Peach Pie Crumble Bars, follow these steps: 1. Preparation: Start by preheating your oven to 350°F (175°C). Prepare a 9x13 inch baking dish by greasing it or lining it with parchment paper. Leave some overhang for easy removal later. 2. Mixing Dry Ingredients: In a large bowl, whisk together: - 2 cups all-purpose flour - 1 cup rolled oats - 1/2 cup brown sugar, packed - 1/2 cup granulated sugar - 1 teaspoon baking powder - 1/2 teaspoon salt 3. Creating the Crumble: Add 1 cup of softened, cubed unsalted butter to the dry mix. Use your fingers or a pastry cutter to mix until it looks like coarse crumbs. Keep about 1 cup of this crumb mixture for later. 4. Preparing the Peach Filling: In another bowl, combine: - 2 cups fresh peaches, peeled and diced - 1 tablespoon fresh lemon juice - 2 tablespoons cornstarch - 1 teaspoon ground cinnamon - 1/2 teaspoon ground nutmeg - 1/2 teaspoon vanilla extract Toss gently until the peaches are coated. 5. Layering: Press the remaining crumble mixture evenly into the bottom of the prepared dish. Pour the peach mix over it, spreading it out evenly. 6. Topping: Sprinkle the reserved crumble mixture over the peach layer, ensuring even coverage. 7. Baking: Place the dish in the oven and bake for 30-35 minutes. Look for a golden brown topping and bubbling peach filling. 8. Cooling: Once baked, remove from the oven. Let it cool for at least 30 minutes in the pan before slicing. - Prep Time: 15 minutes - Cook Time: 30-35 minutes - Total Time: 1 hour 5 minutes - Servings: 12 bars For an extra touch, dust the bars with powdered sugar or serve them warm with vanilla ice cream. Enjoy your delicious Peach Pie Crumble Bars! This blog post outlined a simple and tasty peach pie crumble bar recipe. You learned about the key ingredients, step-by-step instructions, and helpful tips to make the perfect dessert. Remember, you can try different fruits or adjust for dietary needs. Store leftovers correctly to keep them fresh. Lastly, have fun experimenting with flavors and pairings. Enjoy making this delightful treat!
Peach Pie Crumble Bars Flavorful and Easy Delight
If you’re craving a sweet treat that’s both easy to make and packed with flavor, you’re in the right place! These Peach Pie Crumble Bars
- 2 cups grated zucchini (approximately 2 medium zucchinis) - 1 cup peeled and grated apple (about 1 medium apple, tart varieties like Granny Smith work well) - 1/2 cup granulated sugar - 1/2 cup packed brown sugar - 1/2 cup vegetable oil - 2 large eggs, at room temperature - 2 teaspoons pure vanilla extract - 2 cups all-purpose flour - 1 teaspoon baking powder - 1/2 teaspoon baking soda - 1/2 teaspoon kosher salt - 1 teaspoon ground cinnamon - 1/4 teaspoon ground nutmeg - 1/2 cup chopped walnuts or pecans (optional but recommended for added texture) For the crumb topping: - 1/2 cup all-purpose flour - 1/3 cup packed brown sugar - 1/4 cup unsalted butter, melted and slightly cooled - 1/2 teaspoon ground cinnamon When making Zucchini Apple Crumb Bread, you need fresh ingredients. The zucchini adds moisture and texture, while the apple brings a sweet tang. Using both sugars enhances the flavor and gives a nice caramelized crust. I always choose vegetable oil for a tender crumb. The spices, like cinnamon and nutmeg, warm the bread with comforting flavors. If you love a little crunch, add walnuts or pecans. For the crumb topping, you'll mix flour, brown sugar, and butter. This creates a sweet, crumbly layer that makes each slice special. You can find the complete recipe details in the [Full Recipe]. Enjoy every bite of this rich and flavorful delight! First, you will need to grate the zucchini and apple. Use a box grater or a food processor. Aim for about 2 cups of zucchini and 1 cup of apple. I like to use tart apples, like Granny Smith, for a nice balance. After grating, let the mixture sit for about 10 minutes. This time helps to drain extra moisture. If it's very wet, press it gently with a clean kitchen towel. This step is key for a nice, non-soggy bread. In a large bowl, whisk together the granulated sugar, brown sugar, vegetable oil, eggs, and vanilla extract. Mix until it becomes smooth. This combination adds moisture and sweetness to the bread. Make sure your eggs are at room temperature. This helps them mix better and gives a lighter texture. Now, sift together the all-purpose flour, baking powder, baking soda, salt, ground cinnamon, and ground nutmeg in another bowl. Sifting helps to blend the dry ingredients evenly and adds air for a fluffier bread. Gradually add the dry mix to the wet mix. Stir gently until just combined. Be careful not to overmix! This can make the bread tough. Next, fold in the drained zucchini and apple mixture. If you want a little crunch, add in some chopped walnuts or pecans at this stage. For the crumb topping, mix 1/2 cup of flour, 1/3 cup of brown sugar, melted butter, and ground cinnamon in a small bowl. Use a fork or your fingers to mix until it looks like coarse crumbs. This adds a nice, sweet crunch on top. Pour the batter into a greased and floured 9x5-inch loaf pan. Smooth the top with a spatula for an even surface. Bake in a preheated oven at 350°F (175°C) for 50-60 minutes. To check for doneness, insert a toothpick into the center. It should come out clean or with a few moist crumbs. Once done, cool the bread in the pan for 10-15 minutes before transferring it to a wire rack. This helps it finish cooling without getting soggy. For the complete baking experience, check out the Full Recipe. To make the best zucchini apple crumb bread, avoid overmixing the batter. When you combine wet and dry ingredients, stir just until you see no dry flour. This keeps the bread light and fluffy. Overmixing can lead to a tough texture, which you don’t want. For even baking, make sure your oven is preheated to 350°F (175°C). Place the loaf pan in the center of the oven. This helps heat circulate around the bread. Check your bread around the 50-minute mark. A toothpick should come out clean or with a few moist crumbs. When it comes to serving, warm slices of bread with butter are a hit. You can also add a slice of fresh apple on top for a nice touch. A light dusting of cinnamon or powdered sugar can make it look fancy. To slice the bread, wait until it cools for at least 10 minutes. This keeps the slices intact and pretty. Use a sharp knife for clean cuts. Zucchini can hold a lot of water. If your zucchini feels very wet, drain it well before mixing. You can press it gently with a clean kitchen towel. This step helps keep your crumb bread from being too soggy. If your batter seems too wet, add a little extra flour, about a tablespoon at a time, until the texture feels right. {{image_4}} You can customize your zucchini apple crumb bread with exciting flavors. Adding spices like ground ginger or cloves can give your bread a warm kick. You might also want to try adding dried fruits, like raisins or cranberries, for a sweet burst. If you love chocolate, toss in some chocolate chips. They melt beautifully, bringing a rich taste to each slice. If you need a gluten-free version, it's easy to swap out the flour. Use a gluten-free flour blend that mimics all-purpose flour. This will keep the texture light and fluffy, just like the original recipe. Be sure to check the blend for xanthan gum; this helps bind the ingredients together. You can make this recipe vegan by replacing the eggs and dairy. Use flaxseed meal mixed with water as an egg substitute. For each egg, mix 1 tablespoon of flaxseed meal with 2.5 tablespoons of water. Let it sit for a few minutes until it thickens. Instead of butter, try using coconut oil or a plant-based margarine for the crumb topping. This keeps the bread moist and delicious while staying plant-based. You can follow the [Full Recipe] to create your perfect loaf! To keep your zucchini apple crumb bread fresh, wrap it tightly in plastic wrap. Placing it in an airtight container is also a good idea. Store it in the fridge for up to one week. This helps maintain its moisture and flavor. If you notice it getting too dry, a slice of apple can help add moisture back. Freezing zucchini apple crumb bread is easy. First, let the bread cool completely. Then, wrap it in plastic wrap and foil. This extra layer prevents freezer burn. You can freeze it for up to three months. When you are ready to enjoy it, just take it out and let it thaw in the fridge overnight. To reheat your bread, preheat your oven to 350°F (175°C). Place the slices on a baking tray. Heat them for about 10-15 minutes. This method keeps the bread soft and warm. You can also use a microwave. Just heat a slice for about 20-30 seconds. However, the oven method gives the best texture. You can use unsweetened applesauce as an egg substitute. Use 1/4 cup of applesauce for each egg. This keeps the bread moist and adds sweetness. Another option is ground flaxseed mixed with water. Use 1 tablespoon of flaxseed and 3 tablespoons of water for each egg. Let it sit for a few minutes to thicken. Yes, you can use frozen zucchini or apple. Just thaw them before using. Drain any extra water to avoid a soggy bread. Frozen fruits and veggies can change the texture a bit, but the taste will still be great. To check if the bread is done, insert a toothpick into the center. If it comes out clean or with a few moist crumbs, the bread is ready. If you see wet batter, bake it for a few more minutes. Yes, you can make mini loaves! Divide the batter into smaller pans. Bake for about 25 to 30 minutes. Always check for doneness with a toothpick. Mini loaves are great for gifts or snacks. Zucchini apple crumb bread is a healthy treat. Each slice has around 150 calories. It contains fiber from the zucchini and apples, which is good for digestion. It also offers vitamins and minerals. If you add nuts, you get healthy fats too. For a complete breakdown, refer to the Full Recipe. This article covered how to make delicious zucchini apple crumb bread. We explored the key ingredients, from grated zucchini to sugars and spices. I provided easy steps for mixing and baking. You learned tips for perfect results and variations to try. In closing, enjoy this tasty treat fresh from your oven. Remember, small changes can make a big difference. Happy baking!
Zucchini Apple Crumb Bread Rich and Flavorful Delight
If you’re craving a warm, comforting treat, look no further than Zucchini Apple Crumb Bread. This delightful recipe brings together the subtle sweetness of apples
- 4 ripe peaches, thoroughly peeled and elegantly sliced - 1 cup granulated sugar, divided - 1 tablespoon freshly squeezed lemon juice - 1 cup all-purpose flour - 1 ½ teaspoons baking powder - ½ teaspoon salt - 1 cup whole milk - 1 stick (½ cup) unsalted butter, melted - 1 teaspoon pure vanilla extract - ½ teaspoon ground cinnamon, plus more for dusting - Whipped cream or vanilla ice cream for serving I love using ripe peaches in this recipe. They add a sweet and juicy burst of flavor. The sugar balances the tartness of the peaches. Fresh lemon juice brightens the taste. The mix of flour and baking powder gives the pudding its light texture. Salt enhances all the flavors in the dish. Whole milk makes the batter rich and creamy. Melted butter adds a nice depth. Vanilla extract gives a sweet scent, and cinnamon brings warmth. Finally, whipped cream or ice cream makes it special when serving. For the full recipe, check out the [Full Recipe]. You now know how to make a delicious Tennessee Peach Pudding. We covered the ingredients, step-by-step instructions, and helpful tips. You can substitute fruits or modify the recipe for special diets. Store leftovers properly or even freeze them. This dessert is great for any gathering. It’s easy, comforting, and sure to impress. Enjoy making this pudding and impress your friends and family with your skills. Happy baking!
Tennessee Peach Pudding Delightful Summer Dessert
Summer just isn’t complete without a sweet dish that shines! Tennessee Peach Pudding is a delightful dessert that combines juicy peaches with a tender, buttery