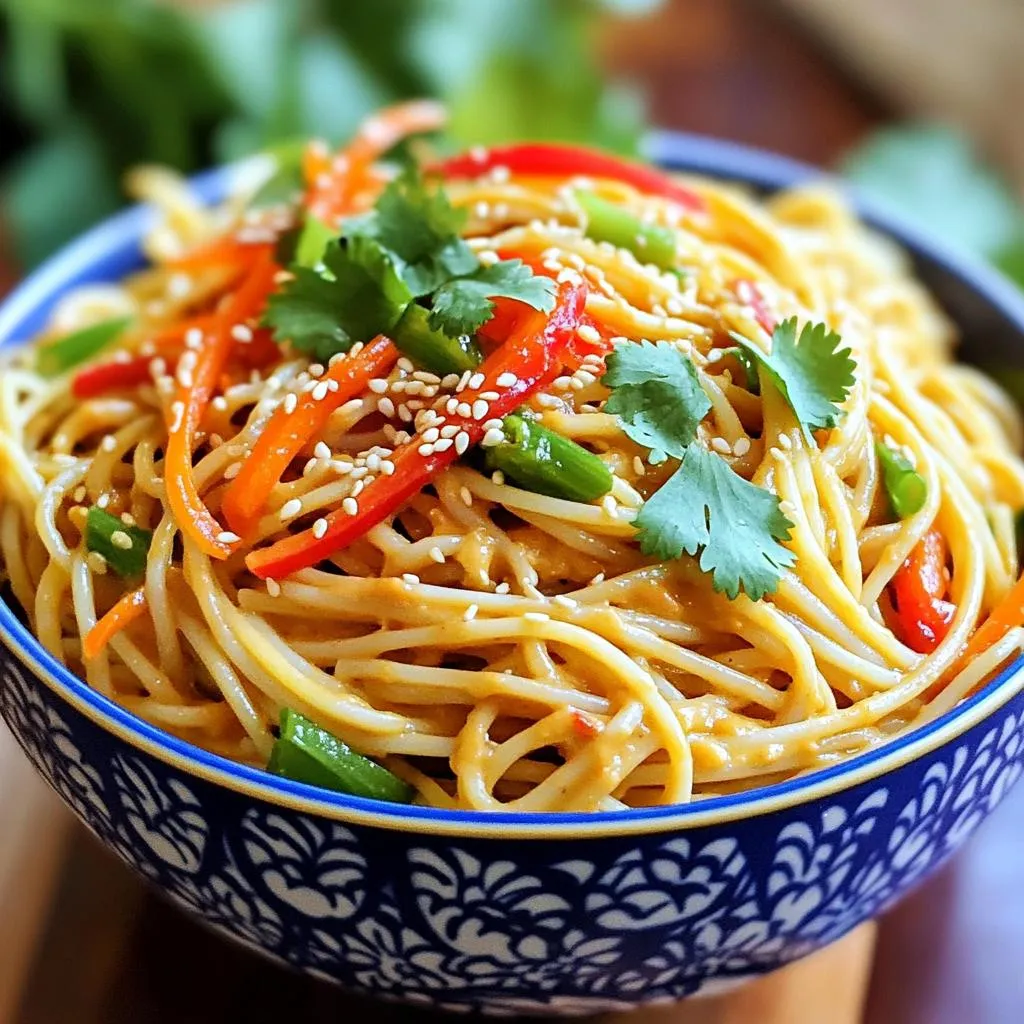
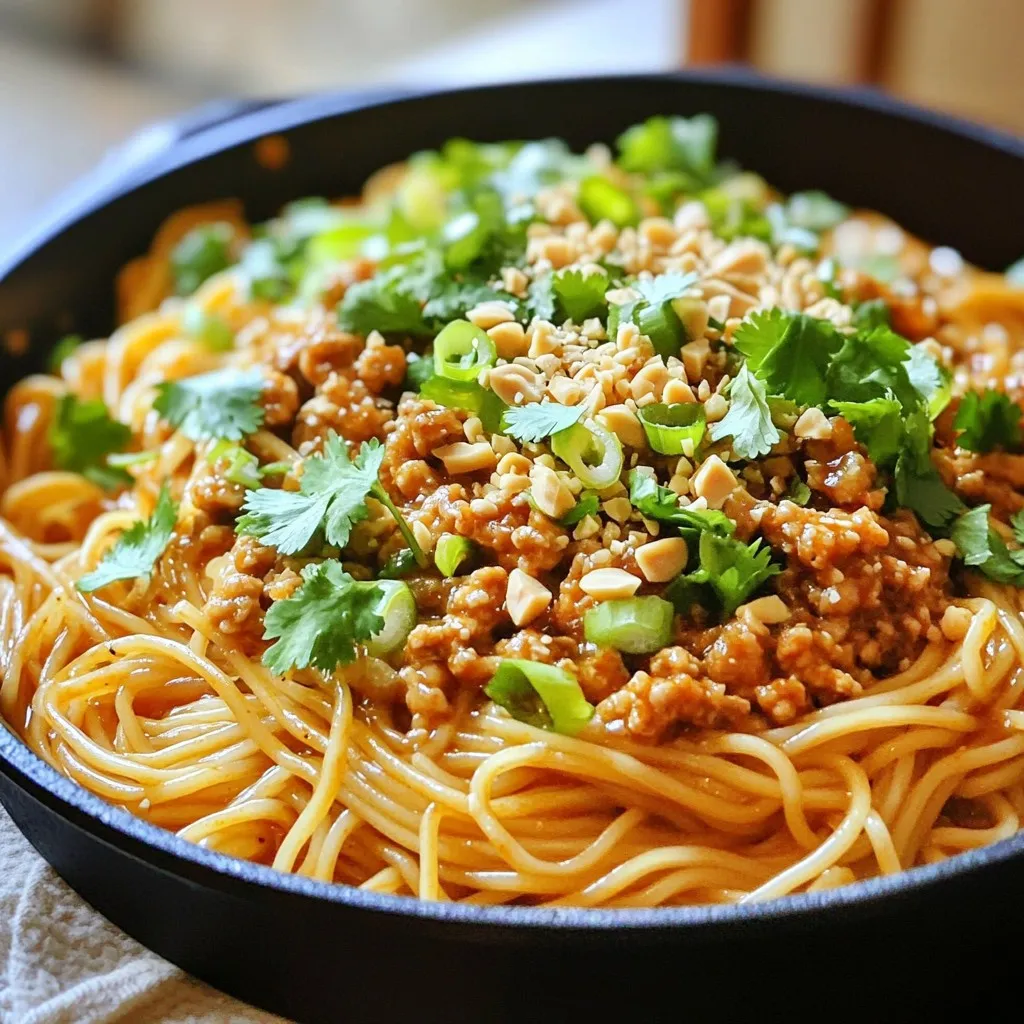
Dinner

- Ground beef - Garlic and ginger - Soy sauce and gochujang In this recipe, I use ground beef for its rich flavor. I prefer 80/20 beef, as it has enough fat to keep the meat juicy. Garlic and ginger add a punch of flavor. They bring warmth and depth to the dish. Soy sauce gives a salty taste, while gochujang adds a sweet and spicy kick. - Sliced green onions - Sesame seeds For garnish, I suggest sliced green onions and sesame seeds. They add a fresh crunch and a nice visual touch. You can sprinkle them on top before serving for extra flair. - Jasmine rice - Steamed broccoli I love serving this Korean ground beef bowl over jasmine rice. The rice soaks up the sauce, making each bite flavorful. Steamed broccoli is a great side. It adds color and nutrients to your meal. You can serve the broccoli on the side or mix it in. For the full recipe, refer to the section above. First, heat a large skillet over medium heat. Add 1 pound of ground beef. Cook it for about 5 to 7 minutes. Use a spatula to break the meat into small pieces. You want it to brown nicely. Once it’s browned, drain any excess fat. Leave about 1 tablespoon in the skillet. This keeps the flavor rich. Next, add the chopped onion, minced garlic, and grated ginger to the skillet. Sauté them for about 3 to 4 minutes. You want the onion to turn translucent. This step adds a nice depth of flavor to your dish. The aroma will fill your kitchen, making it smell amazing. Now, let’s make the sauce. In a small bowl, whisk together 3 tablespoons of soy sauce, 1 tablespoon of gochujang, and 2 tablespoons of brown sugar. Mix until smooth. Pour this sauce over the beef in the skillet. Stir well to coat the meat evenly. Lower the heat to a gentle simmer. Let it cook for another 3 to 4 minutes. The sauce should thicken slightly. Finally, stir in 1 tablespoon of sesame oil for extra richness. To assemble your bowls, start with cooked jasmine rice. Place a generous amount in each serving dish. Top the rice with the beef mixture. Add steamed broccoli florets on the side. For a beautiful finish, garnish each bowl with sliced green onions and a sprinkle of sesame seeds. This makes your meal look as good as it tastes. Enjoy your Korean Ground Beef Bowl! For the full recipe, check the reference above. - Alternatives for ground beef: If you want a lighter dish, try ground turkey or chicken. Both options still offer great flavor. For a vegetarian twist, use crumbled tofu or tempeh. These alternatives soak up the sauce well. - Using different vegetables: Feel free to mix in your favorite veggies. Bell peppers, carrots, or snap peas can add color and crunch. You can also use frozen stir-fry mixes for quick prep. - Adjusting spice levels: You can control the heat by adding more or less gochujang. If you want it milder, use less gochujang or mix in some honey. For extra heat, add red pepper flakes or sliced chili peppers. - Adding extra toppings: Boost the flavor with toppings. Try adding sliced cucumbers for crunch or pickled radishes for tang. A drizzle of sriracha can also bring a nice kick. - Skillet vs. wok cooking: A large skillet works well for this dish, but a wok can help cook everything faster. The high sides of a wok keep the ingredients from spilling out. Choose based on what you have. - Achieving the best texture: Cook the beef until it's nicely browned. This step helps develop a rich flavor. Sauté the onion and garlic until soft for a flavorful base. Don't rush these steps for the best result. {{image_4}} You can switch the ground beef for other proteins. Ground turkey or chicken works well. These leaner meats offer a different taste. They still soak up the sauce nicely. For a vegetarian option, use firm tofu. Crumble the tofu and cook it just like the beef. It absorbs flavors great and keeps the dish hearty. You can easily change the flavor of this dish. If you like it spicy, add more gochujang. A dash of chili flakes can also bring the heat. For those who prefer mild flavors, reduce the gochujang. Add extra herbs like cilantro or basil for a fresh twist. Experiment with garlic powder or onion powder to enhance the taste. Serving this dish can be fun and varied. Try Korean lettuce wraps for a fresh bite. Just scoop the beef into crisp lettuce leaves. This makes a great finger food option. Another idea is to create burrito bowls with tortillas. Layer the rice, beef, and toppings in a tortilla for a tasty meal. Each style offers a new way to enjoy the same great flavors found in the Full Recipe. To keep your Korean Ground Beef Bowl fresh, use airtight containers. Glass or plastic containers work well. These will prevent moisture loss and keep flavors intact. Store the leftovers in the fridge if you plan to eat them within a few days. If you want to save them longer, consider freezing. Just make sure to label the containers with the date. When reheating, the microwave is quick but can dry out the beef. Place a damp paper towel over the bowl to keep moisture. Heat in short intervals, stirring often. If using the stove, warm it gently over low heat. Add a splash of water or soy sauce to enhance moisture. This helps keep the beef juicy and flavorful. In the fridge, your Korean Ground Beef Bowl lasts about 3-4 days. Check for signs of spoilage before eating. If you see any off smells or changes in color, it’s best to toss it. Always trust your senses when it comes to food safety. A Korean Ground Beef Bowl is a simple yet rich dish. It features ground beef cooked with garlic and ginger. This dish gets its unique flavor from soy sauce and gochujang, a spicy Korean chili paste. You'll also find brown sugar to balance the heat. Served over jasmine rice, it often includes steamed broccoli for crunch. Garnish with sliced green onions and sesame seeds for a nice touch. This bowl is a complete meal that is flavorful and satisfying. Yes, you can make this dish ahead of time. Just cook the beef mixture as directed. Let it cool, then store it in an airtight container. It stays fresh in the fridge for about 3 days. For meal prep, you can also freeze it. It should last up to 3 months in the freezer. When you are ready to eat, simply reheat it in a skillet or microwave. This makes busy weeknights easier. Several sides complement the Korean Ground Beef Bowl perfectly. Here are some ideas: - Kimchi for a spicy kick - Cucumber salad for freshness - Pickled vegetables for tang - Steamed bok choy for added greens - Fried eggs for extra protein These sides enhance the flavors and add variety to your meal. Enjoy mixing and matching to find your favorite pairings! This Korean Ground Beef Bowl combines savory beef, aromatic spices, and fresh veggies. We discussed the main ingredients, like garlic and gochujang, and how to cook them perfectly. You learned different serving ideas and tips to customize your bowl. Finally, storing leftovers helps you enjoy this tasty meal later. Remember, cooking is fun and allows for creativity. Try making this dish your own, and enjoy every bite!
Korean Ground Beef Bowl Flavorful and Easy Meal
Looking for a tasty and quick meal? The Korean Ground Beef Bowl is your answer! This dish combines savory ground beef with bold flavors like
To make this dish, you need the following ingredients: - 2 boneless, skinless chicken breasts - 8 oz fettuccine pasta - 3 tablespoons Cajun seasoning - 2 tablespoons honey - 4 tablespoons unsalted butter - 1 tablespoon olive oil - 1 bell pepper (red or yellow), thinly sliced - 1 small onion, thinly sliced - 3 cloves garlic, minced - 1 cup chicken broth - ½ cup heavy cream - Salt and pepper to taste - Fresh parsley, finely chopped (for garnish) - Grated Parmesan cheese (optional) I love to play with flavors. You can add a pinch of cayenne for heat or smoked paprika for depth. A splash of lemon juice brightens the dish and adds freshness. Try fresh basil for a herb twist. You can also swap fettuccine for penne or spaghetti based on your preference. Gather these tools to make your cooking easier: - Large pot for boiling pasta - Large skillet for cooking chicken and sauce - Cutting board for chopping vegetables - Sharp knife for slicing - Wooden spoon for stirring - Measuring spoons for accurate seasoning Ready to dive into the Full Recipe? Enjoy the cooking journey! To start, grab a large pot and fill it with water. Add a good amount of salt to the water. Bring the water to a rolling boil. Once boiling, add the fettuccine. Cook it for about 8 to 10 minutes or until it is al dente. After cooking, drain the pasta and save half a cup of the pasta water. Set the pasta aside for later. While the pasta cooks, take your chicken breasts and season them. Sprinkle Cajun seasoning, salt, and pepper on both sides. Make sure each piece is covered well. Next, heat a large skillet over medium heat and add olive oil. When the oil is hot, place the seasoned chicken breasts in the skillet. Cook for 6 to 7 minutes on each side. Look for a golden color and ensure the chicken is no longer pink inside. After cooking, remove the chicken and let it rest. Slice it into strips. Now, in the same skillet, melt butter over medium heat. Add sliced onions, bell peppers, and minced garlic. Sauté these for about 4 to 5 minutes until they are soft and smell great. After that, pour in chicken broth and honey. Use a wooden spoon to scrape up any bits left from the chicken. Let this mixture simmer for 5 minutes. Stir in heavy cream and cook for another 2 to 3 minutes until the sauce thickens a bit. Time to bring it all together! Add your cooked fettuccine and sliced chicken into the skillet with the sauce. Toss everything gently, making sure the pasta and chicken are well-coated. If the sauce is too thick, add some reserved pasta water a little at a time until it reaches your desired consistency. Taste the dish and adjust the seasoning with salt and pepper if needed. Serve it hot, garnished with fresh parsley and, if you like, some grated Parmesan cheese. For the full recipe, check the earlier sections. Enjoy your cooking! To cook the best chicken, follow these tips: - Use fresh chicken. Fresh chicken tastes better and cooks well. - Season well. Use Cajun seasoning, salt, and pepper for great flavor. - Let it rest. After cooking, let your chicken sit for a few minutes. This keeps it juicy. For even cooking, use a meat thermometer. The chicken should reach 165°F inside. This way, the chicken stays moist and safe to eat. A creamy sauce makes the dish shine. Here’s how to get it just right: - Start with chicken broth. It adds flavor and helps with thickness. - Use heavy cream. This gives your sauce a rich and smooth texture. - Adjust with pasta water. If the sauce is too thick, add reserved pasta water slowly. This helps you reach your desired consistency. Let the sauce simmer. This allows the flavors to blend nicely. A good sauce coats the pasta well without being too runny. Presentation adds excitement to your meal. Here are some ideas: - Use wide bowls. They allow you to arrange pasta beautifully. - Garnish with parsley. This adds color and a fresh taste. - Sprinkle Parmesan cheese on top. It gives a nice finish and extra flavor. For a pop of color, add a slice of lemon on the side. This not only looks great but also adds a hint of brightness to each bite. {{image_4}} You can switch up the pasta for this dish. Try using penne, rotini, or even whole wheat pasta. Each type brings a unique taste and texture. Gluten-free pasta is also a great choice. It will keep the dish friendly for those with gluten sensitivities. Just remember to cook it according to the package instructions. If you want to change the protein, consider shrimp or sausage. Both options pair well with Cajun flavors. You can use firm tofu for a plant-based option. Simply replace the chicken with an equal amount of your chosen protein. For shrimp, cook it for about 3-4 minutes until pink. For sausage, slice and sauté until cooked through. To make this dish vegetarian, skip the chicken and use mushrooms instead. They add a nice texture and flavor. For a vegan version, use plant-based butter and cream. Coconut cream works well as a substitute. It adds a touch of sweetness that complements the honey. With these swaps, you can enjoy a delicious meal while keeping it plant-based. For the full recipe, check out the link provided. To store leftovers, let the dish cool first. Place the chicken and pasta in an airtight container. Make sure to separate the sauce to keep the pasta from getting soggy. Store it in the fridge for up to three days. This keeps the flavors fresh and tasty. When it's time to enjoy leftovers, reheat them on the stove. Use medium heat to warm the chicken and pasta. Add a splash of chicken broth or water to keep it moist. Stir gently until heated through, about 5-7 minutes. This method helps maintain the dish's creamy texture and spice. If you want to save some for later, freezing works well. First, cool the dish completely. Then, divide it into portions in freezer-safe containers. Make sure to label each container with the date. You can freeze it for up to three months. When you're ready to eat it, thaw it overnight in the fridge. Reheat on the stove for the best taste. Enjoy your Spicy Cajun Honey Butter Chicken & Pasta even after some time! For the full recipe, check out the earlier sections. You can serve this dish with a fresh side salad. A simple green salad with lemon vinaigrette works great. Garlic bread or crusty rolls also pair well. You might like to include some steamed vegetables, like broccoli or green beans, for added nutrition. These sides balance the rich flavors of the chicken and pasta. Yes, you can prepare this meal ahead of time. Cook the chicken and pasta, then store them separately in the fridge. When ready to eat, reheat them in a skillet. Add the sauce and toss everything together. This method keeps the chicken juicy and the pasta fresh. To adjust the spice, use less Cajun seasoning. Start with one tablespoon and add more if you like heat. You can also add a pinch of cayenne pepper for extra kick. For a milder taste, add more honey or cream to balance the flavors. Adjusting spice lets you enjoy this dish at your comfort level. This blog post covered all you need for Spicy Cajun Honey Butter Chicken & Pasta. We discussed the main ingredients and suggested seasonings. I shared cooking steps and essential tips for perfect results. You learned about variations, storage, and answers to common questions. In closing, this dish is fun and easy to make. It’s great for family dinners or gatherings. Try it out and enjoy a tasty meal!
Spicy Cajun Honey Butter Chicken & Pasta Delight
Get ready for a flavor explosion with my Spicy Cajun Honey Butter Chicken & Pasta Delight! This dish combines juicy chicken, rich pasta, and a
To make One-Pan Chicken with Buttered Noodles, you need a few simple ingredients. Here’s the list: - 4 boneless, skinless chicken thighs - 8 oz egg noodles - 2 cups chicken broth - 3 cloves garlic, minced - 1 cup cherry tomatoes, halved - 1 cup fresh spinach - 3 tablespoons unsalted butter - 2 tablespoons extra virgin olive oil - 1 teaspoon dried Italian herbs - Salt and freshly ground black pepper to taste - Fresh parsley, chopped (for garnish) These ingredients are easy to find. The chicken thighs give you juicy meat. Egg noodles soak up the broth and flavors well. Garlic and tomatoes add great taste. Spinach adds a nice touch of green. Butter makes everything creamy and rich. By using fresh herbs and good quality broth, you boost the dish's flavor. You can find most of these ingredients in your local store or farmer's market. For the full recipe, check out the details later. - First, season the chicken thighs. - Use salt, pepper, and dried herbs. - Next, heat olive oil in a large skillet. - Wait for it to shimmer. - Now, add the chicken to the hot skillet. - Sear each side for 5-7 minutes. - Check for golden brown color and doneness. - The chicken should reach 165°F inside. - Once cooked, remove the chicken and set aside. - In the same skillet, add minced garlic. - Stir it for about 1 minute. - Next, add halved cherry tomatoes. - Cook for 2-3 minutes until soft. - Carefully pour in chicken broth. - Scrape the bottom for flavor. - Bring the broth to a gentle simmer. - Add the egg noodles to the broth. - Make sure they are fully submerged. - Cook the noodles for about 7-9 minutes. - Stir occasionally to prevent sticking. - When noodles are almost done, return the chicken. - Add fresh spinach to the skillet. - Stir everything together gently. - Cook for another 2-3 minutes. - Wait until spinach wilts and chicken heats. - Finally, add unsalted butter to the mix. - Toss everything well to coat. - Taste and adjust seasoning if needed. - Add more salt and pepper as desired. Follow this guide for a simple yet delicious meal. For the complete recipe, refer to the [Full Recipe]. - Checking internal temperature: Use a meat thermometer. Chicken should reach 165°F. This keeps it juicy and safe to eat. - Techniques for a nice sear: Make sure your skillet is hot. This helps the chicken get a golden crust. Don’t crowd the pan; give each piece space to brown properly. - Avoiding sticking: Stir the noodles often while they cook. This keeps them from clumping together. Adding a little oil to the water can help too. - Cooking to al dente: Follow the package time closely. You want the noodles firm, not mushy. Taste them a minute before the time is up to check. - Recommended herbs and spices: Fresh herbs like basil or parsley can brighten the dish. You can also add a pinch of red pepper flakes for heat. - Optional garnishes: A sprinkle of fresh parsley adds color. A squeeze of lemon juice before serving brightens all the flavors. {{image_4}} You can switch proteins in this dish. If you prefer chicken breast, it works well. You can also use turkey thighs for a leaner choice. For a vegetarian option, try using firm tofu. For gluten-free noodles, there are many choices. Rice noodles or zucchini noodles are both great options. They pair nicely with the sauce and chicken flavors. Always check the package to get the cooking times right. Want to add some veggies? Bell peppers or zucchini bring color and taste. Just chop them up and toss them in with the garlic and tomatoes. They will cook perfectly in the skillet. If you like heat, try adding red pepper flakes. Just a pinch can make a big difference. You can adjust the spice level to match your taste. Pair this dish with a fresh salad. A simple green salad with lemon dressing works great. You can also serve it with steamed broccoli or green beans for added nutrition. Wine can elevate your meal. A nice white wine, like Chardonnay, pairs well with chicken. It complements the flavors of the noodles and sauce. For more details, check the Full Recipe. To store leftovers, wait for the dish to cool down. Place the chicken and noodles in an airtight container. This keeps them fresh for up to three days. Make sure to separate the chicken from the noodles if you can. This helps each part stay moist. Use glass or BPA-free plastic containers for safe storage. If you want to freeze this meal, it is best to do so right after cooking. Allow it to cool first, then divide it into portions. Use freezer-safe bags or containers, and remove as much air as possible. This can help prevent freezer burn. For best results, eat within three months. When you’re ready to eat, thaw the meal in the fridge overnight. To reheat without drying out, use the stovetop or microwave. For the stovetop, add a splash of broth or water to the skillet. Heat over low until warm. If using a microwave, cover the dish with a damp paper towel. This keeps the moisture in. Heat in short bursts, stirring in between, for even warmth. It takes about 10 minutes to prep and 20 minutes to cook. In total, you need about 30 minutes. This quick meal is great for busy nights when you want something tasty. Yes, you can make this dish ahead of time. To prep, cook the chicken and noodles, then cool them down. Store them in airtight containers. When you're ready to eat, just reheat them on the stove or in the microwave. This helps save time during your busy week. If you don’t have chicken broth, you can use vegetable broth or water. If you use water, add a bit more seasoning to boost the flavor. Both options will still work well, but they will change the taste a little. This article covered a simple and tasty recipe for One-Pan Chicken with Buttered Noodles. We detailed each step, from preparing the chicken to cooking the noodles and final assembly. You learned tips for perfect cooking and variations to suit your taste. Remember, you can swap ingredients or add flavors to make it your own. By following these guidelines, you can enjoy a delicious meal that’s easy to make and store. Happy cooking, and enjoy your dish!
One-Pan Chicken with Buttered Noodles Simple Meal
Get ready to simplify your dinner plans with my One-Pan Chicken with Buttered Noodles recipe. This dish packs flavor and comfort into one easy skillet,
When making honey garlic salmon bites, you need fresh and simple ingredients. Here's what to gather: - 1 pound salmon fillet, skin removed and cut into bite-sized pieces - 1/4 cup honey - 3 tablespoons soy sauce - 3 cloves garlic, minced - 1 teaspoon ginger, freshly grated - 1 tablespoon olive oil - Fresh salt and pepper to taste - 2 green onions, finely chopped, for garnish - A sprinkle of sesame seeds, for garnish These ingredients come together to create a delightful dish. The salmon is rich and buttery, while the honey and garlic add a sweet and savory punch. The ginger adds a little warmth, making this dish perfect for cozy nights. You can find the full recipe at the start of this article, guiding you through the steps to make this warm meal. To start, grab a medium bowl. In this bowl, combine the honey, soy sauce, minced garlic, and freshly grated ginger. Make sure to whisk these ingredients together until the mixture is smooth. This step is key, as the marinade brings rich flavor to the salmon bites. Next, take your bite-sized salmon pieces and coat them in the marinade. Ensure each piece gets a good amount of marinade on it. Once coated, cover the bowl with plastic wrap. Let the salmon marinate for about 15 minutes at room temperature. This allows the salmon to soak up all those tasty flavors. While the salmon marinates, heat one tablespoon of olive oil in a non-stick skillet over medium heat. Wait until the oil shimmers, but don’t let it smoke. Once hot, add the marinated salmon bites to the skillet. Be sure to reserve any leftover marinade for later. Cook the salmon bites for about 3-4 minutes on each side. Gently flip them with a spatula to avoid breaking them. You want them to turn a lovely golden brown and be fully cooked. In the last minute, pour the reserved marinade into the skillet. This will create a sticky glaze over the salmon. Let it bubble and thicken a bit as you stir gently. This step makes the dish even more delicious. Once cooked, take the skillet off the heat. Taste the salmon and adjust the seasoning with fresh salt and pepper if needed. For serving, carefully place the glazed salmon bites on a vibrant platter. Finish with finely chopped green onions and a sprinkle of sesame seeds for a nice touch. For a full recipe, check the details included above. For the best honey garlic salmon bites, timing is key. I suggest cooking the salmon bites for about 3 to 4 minutes on each side. This gives them a nice golden brown color and ensures they cook through. To check for doneness, look for the salmon to flake easily with a fork. It should be opaque and tender inside. A sticky glaze makes these bites special. To achieve this, pour the reserved marinade into the skillet in the last minute of cooking. Stir gently as it bubbles and thickens. This will coat the salmon beautifully. The glaze should cling well, adding flavor and shine. For serving, I like to use a rustic wooden board or a white dish. It makes the colors pop. Garnish the salmon bites with finely chopped green onions and sesame seeds. This adds crunch and a lovely look. To create a cozy ambiance, add lime wedges on the side. They bring a fresh burst and brighten the plate. {{image_4}} If you want to change the sweetness, try using maple syrup. It gives a nice flavor twist. Agave nectar works too. It is lighter and perfect for a health kick. Brown sugar can also add a rich, caramel touch to the dish. Each option brings a unique taste to the honey garlic salmon bites. To spice things up, consider adding chili flakes. They add a nice kick without being too hot. Lime zest can brighten the dish and give it a fresh touch. You can also mix in herbs like cilantro or parsley. These add fragrance and depth to each bite. Experiment with these flavors to find your favorite blend. When you serve honey garlic salmon bites, think about sides that complement the dish. Steamed rice is a great choice. It soaks up the glaze nicely. You can also pair them with roasted vegetables. They add color and a bit of crunch. A simple salad with fresh greens works well too. It balances the rich flavors of the salmon. Enjoy the meal! For the full recipe, check the main section. Store any leftover honey garlic salmon bites in an airtight container. Make sure to let them cool first. I recommend placing a piece of wax paper between layers if you stack them. This helps prevent sticking. Properly stored, they can last up to three days in the fridge. Reheat them gently to keep them moist and tasty. You can freeze honey garlic salmon bites for later enjoyment. First, let them cool completely. Then, place them in a single layer on a baking sheet. Freeze for about an hour until solid. Transfer the frozen bites to a freezer-safe bag. Remove as much air as possible before sealing. When you're ready to eat, thaw them in the fridge overnight. To reheat, bake them at 350°F for about 10-15 minutes, or until heated through. The honey garlic salmon bites stay fresh for up to three days in the fridge. If frozen, they can last for about two to three months. Always check for any off smells or changes in color before consuming. Enjoy these bites at their best for a cozy winter dinner experience. Yes, you can use other fish for this dish. Some great alternatives are: - Trout: It has a similar flavor and texture to salmon. - Tilapia: A mild fish that takes on flavors well. - Cod: Offers a firm texture and mild taste. - Mahi-mahi: A bit firmer, but works well with honey and garlic. Each fish will add a unique taste, so feel free to experiment! To make this dish gluten-free, use gluten-free soy sauce. Here are some options: - Tamari: A popular gluten-free soy sauce. - Coconut aminos: A tasty substitute that is also lower in sodium. - Liquid aminos: A soy sauce alternative that is gluten-free. These options keep the dish flavorful without gluten. Reheating salmon bites can be simple. Here’s how: - Oven: Preheat your oven to 350°F. Place salmon on a baking sheet and heat for about 10 minutes. - Skillet: Heat a non-stick skillet over low heat. Add salmon and cover. Warm for about 5 minutes. - Microwave: Place salmon on a microwave-safe plate. Heat in 30-second intervals until warm. These methods help keep the salmon moist and tasty. Yes, you can prepare this dish ahead of time! Here are some tips: - Marinate salmon: You can marinate the salmon up to 2 hours before cooking. - Cooked salmon: Cooked bites can be stored in the fridge for up to 2 days. - Reheat: Simply reheat as mentioned above. This makes it easy to enjoy a cozy dinner without stress! For the full recipe, check out the original instructions. This post covered how to make honey garlic salmon bites. We went over the ingredients and simple steps. I shared tips for perfect cooking and tasty serving ideas. You can explore variations with different sweeteners or spices. Remember to store leftovers properly to enjoy later. With these tips, you'll impress anyone who tries your dish. Enjoy your cooking and the delicious meals ahead!
Cozy Winter Dinners: Delightful Honey Garlic Salmon Bites
Winter calls for cozy meals, and there’s nothing better than Honey Garlic Salmon Bites! They are quick, tasty, and perfect for chilly nights. Imagine warm,
- Chicken and Marinade Ingredients - 2 boneless, skinless chicken breasts - 1 tablespoon olive oil - 2 tablespoons honey - 1 tablespoon chipotle sauce (add more for extra heat) - 1 teaspoon smoked paprika - 1 teaspoon garlic powder - 1 teaspoon onion powder - Salt and freshly ground black pepper, to taste - Base Ingredients - 1 cup quinoa or brown rice, cooked according to package instructions - Topping Ingredients - 1 cup black beans, thoroughly rinsed and drained - 1 cup corn (choose from fresh, frozen, or canned) - 1 ripe avocado, sliced - ½ cup cherry tomatoes, halved - Fresh cilantro, finely chopped, for garnish - Lime wedges, for serving When I prepare these Honey Chipotle Chicken Bowls, I start by gathering all these ingredients. Each item plays a key role in building flavor and texture. The chicken will soak up the sweet and spicy marinade for a fantastic taste. The quinoa or brown rice serves as a hearty base, while black beans and corn add protein and crunch. Fresh avocado and tomatoes bring a pop of color and creaminess. Don't forget the lime wedges; they add a zesty finish that brightens the whole dish. For the full recipe, check the section above. To start, mix the honey, chipotle sauce, smoked paprika, garlic powder, onion powder, salt, and pepper in a bowl. This mix will create a tasty marinade for your chicken. Place the chicken breasts in a resealable bag or shallow dish. Pour the marinade over the chicken, making sure it is covered well. Seal the bag or cover the dish. Let it sit in the fridge for at least 30 minutes. For more flavor, you can marinate it for up to 2 hours. Next, heat your grill or a grill pan on medium-high heat. If you use a pan, add a little olive oil to stop sticking. Once hot, take the chicken from the marinade. Allow excess marinade to drip off. Grill the chicken for about 6-7 minutes on each side. You want the chicken to reach 165°F (75°C). After grilling, let the chicken rest on a plate for 5 minutes before slicing it. Now, it’s time to build your bowls! Start by adding cooked quinoa or brown rice as the base in each bowl. Then, layer on black beans, corn, sliced avocado, and halved cherry tomatoes. Make sure it looks bright and colorful. Slice the grilled chicken into thin strips and place it on top of the veggies. To finish, sprinkle fresh cilantro for flavor and serve lime wedges on the side. Squeeze the lime over the bowl right before you eat for an extra zing. For more details, check the Full Recipe. To cook perfect chicken, use a simple marinade. Combine honey, chipotle sauce, and spices. Let the chicken soak for at least 30 minutes. This gives it flavor. If you have time, marinating it for two hours is even better. Grill the chicken on medium-high heat for 6-7 minutes per side. Check that the internal temperature is 165°F. Let it rest before slicing. Resting keeps the juices inside, making the chicken moist and tasty. How you serve the dish matters. Use a large, shallow bowl for a beautiful look. Start with a base of quinoa or rice. Layer on black beans, corn, and tomatoes. Slice the grilled chicken and place it on top. Add avocado slices for creaminess. Finish with cilantro for a pop of color. Serve lime wedges on the side for a fresh squeeze right before eating. For a fun touch, place the bowls on a wooden platter. Want more flavor? Add spices or herbs to the marinade. Try adding cumin or chili powder for extra heat. Fresh herbs like parsley or oregano can boost flavor too. If you like it spicy, increase the chipotle sauce. You can also add sliced jalapeños or a dash of hot sauce. Mixing in lime zest gives a bright, fresh taste. This dish is all about personal preference, so feel free to experiment! For the full recipe, check out the Honey Chipotle Chicken Bowls . {{image_4}} You can easily swap out the chicken for firm tofu or tempeh. Both options soak up the marinade well. Use the same marinade to flavor them. Grill or pan-fry until golden brown. You can also use chickpeas for a nutty taste. They add protein and work great in the bowl. While quinoa and brown rice are classic choices, you can get creative. Try using farro or barley for a hearty base. Both grains add a lovely texture. If you want something lighter, cauliflower rice is a healthy option. It absorbs flavors and keeps the dish fresh. Want to change up the flavor? You can add fresh herbs like cilantro or parsley to the marinade. For a tangy kick, mix in lime juice or zest. If you like heat, add more chipotle sauce or some diced jalapeños. You can also try a sweet twist by adding mango or pineapple to the bowl. This will balance the heat and add a tropical flair. For a unique touch, consider adding feta cheese for a bit of creaminess. This recipe is very flexible. You can adjust it to suit your taste. Try these variations to make the dish your own. For the full recipe, click here: [Full Recipe]. After your meal, let any leftovers cool down. Place the chicken and toppings in airtight containers. Keep grains like quinoa or rice separate for best results. Store everything in the fridge for up to three days. This way, your flavors stay fresh and tasty. When you're ready to enjoy your leftovers, use the microwave or stovetop. For the microwave, place everything in a bowl and heat for 1-2 minutes. Stir halfway to ensure even heating. If using the stovetop, warm the chicken and toppings in a pan over low heat. Add a splash of water to keep it moist. You can freeze these bowls for later. Just make sure to store each part separately. Use freezer-safe bags or containers. The chicken can last up to three months in the freezer. When you're ready to eat, thaw it in the fridge overnight before reheating. Yes, you can use chicken thighs instead of breasts. Chicken thighs add more flavor and stay moist. They also work well with the honey chipotle marinade. Just adjust the cooking time. Thighs may need a few extra minutes on the grill to reach 165°F. If you don’t have chipotle sauce, you can use smoked paprika or cayenne pepper. You can also mix adobo sauce with a bit of honey. This keeps the smoky flavor. Other hot sauces work too, but they won't match the same taste. To make it spicier, add more chipotle sauce to the marinade. You can also include diced jalapeños or cayenne pepper. Serve with a spicy salsa for extra heat. Adjust the spice to your liking for the perfect kick. Yes, you can prepare the chicken and quinoa in advance. Marinate the chicken the night before for deeper flavor. Cook the quinoa and store it in the fridge. Assemble the bowls right before serving for the best taste. You can store leftovers in an airtight container. They last in the fridge for up to three days. For longer storage, freeze the chicken and quinoa. They can last up to three months in the freezer. While fresh ingredients are best, you can use frozen or canned. Frozen corn and beans are good substitutes. Just rinse and drain canned ingredients well. This helps reduce extra sodium and maintains flavor. Yes! Feel free to add your favorite toppings. Shredded cheese, sour cream, or sliced radishes work well. You can also add fresh greens like spinach or arugula. Customize your bowl to fit your taste. Absolutely! The honey chipotle chicken is sweet and flavorful. Kids often love that combination. If they prefer less spice, use less chipotle sauce. Adjust the heat to make it perfect for your family. Light drinks work well, like lemonade or iced tea. A cold beer is also a great choice. For a non-alcoholic option, try sparkling water with lime. These drinks will complement the flavors nicely. You can find the full recipe for Honey Chipotle Chicken Bowls within this article. It details each step and ingredient for you. Enjoy creating this tasty meal at home! In this blog post, we explored how to make delicious chicken bowls. We covered the key ingredients, like marinade and toppings, and outlined easy steps for marinating and grilling. You learned tips for cooking chicken perfectly and ideas to present your meal nicely. We also looked at tasty variations and how to store leftovers. Remember, with a few changes, you can personalize this dish for everyone. Enjoy making your own chicken bowls!
Honey Chipotle Chicken Bowls Flavorful and Simple Meal
Are you ready to treat your taste buds? Honey Chipotle Chicken Bowls are packed with flavor and easy to make. In just a few steps,
To make these tasty wraps, you need the right ingredients. Here’s what you will need: - 1 lb ground beef - 1 tablespoon onion powder - 1 tablespoon garlic powder - 1 teaspoon paprika - Salt and pepper, to taste - 4 large flour tortillas - 1 cup shredded lettuce - 1 cup shredded cheddar cheese - 1/2 cup sliced pickles - 1/2 cup Big Mac sauce (combine: 1/2 cup mayonnaise, 2 tablespoons ketchup, 1 tablespoon mustard, 1 tablespoon finely chopped onion, 1 tablespoon sweet relish, salt to taste) These basics give your wraps that classic Big Mac taste with a fun twist. Want to customize your wraps? Here are some fun ideas: - Add diced tomatoes for freshness. - Sprinkle extra onions for a stronger flavor. - Try sliced jalapeños for a spicy kick. - Use gluten-free tortillas if you need them. - For a vegetarian option, swap beef for black beans or lentils. These toppings let you create your own version of Big Mac wraps. Feel free to mix and match! Check the Full Recipe for more details. To start, season the ground beef. In a large bowl, mix the beef with onion powder, garlic powder, paprika, salt, and pepper. Use your hands or a spoon to blend it well. This step is key for flavor. Next, heat a skillet over medium heat. Once it's hot, add the seasoned ground beef. Cook for about 7-10 minutes. Stir often and break up the meat with a spatula as it cooks. You want it browned and fully cooked. If there's extra fat, drain it off. Set the beef aside for later. To get the best flavor, do not rush this step. Cooking it slowly helps the spices soak into the meat. Now, let’s make that tasty Big Mac sauce. Grab a separate bowl. Combine mayonnaise, ketchup, mustard, finely chopped onion, sweet relish, and a pinch of salt. Mix until it’s smooth and creamy. This sauce is what makes the wrap special. For a twist, try adding a dash of hot sauce or a sprinkle of garlic powder. You can even mix in some chopped jalapeños for heat! It’s time to put it all together! Start with a large flour tortilla on a flat surface. Spoon about 2-3 tablespoons of the Big Mac sauce into the center. Spread it out evenly. Then, add about 1/4 cup of the cooked ground beef on top of the sauce. Layer on shredded lettuce, cheddar cheese, and pickles. If you want, add any extra toppings like diced tomatoes or onions. To wrap it up, fold the sides of the tortilla inward. Then, roll it tightly from the bottom to the top. Make sure the filling stays inside. Repeat this for the other tortillas. For a warm finish, toast each wrap in the skillet over medium heat. Cook for 2-3 minutes on each side until they are golden brown. This will give them a nice, crispy texture. This method for assembly keeps everything secure. You’ll enjoy a perfect bite every time! To get a golden crust on your wraps, use medium heat. This helps the outside crisp up nicely without burning the inside. Here are some tips to achieve that perfect golden brown: - Use a non-stick skillet. This prevents the wraps from sticking. - Add a little oil. A small amount of oil helps with browning. - Cook for 2-3 minutes per side. Watch closely to prevent burning. If you want a crunchier wrap, cook it a bit longer. Just keep an eye on it. Adjust the heat as needed. Pair your wraps with tasty sides to enhance the meal. Here are some great options: - Sweet potato fries: They add a sweet crunch that balances the savory wrap. - Coleslaw: A fresh side that brings a nice crunch and coolness. - Fruit salad: A light and refreshing choice to cleanse your palate. For plating, slice each wrap in half. This makes them look nice and is easy for dipping. You can serve them with extra Big Mac sauce on the side. For a fun touch, sprinkle some sesame seeds or fresh herbs on top. This adds color and flavor. Enjoy your homemade Big Mac wraps with friends or family! {{image_4}} You can easily change your Big Mac wraps to fit your taste. If you want a meat alternative, try using ground turkey or chicken. These options are leaner and still super tasty. You can also use plant-based meat for a veggie twist. For a health-conscious swap, consider using whole wheat tortillas. They add fiber and taste great. You can also add more veggies. Try diced bell peppers or shredded carrots. They boost the flavor and nutrition. Mix-ins can add that special touch. Consider adding jalapeños for heat or avocado for creaminess. A sprinkle of fresh herbs, like cilantro, can brighten up the dish. Your Big Mac wraps can change with the seasons. In summer, try adding fresh tomatoes or corn for a burst of freshness. You can also use grilled vegetables for a smoky flavor. In winter, consider adding roasted veggies like sweet potatoes or Brussels sprouts. They offer warmth and comfort during colder months. Toppings can also reflect the season. In fall, top with apple slices or a sprinkle of cinnamon for a twist. In spring, fresh greens like arugula can add a crisp bite. These variations keep your wraps exciting and delicious all year round! For the full recipe, check out the Homemade Big Mac Wraps section. After making your homemade Big Mac wraps, you might have some left over. To keep them fresh, store them right. Wrap each wrap in plastic wrap or foil. Then, place them in an airtight container. This helps prevent them from getting soggy. You can refrigerate the wraps for up to three days. If you want to keep them longer, freeze them. Just make sure to use freezer-safe bags or containers. They can last up to three months in the freezer. When it’s time to enjoy your leftovers, reheating is key. To keep the wraps from getting soggy, use a skillet. Heat the skillet over medium heat. Place the wrap in the skillet for about 3-4 minutes on each side. This keeps the outside crispy while warming the inside. You can also use an oven. Wrap the Big Mac wraps in foil and bake at 350°F for about 10-15 minutes. If you have extra toppings like lettuce, add them fresh after reheating. This keeps them crunchy and tasty. To add some heat to your wraps, you have a few options. You can mix in some cayenne pepper or crushed red pepper flakes into the ground beef. This will give your meat a nice kick. You can also try adding sliced jalapeños for a fresh, spicy crunch. Another idea is to use a spicy version of the Big Mac sauce. Mix in some hot sauce or sriracha to the sauce for extra flavor. Yes, you can make these wraps ahead of time. Prepare the ground beef and sauce, then assemble the wraps. Wrap each one tightly in foil or plastic wrap. Store them in the fridge for up to two days. When you're ready to eat, heat them in a skillet or the microwave. This makes meal prep easy and keeps your wraps fresh. If you want a different protein, there are many great options. Ground turkey or chicken work well and have a lighter taste. You could also try plant-based meat like lentils or chickpeas for a vegetarian option. For a gluten-free meal, make sure to use gluten-free tortillas. These swaps keep your wraps tasty and fit your diet. You can tell when the ground beef is done by checking its color. It should be a nice brown with no pink spots left. The meat should also be crumbly and firm. If you have a meat thermometer, the inside should reach at least 160°F. This ensures it is safe to eat and fully cooked. In this blog post, I covered how to make homemade Big Mac wraps. I detailed main ingredients like ground beef, spices, and tortillas. I also explored optional toppings and how to make the Big Mac sauce. You can customize these wraps with different meats, sauces, or toppings. Try seasonal ingredients for fresh twists. Remember, storing and reheating correctly keeps the wraps tasty. Enjoy creating your unique version of this classic dish! Your homemade Big Mac wraps can impress anyone.
Homemade Big Mac Wraps Simple and Tasty Meal
Are you craving the savory delight of a Big Mac but want something easier to make? You’re in luck! In this blog post, I’ll show
- 4 medium russet potatoes - 1 pound ground turkey or ground beef - 1 packet taco seasoning mix - 1 tablespoon extra-virgin olive oil - 1 small onion, finely chopped - 2 cloves garlic, minced - 1 cup diced tomatoes - 1 cup black beans - 1 cup shredded cheese - 1 ripe avocado - 1 cup sour cream - Fresh cilantro for garnish - Salt and pepper To measure ingredients accurately, use standard measuring cups and spoons. Level off dry ingredients with a straight edge. For liquids, check the measurement at eye level. If you have dietary needs, you can swap ground beef for turkey. For a vegan option, use lentils instead of meat. You can also replace sour cream with cashew cream for a dairy-free choice. Use the Full Recipe to explore more about Taco Potatoes. To make Taco Potatoes, start by preheating your oven to 425°F (220°C). This high temperature helps the potatoes cook evenly and become fluffy inside. Next, wash the russet potatoes well. This removes dirt and grit. Use a fork to pierce each potato several times. This step allows steam to escape while they bake. Place the potatoes on a baking sheet and put them in the oven for about 45-60 minutes. They are ready when a fork easily goes in. While your potatoes bake, heat one tablespoon of olive oil in a large skillet over medium heat. Add the chopped onion first and sauté it for about 3-4 minutes until it looks clear and smells great. Then, add two cloves of minced garlic and stir for one more minute. Keep an eye on it so it doesn’t burn. Next, add one pound of ground turkey or beef. Break it apart with a spatula. Cook it until it turns brown, which should take about 5-7 minutes. Once browned, mix in the taco seasoning packet, one cup of diced tomatoes, and one cup of black beans. Stir everything and let it cook for 5 more minutes to blend the flavors. Taste and add salt and pepper if needed. When the potatoes finish baking, take them out and let them cool for a few minutes. Carefully cut each potato in half lengthwise. Use a spoon to scoop out some of the insides to make room for the filling. Be gentle to keep the skin intact. You can use the scooped potato in future recipes if you like! Now, fill each potato half with the tasty taco mixture you made. Don’t be shy; pack it in! Then, sprinkle one cup of shredded cheese on top of each one. Place the filled potatoes back in the oven for another 10 minutes. This step melts the cheese and makes everything lovely and bubbly. After baking, let the potatoes cool slightly. Top each one with diced avocado, a dollop of sour cream, and some fresh cilantro. This adds color and flavor. For a great look, arrange them on a large platter and add lime wedges on the side. You can also serve them in individual bowls for a cozy feel. Enjoy your Taco Potatoes packed with flavorful goodness! For the complete recipe, refer to the [Full Recipe]. To make Taco Potatoes great, avoid common mistakes. First, do not skip washing the potatoes. Dirt can ruin the taste. Second, pierce the potatoes well. This lets steam escape and prevents bursting. Overcooking can lead to dry potatoes. Keep an eye on the baking time. Finally, taste the filling. Adjust the seasoning as needed to balance flavors. Taco Potatoes shine on their own, but sides enhance the meal. Try a fresh salad with lime dressing. It adds brightness and crunch. Chips and salsa work too. They bring a fun, crunchy touch. For a heartier option, serve with rice or quinoa. This adds substance and makes the meal more filling. Customization makes Taco Potatoes fun. Want more heat? Add jalapeños or hot sauce to the filling. You can also swap toppings based on your taste. Use Greek yogurt instead of sour cream for a tangy twist. Change the cheese to pepper jack for a spicy kick. The options are endless, so feel free to get creative! For the full recipe, check out the complete instructions. {{image_4}} To make vegetarian taco potatoes, you can swap the meat for other tasty options. Try using lentils or quinoa. Both provide protein and texture. You can also add more veggies! Bell peppers, corn, or zucchini work great. Just sauté them with the onions and garlic. This adds color and flavor. You can still use taco seasoning to keep that classic taste. If you need gluten-free taco potatoes, choose a gluten-free taco seasoning. Many brands offer gluten-free mixes. You can also make your own. Combine chili powder, cumin, garlic powder, and onion powder. This way, you can enjoy taco potatoes without worries. Always double-check labels to ensure all ingredients are gluten-free. Want to kick up the heat? Add jalapeños to your filling. Dice them and mix them in while cooking the meat. You can also drizzle hot sauce on top before serving. If you love bold flavors, try adding a few dashes of chipotle powder. It gives a smoky heat that enhances the dish. Remember, adjust the spice level to your taste! For the full recipe, refer to the earlier section. To store leftover Taco Potatoes safely, allow them to cool first. Place them in an airtight container. Keep them in the fridge for up to three days. Make sure to label the container with the date. This method helps you avoid waste and keeps your food fresh. When reheating Taco Potatoes, I recommend using the oven. Preheat it to 350°F (175°C). Place the potatoes on a baking sheet and cover them with foil. This keeps the potatoes from drying out. Heat them for about 15-20 minutes, or until they're warm. You can also use a microwave, but be cautious. Microwaving may make the skins a bit soggy. To freeze Taco Potatoes, first, cool them completely. Wrap each potato in plastic wrap. Then, place them in a freezer-safe bag. They can last up to three months in the freezer. To defrost, move them to the fridge overnight. Reheat them as you like afterward. This way, you can enjoy them anytime! For the full recipe, check out the provided link. To serve more people, simply scale the ingredients. For each extra serving, add one potato and a portion of the filling. For example, if you want to serve six, use six potatoes and increase the ground meat to 1.5 pounds. Adjust all other ingredients similarly. This way, everyone gets a tasty taco potato! Yes, you can prepare Taco Potatoes ahead of time. Bake the potatoes and make the filling. Store them separately in the fridge. When ready to eat, fill the potatoes and bake them. This saves time and keeps everything fresh for your meal. You can also freeze the filling for future meals. You can get creative with the fillings! Try grilled vegetables, shredded chicken, or even quinoa for a twist. You can also add corn, jalapeños, or different beans. This makes each taco potato unique and fun. Experiment with flavors to find your favorite combinations! Making your own taco seasoning is easy! Combine the following spices: - 1 tablespoon chili powder - 1 teaspoon cumin - 1 teaspoon paprika - 1 teaspoon garlic powder - 1 teaspoon onion powder - 1/2 teaspoon salt - 1/4 teaspoon black pepper - 1/4 teaspoon cayenne pepper (optional) Mix these well and use about 2-3 tablespoons for your filling. This homemade blend adds a fresh taste to your dish. Yes, sweet potatoes are a great choice! They offer a sweet flavor and extra nutrients. Their texture is slightly different, but they work well with taco fillings. They add a unique twist that many people enjoy. Just bake them until tender, just like russet potatoes. Taco Potatoes are a tasty dish full of flavor and fun. We covered the main ingredients like russet potatoes and ground meat, along with tips for cooking and serving. You learned how to customize your tacos for different diets. Store any leftovers correctly to keep them fresh. Remember these tips to make each meal special. Taco Potatoes are easy to love and share. Try them soon for a satisfying meal!
Taco Potatoes Packed with Flavorful Goodness
Ready for a flavor explosion? These Taco Potatoes are your new go-to meal! Bursting with spices and a tasty filling, they make any dinner exciting.
This savory ground beef teriyaki recipe is quick and easy. It takes just 25 minutes to make. You can enjoy it for dinner or meal prep for the week. The dish serves four and pairs well with rice or quinoa. Here’s what you need to make this flavorful meal: - 1 lb ground beef - 1/4 cup soy sauce - 2 tablespoons honey - 1 tablespoon rice vinegar - 2 cloves garlic, minced - 1 tablespoon fresh ginger, grated - 1 tablespoon sesame oil - 1 cup broccoli florets - 1 medium carrot, cut into thin strips (julienned) - 1 bell pepper, diced (color of your choice) - 2 green onions, finely chopped - 1 teaspoon sesame seeds (for garnish) - Cooked rice or quinoa (for serving) You can add more flavor or texture with these optional ingredients: - Red pepper flakes for heat - Peas for sweetness - Cashews or peanuts for crunch - Fresh herbs like cilantro for brightness First, gather your sauce ingredients. You need soy sauce, honey, rice vinegar, garlic, ginger, and sesame oil. In a mixing bowl, whisk these together. You want a smooth and tasty sauce. This sauce gives your ground beef a rich flavor. Set it aside for later. Now, grab a large skillet. Heat it over medium heat. Add the ground beef and cook it for 5 to 7 minutes. Use a spatula to break the meat apart as it cooks. You want it to brown nicely. After cooking, drain any extra grease. This keeps your dish lean and healthy. Once the beef is ready, pour the teriyaki sauce over it. Stir well to coat the meat. Lower the heat and let it simmer for 3 to 4 minutes. This lets the flavors mix. Next, add broccoli, carrots, and bell pepper to the skillet. Cook everything together for 4 to 5 minutes. You want the veggies to be tender but still crunchy. After that, fold in chopped green onions. They add a fresh taste. Let everything cool a bit before you portion it out. Serve your teriyaki beef over rice or quinoa. Finally, sprinkle sesame seeds on top for a nice crunch. Enjoy your meal prep ground beef teriyaki! For the full recipe, check back to the earlier section. To boost the taste of your ground beef teriyaki, use fresh ingredients. Fresh garlic and ginger add a bright flavor. Consider marinating the beef for an hour in the teriyaki sauce. This step allows the meat to soak in the flavors. You can also add a splash of lime juice for a tangy twist. When cooking, don’t rush. Let the beef brown well before adding the sauce. This creates a deeper flavor. Meal prepping can save you time and effort. First, chop all your veggies in advance. Store them in airtight containers in the fridge. Cooked beef can last in the fridge for up to four days. Divide your teriyaki into meal prep containers while it's still warm. This helps prevent sogginess. For easy meals, pair the beef with rice or quinoa. Keep them in separate containers to maintain texture. A good presentation makes meals more enjoyable. Serve your rice or quinoa in a bowl. Layer the teriyaki beef and veggies on top. This creates a colorful dish. Use a sprinkle of green onions and sesame seeds for garnish. A lime wedge on the side adds a pop of color and flavor. Remember, we eat with our eyes first! {{image_4}} You can swap ground beef for other meats. Ground turkey works well. It has a milder taste. Ground chicken is another good choice. If you're looking for a plant-based option, try crumbled tofu or tempeh. These will soak up the teriyaki sauce nicely. Use the same cooking time for these substitutes. You can still enjoy the same great flavors. Adding vegetables makes this dish even better. Try adding snap peas for a sweet crunch. You can toss in zucchini, sliced thin, for added texture. Mushrooms also add a nice umami flavor. Feel free to mix and match your favorite veggies. Just remember to cut them into small pieces. This way, they cook evenly and stay crisp. Want to change up the flavor? You can add a splash of sriracha for heat. A squeeze of lime juice can brighten the dish. If you like it sweet, add more honey or some pineapple. You can also try different sauces. Teriyaki is great, but hoisin or oyster sauce can work too. Don’t forget to adjust the soy sauce amount if you do! After you cook your ground beef teriyaki, let it cool down. This step helps keep your meal fresh. Once cooled, place it in airtight containers. Make sure to separate the teriyaki beef from the rice or quinoa. This keeps everything tasting great for days. Store the containers in the fridge. Your meal will stay fresh for about 3-4 days. When you are ready to eat, take out your meal prep container. You can reheat it in the microwave or on the stovetop. If using the microwave, cover the container with a lid or microwave-safe wrap. Heat for about 2-3 minutes, stirring halfway through. If using the stovetop, place the beef in a pan over low heat. Stir often until it is hot. Add a splash of water or soy sauce if it seems dry. If you want to save your teriyaki beef for later, freezing is a great option. Portion it into freezer-safe containers. Make sure to leave some space at the top, as the beef may expand when frozen. Label each container with the date. You can freeze it for up to 3 months. When you are ready to eat, thaw it in the fridge overnight. Reheat it as mentioned above. Enjoy your tasty meal anytime! Yes, you can use frozen ground beef. Just make sure to thaw it first. You can thaw it overnight in the fridge. If you’re short on time, you can use the microwave. Once thawed, follow the cooking steps in the recipe. This method saves time and still gives you a tasty dish. Meal Prep Ground Beef Teriyaki lasts about 4 days in the fridge. Store it in airtight containers to keep it fresh. Make sure it cools down before you seal it to avoid moisture build-up. This way, you can enjoy easy dinners throughout the week. You can serve ground beef teriyaki with many sides. Cooked rice or quinoa pairs well. Steamed veggies also make a great choice. For a crunchy twist, add a side salad. You can even serve it in lettuce wraps for a fun hand-held meal. This blog post showed you how to make Meal Prep Ground Beef Teriyaki. We covered the key ingredients and the steps to create a tasty dish. I shared tips to enhance flavor and make meal prep easier. Variations let you customize your meal with different proteins and veggies. Store your teriyaki properly to keep it fresh. In the end, you can enjoy this meal any time. Try your own twists and make it yours. Happy cooking!
Meal Prep Ground Beef Teriyaki for Easy Dinners
Do you need quick and tasty dinners? Meal Prep Ground Beef Teriyaki is your answer! This dish packs flavor and makes busy nights a breeze.
- 4 large bell peppers (choose a mix of colors for visual appeal) - 1 lb ground turkey (or a plant-based meat alternative for a vegetarian option) - 1 cup quinoa, thoroughly rinsed under cold water - 2 cups vegetable broth - 1 can (15 oz) black beans, rinsed and drained - 1 can (15 oz) diced tomatoes, undrained - 1 teaspoon ground cumin - 1 teaspoon smoked paprika - 1 teaspoon onion powder - 1 teaspoon garlic powder - Salt and black pepper to taste - 1 cup shredded cheese (optional for topping) - Fresh cilantro, chopped, for garnish - Other vegetables like corn or zucchini - Different types of cheese such as feta or mozzarella - Spices and herbs like oregano or basil Each ingredient plays a role in making this dish tasty and fun. Bell peppers add a sweet crunch. Ground turkey brings protein and flavor. Quinoa offers great texture and health benefits. Black beans add fiber, while diced tomatoes give a juicy punch. Seasonings like cumin and paprika make the dish shine. Feel free to mix in optional ingredients! Adding corn or zucchini can boost freshness. Choosing different cheeses can give a unique twist. And don’t shy away from herbs; they can elevate your meal to the next level. For a complete guide, check out the Full Recipe. 1. Preheat the oven: Set your oven to 375°F (190°C). This helps cook the meal evenly. 2. Prepare the bell peppers: Cut the tops off the four large bell peppers. Remove the seeds and membranes inside. Save the tops by chopping them finely for later use. This adds flavor to your filling. 1. Cooking the turkey: In a large skillet, heat it over medium heat. Add 1 pound of ground turkey (or a plant-based alternative) and cook until it’s browned. This takes about 5 to 7 minutes. Use a spatula to break it apart as it cooks. 2. Mixing in spices and other ingredients: Add the chopped bell pepper tops to the skillet. Cook for 3 to 4 minutes until they soften. Then, sprinkle in 1 teaspoon each of ground cumin, smoked paprika, onion powder, and garlic powder. Add salt and black pepper to taste. Mix well. Stir in 1 can of black beans, 1 can of diced tomatoes, and 1 cup of cooked quinoa. Heat everything through for about 5 minutes. 1. Filling the peppers: Spoon the filling into the hollowed bell peppers. Pack it well to fit all the goodness inside. 2. Baking instructions: Place the filled peppers upright in a baking dish. If you want, add 1 cup of shredded cheese on top. Cover the dish tightly with foil to keep moisture in. Bake for 25 minutes, then remove the foil and bake for another 10 minutes. This helps the peppers get tender and the cheese to melt. After baking, let them cool for 5 minutes. Garnish with chopped fresh cilantro before serving. For the complete recipe, check out the Full Recipe section. To cook your peppers just right, you want to bake them at 375°F (190°C). This gives them a nice tender bite. After 25 minutes, check their softness. They should be tender but still hold their shape. A fork should pierce the skin easily. Spices make a big difference. I love using cumin, smoked paprika, onion powder, and garlic powder. They add warmth and depth. For a fresh twist, try adding fresh herbs like cilantro or parsley. Pair these peppers with a simple salad or some crusty bread for a great meal. To make your dish shine, use a colorful platter. Place the peppers upright for a fun look. Drizzle olive oil and lime juice over them for extra flavor and flair. Garnish with chopped cilantro for a pop of color. This makes your meal not just tasty, but also beautiful. For the full recipe, check out the detailed instructions above. Enjoy creating this colorful and flavorful dish! {{image_4}} For a vegetarian or vegan twist on unstuffed peppers, you can easily swap out the meat. Here are some ideas: - Substitutions for protein: Use lentils, chickpeas, or tofu. These options add great protein. - Plant-based fillings: Try adding mushrooms or tempeh for a hearty texture. You can also include nuts for crunch and flavor. You can transform your unstuffed peppers with different flavors. Here are two tasty ideas: - Tex-Mex style: Add taco seasoning, corn, and jalapeños. Top with avocado and cilantro for freshness. - Mediterranean inspired: Use feta cheese, olives, and herbs like oregano. Incorporate spinach for a vibrant taste. Feel free to change up the ingredients for fun. Here are some swaps you can try: - Using different grains or legumes: Quinoa is great, but you can also use brown rice or farro. These grains provide different textures and tastes. - Alternative veggies: Instead of bell peppers, use zucchini or eggplant. They create a new twist on the dish while still being delicious. For the full recipe, check out the Unstuffed Bell Peppers Delight. To keep unstuffed peppers fresh, store them in the fridge. Use airtight containers to prevent moisture loss. Leftovers can stay good for 3 to 5 days. Make sure they cool before sealing. This helps keep the taste and texture. You can freeze unstuffed peppers for later meals. First, let them cool completely. Then, wrap each pepper in plastic wrap. Place them in a freezer-safe bag or container. They can last up to 3 months in the freezer. When you're ready to enjoy, thaw them overnight in the fridge. Reheat them in the oven at 350°F until hot. You can also use the microwave for quicker results. Just cover them to keep moisture in. Unstuffed peppers last about 3 to 5 days in the fridge. If frozen, they can keep for about 3 months. After that, they may lose flavor and texture. Always check for any signs of spoilage before eating. Enjoy your meal at its best! Yes, you can use other types of meat. Ground beef or chicken works well. For a lighter dish, try ground turkey. If you want a vegetarian meal, use a plant-based meat like lentils or chickpeas. Both options add unique flavors and textures. You can also mix in different proteins to suit your taste. To keep your peppers firm, avoid overcooking them. First, don’t boil or steam the peppers before baking. Instead, fill them with the mixture and bake right away. Also, make sure the filling isn’t too wet. If it is, drain excess liquid before filling the peppers. You can also bake them at a higher temperature for a shorter time to maintain their crunch. Yes, you can prepare this recipe in advance. Cook the filling and cool it completely. Store it in the fridge for up to three days. You can also fill the peppers and keep them in the fridge until you’re ready to bake. Just cover them well to keep them fresh. For freezing, wrap the filled peppers tightly. They can last up to three months in the freezer. When ready to eat, thaw them overnight in the fridge, then bake as directed. In this blog post, I highlighted key ingredients for stuffed peppers, along with preparation and cooking steps. I shared tips for achieving perfect peppers and offered creative variations. Storing tips ensure your leftovers stay fresh, while FAQs address common concerns. Stuffed peppers are simple, fun, and adaptable. Whether you're making them vegetarian or adding spices for flair, you can enjoy delicious, healthy meals. Try these recipes and have fun in the kitchen!
Unstuffed Peppers Recipe Quick and Flavorful Meal
Looking for a quick and tasty meal? This Unstuffed Peppers Recipe is your answer! Packed with flavor, this dish is easy to make and fun
To make a hearty beef and pepper rice bowl, you need fresh quality ingredients. Here’s what you’ll need: - 1 lb beef sirloin, thinly sliced - 1 cup jasmine rice - 2 tablespoons soy sauce - 1 tablespoon sesame oil (plus more for cooking) - 1 red bell pepper, sliced - 1 yellow bell pepper, sliced - 1 green bell pepper, sliced - 1 small onion, sliced - 2 cloves garlic, minced - 1 tablespoon fresh ginger, minced - 2 green onions, chopped (for garnish) - Sesame seeds (for garnish) - Salt and pepper to taste - 2 cups water or beef broth These ingredients create a colorful and flavorful dish. Each component adds its own touch. The beef gives protein and richness, while the peppers offer crunch and sweetness. Jasmine rice brings a light and fragrant base. For the best taste, use fresh veggies and quality beef. You can find the full recipe at the end of this section. Enjoy building your beef and pepper rice bowl! - Bring 2 cups of water or beef broth to a boil. - Rinse 1 cup of jasmine rice under cold water until clear. - Add the rice to the boiling liquid. - Reduce heat to low and cover tightly. - Let it simmer for 15 minutes or until liquid is absorbed. - Remove from heat and let it stand for 5 minutes. - Fluff the rice with a fork and keep warm. - In a bowl, mix 1 lb of sliced beef with 2 tablespoons of soy sauce. - Add 1 tablespoon of sesame oil, 2 cloves of minced garlic, and 1 tablespoon of minced ginger. - Sprinkle with salt and pepper to taste. - Ensure the beef is well-coated. - Cover the bowl and let it rest at room temperature for 15 minutes. - Heat a teaspoon of sesame oil in a large skillet over medium-high heat. - Add 1 small sliced onion and the sliced bell peppers (1 red, 1 yellow, 1 green). - Stir-fry the vegetables for 5-7 minutes until softened but still crisp. - Transfer the vegetables to a plate and set aside. - In the same skillet, add more sesame oil if needed. - Add the marinated beef in a single layer. - Cook for 2-3 minutes on each side until browned and no longer pink. - If necessary, cook in batches to avoid crowding. - Return the sautéed vegetables to the skillet with the beef. - Toss everything together gently over heat for about a minute. - Serve the mixture generously over the jasmine rice. - Garnish with chopped green onions and sesame seeds for added flavor. For the complete cooking process, you can refer to the Full Recipe. - Use high heat for better stir-frying. This helps the beef brown nicely. - Don’t overcrowd the skillet for even cooking. Cook in batches if needed. - Marinate the beef longer for enhanced flavor. I often suggest 30 minutes. - Keep beef at room temperature before cooking. This helps it cook evenly. - Pair with additional sides like salad or spring rolls. These add crunch and freshness. - Consider using a variety of pepper colors for visual appeal. It makes the dish pop! When preparing your Beef and Pepper Rice Bowl, these tips will ensure a delicious outcome. For the full recipe, check out the earlier section. Enjoy your cooking adventure! {{image_4}} You can easily change the protein in this beef and pepper rice bowl. If beef isn't your thing, try chicken or tofu. Chicken breast works well and cooks quickly, making it a great choice. Tofu is a fantastic plant-based option. It soaks up flavors well and adds a nice texture. For beef, explore different cuts like flank steak or ribeye. Each cut has its own flavor and tenderness. Flank steak is lean but flavorful, while ribeye is rich and juicy. Adding more vegetables boosts nutrition and flavor. Broccoli, carrots, and snap peas are great choices. They add color and crunch. You can also try seasonal veggies. Zucchini and asparagus can freshen up the dish during summer. In fall, add pumpkin or sweet potatoes for a cozy touch. Want more flavor? Chili paste adds a nice kick if you like heat. Start with a small amount and adjust to your taste. For a sweeter twist, use teriyaki sauce. It brings a unique flavor profile that pairs well with beef and veggies. For the full recipe, check out the Full Recipe section. Enjoy experimenting with these variations! Store your leftovers in an airtight container in the fridge. This helps keep the food fresh and safe. It is best consumed within 3-4 days. If you wait too long, the flavors may fade. Make sure to check for any signs of spoilage before eating. If you want to save some for later, freeze portions in freezer-safe bags. This makes it easy to store and keep for a longer time. When you are ready to eat, thaw the frozen meal in the fridge overnight. Thawing helps maintain the texture and taste of the dish. To reheat, use the microwave or stove for even heating. If the rice seems dry, add a splash of water before reheating. This will help bring back the fluffy texture. Stir the rice and beef mixture well to ensure everything heats evenly. Enjoy your meal just as you made it! To make fluffy rice, rinse the rice before cooking. This removes extra starch. After boiling, let it rest for five minutes. Then, fluff it with a fork. This keeps the grains separate and light. Yes, you can prepare the rice, beef, and veggies ahead. Store them in separate containers. When ready to eat, just warm them up and combine. This makes for an easy and quick meal later. To make it gluten-free, simply swap soy sauce with gluten-free tamari. This keeps the taste while avoiding gluten. Always check labels to ensure all ingredients are gluten-free. You can add a variety of toppings to enhance flavor. Avocado adds creaminess. Fresh cilantro gives a nice herb taste. A drizzle of hot sauce can bring heat and excitement. Experiment with your favorites! In this blog post, we explored a tasty beef stir-fry recipe packed with fresh veggies and jasmine rice. You learned how to marinate, sauté, and combine ingredients for a delicious meal. Remember, cooking is about creativity, so feel free to change ingredients to suit your taste. Try different proteins or veggies to make it unique. With these tips, you can enjoy a flavorful dish while impressing your family. Keep experimenting and have fun in the kitchen!
Hearty Beef and Pepper Rice Bowl Recipe Delight
Are you ready for a meal that combines bold flavors and a satisfying crunch? This Hearty Beef and Pepper Rice Bowl is just what you