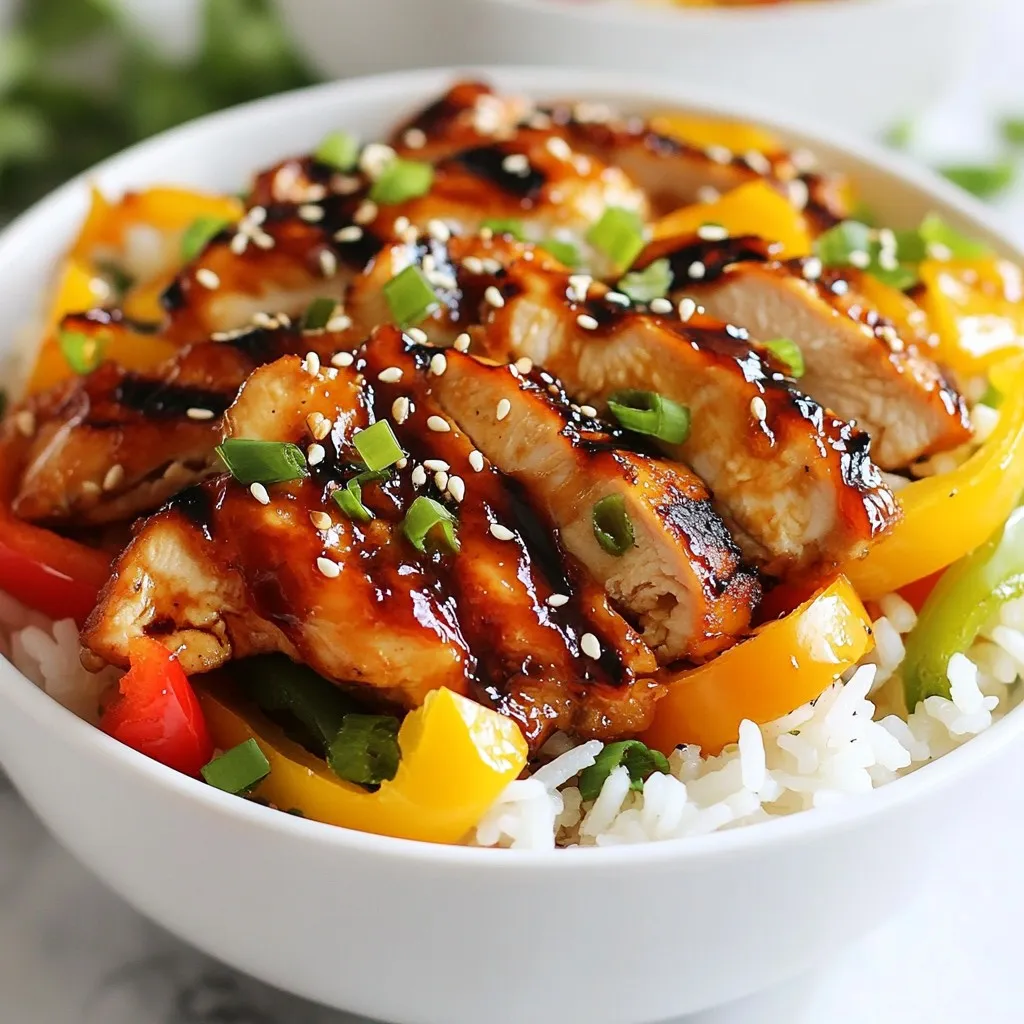
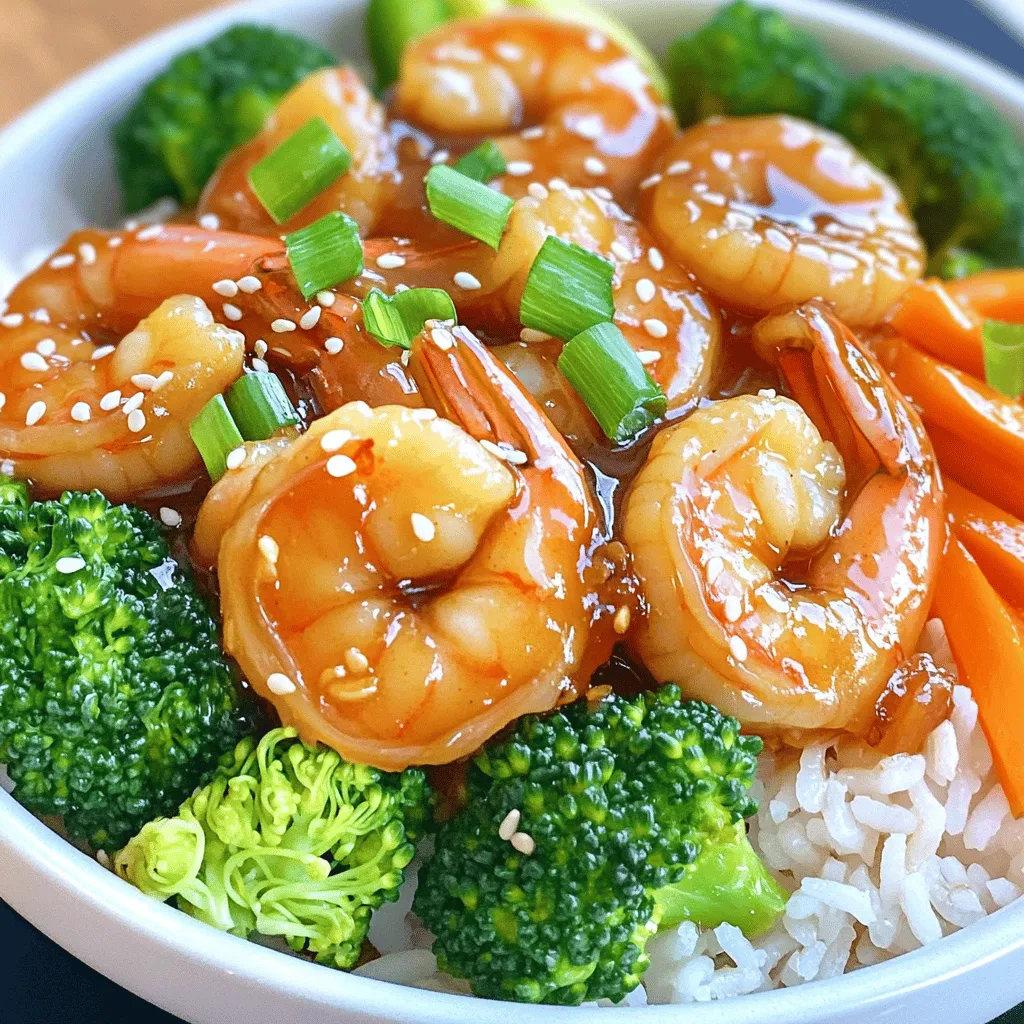
Dinner

- 1 pound large raw shrimp, peeled and deveined - 1 cup jasmine rice - 2 ripe avocados, diced - 1 red bell pepper, thinly sliced - 1 small cucumber, diced - 2 tablespoons soy sauce - 1 tablespoon sriracha - 1 tablespoon freshly squeezed lime juice - 2 tablespoons olive oil - 2 cloves garlic, minced - 1 tablespoon fresh ginger, grated - Salt and freshly ground black pepper, to taste - Fresh cilantro leaves, for garnish - Lime wedges, for serving When I start making this dish, I focus on fresh and vibrant ingredients. The shrimp should be large and raw to get that perfect texture. I love jasmine rice for its aroma and taste. Avocados add creaminess, while the bell pepper and cucumber bring crunch and freshness. Next, the marinade is key to flavor. Soy sauce gives saltiness, and sriracha adds a spicy kick. Fresh lime juice brightens everything up. I use garlic and ginger for depth. Make sure to season with salt and pepper for balance. For garnish, I always have fresh cilantro on hand. It adds a pop of color and a fresh taste. Lime wedges make it easy to add a burst of flavor when serving. You can find the full recipe in the article, and I promise it will be a hit! - Rinse the jasmine rice to remove excess starch. - Boil 2 cups of water in a pot. Add the rinsed rice and reduce heat to low. - Cover the pot and simmer for about 15 minutes until the rice is tender. - Fluff the rice with a fork and set aside. - In a bowl, mix soy sauce, sriracha, lime juice, garlic, and ginger. - Stir well until everything is combined. Set aside to marinate the shrimp. - Heat olive oil in a large skillet over medium-high heat. - Add the shrimp and cook until they turn pink, about 2-3 minutes. - Pour the marinade over the shrimp and toss to coat. - Cook for an additional 1-2 minutes until the sauce thickens and shrimp are done. - Start by layering rice as the base in serving bowls. - Next, add sliced bell pepper, diced cucumber, and creamy avocado on top. - Finally, top with the spicy shrimp and drizzle some sauce over the dish. Enjoy the burst of flavors in every bite of your Spicy Shrimp and Avocado Rice Bowl! For the complete recipe, check out the Full Recipe. How to tell when shrimp are cooked Shrimp cook quickly. They turn from gray to pink. You will see them curl slightly. When the flesh is opaque, they are done. Overcooked shrimp become tough, so keep an eye on them. Choosing the right shrimp size for even cooking I recommend using large shrimp, about 16-20 per pound. This size cooks evenly and maintains a good texture. If you use smaller shrimp, they may cook faster. Adjust cooking time to avoid overcooking. Additional spices or herbs to add complexity You can elevate your dish with spices like paprika or cumin. Fresh herbs like cilantro or parsley add a bright touch. Try lime zest for a citrusy kick. Each adds a unique flavor to your bowl. Suggestions for adjusting spice levels with sriracha Sriracha adds heat, but you can adjust it. Start with a small amount if you prefer milder dishes. Add more to boost the spice. You can also mix in honey for a sweet heat. Alternative methods for cooking jasmine rice You can use a rice cooker for easy, fluffy rice. Just follow the machine's instructions. Another method is to use a pot in boiling water. Just like with pasta, boil until tender, then drain. How to prevent rice from sticking Rinsing rice removes excess starch, which helps keep it fluffy. Use a fork to fluff cooked rice gently. Adding a bit of oil while cooking also prevents sticking. This keeps your rice light and separate. For the complete recipe, check out the [Full Recipe]. {{image_4}} You can swap shrimp for other proteins. Try chicken or firm fish for a twist. If you want a vegan option, use tofu instead of shrimp. Tofu absorbs flavors well, making it a great choice. Just make sure to press it to remove excess water before cooking. To sweeten your bowl, add tropical fruits like mango. Mango pairs well with the spicy shrimp and creamy avocado. You can also try different sauces for added flavor. Teriyaki sauce can give a nice sweet and savory touch. Experimenting with these flavors keeps your dish exciting. You can change how you serve your bowl. Turn it into a burrito bowl by adding beans and corn. Use a tortilla for a fun wrap option. If you prefer a lighter meal, add fresh greens to make a salad. Leafy greens can balance the spice and add crunch. To store leftovers, let the Spicy Shrimp and Avocado Rice Bowl cool down. Place the bowl in an airtight container. This helps keep the flavors fresh. You can store it in the fridge for up to three days. Make sure to separate the shrimp from the rice if possible. This keeps the rice from getting soggy. If you want to freeze the shrimp and rice bowl, first cool it completely. Use a freezer-safe container or bag. Label it with the date. You can freeze it for up to two months. For best results, freeze the shrimp and rice separately. When it’s time to eat, thaw the bowl overnight in the fridge. To reheat, warm the rice in the microwave or on the stove. Heat the shrimp in a skillet until it is hot. This keeps the shrimp tender and tasty. Enjoy the Spicy Shrimp and Avocado Rice Bowl fresh! For the full recipe, see above. Yes, you can use frozen shrimp. Just thaw them first. Place them in a bowl of cold water for about 15 minutes. Pat them dry before cooking. Frozen shrimp may need a minute more to cook. This helps ensure they are fully cooked and safe to eat. Fresh shrimp often taste better, but frozen shrimp work well too. The spice level depends on how much sriracha you use. Start with one tablespoon for a mild kick. You can add more if you like it hot. Taste the marinade before adding it to the shrimp. Adjust it to suit your heat preference. This way, you can enjoy the dish without it being too spicy. This rice bowl pairs well with many sides. Try a light salad for freshness. A cool cucumber salad works great too. You can also serve it with tortilla chips for crunch. For drinks, a cold lemonade or iced tea can balance the heat. These options enhance your meal experience. This recipe takes about 30 minutes in total. You’ll spend around 15 minutes prepping the ingredients. Cooking the shrimp and rice takes another 15 minutes. This recipe makes four servings, perfect for a family meal. The quick prep and cook time makes it easy to enjoy a delicious dish. I recommend jasmine rice for its light and fluffy texture. It absorbs flavors well and pairs nicely with the shrimp. You can also use brown rice for a healthier option. If you prefer a different flavor, try basmati rice. Each type adds a unique taste and feel to your rice bowl. Yes, you can prep some ingredients ahead of time. Cook the rice and store it in the fridge. You can also marinate the shrimp a few hours before cooking. Just keep them in the fridge until you're ready. Prepare the fresh veggies right before serving for the best taste. This helps save time when you’re ready to eat. In this post, we explored a delicious shrimp rice bowl recipe. We covered key ingredients, step-by-step cooking, and helpful tips. You learned about variations, storage, and answered common questions. Creating this dish is simple and fun. Adjust the ingredients to suit your tastes. Enjoy the fresh flavors and unique combinations. You can make it your own. Now go ahead and try it out for a tasty meal!
Spicy Shrimp and Avocado Rice Bowl Delight
Are you ready to elevate your dinner game? This Spicy Shrimp and Avocado Rice Bowl Delight is quick to make and packed with flavor. With
When making Garlic Butter Honey BBQ Chicken Tacos, you'll need these key items: - 1 lb boneless, skinless chicken thighs - 2 tablespoons unsalted butter - 4 cloves garlic, minced - 1/4 cup honey - 1/4 cup BBQ sauce (your favorite brand) These ingredients create a juicy and flavorful chicken. The honey adds a sweet touch, while the BBQ sauce brings a smoky flavor. The garlic and butter add richness, making each bite a delight. To make your tacos shine, gather these toppings: - 1 cup shredded lettuce - 1 cup diced tomatoes - 1/2 cup crumbled queso fresco or feta cheese - Fresh cilantro for garnish - Lime wedges, for serving These fresh toppings add crunch and color. The lettuce and tomatoes bring brightness, while the queso fresco adds creaminess. A squeeze of lime at the end gives a nice zing. Don't forget to add flavor with these spices: - 1 teaspoon smoked paprika - 1/2 teaspoon cayenne pepper (optional for heat) - Salt and pepper, to taste These spices elevate the chicken. Smoked paprika gives it depth, and cayenne adds a kick. Adjust the salt and pepper to fit your taste. For the full recipe, check out the [Full Recipe]. To start, you need to prepare the marinade. Grab a mixing bowl and whisk together honey, BBQ sauce, smoked paprika, cayenne pepper, salt, and pepper. This mix brings a sweet and smoky taste. Now, add your chicken thighs to the bowl. Make sure they are fully coated in the marinade. Cover the bowl and place it in the refrigerator. Let the chicken marinate for at least 20 minutes. This time allows the flavors to soak in. Next, heat a large skillet over medium heat. Add unsalted butter and let it melt. Once melted, add the minced garlic to the pan. Sauté the garlic for about 1-2 minutes. You want it fragrant but not burned. Now, take the marinated chicken thighs and carefully add them to the hot skillet. Cook the chicken for about 6-7 minutes on each side. You need to ensure the chicken reaches an internal temperature of 165°F (75°C). This step keeps it safe to eat and juicy. While the chicken cooks, it’s time to warm the corn tortillas. Use another dry skillet over medium heat. Heat each tortilla for about 30 seconds on each side. This warms them up and makes them flexible. Soft tortillas make for better tacos. Keep them warm in a clean kitchen towel until you are ready to assemble. Now comes the fun part: assembling the tacos! Start by placing a generous amount of sliced chicken on each tortilla. Top with shredded lettuce and diced tomatoes. Sprinkle crumbled queso fresco on top for that creamy finish. For a nice touch, garnish with fresh cilantro. Serve your tacos with lime wedges on the side. A squeeze of lime over the tacos adds a bright flavor. Enjoy this delicious meal with friends or family. For the full recipe, check out the Garlic Butter Honey BBQ Chicken Tacos. To ensure your chicken thighs are juicy and tender, check the internal temperature. It should reach 165°F (75°C). Use a meat thermometer for accuracy. After cooking, let the chicken rest for a few minutes. This helps the juices redistribute, making each bite more flavorful. Want to boost the flavor? Try adding a squeeze of fresh lime juice over the chicken while it’s warm. It brightens the taste and adds a nice zing. You can also experiment with other seasonings. A dash of cumin or chili powder can give your tacos a unique twist. Pair these tacos with simple sides. Some tasty options include corn on the cob or a fresh salad. For drinks, I recommend a cold beer or a refreshing iced tea. These choices balance well with the sweet and savory flavors of the tacos. Enjoy every bite! {{image_4}} You can switch up the protein in these tacos. If you want beef, use flank steak. Cut it into thin strips. Grill or sauté it until cooked through. Shrimp is another great choice. Toss it in the marinade and cook until pink. Tofu works well too. Press the tofu to remove water, then marinate and sauté until golden. For a plant-based twist, use jackfruit. Shred it and cook with the same marinade. It absorbs flavors well. You can also try tempeh. Marinate and sauté it until crispy. For a quick option, use store-bought vegan chicken. Just sauté it like the real thing. Spice lovers can add more cayenne or use a spicy BBQ sauce. You can also mix in some chipotle sauce for a smoky kick. If you like sweet, add more honey or use a honey BBQ sauce. Try different BBQ sauces to change the taste. Each one brings its own flair to your tacos. Explore these variations to make your Garlic Butter Honey BBQ Chicken Tacos truly your own! For the full recipe, check out the complete details above. After you enjoy your Garlic Butter Honey BBQ Chicken Tacos, store any leftovers wisely. Place the chicken and toppings in separate containers. Use airtight containers to keep them fresh. Store the chicken in the fridge for up to three days. The toppings can also stay fresh for a similar time if kept in a cool spot. To keep the flavor and texture, reheat the chicken on the stove. Place it in a skillet over medium heat. Stir it a few times until it’s warm. You can also use the microwave. Heat it in short bursts, checking often to avoid drying it out. Tortillas can be warmed in a dry skillet for a few seconds. This method adds a nice softness back to the tortillas. You can freeze the chicken or tacos for later meals. For chicken, let it cool completely before placing it in a freezer-safe bag. Remove as much air as possible and seal it tightly. Freeze for up to three months. For tacos, it’s best to freeze the chicken and tortillas separately. This way, you can enjoy them fresh when you’re ready. Just remember to thaw overnight in the fridge before reheating. Yes, you can prepare these tacos ahead of time. Start by marinating the chicken. Mix honey, BBQ sauce, smoked paprika, cayenne pepper, salt, and pepper in a bowl. Add the chicken thighs and coat them well. Cover the bowl and refrigerate for up to 24 hours. This allows the flavors to blend and enhances taste. When it’s time to cook, just heat the skillet and sauté the chicken as outlined in the recipe. You can also prepare toppings like lettuce and tomatoes ahead. Just store them in sealed containers in the fridge. This makes assembly quick and easy. The best BBQ sauce depends on your taste. I like to use a sauce that balances sweetness and tang. Brands like Sweet Baby Ray’s or Stubbs are popular options. You can also try a smoky flavor if that’s what you enjoy. Experimenting with different BBQ sauces can change the taco flavor. Use a spicy sauce for a kick or a honey-based sauce for extra sweetness. To make these tacos gluten-free, choose corn tortillas instead of flour. Most corn tortillas are naturally gluten-free. Always check the package to be sure. For the BBQ sauce, many brands offer gluten-free options. Look for sauces without wheat or barley. You can also make your own BBQ sauce at home using safe ingredients. Adjusting the spice level is easy. If you like mild tacos, skip the cayenne pepper. You can also replace it with a dash of paprika for flavor without heat. For spicier tacos, add more cayenne or try a hot sauce in the marinade. You can also garnish with sliced jalapeños for an extra kick. Enjoy experimenting until you find your perfect level of heat! This guide covered all you need for tasty chicken tacos. You learned about ingredients, cooking, and serving. Don’t forget to try different proteins or flavors. Storing and reheating tips help you enjoy them later. Remember, these tacos are fun and easy. They can fit any taste with small changes. Enjoy making and sharing these delicious tacos!
Garlic Butter Honey BBQ Chicken Tacos Simple Delight
Are you ready to treat your taste buds? Garlic Butter Honey BBQ Chicken Tacos are a simple delight! With juicy chicken kissed by sweet honey
- 1 lb ground beef - 1 tablespoon seasoning mix (like garlic powder, onion powder, and paprika) - 4 large flour tortillas - ½ cup shredded lettuce - ½ cup diced tomatoes - ½ cup sliced pickles - ¼ cup mayonnaise - ¼ cup ketchup - 2 tablespoons mustard - 1 tablespoon apple cider vinegar Making Big Mac Wraps is simple. You need some key ingredients for an awesome taste. First, we need ground beef. It gives that classic burger flavor. The seasoning mix adds depth and zest to the beef. Next, we grab our tortillas. They hold everything together and make it easy to eat. Choose large flour tortillas for the best wrap. Now let’s talk about fresh vegetables. Shredded lettuce adds crunch and freshness. Diced tomatoes bring a juicy burst with every bite. Sliced pickles give a tangy kick that makes it all come alive. Finally, we need sauce components. Mayonnaise, ketchup, and mustard combine for a smooth, tasty sauce. The apple cider vinegar adds a little tanginess that rounds out the flavors. For the complete experience, check out the Full Recipe. It gives you all the steps to create these fun wraps! - Heat the Skillet Start by turning your skillet to medium heat. This is the perfect temp for browning beef. Wait until the skillet is hot. - Season the Beef Add 1 lb of ground beef to the skillet. Use a spatula to break it apart. Cook for about 5-7 minutes. Once it turns brown, drain off any extra fat. Now, sprinkle your seasoning mix on the beef. This can be garlic powder, onion powder, or paprika. Add salt and pepper, then stir well. Cook for 2-3 more minutes before removing it from heat. - Mixing Ingredients Grab a small bowl. In it, whisk together ¼ cup mayonnaise, ¼ cup ketchup, 2 tablespoons mustard, and 1 tablespoon apple cider vinegar. This blend will give your wraps a tasty kick. - Achieving Consistency Keep whisking until the sauce is smooth. This creamy sauce is key to a great wrap. Make sure there are no lumps. - Spreading the Sauce Take your large flour tortillas and lay them on a clean surface. Spread a good tablespoon of the sauce in the center of each tortilla. Leave space around the edges, so they wrap well. - Layering Ingredients Evenly put the seasoned beef down the center of each tortilla. Next, add ½ cup shredded lettuce, ½ cup diced tomatoes, and ½ cup sliced pickles. Finish with ½ cup shredded cheddar cheese on top of the veggies. - Wrapping Technique To wrap, fold the sides in over the filling first. Then, roll the bottom edge up and over the filling. Keep rolling tightly until the wrap is closed. This method keeps everything inside and neat. Optional: For crispy wraps, place them seam-side down in the skillet. Toast each side for 1-2 minutes until golden brown. You can find the Full Recipe for more details! - Ensuring Tender Meat: Start by cooking the ground beef over medium heat. This helps it cook evenly. Break the meat apart with a spatula as it cooks. You want it fully browned, which takes about 5-7 minutes. Drain off any fat to keep it light. - Avoiding Excess Grease: After cooking, always drain the fat from the skillet. Too much grease can make your wraps soggy. Rinse the pan with hot water if needed. This small step keeps your Big Mac Wraps tasty and fresh. - Plating Suggestions: Cut your wraps in half on a diagonal to show off the layers inside. Arrange the halves on a colorful platter. This makes your dish more inviting. - Garnishing Ideas: Add a sprinkle of fresh herbs on top for color. Chopped parsley or cilantro works well. You can also place a few extra pickles around the platter to enhance the look. - Pairing Ideas: These wraps go great with a side of crispy fries or sweet potato wedges. You can also serve them with a fresh salad for a lighter meal. - Best Sides to Serve: Try a classic coleslaw or a tangy cucumber salad. These sides add crunch and balance the flavors of the wraps. {{image_4}} Protein Alternatives You can use many proteins in Big Mac Wraps. Try ground turkey or chicken for a leaner version. If you want a bolder taste, use chorizo or spicy sausage. You can even opt for shredded beef for a unique twist. These changes keep the wraps fun and tasty. Vegan Options For a vegan take, swap out the beef for lentils or black beans. You can also use plant-based ground meat. Look for vegan cheese to replace cheddar. Use a vegan mayo for the sauce. This way, everyone can enjoy Big Mac Wraps. Additional Sauces You can change the sauce for extra flavor. Try adding barbecue sauce or sriracha for heat. A dash of ranch dressing can give a creamy twist. Mix up your sauces to find your favorite blend. Each new sauce brings a different taste to your wraps. Spices and Seasoning Variations Experimenting with spices can make the wraps exciting. Add cumin or chili powder for warmth. You can also try Italian herbs for a fresh twist. A sprinkle of smoked paprika adds depth. Don’t hesitate to adjust the seasonings to match your taste. Use in Salads Leftover wraps make great salads. Cut the wraps into strips and toss them with greens. Add chopped veggies and your favorite dressing. You can use the sauce as a salad dressing too. This way, you transform wraps into a light meal. Wrap into Quesadillas If you have leftover filling, try making quesadillas. Layer the filling between two tortillas and grill until crispy. The cheese will melt, creating a gooey treat. This method gives a new life to your leftovers in a fun way. For the complete recipe, check the [Full Recipe]. To keep your Big Mac Wraps fresh, store them in the fridge. Use airtight containers or wrap them tightly in plastic wrap. This keeps the wraps from drying out. Try to eat them within three days for the best taste. For sauces and fillings, keep them in separate containers. This helps maintain their texture and flavor. You can store the sauce for about a week. Make sure to check for any signs of spoilage before use. To freeze your wraps, wrap each one in foil or plastic wrap. This prevents freezer burn. Place them in a freezer bag or container. They can last up to three months in the freezer. When ready to eat, take them out and thaw in the fridge overnight. For quick thawing, use the microwave on low heat. This helps keep the wraps soft. To reheat your wraps, I suggest using a skillet for the best results. Heat it over medium heat and place the wrap seam-side down. Cook for 2-3 minutes on each side until crispy. If you use a microwave, wrap them in a damp paper towel. Heat for 30-60 seconds. This method may not make them crispy, but it’s quick. Enjoy your Big Mac Wraps with their fresh taste! Big Mac Wraps are a fun twist on the classic Big Mac. They use tortillas instead of buns. You get all the tasty flavors in a neat wrap. The seasoned beef, cheese, and veggies create a great mix. Think of it as a handheld version of the Big Mac. Yes, you can prep Big Mac Wraps ahead of time! Make the filling and sauce first. Store them in separate containers. When ready to eat, just assemble the wraps. You can keep the filled wraps in the fridge for a day. They taste great even after some time! Absolutely! You can change up the ingredients. Use turkey or chicken instead of beef. If you're vegan, try plant-based meat or beans. You can also swap out the sauce for your favorite. Add extra veggies like onions or bell peppers for more crunch. Big Mac Wraps are about 400-500 calories each. The exact number depends on your ingredients. You get protein from the beef, fiber from the veggies, and some fat from cheese. It’s good to check the labels of your ingredients for precise info. You can find the Full Recipe [here](#). This will guide you through making delicious Big Mac Wraps from start to finish. Enjoy cooking! You've learned how to make delicious Big Mac Wraps, from ingredients to storage tips. Use ground beef, fresh veggies, and tasty sauces to create your own wraps. Follow the steps for cooking, assembling, and presenting them well. Remember, you can customize these wraps to fit your taste or diet. Whether you make them in advance or turn leftovers into salads, they remain versatile and fun to enjoy. Now, grab the full recipe and get cooking! Enjoy your delicious creation!
Big Mac Wraps Flavorful and Fun Recipe Guide
Get ready to enjoy a tasty twist on a classic! In this guide to Big Mac Wraps, I’ll show you how to make this fun
- 4 large russet potatoes - 1 cup sour cream - ½ cup cream cheese (softened) - 1 cup shredded sharp cheddar cheese - ½ cup crispy cooked bacon bits (optional) - ¼ cup fresh green onions (finely chopped) - 1 cup mini marshmallows - ½ cup semi-sweet chocolate chips - ¼ cup unsweetened cocoa powder - ¼ cup packed brown sugar - ¼ teaspoon pure vanilla extract - Salt and freshly ground black pepper - Olive oil for drizzling Mississippi Mud Potatoes are fun and rich. You need the right ingredients for the best taste. Start with russet potatoes. They are big and fluffy. Sour cream and cream cheese give a creamy texture. Cheddar cheese adds a sharp flavor. Bacon bits are optional but add a nice crunch. Green onions bring freshness to the mix. Sweet toppings make this dish unique. Mini marshmallows and chocolate chips create a sweet layer. Cocoa powder and brown sugar add richness. A touch of vanilla extract enhances the sweet flavor. - You can swap cream cheese for Greek yogurt. - Try cashew cream as a vegan sour cream. - Use mushrooms or tofu instead of bacon for a veggie option. Using these swaps can keep the dish tasty. You can adjust to fit your diet and preferences. - Baking sheet or oven rack - Mixing bowls - Fork for piercing potatoes - Spoon for scooping potatoes Gathering the right tools makes cooking easier. A baking sheet helps catch any drips. Mixing bowls are perfect for combining your ingredients. A fork is needed to pierce potatoes before baking. A spoon helps to scoop out the insides neatly. With these ingredients and tools, you’re ready to make Mississippi Mud Potatoes. For the complete guide, check out the Full Recipe. 1. Start by preheating your oven to 400°F (200°C). This temperature helps cook the potatoes perfectly. 2. Scrub each russet potato well under running water. This removes dirt and makes them clean. 3. Use a fork to pierce each potato a few times. This lets steam escape while baking. 4. Drizzle a bit of olive oil on the skins. Sprinkle them with salt for flavor. 5. Place the potatoes on a baking sheet or right on the oven rack. Bake them for about 45-55 minutes. You want them tender when you poke them with a fork. 6. While the potatoes bake, mix the filling. In a bowl, combine sour cream, cream cheese, and cheddar cheese. 7. If you like bacon, add crispy bits to the mix. Chop some green onions and toss them in too. 8. Stir everything until it's well mixed. Season with salt and pepper to taste. 1. When the potatoes are done baking, take them out carefully. Allow them to cool for a few minutes. 2. Cut each potato in half lengthwise. Be careful; they’ll be hot! 3. Gently scoop out the insides of the potatoes. Leave a thin layer inside to hold the shape. 4. Add the scooped potato to the cheese mixture. Blend it until smooth and creamy. 1. Fill the empty potato skins with the cheesy mixture. Pile it high for a nice look. 2. In a separate bowl, mix mini marshmallows, chocolate chips, cocoa powder, brown sugar, and vanilla. Stir well until combined. 3. Spread this marshmallow-chocolate mix over the stuffed potatoes. Make sure to cover them nicely. 4. Put the filled potatoes back in the oven. Broil them on high for about 2-3 minutes. 5. Watch closely until the tops bubble and turn golden brown. 6. Take them out and let them cool slightly before serving. This helps the toppings set. For the complete details, check the Full Recipe for Mississippi Mud Potatoes. To make your Mississippi Mud Potatoes soft and fluffy, choose russet potatoes. They have the right starch content. Bake them until fork-tender, about 45-55 minutes at 400°F. Let them cool before scooping for a fluffy filling. When mixing, blend the potato flesh with sour cream and cream cheese. The cream will help create a smooth, creamy texture. Add salt and pepper to taste for flavor. These potatoes shine with simple sides. Try a fresh garden salad or steamed green beans. For a fun twist, serve them with a side of BBQ chicken. When plating, use a colorful platter. Garnish with more green onions and a drizzle of chocolate syrup. This adds a playful touch to your dish. Watch the baking time! Overbaking can dry out the potatoes. Keep an eye on them as they cook. Also, pay attention to ingredient ratios. Too much cream cheese can make the filling heavy. Stick to the measurements in the Full Recipe for best results. Balancing the flavors is key to a delicious outcome. {{image_4}} You can make your Mississippi Mud Potatoes more exciting by adding spices or herbs. Try garlic powder, paprika, or even some fresh herbs like chives or dill. These will boost the flavor and make your dish pop. You can also experiment with different cheeses. Instead of sharp cheddar, try pepper jack for some heat, or smoked gouda for a rich taste. Each choice will give you a new twist on the classic flavor. You don’t have to bake these potatoes if you want to try something new. Grilling adds a smoky flavor that pairs nicely with the creamy filling. Just wrap the potatoes in foil and grill for about 45 minutes. If you're short on time, consider using an Instant Pot. Cook the potatoes on high pressure for about 15 to 20 minutes. This method saves time and still gives you tasty, fluffy potatoes. Want to turn this savory dish into something sweet? You can change the filling by adding sweet cream cheese and vanilla. This makes a fun dessert option. For toppings, add a drizzle of chocolate syrup or sprinkle some crushed graham crackers on top. You can even top it with whipped cream for a delightful touch. This twist will surprise your guests and make dessert memorable. To store Mississippi Mud Potatoes, let them cool first. Place leftovers in an airtight container. This keeps them fresh and tasty. You can store them in the fridge for up to 3 days. If you want to keep them longer, consider freezing. You can reheat Mississippi Mud Potatoes in the microwave or oven. For the microwave, place a potato on a microwave-safe plate. Heat for about 1-2 minutes. Check if it is warm enough. For the oven, preheat to 350°F (175°C). Place the potatoes on a baking sheet and cover with foil. Bake for about 15-20 minutes. This helps keep the texture and flavor intact. Yes, you can freeze Mississippi Mud Potatoes. Wrap them well in plastic wrap, then place in a freezer bag. They can last up to 2 months in the freezer. When ready to eat, thaw them in the fridge overnight. Reheat using the oven for best results. This keeps the flavors fresh and delicious. Mississippi Mud Potatoes are a fun twist on classic stuffed potatoes. They mix savory and sweet flavors. The base is a russet potato, baked until soft. Then, you scoop out the insides and mix them with creamy cheese and green onions. Finally, you add a sweet topping of marshmallows and chocolate. This dish looks great and tastes amazing! Yes, you can make Mississippi Mud Potatoes ahead. Bake the potatoes and prepare the filling. Store them separately in the fridge. When you are ready, refill the potatoes and broil them just before serving. This saves time on busy days. To make Mississippi Mud Potatoes gluten-free, check all labels. Sour cream and cream cheese are usually gluten-free. Use a gluten-free bacon substitute if you want bacon bits. Cocoa powder is also gluten-free, so you’re good there! These potatoes pair well with light salads or grilled vegetables. You can also serve them with a protein like grilled chicken or steak. They are so rich that simple sides work best. The total time to make Mississippi Mud Potatoes is about 1 hour and 10 minutes. Prep takes about 20 minutes, and baking takes 45 to 55 minutes. You will enjoy the wait when you taste them! You can find the full recipe for Mississippi Mud Potatoes on the original recipe page. It has all the steps and tips you need. Mississippi Mud Potatoes blend creamy, sweet, and savory flavors for a unique dish. You learned about the key ingredients, prep steps, and helpful tips to make this dish perfect. Remember to try different flavors and storing methods. Experimenting can lead to fun variations! Whether for a family meal or a gathering, these potatoes will impress. Dive in and create a tasty experience that everyone will love. You're ready to enjoy tasty Mississippi Mud Potatoes!
Delicious Mississippi Mud Potatoes Scrumptious Recipe
Are you ready to dive into a unique dish that combines sweet and savory? Mississippi Mud Potatoes are not just a side but a delightful
- 1 cup white rice - 2 cups vegetable broth - 1 tablespoon olive oil - 1 small onion, diced - 1 bell pepper (any color), diced - 2 cloves garlic, minced - 1 can (15 oz) black beans, drained and rinsed - 1 cup corn (fresh or frozen) - 1 tablespoon taco seasoning - 1 teaspoon ground cumin - Salt and pepper to taste - 1 cup diced tomatoes (fresh or canned) - 1 avocado, diced - 1 cup shredded cheese (cheddar or Mexican blend) - Fresh cilantro, chopped (for garnish) - Lime wedges (for serving) When choosing ingredients, quality matters. Fresh vegetables enhance flavor. For beans, use low-sodium canned options. If you want a creamy texture, choose ripe avocados. Dietary needs vary. For gluten-free, confirm that your taco seasoning is gluten-free. If you're vegan, skip the cheese and use a plant-based alternative. You can swap white rice for brown rice for added fiber. Each choice can change the dish's taste and health benefits. For the full recipe, check out the [Full Recipe]. To start, bring 2 cups of vegetable broth to a boil in a medium saucepan. Once it bubbles, add 1 cup of white rice. Cover the pot and lower the heat. Let it simmer for 15-20 minutes. This time allows the rice to absorb the broth. After 20 minutes, take it off the heat but keep it covered for 5 more minutes. This steaming step makes the rice fluffy. Once done, use a fork to fluff the rice gently. While the rice cooks, heat 1 tablespoon of olive oil in a large skillet over medium heat. Add 1 small diced onion and 1 diced bell pepper. Sauté for about 5 minutes until they are soft and fragrant. This step is vital for flavor. If you rush it, the veggies won't taste as good. Now, add 2 minced garlic cloves, 1 tablespoon of taco seasoning, and 1 teaspoon of ground cumin to the skillet. Stir well for a minute until the mixture is aromatic. Next, add 1 can of drained black beans, 1 cup of corn, and 1 cup of diced tomatoes. Stir everything together thoroughly. Heat this mixture for about 3-5 minutes. Taste it and season with salt and pepper as needed. Once heated, gently fold in the cooked rice. Mix everything well, letting it warm together for 2-3 more minutes on low heat. The flavors will blend nicely. This is where the magic happens! You can find the Full Recipe at the beginning of the article for more details. To make taco rice perfect, start with the spices. Adjust the spice levels to suit your taste. If you want more heat, add a pinch of cayenne or jalapeño. For a milder flavor, reduce the taco seasoning. You can also experiment with spices like paprika or chili powder. Cooking time matters too. For the rice, use a medium saucepan. Bring your vegetable broth to a boil, then add the rice. Cover and lower the heat. Let it simmer for about 15-20 minutes. This will give you fluffy rice every time. After cooking, let it steam for 5 minutes before fluffing it with a fork. When serving taco rice, toppings add excitement. Diced avocado brings creaminess, while shredded cheese adds richness. Fresh cilantro offers a burst of flavor. You can also use sour cream or Greek yogurt for a cooling effect. For side dishes, consider a simple salad or tortilla chips. A refreshing drink like lemonade pairs well too. These options can enhance your meal and make it feel special. Avoid overcooking your rice or vegetables. Overcooked rice turns mushy. Veggies lose their crunch and flavor if cooked too long. Keep an eye on the cooking times for best results. Another mistake is not seasoning adequately. Always taste your dish as you cook. Adjust salt and pepper to your liking. Seasoning at the right moments can elevate your taco rice to a new level. For the full recipe, check out the Taco Rice Fiesta! {{image_4}} You can mix in different proteins to make taco rice even better. Chicken, beef, or tofu work well. - Chicken: Cook diced chicken in the skillet before adding the veggies. - Beef: Ground beef can be browned first. This adds great flavor. - Tofu: Use firm tofu. Just cube it and sauté until golden. If you add protein, adjust the cooking times. Make sure the meat is fully cooked before mixing in the rice and veggies. For a plant-based dish, you can easily swap out meat. Use more beans or lentils for protein. Here are some ideas for vegan taco rice: - Replace cheese with a vegan cheese option or skip it entirely. - Add toppings like sliced jalapeños, salsa, or guacamole. This keeps the dish tasty and satisfying without animal products. If you need a gluten-free taco rice, you have options! Choose gluten-free products for the best results. - Use gluten-free taco seasoning. Many brands offer this. - Brown rice is a great substitute for white rice. These small changes help make taco rice fit into a gluten-free diet while keeping it delicious. To keep taco rice fresh, you should refrigerate it. Place your leftover taco rice in an airtight container. This helps to keep it moist. Ensure the rice cools down before sealing the container. It is best to eat the leftovers within three days for the best taste. When you are ready to enjoy leftover taco rice, you have a few options. You can use the microwave, stovetop, or oven. For the microwave, place the rice in a bowl and cover it with a damp paper towel. Heat it for about one to two minutes. If you prefer the stovetop, warm it in a skillet over medium heat. Add a splash of vegetable broth to keep it moist. For the oven, preheat to 350°F (175°C) and place the rice in a baking dish covered with foil. Heat for about 15 minutes. Always check that the rice is hot throughout. Freezing taco rice is a great option if you want to save some for later. First, let the rice cool completely. Then, pack it into freezer-safe containers or bags. Make sure to remove as much air as possible. Taco rice can last in the freezer for up to three months. When you want to eat it, thaw it overnight in the fridge. Reheat it using the methods mentioned above. This way, you can enjoy your taco rice just like when it was fresh! For the full recipe, check out the Taco Rice Fiesta. To make Taco Rice vegetarian, you can easily swap out meat and dairy. Here are some ideas: - Use vegetable broth instead of chicken broth. - Replace meat with more beans or lentils for protein. - Skip the cheese or use a dairy-free cheese option. - Add extra veggies like zucchini or mushrooms for more flavor. These substitutions keep the dish tasty and filling, while also being meat-free. Yes, you can make Taco Rice ahead of time! Here are some tips: - Cook the rice and vegetable mixture separately. This way, they stay fresh. - Store each in airtight containers in the fridge. - You can prepare it up to two days in advance. - When ready to eat, simply reheat both and mix them together. This makes meal prep easy and saves time on busy days. Taco Rice pairs well with different sides and drinks. Here are some ideas: - Serve with tortilla chips and salsa for crunch. - A fresh green salad adds a nice touch. - Pair with guacamole for creaminess. - Cold drinks like iced tea or lemonade work great, too. These options enhance your meal and make it even more enjoyable. For the full recipe, check out the Taco Rice Fiesta. Taco Rice is simple and fun to make. We covered the key ingredients, cooking steps, and tips to get it just right. You can mix in proteins or go fully plant-based to fit your needs. Remember to watch cooking times and season well for the best flavor. Store your leftovers correctly to enjoy later. Now, get cooking and enjoy your tasty Taco Rice creation today!
Taco Rice Recipe Simple and Flavorful Meal Idea
Looking for an easy meal that bursts with flavor? My Taco Rice recipe is the perfect solution! This dish combines hearty rice with spicy goodness
- 1 lb ground beef (80/20) - 8 small flour tortillas - 1 cup shredded lettuce - 1 cup diced tomatoes - 1 cup shredded cheddar cheese - 1/2 cup pickles, sliced - 1/2 cup mayonnaise - 2 tablespoons yellow mustard - 2 tablespoons ketchup - 1 tablespoon white vinegar - 1 teaspoon garlic powder - 1 teaspoon onion powder - Salt and freshly cracked black pepper to taste - Cooking oil for frying - Sturdy spatula The key to making the Big Mac Smash Burger Taco lies in its ingredients. Use high-quality ground beef, like 80/20. This mix gives you a juicy patty with a nice amount of fat. For the tortillas, I like small flour ones. They’re soft and easy to fold. You’ll also need fresh toppings like shredded lettuce, diced tomatoes, and cheddar cheese. These add crunch and flavor. Don’t forget the pickles! They give a nice tang that pairs well with the rich beef. Next, let’s talk about the special sauce. It’s a mix of mayonnaise, mustard, ketchup, and a few spices. This sauce gives your taco that Big Mac taste! For cooking, have some oil on hand for frying. A sturdy spatula is also a must for smashing those patties down. You can find the complete recipe in the [Full Recipe] section. To make the sauce, grab a medium bowl. - Combine: - 1/2 cup mayonnaise - 2 tablespoons yellow mustard - 2 tablespoons ketchup - 1 tablespoon white vinegar - 1 teaspoon garlic powder - 1 teaspoon onion powder - A pinch of salt and black pepper Stir everything well until smooth. Let the sauce sit for a bit. This helps the flavors mix together and taste better. Now it’s time to form the patties. - Take 1 pound of ground beef and divide it into 8 parts. Each part should weigh about 2 ounces. - Roll each piece into a loose ball. Do not press too hard so the meat stays tender. Using tender meat makes your burgers juicy and delicious. Next, let’s cook the patties. - Preheat a large skillet or griddle over medium-high heat. - Add a bit of cooking oil to coat the pan. Once hot, place the beef balls on the skillet. - Press each ball down firmly with a spatula. Flatten them to about 1/4 inch thick. - Season with salt and pepper. Cook for 2-3 minutes until a golden crust forms. - Flip the patties and cook for another 1-2 minutes. This will give you the perfect doneness. While the burgers cook, let’s warm the tortillas. - Heat another skillet over medium-low heat. - Place each flour tortilla in the skillet. Warm them for about 30 seconds on each side. This step makes the tortillas soft and easy to fold. Now, it’s time to assemble the tacos. - Lay a warm tortilla flat. - Place one smash burger patty in the center. - Add a handful of shredded lettuce, diced tomatoes, and a sprinkle of cheddar cheese. - Top it off with pickle slices. - Drizzle some Big Mac sauce over everything. To fold the taco, gently bring the sides of the tortilla up and pinch them together. For a great look, arrange the tacos on a nice platter. - Garnish with extra pickles and a sprinkle of fresh parsley or cilantro. - Serve with more Big Mac sauce on the side for dipping. This recipe is fun and full of flavor. Enjoy your tasty creation! For the full recipe, check it out [here](#). Ensuring Juiciness To keep your patties juicy, use ground beef with a fat content of 20%. This fat adds flavor and moisture. When you form the patties, avoid packing the meat too tightly. Looser patties will cook better and stay tender. Avoiding Overcooking Watch the cooking time closely. Smash the patties down to about 1/4 inch thick for even cooking. Flip them when they get a golden crust. Cook for just 2-3 minutes on the first side and 1-2 minutes on the other side. This keeps the beef tender and juicy. Customizing Big Mac Sauce to Taste You can change the Big Mac sauce to fit your taste. Start with the basic recipe. Add more mustard for tang or extra ketchup for sweetness. You can also mix in some hot sauce for a kick. Suggested Additional Ingredients Consider adding diced onions or minced garlic to the sauce. These add depth and flavor. A splash of Worcestershire sauce can enhance the savory notes. Experiment and find your perfect mix! Using Corn Tortillas vs. Flour Flour tortillas are soft and pliable, perfect for this taco. Corn tortillas offer a different texture and flavor. If you like a more authentic taste, try corn tortillas. They will add a nice crunch and are great for holding the filling. Gluten-Free Options If you need a gluten-free option, look for corn tortillas. You can also find gluten-free flour tortillas in stores. They work well and keep the taco fun and tasty. Always check labels to ensure they meet your dietary needs. {{image_4}} You can switch up the protein in your Big Mac Smash Burger Taco for more fun. - Turkey or Chicken Burger Alternatives: Ground turkey or chicken works well. They are leaner than beef, making them a great choice. Just season them well to keep the flavor strong. - Vegetarian Black Bean or Lentil Patties: If you want a meatless meal, use black beans or lentils. Mash them up, add spices, and form patties. They give a nice texture and flavor to the taco. Adding new flavors can make your taco even more exciting. - Spicy Big Mac Smash Burger Taco: For a kick, add some hot sauce to the Big Mac sauce. You can also mix in diced jalapeños with the beef for extra heat. - Adding Avocado or Guacamole: Creamy avocado or guacamole adds a smooth touch. It pairs well with the crunch of the lettuce and pickles. Use fresh, seasonal ingredients to change up your dish. - Incorporating Summer Vegetables: Add fresh corn or diced bell peppers for a summer vibe. You can also toss in some diced zucchini for added color and crunch. - Winter Spice Flavors: In colder months, try adding spices like cumin or smoked paprika. These warm flavors can make the taco feel cozy and comforting. Feel free to explore these variations to make your Big Mac Smash Burger Taco truly your own! For the full recipe, check out the earlier section. To keep your Big Mac Smash Burger Tacos fresh, store them in an airtight container. Place parchment paper between layers to keep them from sticking. Refrigerate right after serving. This helps maintain their flavor and texture. How long do they last in the fridge? They can stay good for about 3 days. After that, they may lose their taste and texture. When you’re ready to eat your leftovers, reheating is key. The best method is to use a skillet. This helps keep the tacos crisp. Heat the skillet on low and warm each taco for about 2-3 minutes on each side. Microwave reheating is quick but can make the tortillas tough. If you choose this method, use a damp paper towel on top to add moisture. Heat in short bursts of 30 seconds until warm. You can freeze both the patties and the assembled tacos. For patties, place them in a single layer on a baking sheet. Once frozen, transfer them to a freezer bag. This prevents them from sticking together. If you freeze assembled tacos, wrap each one tightly in plastic wrap. Then place them in a freezer-safe bag. Thawing recommendations? Move them to the fridge overnight before reheating. This helps keep them moist and delicious. A Big Mac Smash Burger Taco is a fun mix of flavors. It combines the classic Big Mac taste with a taco format. You get a juicy smash burger in a soft tortilla. The toppings include fresh lettuce, diced tomatoes, cheddar cheese, and pickles. You’ll also drench it in a creamy Big Mac sauce. This fusion dish is tasty and playful, perfect for any meal. To make the Big Mac sauce, gather these ingredients: - 1/2 cup mayonnaise - 2 tablespoons yellow mustard - 2 tablespoons ketchup - 1 tablespoon white vinegar - 1 teaspoon garlic powder - 1 teaspoon onion powder - Salt and freshly cracked black pepper to taste Mix all the ingredients in a bowl. Stir well until smooth. Let it sit for a few minutes. This helps the flavors blend together. You’ll want that creamy, tangy taste to shine through. Yes, you can use different tortillas. Flour tortillas are soft and easy to fold. You might also like corn tortillas for a gluten-free option. They add a nice corn flavor. If you want a whole grain choice, try whole wheat tortillas. Each type of tortilla changes the dish's feel slightly, so pick what you love best. Great sides for the Big Mac Smash Burger Taco include: - Crispy french fries - Coleslaw for crunch - Fresh fruit for sweetness - Nachos with cheese and salsa These sides balance the meal and add variety. They also make for a fun and colorful table setting. You can adjust the spice level to your liking. Add chopped jalapeños for a kick. You can also mix in hot sauce with the Big Mac sauce. For a milder option, include sweet peppers instead. This way, you can create a dish that fits your taste buds perfectly. The Big Mac Smash Burger Taco blends fun flavors with easy steps. You learned the main ingredients, special sauce, and how to cook everything. I shared tips on making juicy patties and spicing things up. Remember, you can use different proteins and tortillas for variety. This dish is customizable and great for sharing or a family meal. Enjoy your cooking adventure, and make it uniquely yours!
Big Mac Smash Burger Taco Flavorful and Fun Recipe
Craving a fun twist on classic flavors? The Big Mac Smash Burger Taco blends two favorites into one delicious dish. With juicy beef patties, fresh
- 2 chicken breasts, diced into bite-sized pieces - 1 cup cornstarch - 1 teaspoon garlic powder - 1 teaspoon onion powder - 1 teaspoon smoked paprika - Salt and freshly cracked pepper - Oil for frying - 1 cup shredded romaine lettuce - 1 cup cooked jasmine rice - ½ cup cherry tomatoes, halved - ¼ cup green onions, sliced - ¼ cup fresh cilantro, chopped - Sesame seeds for garnish - ½ cup creamy mayonnaise - 2 tablespoons sweet chili sauce - 1 tablespoon sriracha - 1 teaspoon fresh lime juice - Pinch of salt The chicken is the star of this dish. I use two chicken breasts, cut into small pieces. Cornstarch gives the chicken a crispy coat. I add garlic powder, onion powder, and smoked paprika for flavor. Salt and pepper bring out the taste. I fry the chicken in hot oil until it’s golden and crunchy. For the bowl, I start with a cup of cooked jasmine rice. This rice is soft and full of flavor. Next, I layer in one cup of shredded romaine lettuce. This adds a nice crunch. I then add halved cherry tomatoes for freshness. The sliced green onions add a mild bite, while fresh cilantro gives a burst of flavor. Finally, I sprinkle sesame seeds on top for a lovely touch. The Bang Bang sauce ties everything together. I mix creamy mayonnaise with sweet chili sauce and sriracha. This sauce gives a sweet and spicy kick. A splash of lime juice brightens the flavor, while a pinch of salt rounds it out. Check out the Full Recipe for detailed steps on making this flavorful dish. - Combine mayonnaise, sweet chili sauce, sriracha, lime juice, and salt. - Whisk until smooth and set aside. Making the Bang Bang sauce is simple. The creamy mayo blends with sweet chili sauce. Sriracha adds a spicy kick. Lime juice brightens the flavors. Just mix these in a bowl, and you have a tasty sauce ready to go. - Mix cornstarch, garlic powder, onion powder, smoked paprika, salt, and pepper. - Coat chicken pieces evenly with the mixture. Next, we need to coat our chicken. The cornstarch gives a nice crunch. Garlic and onion powder add great taste. Smoked paprika gives it a warm, rich flavor. Toss the chicken in this mix until all pieces are covered well. - Heat oil in a skillet. - Fry coated chicken until golden brown. - Drain on paper towels. Now, let’s cook the chicken. Heat oil in your skillet until it's shimmering. Carefully add the coated chicken in batches. Fry each piece until it's golden brown. About 5 to 7 minutes should do. Once done, let them rest on paper towels to catch any extra oil. - Layer jasmine rice, romaine lettuce, and fried chicken. - Top with cherry tomatoes, green onions, and cilantro. It's time to build your bowl! Start with a warm layer of jasmine rice. Next, add a generous handful of romaine lettuce. Now, place the crispy fried chicken on top. Finally, sprinkle cherry tomatoes, green onions, and fresh cilantro for color and crunch. - Generously pour Bang Bang sauce over the assembled bowl. - Garnish with sesame seeds. To finish, drizzle that delicious Bang Bang sauce all over the bowl. Don’t be shy; make it nice and saucy! For the final touch, sprinkle sesame seeds on top. They add a nice nutty flavor and look great! For the full recipe, check the previous section. Enjoy your vibrant, flavorful Bang Bang Chicken Bowl! - Ensure oil is hot enough before frying to achieve crispiness. - Avoid overcrowding the skillet to maintain even cooking. This makes sure each piece fries nicely and gets golden brown. - Serve with lime wedges for added zest. The lime juice brightens the dish and adds a fresh kick. - Use individual dishes for serving for an appealing presentation. It makes each serving look special and fun. - Adjust spice level in the sauce with more or less sriracha. This lets you make the sauce as spicy as you like. - Substitute chicken with tofu or shrimp for variety. Both options add their own unique flavors and textures to the bowl. You can find the full recipe in the main article. Enjoy your cooking! {{image_4}} You can easily change some ingredients to fit your taste. If you want to swap jasmine rice, use quinoa or brown rice. Both options give a nice texture and flavor. For greens, try spinach or arugula instead of romaine lettuce. These greens add different tastes and nutrients to your bowl. If you want a healthier option, consider baking or air-frying the chicken. This way, you cut down on oil while keeping the chicken crispy. For the Bang Bang sauce, you can use yogurt instead of mayonnaise. Yogurt gives a tangy taste and makes the sauce lighter. To make your bowl even better, add avocado slices. They bring creaminess and richness. You can also include other veggies like bell peppers or cucumbers. These veggies add crunch and color, making your meal more fun and exciting. Remember, feel free to get creative with your Bang Bang Chicken Bowl. Try out these variations and see which ones you love the most! For the complete recipe, check out the Full Recipe. To keep your leftovers fresh, store chicken separate from the rice and toppings. Use airtight containers for best results. This helps maintain the texture of each ingredient. Store the Bang Bang sauce in a different container. This keeps its bold flavor intact, so you can enjoy it later. When it's time to reheat, use an oven or air fryer for the chicken. This method keeps it crispy and delicious. Avoid the microwave, as it can make the chicken soggy. Simply heat until warm, and you’ll have that delightful crunch back. If you want to save some for later, you can freeze cooked chicken safely. Portion it out for easy meals down the line. The Bang Bang sauce can also be frozen. Just keep it in small portions. This way, you can enjoy the flavors without making it fresh each time. Bang Bang Chicken is a delicious dish with crispy chicken pieces. The chicken is coated in a mix of spices and cornstarch, then fried until golden. It sits atop a base of rice and fresh greens. The star is the Bang Bang Sauce, which is creamy and slightly spicy. It has a sweet and tangy taste that makes your taste buds dance. The mix of textures makes this dish really fun to eat! Yes, you can prepare some parts ahead. Cook the chicken and make the Bang Bang Sauce in advance. Keep them in the fridge until you are ready to serve. However, I suggest frying the chicken fresh. This keeps it crispy and tasty. Freshness is key for the best flavor and texture. You can serve many sides with the Bang Bang Chicken Bowl. Here are some ideas: - Steamed broccoli for a healthy touch - Sliced cucumbers for a cool crunch - Extra lime wedges for zest - A simple salad for added greens These sides will add color and flavor to your meal. The spiciness of Bang Bang Sauce can vary. It usually has a mild kick from sriracha. If you like it spicier, add more sriracha. If you want it less spicy, reduce the amount. The balance of creamy mayo and sweet chili sauce helps keep it smooth. You can make it your own by adjusting the heat level. The Bang Bang Chicken Bowl can be healthy with some tweaks. It has protein from chicken and fiber from veggies. To make it lighter, use less mayonnaise in the sauce. Substitute fried chicken with grilled chicken or tofu. You can also add more greens for extra vitamins. This way, you get a great meal that tastes good and feels good! This blog post covered the tasty recipe for a Bang Bang Chicken Bowl. You learned about the fresh ingredients and step-by-step instructions to make it. I shared tips on cooking, serving, and customizing your dish. You can also modify cooking methods and store leftovers properly. Try this recipe for a fun meal. It’s quick, flavorful, and easy to enjoy. Happy cooking!
The BEST Bang Bang Chicken Bowl Flavorful and Fun Feast
Craving a meal that’s both tasty and fun? Look no further than the BEST Bang Bang Chicken Bowl! This dish combines crispy chicken, fluffy rice,
- 1 pound ground beef (80% lean, 20% fat) - Cheddar cheese and hamburger buns - Fresh vegetables and condiments To make a great crack burger, start with quality ground beef. I prefer 80% lean beef. This fat content gives the burger juiciness and flavor. Next, grab some sharp cheddar cheese; it melts beautifully and adds a rich taste. Don't forget soft hamburger buns. They hold your burger together while adding a nice texture. - Garlic powder, onion powder, and smoked paprika - Worcestershire sauce and sea salt Now let's talk about flavor. Seasonings are key. Garlic powder and onion powder add depth. Smoked paprika brings a warm, smoky note. Worcestershire sauce enhances the beef's flavor, while sea salt brings everything together. These ingredients ensure your crack burgers burst with taste. - Hot sauce for extra kick - Alternatives for customizing toppings Want to spice things up? Add hot sauce to the mix. It gives your burger a nice kick. You can also customize your toppings. Use avocado, jalapeños, or even different cheeses. Get creative! Personalizing your burger is part of the fun. For the full recipe, check out the details above. To make great crack burgers, start by mixing the ground beef with spices. In a big bowl, add 1 pound of ground beef. Then, sprinkle in 1 teaspoon each of garlic powder, onion powder, smoked paprika, black pepper, and sea salt. Add 1 tablespoon of Worcestershire sauce too. Use your hands to mix gently. Be careful not to squeeze the meat too hard. Overworking it can make the burgers tough. You want the beef to stay juicy and full of flavor. Next, it’s time to shape the patties. Divide the beef mixture into four equal parts. Roll each part into a ball and then flatten it into a patty. Make sure the center is a bit thicker than the edges. Use your thumb to press a small indent into the center of each patty. This helps them cook evenly. Without this step, the burgers may puff up while grilling, making them uneven. Now, let’s cook those patties! Heat a grill or skillet on medium-high until it’s hot. Place the patties gently on the grill or skillet. Don’t press down on them; just let them sear. Cook for about 3-4 minutes on one side. Then, flip each patty over and top with a slice of cheddar cheese. Cook for another 3-4 minutes until the inside reaches 160°F (71°C). This ensures they are safe and tasty. To add some crunch, toast your hamburger buns on the grill or in a toaster. This step makes them golden and crisp. For the full recipe, refer to the ingredients section. This will help you create the best crack burgers that wow your taste buds! To make sure your burgers are just right, check the internal temperature. Aim for 160°F (71°C) for safety. Use a meat thermometer for accuracy. This helps you avoid undercooked or overcooked burgers. To keep them juicy, don’t press the patties down while cooking. Let them sear nicely to lock in flavors. Toasting your hamburger buns is key to a great burger. Start by heating your grill or skillet. Place the buns cut-side down until they turn golden brown. This step adds texture and warmth. It also prevents the buns from getting soggy. A crisp bun holds up better against juicy toppings. Layering your ingredients makes a big difference in taste. Start with a layer of mayonnaise on the bottom bun. Then add a cheesy patty, lettuce, tomato, and pickles. Finish with ketchup or hot sauce for extra flavor. For a fun touch, arrange the burgers on a colorful platter. Add extra pickles and lettuce around the edges. You can even use little paper flags in each burger for a festive look. Follow the Full Recipe for more detailed steps on crafting these delicious Crack Burgers. {{image_4}} You can swap the ground beef for other meats. Turkey and chicken work well. They offer a lighter taste. You can also try plant-based options for a vegetarian twist. Using ground turkey keeps the burger lean. Ground chicken adds a subtle flavor. Plant-based patties can be just as satisfying. Each option brings a unique taste and texture to the burger. Toppings can make or break a burger. You can use unusual toppings to surprise your guests. Try avocado slices or crispy onions for a fun twist. Pineapple rings add a sweet touch. You can also use jalapeños for a kick. Instead of ketchup and mayo, think outside the box. A spicy aioli or tangy barbecue sauce can elevate the flavor. Don't be afraid to mix and match toppings. Personalizing your burger is easy. You can add your favorite ingredients to make it your own. Some popular toppings include sautéed mushrooms and roasted red peppers. Fresh herbs like basil or cilantro can add brightness. For sides, consider classic fries or a fresh salad. Each choice gives a new flavor and vibe to your meal. Explore different combinations to find your perfect crack burger. Check out the Full Recipe for ideas on how to get started! To keep your crack burgers fresh, store them carefully. Place cooked burgers in an airtight container. They can stay in the fridge for up to three days. For best taste, let the burgers cool down first. This helps avoid sogginess. Store your toppings and condiments separately. This way, they stay fresh longer. Keep lettuce and tomato in sealed bags. Store pickles in their jar. This keeps flavors bright when you're ready to eat. When reheating crack burgers, use the oven or skillet. These methods keep the burgers juicy and warm. Preheat the oven to 350°F (175°C). Wrap your burger in foil and heat for 10-15 minutes. If using a skillet, heat it over medium. Add a little oil, then place the burger in. Heat for about 3-4 minutes on each side. Avoid the microwave if you can. Microwaving can make the burgers soggy and rubbery. Keep the flavors and textures intact with these methods. Freezing is a great way to save your crack burgers. To freeze patties, shape them as you would for cooking. Place them on a baking sheet lined with parchment paper. Freeze them until solid, usually about an hour. Then, transfer the patties to a freezer bag. This saves space and keeps them fresh. When you want to cook from frozen, no need to thaw. Just add a few extra minutes to your cooking time. Cook until the internal temperature reaches 160°F (71°C). This keeps the burgers safe and tasty. A crack burger is a juicy, flavorful burger that hooks you with its taste. The term "crack" comes from how addictive it is. Once you try one, you want more. The blend of spices, the melty cheese, and fresh toppings make it hard to resist. Each bite gives you a burst of flavor that makes it special. Yes, you can make crack burgers in advance! Here are some tips for meal prepping: - Prepare the patties: Shape the burger patties and wrap them in plastic. - Store in the fridge: Keep them in the fridge for up to a day. - Freeze for longer: Wrap them tightly and freeze for up to three months. - Cook from frozen: Just add a few extra minutes to cooking time. Pair your crack burgers with these tasty sides: - French fries: Classic and crunchy, they never disappoint. - Coleslaw: The crunch and creaminess balance the burger well. - Onion rings: Crispy onion rings add a fun twist. - Potato salad: A creamy side that complements the meal. - Grilled veggies: Add color and healthy crunch to the plate. For the full recipe, check out Crack Burgers . To make delicious crack burgers, start with quality beef and key seasonings. Form perfect patties and cook them just right for juicy flavor. Don't forget to toast your buns for added taste. Feel free to customize with creative toppings and sides to suit your palate. Store any leftovers properly, and reheating can bring back that fresh flavor. Remember, make it your own by experimenting with different meats and spices. Enjoy crafting your perfect burger experience!
Crack Burgers That Will Wow Your Taste Buds
If you’re looking for a burger that takes your taste buds on a joyride, you’ve hit the jackpot! These Crack Burgers mix juicy beef, melty
- 1 pound white fish fillets (cod or tilapia) - 2 cups green and red cabbage - 1 medium carrot - 1/2 cup plain Greek yogurt - 1 ripe avocado - 1 tablespoon extra virgin olive oil - 1 teaspoon ground cumin - 1 teaspoon chili powder - Fresh lime juice - Corn tortillas - Lime wedges - Fresh cilantro When I make Fish Taco Slaw Bowls, I focus on fresh and vibrant flavors. The main ingredients bring a lively crunch and a healthy twist. The fish sits at the center of this dish. I recommend using white fish, like cod or tilapia, for its mild taste. I love how it takes on spices well, making each bite rich and flavorful. The colorful slaw is a mixture of green and red cabbage, which adds a nice texture. I also add a grated carrot for a hint of sweetness. These ingredients not only look good but also balance the fish perfectly. The slaw gets a creamy touch from plain Greek yogurt. It makes the dish feel bright and fresh. The seasonings make a big difference in taste. Extra virgin olive oil adds a smooth richness. Ground cumin and chili powder bring warmth and depth. A splash of fresh lime juice gives it a zesty kick that wakes up the flavors. For serving, I use warm corn tortillas, which are soft and perfect for holding everything together. A lime wedge on the side allows you to add more zest if you like. Fresh cilantro rounds out the dish, adding a pop of color and a burst of flavor. This recipe is simple yet satisfying. You can find the Full Recipe for detailed steps to create these delicious Fish Taco Slaw Bowls! To start, pat the fish fillets dry with paper towels. This step helps the fish get a nice crust when cooked. Next, mix olive oil, cumin, chili powder, salt, and pepper in a small bowl. Rub this mixture all over the fish fillets. Let the fish marinate for about 15 minutes. This waiting time allows the flavors to soak in. Now, heat a non-stick skillet over medium heat. Once hot, place the marinated fish fillets in the skillet. Cook them for about 3-4 minutes on each side. The fish should turn opaque and flake easily when done. Remove the fish from the skillet and break it into bite-sized pieces with a fork. In a large bowl, combine finely shredded green cabbage, red cabbage, grated carrot, and chopped cilantro. This mix adds crunch and color. For the dressing, whisk together Greek yogurt and lime juice in a small bowl. Drizzle this dressing over the cabbage mixture, then toss everything well. This ensures that every piece is coated with the dressing. For the full recipe, refer to the instructions above, and enjoy your fish taco slaw bowls! Using fresh ingredients is key to great taste. Fresh fish brings a light and tender flavor. Crisp cabbage adds crunch, while bright cilantro gives a burst of freshness. Always choose ripe avocados for the best creaminess. They enhance the overall dish. Seasoning is just as important. I love using ground cumin and chili powder. They add warmth and depth. Kosher salt and pepper bring balance. Coat the fish well to ensure each bite is packed with flavor. Cooking fish can be simple and fun. Start by patting the fillets dry. This helps them sear better. Always preheat your skillet. A hot pan gives a nice crust and keeps the fish moist inside. Cook it for 3-4 minutes on each side. The fish should flake easily. This means it is done. For tortillas, warmth is vital. Toast them in a dry skillet over medium heat. Just one minute per side is enough. This makes them soft yet slightly crisp. It improves their flavor and texture. Presentation matters. When serving your slaw bowls, start with a bright slaw layer. Add the fish pieces on top for color. Slices of avocado add richness. Use lime wedges for a pop of color and taste. Don’t forget about sides. You can serve with a fresh salsa or a zesty sauce. A side of black beans or corn adds more nutrition and flavor. For a fun twist, consider serving with tortilla chips for crunch. For the full recipe, check out the detailed preparation steps and ingredients. {{image_4}} You can use more than just cod or tilapia for these bowls. Consider using salmon, mahi-mahi, or even shrimp. Each fish has a unique taste. Salmon adds richness, while mahi-mahi offers a mild flavor. Shrimp provides a sweet touch. When you switch up the fish, you change the whole dish. Your taste buds will thank you for exploring these options. Don’t feel limited to just cabbage in your slaw. You can mix in crunchy radishes, sweet bell peppers, or even fresh herbs like mint or parsley. Each vegetable adds its own flair. For dressings, try a zesty lime vinaigrette or a creamy avocado dressing. These options can brighten your meal. Experimenting with slaw keeps every bite exciting. Substituting Greek yogurt is easy if you want a lighter touch. You can use sour cream or a dairy-free yogurt made from nuts. For toppings, think about vegan options like cashew cream or hummus. These alternatives keep the bowls delicious while catering to different diets. Personalizing your ingredients helps create a dish that feels just right for you. Check the Full Recipe for ideas on building your perfect fish taco slaw bowl. To keep your fish taco slaw bowls fresh, store fish and slaw separately. This helps maintain their textures. Use airtight containers for best results. Glass or plastic containers work well. Make sure to cool everything before sealing. Store in the fridge and eat within three days for the best flavor. When reheating fish, place it in a skillet over low heat. This helps prevent drying out. Add a splash of water for moisture. Heat until warmed through, about five minutes. For tortillas, warm them in a dry skillet for a minute on each side. This keeps them soft and pliable, ready for your slaw bowls. You can freeze assembled bowls, but it’s not the best choice. Freezing changes the texture of the fish and slaw. Instead, freeze the fish and slaw separately. Place them in freezer-safe bags or containers. Remove as much air as possible. Thaw in the fridge overnight before reheating. Enjoy your fresh flavors with every bite! You can tell the fish is cooked by its color and texture. Look for these signs: - The fish turns opaque. - It flakes easily with a fork. - The internal temperature reaches 145°F (63°C). Cooking fish can be tricky. Use a fork to test it gently. If it breaks apart easily, it is ready. Overcooking can make fish tough, so keep an eye on it. For best results, follow the cooking time in the recipe. Yes, you can prepare many parts ahead of time. Here are some tips: - Cook the fish and store it in the fridge for up to two days. - Make the slaw a day in advance. Keep it covered in the fridge. - Warm the tortillas just before serving for the best taste. These steps save time and keep the flavors fresh. Just assemble the bowls when you are ready to eat. Fish taco slaw bowls are tasty on their own, but you can add sides for a complete meal. Here are some ideas: - Black beans for protein. - Mexican rice for added carbs. - Grilled corn for sweetness. - Fresh salsa for a spicy kick. These sides complement the flavors and add variety. Feel free to mix and match based on what you enjoy. For a step-by-step guide on making Fish Taco Slaw Bowls, check out the full recipe. It includes all the ingredients and cooking instructions you need to create this delicious dish. In this post, I covered how to make delicious fish taco slaw bowls. We explored the essential ingredients, from fish to fresh veggies, and the tasty dressings. I shared step-by-step cooking instructions, smart tips, and variations to try. Remember, using fresh ingredients makes a big difference. Enjoy making this dish for yourself and your friends. It’s easy, fun, and full of flavor! Your kitchen will feel alive with every bite.
Fish Taco Slaw Bowls Flavorful and Fresh Idea
Looking for a fresh and fun meal idea? Fish Taco Slaw Bowls are bursting with flavor and color. Made with flaky fish, crunchy slaw, and
- Rice and Broth Components - 1 cup long-grain white rice - 2 cups vegetable broth - Protein and Vegetables - 1 pound ground beef (or turkey) - 1 can (15 oz) black beans, drained and rinsed - 1 cup corn kernels (fresh, frozen, or canned) - 1 small onion, finely chopped - 2 cloves garlic, minced - Seasoning and Toppings - 1 packet taco seasoning - 1 cup shredded cheddar cheese - 1 tablespoon olive oil - Salt and pepper to taste - Fresh cilantro leaves (for garnish) - Lime wedges (for serving) The ingredients in this cheesy taco rice skillet create a balanced meal. The rice and broth give a good base for flavor. Ground beef or turkey adds protein, while beans and corn boost the veggie count. Taco seasoning brings a punch, and cheese adds creaminess. With fresh cilantro and lime, you make it bright and fresh. You’ll love how easy it is to find these ingredients and how quickly they come together. For the full recipe, check out the details above! 1. Heating the Olive Oil and Onions: Start by heating one tablespoon of olive oil in a large skillet over medium heat. Once the oil is hot, add a finely chopped onion. Cook for about 3-4 minutes until the onion turns soft and clear. This step adds a sweet base to our dish. 2. Adding Garlic for Flavor: Next, add two minced garlic cloves. Stir and cook for one more minute. This will make your kitchen smell amazing and enhance the flavor. 3. Browning the Meat: Now, add one pound of ground beef or turkey. Break it up with a spoon and cook for 5-7 minutes. You want the meat to be fully browned and cooked through. This step gives the dish richness and protein. 1. Incorporating Taco Seasoning: Sprinkle in one packet of taco seasoning. Mix well to coat the meat and onions. This adds bold flavor to your skillet. 2. Adding Beans, Corn, and Rice: Now, add one can of black beans (drained and rinsed), one cup of corn, and one cup of long-grain white rice. Stir everything together for a colorful mix. 3. Pouring in Vegetable Broth: Pour in two cups of vegetable broth. This will help cook the rice and keep everything moist. Stir well to combine all the ingredients. 1. Bringing to a Boil: Turn up the heat to bring the mixture to a boil. This step helps the rice cook evenly. 2. Simmering for Optimal Flavor: Once it boils, lower the heat and cover the skillet. Let it simmer for 18-20 minutes. This allows the rice to absorb all the flavors and become tender. 3. Melting the Cheese: After simmering, remove the skillet from heat. Sprinkle one cup of shredded cheddar cheese on top. Cover it again for a few minutes so the cheese melts nicely. Now your cheesy taco rice skillet is almost ready! For more details, check the Full Recipe. - Ideal Rice Choices For this dish, I love using long-grain white rice. It cooks evenly and has a nice texture. If you prefer, you can also try jasmine rice for a subtle floral note. Avoid sticky rice as it won’t give you the same fluffy results. - Adjusting Seasoning to Taste The taco seasoning gives great flavor! But feel free to tweak it. If you like it spicy, add a pinch of cayenne. If you want a milder taste, reduce the amount of seasoning. Always taste as you go for the best results. - Cooking Time Tips Keep an eye on the cooking time. Simmering for 18-20 minutes is key to soft rice. If you find the rice is still hard, add a splash more broth and cook a bit longer. Trust your senses! - Presentation Ideas Serve the cheesy taco rice skillet right from the skillet for a fun vibe. Add a sprinkle of fresh cilantro on top for color. Lime wedges on the side bring a bright touch. It looks great and taste even better! - Complementary Side Dishes Pair this dish with a simple green salad. You can also serve tortilla chips and salsa for crunch. A side of guacamole can add a creamy element that balances the flavors perfectly. Enjoy your meal! {{image_4}} Vegetarian or Vegan Options To make this dish vegetarian, swap the ground beef or turkey for crumbled tofu or tempeh. You can also use a plant-based meat substitute. For a vegan twist, ensure the cheese is dairy-free. This keeps the dish tasty while meeting plant-based needs. Gluten-Free Alternatives If you want to make the Cheesy Taco Rice Skillet gluten-free, double-check your taco seasoning. Some brands add gluten. Use rice and beans that are certified gluten-free, and you'll have a delicious meal that everyone can enjoy. Spicy Additions Want to spice things up? Add diced jalapeños or a splash of hot sauce. You can also sprinkle in some cayenne pepper with the taco seasoning. Adjust to your heat level. This adds a fun kick to your meal. Different Cheese Varieties While cheddar cheese is classic, you can mix it up! Try pepper jack for some heat or Monterey Jack for a creamier flavor. You can also use a blend of cheeses for a deeper taste. Each option gives a unique twist to this cheesy delight. For the full recipe, refer to the earlier section. To keep your Cheesy Taco Rice Skillet fresh, use proper refrigeration techniques. First, let the dish cool down to room temperature. This helps prevent excess moisture in your storage container. Once cooled, transfer the leftovers into airtight containers. These containers help lock in flavor and keep your meal safe. - Use glass or plastic containers with tight lids. - Label each container with the date for easy tracking. When you are ready to enjoy your leftovers, quick reheating methods work best. Microwaving is the easiest option. Place the rice skillet in a microwave-safe bowl. Cover it with a damp paper towel to keep it moist. Heat in 30-second intervals until warmed through. For stovetop reheating, add a splash of vegetable broth to a skillet. This helps maintain moisture and flavor. Stir gently over medium heat until heated well. Keeping the flavor and texture intact is key. Avoid overheating, as this can dry out the dish. Enjoy your delicious Cheesy Taco Rice Skillet any time! For the full recipe, check the earlier section. How to make Cheesy Taco Rice Skillet less spicy? To reduce the heat, skip the taco seasoning. Use mild or no spice at all. You can also add more corn or cheese. These ingredients cool down the spice. Another great option is to serve with sour cream. It adds creaminess and helps balance the heat. Can I use brown rice instead of white? Yes, you can use brown rice. It adds more fiber and nutrients. However, you will need more cooking time and liquid. Brown rice takes about 40-45 minutes to cook. So, adjust the broth and simmer time accordingly. What other toppings can I add? You can get creative with toppings! Try diced tomatoes, avocado, or jalapeños. Fresh herbs like cilantro or green onions also work well. For a crunchy texture, add tortilla chips or crushed nachos. These toppings make the dish even more fun and tasty! For the complete recipe, check out the Full Recipe section. In this blog post, we covered how to make a delicious Cheesy Taco Rice Skillet. We discussed the key ingredients and step-by-step instructions for cooking. I shared tips for perfecting your dish and offered variations for different diets. Storing leftovers properly is important, and we explored reheating tricks too. Remember, cooking can be fun and creative! You can adjust flavors and ingredients to make this dish your own. Enjoy your cooking journey and delight in your tasty creation!
Cheesy Taco Rice Skillet Quick and Flavorful Meal
Are you ready for a meal that’s packed with flavor and super easy to make? Let me introduce you to the Cheesy Taco Rice Skillet!