If you crave a warm, cheesy snack that’s easy to make, cheese breadsticks are perfect. They’re soft, chewy, and packed with flavor. In this post, I’ll guide you step-by-step to make these tasty treats at home. From choosing the right ingredients to baking tips, I’ve got you covered. Get ready to impress your friends and family with this fun snack idea that everyone will love! Let’s dive in!
Ingredients
Key Ingredients for Cheese Breadsticks
To make delicious cheese breadsticks, you need a few key ingredients. Here’s a list for you:
– 2 cups all-purpose flour
– 1 tablespoon granulated sugar
– 1 teaspoon salt
– 2 teaspoons baking powder
– 1 cup shredded mozzarella cheese
– 1/2 cup milk (preferably whole)
– 1/4 cup unsalted butter, melted (plus extra for brushing)
– 2 teaspoons garlic powder
– 1 tablespoon fresh parsley, finely chopped (optional, for garnish)
These ingredients work together to create a soft and cheesy breadstick. The flour gives the dough structure, while the cheese adds that creamy flavor we all love.
Optional Ingredients for Flavor Enhancement
You can add a few optional ingredients to make your breadsticks even better. Consider these:
– Different types of cheese like cheddar or parmesan for varied taste.
– Fresh herbs like rosemary or thyme to add a fragrant note.
– Spices such as paprika or chili flakes for a hint of heat.
Using these extras can really elevate your cheese breadsticks. Feel free to mix and match based on what you have at home.
Tips on Ingredient Quality
Using good-quality ingredients matters. Here are some tips:
– Choose fresh mozzarella, as it melts beautifully and tastes great.
– Use whole milk for a richer flavor and a softer texture.
– Opt for unsalted butter to control the salt level in your dough.
When you select quality ingredients, your cheese breadsticks will taste fantastic. Always remember, fresh is best! For the full recipe, check out the detailed steps to create these tasty snacks.
Step-by-Step Instructions
Preparing the Dough
First, gather your ingredients for the dough. You need all-purpose flour, sugar, salt, baking powder, shredded mozzarella, milk, and melted butter.
1. Preheat your oven to 375°F (190°C).
2. Line a baking sheet with parchment paper to prevent sticking.
3. In a large bowl, whisk together the flour, sugar, salt, and baking powder. Make sure there are no lumps.
4. Next, fold in the shredded mozzarella cheese. Ensure it’s mixed well with the dry ingredients.
5. In a separate bowl, combine the milk and melted butter. Whisk until they blend together.
6. Pour this wet mixture into the dry ingredients. Mix with a wooden spoon or spatula until a soft dough forms.
7. Transfer the dough to a floured surface. Knead gently for about one minute until it feels smooth.
Shaping the Breadsticks
Now it’s time to shape the dough into breadsticks.
1. Roll the dough into a rectangle about 1/2 inch thick.
2. Use a sharp knife or pizza cutter to cut the dough into strips. Aim for strips that are about 1 inch wide and 4 inches long.
3. Arrange the strips on the prepared baking sheet. Leave space between each stick for rising.
Baking Process for Perfect Results
Baking is where the magic happens.
1. In a small bowl, mix garlic powder with a tablespoon of melted butter.
2. Use a pastry brush to apply this garlic butter over the tops of the breadsticks.
3. Place the baking sheet in the oven and bake for 15-18 minutes. Look for golden edges and a slightly crispy top.
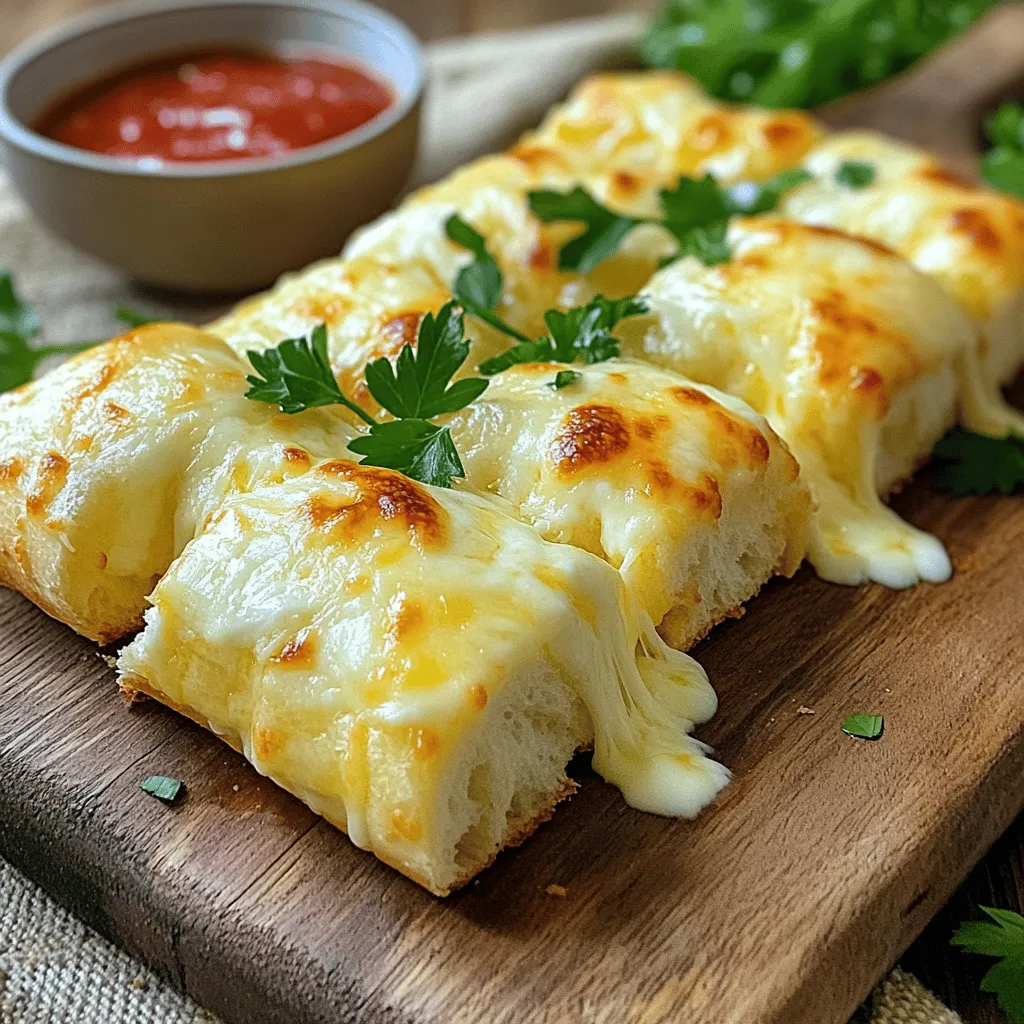
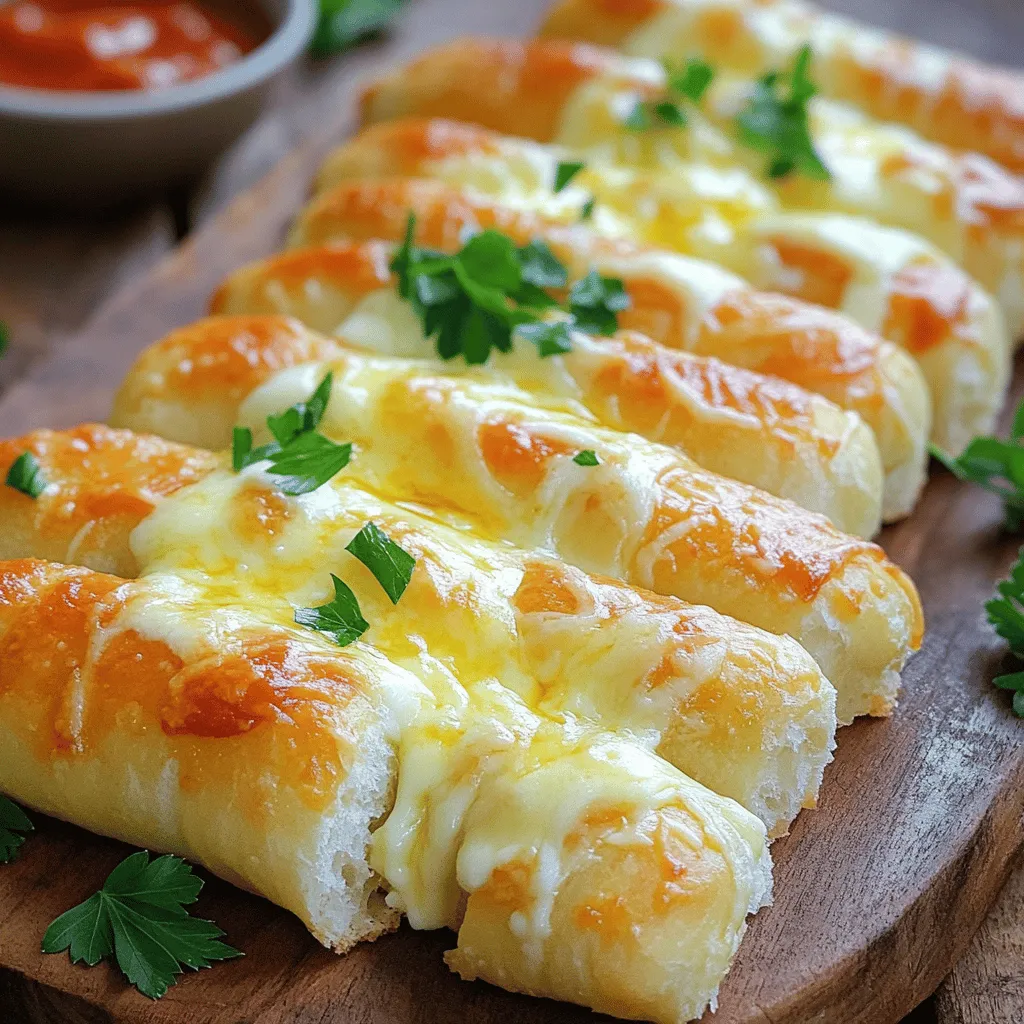
4. Once baked, let the breadsticks cool for a few minutes. You can sprinkle chopped parsley on top for a fresh touch if you like.
5. Serve warm, ideally with marinara sauce for dipping. Enjoy your delicious cheese breadsticks!
Make sure to check the full recipe for more details and insights on making these tasty snacks!
Tips & Tricks
How to Ensure Soft and Chewy Breadsticks
To get soft and chewy breadsticks, use the right mix of flour. All-purpose flour works best. Don’t over-knead the dough. Knead just until smooth. This keeps the breadsticks light. Also, let the dough rest for a few minutes. This helps it rise better. Brush the sticks with melted butter right before baking for a nice finish.
Common Mistakes to Avoid
One common mistake is adding too much flour. This can make the dough dry. Always measure flour carefully. Another mistake is not letting the dough rise. Rising gives the breadsticks their fluffy texture. Lastly, don’t skip the garlic butter. It adds a lot of flavor. Use the Full Recipe to guide you through each step.
Tricks for Extra Flavor Boosts
For extra flavor, try adding herbs. A bit of dried oregano or thyme can make a big difference. You can also mix in some grated Parmesan cheese. It adds a nice salty kick. For a spicy twist, add red pepper flakes to the garlic butter. This gives your breadsticks a fun zing!
Variations
Using Different Types of Cheese
You can mix things up by using different types of cheese. While mozzarella is a favorite, try cheddar for a sharp taste. If you like blue cheese, it adds a bold flavor. Mix in some parmesan for a nutty twist. Each cheese will change the taste and texture. You can blend cheeses for a fun, unique treat. Just remember, different cheeses melt in different ways.
Adding Herbs and Spices
Adding herbs and spices can enhance the flavor. Fresh herbs like rosemary or thyme give a fragrant touch. Dried herbs like oregano or basil work well, too. For a kick, sprinkle in some red pepper flakes. Garlic powder adds a savory punch. You can even mix in some Italian seasoning for a classic taste. Be creative with your choices to find your favorite mix.
Creating Stuffed Cheese Breadsticks
Stuffed cheese breadsticks are a fun variation. You can fill them with cheese or other tasty fillings. Try adding pepperoni, cooked spinach, or roasted peppers. To stuff them, roll out the dough flat, place your filling, and fold it over. Pinch the edges to seal, then cut into strips. Bake as usual for a cheesy surprise inside. These stuffed sticks are perfect for a snack or appetizer. For the full recipe, check out Cheesy Garlic Pull-Apart Breadsticks.
Storage Info
Best Practices for Storing Leftovers
To keep your cheese breadsticks fresh, store them in an airtight container. Place parchment paper between layers to prevent sticking. You can keep them at room temperature for one day. For longer storage, move them to the fridge. They will stay good for up to three days.
Reheating Instructions for Optimal Taste
When you’re ready to enjoy leftovers, preheat your oven to 350°F (175°C). Place the breadsticks on a baking sheet. Bake for about 5-7 minutes until warm. This method helps maintain their soft texture.
Freezing Cheese Breadsticks for Later Use
If you want to freeze cheese breadsticks, let them cool completely first. Wrap each stick in plastic wrap, then place them in a freezer bag. They can last for up to three months in the freezer. When you’re ready to eat, thaw them in the fridge overnight. Reheat as mentioned above for the best taste. After trying the Full Recipe, you’ll have many delicious breadsticks to enjoy later!
FAQs
What is the best cheese for making cheese breadsticks?
I recommend using mozzarella cheese. It melts well and gives a nice stretch. You can also mix in some cheddar for a sharper taste. Other good choices include provolone or gouda. These cheeses add flavor and richness to your breadsticks.
Can I use gluten-free flour for this recipe?
Yes, you can use gluten-free flour. Just ensure it’s a 1:1 substitute for all-purpose flour. This swap keeps the texture light. You may need to adjust the liquid slightly, so watch the dough’s consistency. It should remain soft and pliable.
How do I know when the breadsticks are done baking?
Look for golden brown edges and a slightly crispy top. The breadsticks should feel firm but soft inside. If you poke them lightly, they should spring back. The baking time is around 15-18 minutes at 375°F (190°C). Enjoy them warm for the best taste with marinara sauce.
This article covered key ingredients and their importance in making cheese breadsticks. I shared step-by-step instructions to prepare, shape, and bake them perfectly. We explored tips for soft and chewy breadsticks, plus common mistakes to avoid. I highlighted fun variations and best practices for storing and reheating leftovers.
Using fresh, quality ingredients matters most. Enjoy experimenting with flavors and textures. Now, you have all you need to create delicious cheese breadsticks at home!
