
Craving takeout but want something even better? Let’s make Crispy Sweet and Sour Chicken that will wow your taste buds! I’ll guide you through each simple step, from coating the chicken for that perfect crunch to creating a tangy sauce that brings it all together. Say goodbye to greasy takeout and hello to a homemade dish that impresses every time. Ready to cook like a pro? Let’s dive in!
Ingredients
Main Ingredients
Chicken and Coating Ingredients
– 1 pound boneless, skinless chicken thighs, cut into bite-sized pieces
– 1 cup cornstarch
– 2 large eggs, beaten
– 1/2 cup all-purpose flour
– 1 teaspoon salt
– 1/2 teaspoon black pepper
– Vegetable oil (for frying)
Vegetable and Pineapple Ingredients
– 1 red bell pepper, diced
– 1 green bell pepper, diced
– 1 cup pineapple chunks (canned or fresh)
– 1/4 cup green onions, finely chopped
Sweet and Sour Sauce Ingredients
– 1/2 cup granulated sugar
– 1/2 cup apple cider vinegar
– 1/2 cup ketchup
– 1 tablespoon soy sauce
– 1 teaspoon garlic powder
– 1 teaspoon ginger powder
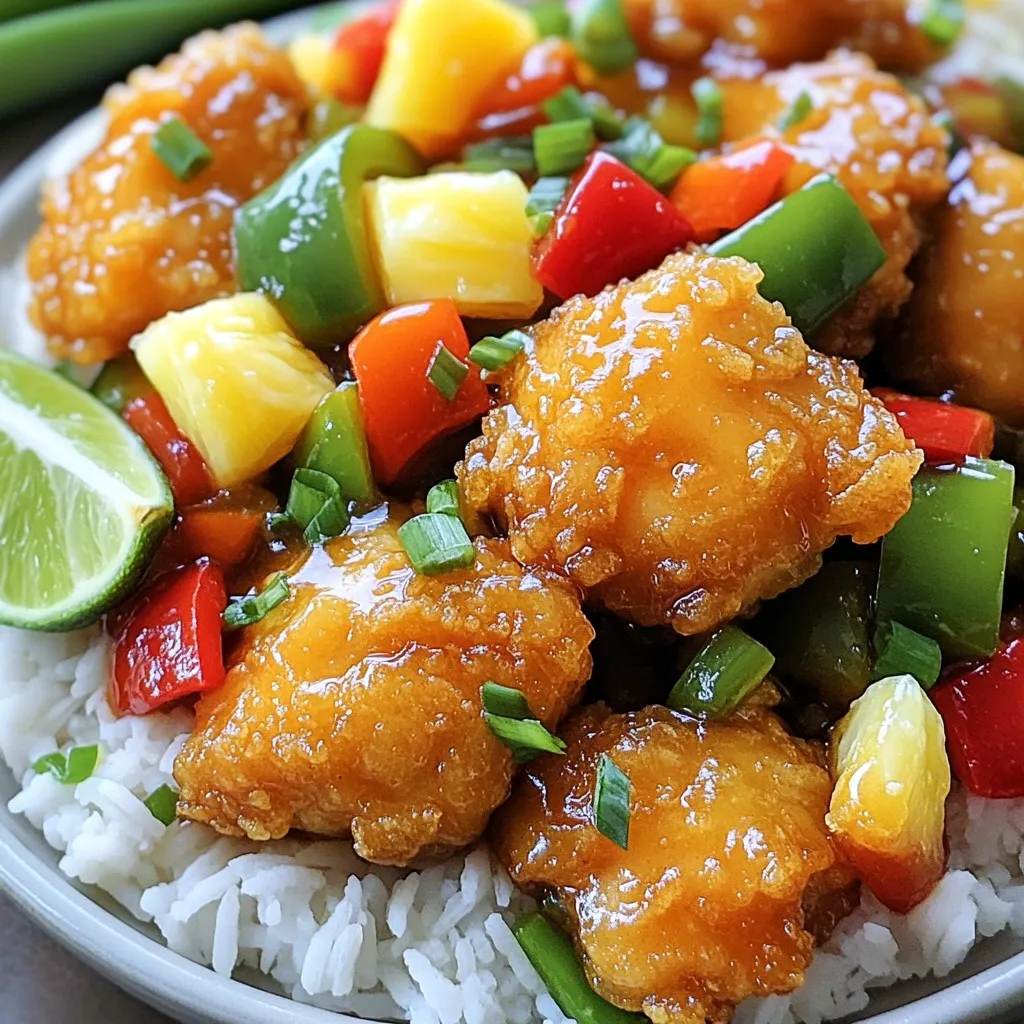
Gather these ingredients before you start cooking. Fresh chicken and colorful vegetables make this dish pop. The sweet and sour sauce is key for that classic flavor. Each element plays a role, so have everything ready to go. You’ll enjoy how easy it is to make!
Step-by-Step Instructions
Preparing the Sweet and Sour Sauce
To start, grab a medium saucepan. Add 1/2 cup of granulated sugar, 1/2 cup of apple cider vinegar, 1/2 cup of ketchup, 1 tablespoon of soy sauce, 1 teaspoon of garlic powder, and 1 teaspoon of ginger powder. Mix them well. Heat the pan over medium heat. Stir until the sauce becomes smooth. Let it simmer for about 5 minutes. The sauce should thicken a bit. Take it off the heat and set it aside. This sauce will bring a sweet and tangy kick to your dish.
Coating the Chicken for Crispiness
Next, we need to coat the chicken. In a large bowl, whisk together 1 cup of cornstarch, 1/2 cup of all-purpose flour, 1 teaspoon of salt, and 1/2 teaspoon of black pepper. Cut 1 pound of boneless, skinless chicken thighs into bite-sized pieces and add them to the bowl. Dredge each piece in the dry mix. Then dip the chicken into 2 beaten eggs. Let the excess egg drip off, and return them to the dry mixture for a second coating. This double coating gives the chicken a crunchy texture.
Frying the Chicken to Perfection
Now it’s time to fry! Heat about 2 inches of vegetable oil in a deep skillet or large pot over medium-high heat. Wait until the oil reaches 400°F. Carefully add the coated chicken pieces in batches. Do not overcrowd the pan. Fry for 5-7 minutes until golden brown and crispy. Once done, remove the chicken and let it drain on paper towels. This step ensures your chicken stays crispy and delicious.
Stir-Frying the Vegetables
In a separate pan, heat 1 tablespoon of vegetable oil over medium heat. Add 1 diced red bell pepper, 1 diced green bell pepper, and 1 cup of pineapple chunks. Stir-fry for about 3-4 minutes. You want the peppers tender but still crisp. The pineapple adds sweetness and bright flavor to the dish.
Combining Chicken and Sauce
Pour the sweet and sour sauce over the sautéed veggies in the pan. Stir gently so the vegetables soak up the sauce. Then add the crispy chicken pieces to the pan. Toss everything together carefully. Ensure the chicken is well-coated in the vibrant sauce. This is where the magic happens!
Finishing Touches for Serving
Let the mixture cook for an extra 1-2 minutes. This warms everything through and helps the flavors meld. Remove the pan from heat. Garnish with 1/4 cup of finely chopped green onions. This adds a fresh finish. Serve your crispy sweet and sour chicken over a bed of fluffy steamed rice. Enjoy every delightful bite!
Tips & Tricks
Tips for Achieving Crispy Chicken
To get that perfect crunch, follow these steps:
– Use cornstarch in the coating mix. It makes the chicken crispier.
– Double-coat the chicken. Dredge it in the dry mix, dip in egg, then return to the dry mix.
– Keep the oil hot. Aim for 400°F when frying. This helps lock in the crispiness.
– Fry in batches. Avoid overcrowding the pan to keep the oil temperature steady.
Recommendations for Sauce Adjustments
Want to tweak the sweet and sour sauce? Here’s how:
– For a sweeter taste, add more granulated sugar. Start with a tablespoon more.
– If you like it tangy, increase the apple cider vinegar by a tablespoon.
– For a spicier kick, mix in a dash of hot sauce or red pepper flakes.
– You can swap ketchup with sweet chili sauce for a different flavor profile.
Serving Suggestions for a Full Meal
Make your meal complete with these ideas:
– Serve the chicken over a bed of steamed rice. This balances the flavors perfectly.
– Add a side of stir-fried veggies. Broccoli or snap peas work well.
– Top with toasted sesame seeds for crunch and flavor.
– Include lime wedges on the side. A squeeze adds freshness to each bite.

Variations
Alternative Protein Options
You can swap chicken for other proteins. Try shrimp, tofu, or pork. Each option has its own taste and texture.
– Shrimp: Use large shrimp, peeled and deveined. Fry until pink and firm.
– Tofu: Use firm tofu, cut into cubes. Press it to remove moisture, then coat and fry.
– Pork: Use pork tenderloin, cut into bite-sized pieces. Coat and fry just like chicken.
These alternatives keep the dish exciting and flavorful.
Vegetarian/Vegan Adaptations
To make this dish vegetarian or vegan, focus on plant-based ingredients. Replace chicken with veggies or tofu.
– Vegetable Mix: Use a mix of bell peppers, broccoli, and snap peas. They add color and crunch.
– Vegan Chicken: Choose a store-bought plant-based chicken. Coat it and fry as you would with chicken.
For the sauce, ensure the ingredients are plant-based. Most are naturally vegan, but check for hidden animal products.
Flavor Profile Variations: Sweet vs. Tangy
You can adjust the sauce to be sweeter or tangier. This changes the whole dish’s taste.
– For Sweeter Sauce: Add more sugar or pineapple juice. This gives a rich, sweet flavor.
– For Tangier Sauce: Increase the apple cider vinegar. This adds a bright, zesty kick.
Experiment with these variations to find your favorite flavor. Enjoying different tastes makes cooking fun!
Storage Info
How to Store Leftovers
To store your crispy sweet and sour chicken, let it cool first. Place it in an airtight container. Make sure to separate the chicken from the sauce. This keeps the chicken crispy longer. Store it in the fridge for up to three days.
Reheating Tips for Best Quality
When reheating, aim to keep that crispy texture. Preheat your oven to 375°F. Place the chicken on a baking sheet. Heat for about 10-15 minutes until warm. You can also use an air fryer for crispiness. Avoid using a microwave, as it can make the chicken soggy.
Freezing and Thawing Instructions
You can freeze the chicken for longer storage. Use a freezer-safe bag to hold the chicken. Remove as much air as possible. The chicken can last up to three months in the freezer. To thaw, place it in the fridge overnight. Reheat in the oven or air fryer for best results. Keep the sauce separate and heat it on the stove.
FAQs
Can I make this recipe gluten-free?
Yes, you can make this recipe gluten-free. Use gluten-free cornstarch and flour. Make sure your soy sauce is gluten-free too. This will keep the dish tasty and safe for those with gluten allergies.
What can I use instead of apple cider vinegar?
If you need a substitute for apple cider vinegar, use rice vinegar or white vinegar. Both options will add a nice tang to the sauce. You can also use lemon juice for a fresh twist.
How do I prevent the chicken from getting soggy?
To keep the chicken crispy, ensure it is well-coated in the dry mixture. Fry the chicken in hot oil, around 400°F. Avoid overcrowding the pan to allow even cooking. After frying, let the chicken drain on paper towels. This helps absorb any excess oil and keeps it crispy.
This blog explained how to make tasty sweet and sour chicken. We covered key ingredients, including chicken, veggies, and sauce. You learned step-by-step instructions for frying and stir-frying. Tips for crispy chicken and storage info were also shared. Remember, you can customize it to suit your taste, whether you want it sweet or tangy. Keep experimenting and enjoy making this dish your own. Now, grab your apron and start cooking!