Are you ready for a delicious treat that’s super easy to make? These Easy Caramel Apple Bites are a fun twist on a classic snack. With just a few ingredients and simple steps, you can create mouthwatering bites everyone will love. Perfect for parties or a sweet snack at home, these bites are customizable and oh-so-tasty! Let’s dive into how to whip up this delightful treat.
Ingredients
List of Required Ingredients
– Medium apples: Granny Smith, Honeycrisp, or your favorite variety
– Caramel candies: 1 cup
– Milk or cream: 2 tablespoons
– Assorted toppings: 1 cup (chopped nuts, mini chocolate chips, sprinkles, crushed Oreos)
– Wooden skewers or toothpicks
Choosing the right ingredients is key. Apples add a fresh crunch. I love using Granny Smith for its tartness. Honeycrisp offers a sweet balance. You can pick any apple you like for this treat.
For the caramel, I prefer using caramel candies. They melt well and create a smooth coating. Mixing in milk or cream helps make the caramel creamier. This makes each bite even more delightful.
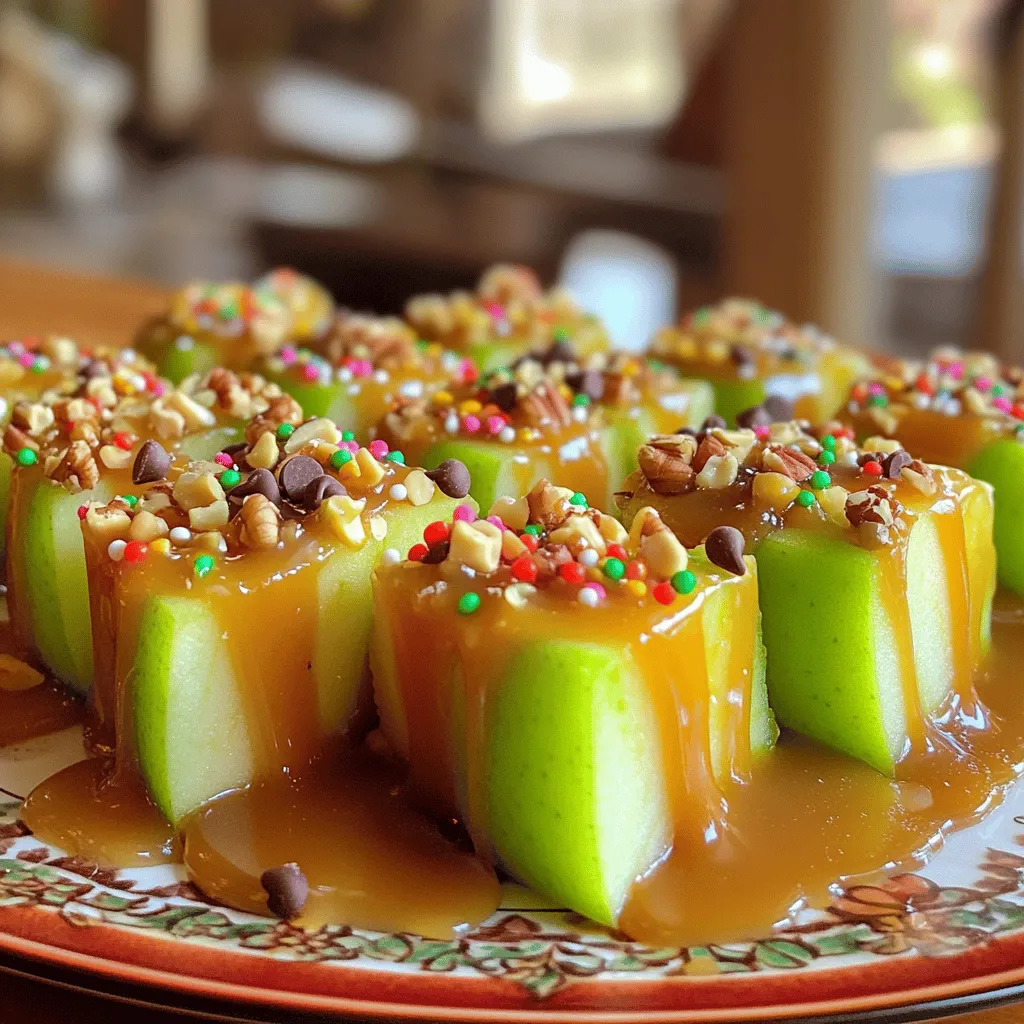
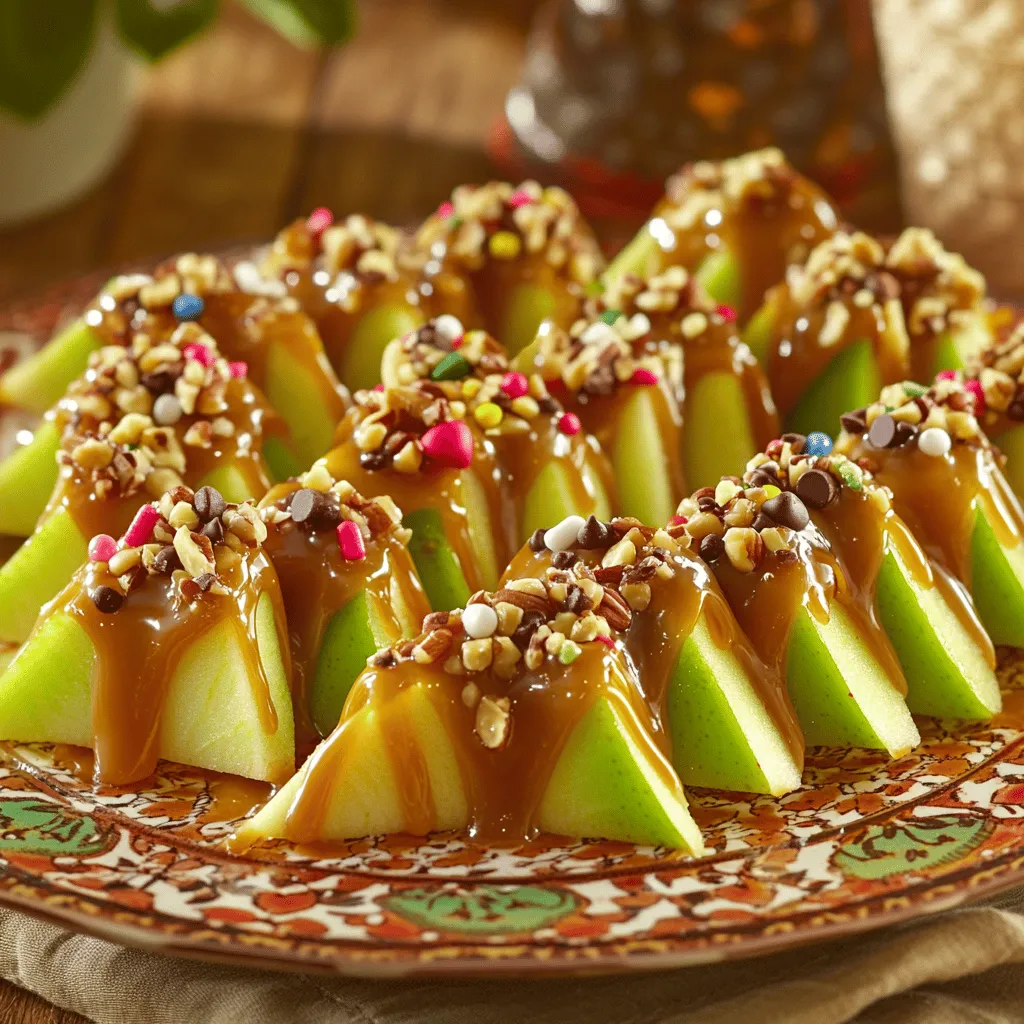
Toppings are where you can have fun! Chopped nuts, mini chocolate chips, sprinkles, and crushed Oreos add different textures and flavors. You can mix and match your favorites. This way, everyone can find something they love.
Having wooden skewers or toothpicks makes dipping easy. They help you grab each apple bite without making a mess. These simple tools make serving fun and easy.
Check out the Full Recipe for detailed instructions on how to create these delicious bites.
Step-by-Step Instructions
Preparing the Apples
– Wash and dry the apples.
– Cut into bite-sized wedges or cubes.
– Insert skewers or toothpicks for easy handling.
Start by giving your apples a good wash. This step helps remove any wax or dirt. Once they are clean, dry them well with a towel. Next, cut the apples into small pieces. You can make wedges or cubes; it’s your choice! For easy eating, stick a skewer or toothpick into each piece. This makes dipping a breeze.
Melting the Caramel
– Combine caramel candies and milk in a microwave-safe bowl.
– Heat in 30-second intervals, stirring frequently.
Now it’s time to melt the caramel! Grab a microwave-safe bowl and add the caramel candies and milk. The milk helps make the caramel smooth. Heat this mixture in the microwave for 30 seconds. After each time, take it out and stir. Keep doing this until the caramel is smooth and lump-free.
Dipping the Apple Pieces
– Dip apple pieces in melted caramel.
– Allow excess caramel to drip off.
Once your caramel is melted, it’s dipping time! Take an apple piece and dip it into the warm caramel. Make sure to coat it well. After dipping, hold it above the bowl for a moment. Let the extra caramel drip off before placing it on the tray.
Adding Toppings
– Roll or sprinkle dipped apples in chosen toppings.
While the caramel is still sticky, it’s time for toppings! You can roll the dipped apples in nuts, sprinkles, or whatever you like. Be creative! Mixing textures and flavors makes each bite special.
Setting the Apple Bites
– Line a baking tray with wax paper.
– Cool apple bites on the tray.
Next, take a baking tray and line it with wax paper. This helps prevent sticking. Place your caramel-coated apple bites on the tray. Make sure they are not touching each other. This way, they can cool without making a mess.
Finalizing the Recipe
– Allow caramel to firm for 15-20 minutes.
– Serve and enjoy.
Let the caramel apple bites sit for about 15 to 20 minutes. This helps the caramel harden. After they are set, you can serve them on a nice plate. Enjoy your tasty treat! You can find the Full Recipe if you want to see the details again.
Tips & Tricks
Perfecting Your Caramel
To make smooth caramel, use quality caramel candies. Chop them into smaller pieces for faster melting. Mix them with milk or cream in a microwave-safe bowl. Heat in short bursts, stirring often. This helps avoid burning. If the caramel starts to bubble too much, pause and stir well.
Creative Topping Ideas
Get creative with toppings! Use chopped nuts, mini chocolate chips, or colorful sprinkles. For fall, try crushed candy corn or pumpkin spice mix. You can even switch it up for holidays. Imagine peppermint bits for winter or fresh berries in spring. Each topping adds a fun twist to your caramel apple bites.
Presentation Tips
Make your apple bites look great! Arrange them on a pretty plate. Drizzle some leftover caramel over the bites for flair. Scatter a few extra toppings around the plate to make it pop. This makes your treat look as tasty as it is. Everyone will want to grab one!
Variations
Chocolate Caramel Apple Bites
You can make these bites even more fun with chocolate. After dipping your apples in caramel, drizzle melted chocolate on top. This adds a rich taste that pairs well with the sweet caramel. You can also use flavored chocolate, like mint or raspberry, to surprise your taste buds. Each bite will be a mix of sweet and tangy flavors.
Nut-Free Options
For those with nut allergies, you can still enjoy tasty toppings. Try using crispy rice cereal, mini marshmallows, or even shredded coconut. These options add crunch without the worry of nuts. Always check labels to ensure your substitutes are safe.
Flavor Combinations
Don’t limit yourself to just apples! You can try pears or bananas for a twist. Each fruit brings its own flavor, keeping things exciting. Mix and match toppings too! Use crushed pretzels, cinnamon, or even colorful candies. This way, every bite is a new taste adventure.
Storage Info
How to Store Caramel Apple Bites
To keep your caramel apple bites fresh, use an airtight container. Choose a container that fits your treats snugly. This helps to avoid air exposure. Line the bottom with parchment paper to prevent sticking. Place a layer of apple bites, then add another piece of parchment on top. Repeat this until all are stored.
Make sure to keep them in a cool place. Avoid direct sunlight or heat, as this can make the caramel sticky and gooey.
Shelf Life
You can keep caramel apple bites in the fridge for up to five days. After that, they may lose their texture and taste. Watch for signs of spoilage, like a change in color or an off smell. If they look dry or hard, it’s best to toss them.
Freezing Tips
Yes, you can freeze caramel apple bites! To do this, first, place them on a baking sheet. Make sure they are not touching. Freeze them for about an hour until firm. Then, transfer them to a freezer-safe bag.
When you’re ready to enjoy them, thaw them in the fridge overnight. This method keeps the caramel from getting too soft. Enjoy your tasty treat anytime! For the full recipe, check out the earlier section.
FAQs
Can I use store-bought caramel sauce instead of caramel candies?
Yes, you can use store-bought caramel sauce. It saves time and effort. The sauce is ready to use, which can be a major plus. However, it may not stick as well to the apples. You might need to chill the apples first to help the sauce adhere. Homemade caramel provides a thicker coating, which some may prefer.
How do I prevent the apples from browning?
To keep apples fresh and bright, you can use lemon juice. Just mix one tablespoon of lemon juice with a cup of water. Soak the apple slices in this mixture for about five minutes. After soaking, rinse and dry the apples. This will stop the oxidation process and keep them looking great.
Can I make these in advance for a party?
Yes, you can prepare caramel apple bites ahead of time. You should dip and coat them, then store them in an airtight container. Place wax paper between layers to avoid sticking. Try to eat them within 24 hours for the best taste and texture. If you need to make them even earlier, you can prepare the apples and caramel separately. This way, you can dip and decorate them just before the party.
In this blog post, we covered how to make delicious caramel apple bites. We explored choosing the right apples, melting caramel, and adding toppings. I also shared tips for perfecting your caramel and creative variations. Remember, these treats are easy and fun to make, whether for a snack or a party. Enjoy experimenting with new flavors and toppings. With a bit of creativity, you can make each batch unique. Happy cooking!
