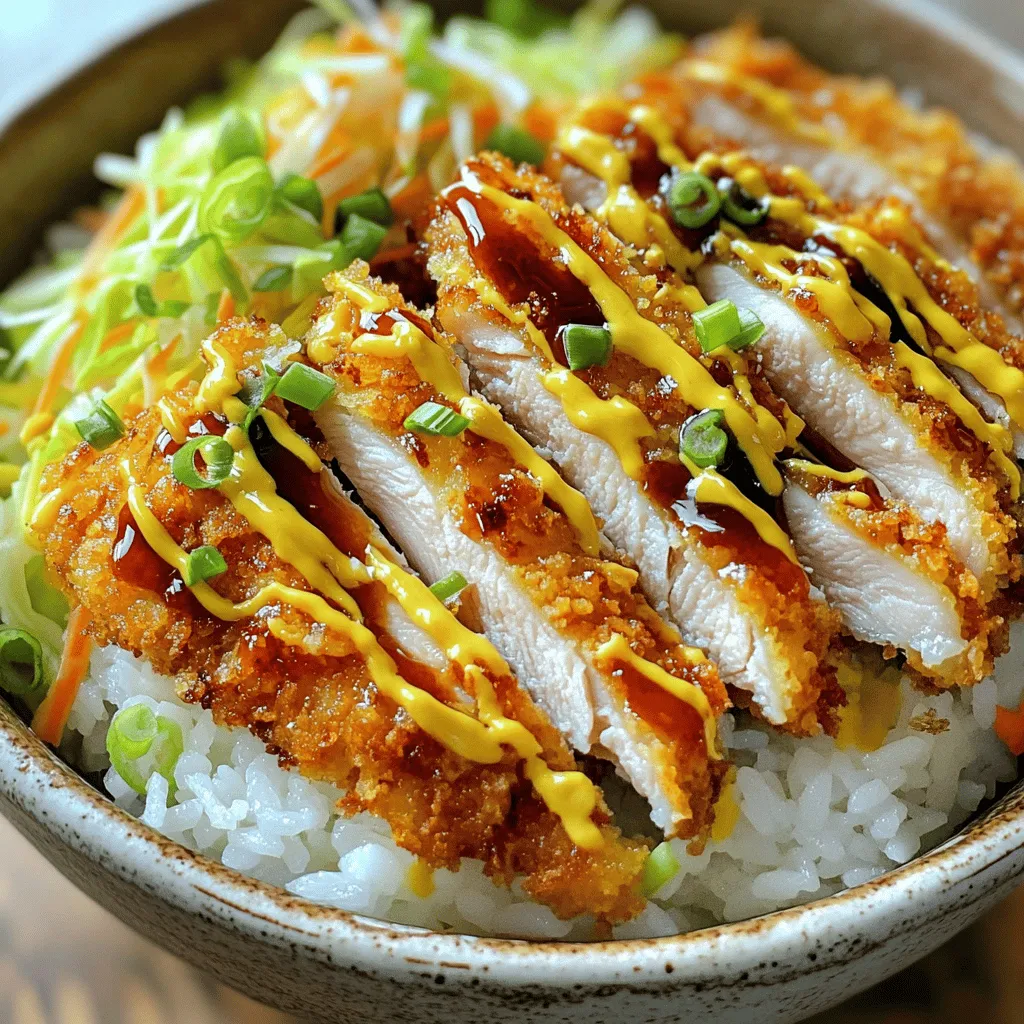
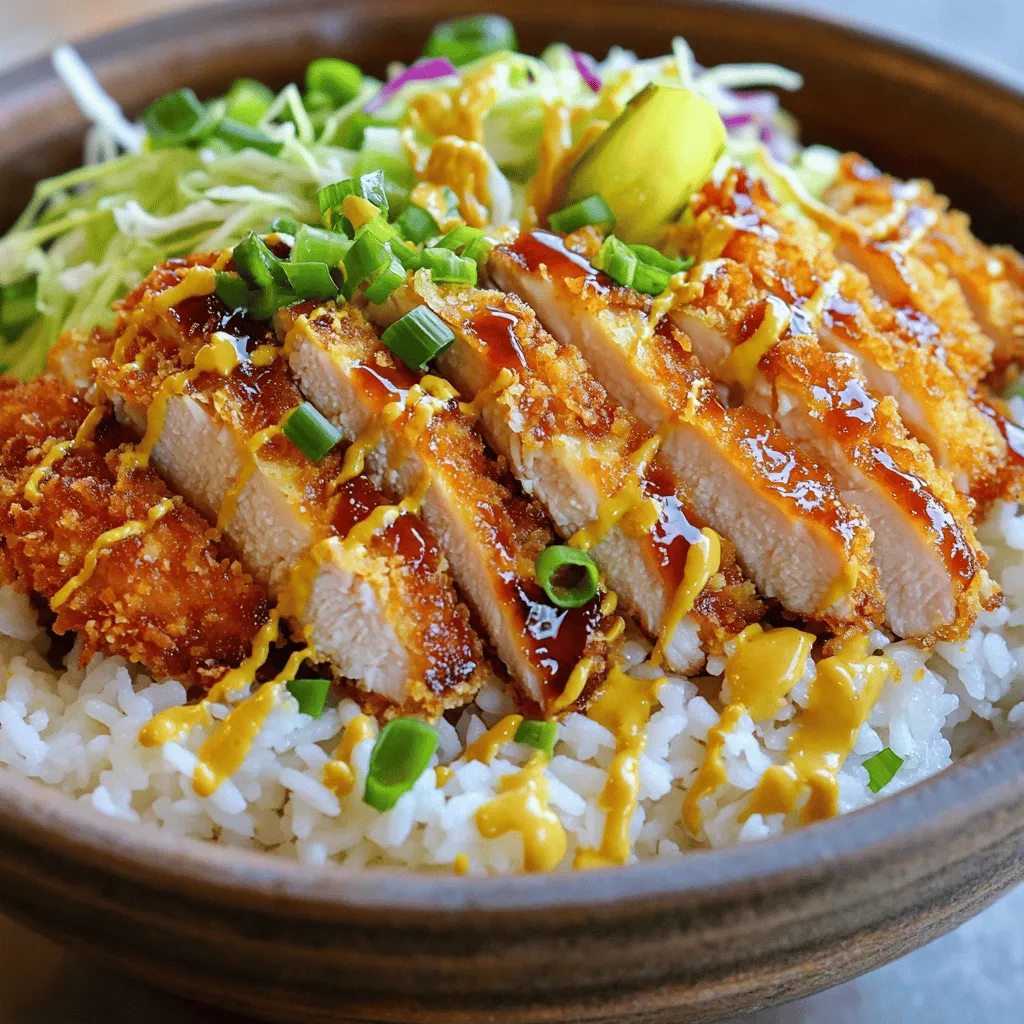
Ready to elevate your weeknight dinners? Japanese Katsu Bowls with Tonkatsu Sauce are a game-changer. Crispy, tender meat atop soft jasmine rice, fresh cabbage, and the perfect drizzle of tonkatsu sauce creates a hearty dish that pleases everyone. In this post, I will walk you through the ingredients, cooking steps, and some exciting variations. Prepare to impress your family with this tasty and satisfying meal!
Ingredients
Main Ingredients
– 2 boneless chicken thighs or pork loin
– 1 cup panko breadcrumbs
– 1/2 cup all-purpose flour
Essential Seasonings
– Salt and pepper to taste
– Vegetable oil for frying
Serving Components
– 2 cups cooked jasmine rice
– 1 cup shredded cabbage
– 2 green onions, sliced
– Pickled ginger for garnish
– 1/4 cup tonkatsu sauce
When making Japanese katsu bowls, the key is in the ingredients. Start with fresh boneless chicken thighs or pork loin. Both options taste great and cook well. I prefer using chicken for its juicy texture.
Panko breadcrumbs give katsu its signature crispiness. They are light and airy, making the dish feel special. The all-purpose flour helps the breadcrumbs stick to the meat.
Seasonings are simple but vital. Use salt and pepper to enhance the flavor of the meat. Vegetable oil is perfect for frying. It has a high smoke point, ensuring your katsu cooks evenly and crisps up nicely.
Next, we need components for serving. Cook jasmine rice to serve as a warm base. The rice is soft and fluffy, making it a great match for the crunchy katsu. Shredded cabbage adds a fresh crunch that balances the meal.
Slice green onions for an extra layer of flavor. Their sharpness pairs well with the rich tonkatsu sauce. Finally, don’t forget the pickled ginger! It offers a tangy contrast that brightens each bite.
For the full recipe, check out the details above. Each ingredient plays a role in making this katsu bowl a delightful experience.
Step-by-Step Instructions
Preparation of Chicken
To start, season the chicken thighs with salt and pepper. Make sure to coat both sides well. If you choose pork loin, use the same seasoning. Next, set up your dredging station. You need three bowls: one for all-purpose flour, one for beaten eggs, and one for panko breadcrumbs. This setup makes coating easy and quick.
Coating and Frying
Now, we will coat the chicken. Take a piece of seasoned chicken and dip it in the flour. Shake off the extra flour. Next, dip it into the beaten eggs. Let any excess egg drip off. Finally, roll the chicken in the panko. Make sure it is fully covered. Repeat this for the second piece.
For frying, heat enough vegetable oil in a skillet to cover the bottom by about 1/4 inch. Turn the heat to medium-high. Wait until the oil shimmers and reaches about 350°F (175°C). This temperature is perfect for frying.
Finishing Touches
Carefully place the coated chicken into the hot oil. Fry each piece for about 5-7 minutes on one side. Then, flip it and cook for another 5-7 minutes. The chicken should be golden brown and crispy. Use a meat thermometer to check the inside temperature. It should reach 165°F (74°C) for safety.
Once cooked, move the chicken to a plate lined with paper towels. This step helps absorb excess oil. After a few minutes, slice the chicken into strips. A sharp knife helps achieve clean cuts.
Assemble your bowls by adding about 1 cup of warm jasmine rice to each serving bowl. Place the sliced chicken on top, then add a handful of shredded cabbage. Drizzle tonkatsu sauce generously over everything. Finally, add sliced green onions and a few pieces of pickled ginger for a delightful garnish. Enjoy your tasty creation!
For the full recipe, see above.
Tips & Tricks
Ensuring Crispy Katsu
To get crispy katsu, start by using the right oil and temperature. I recommend vegetable oil, as it has a high smoke point. Heat the oil to about 350°F (175°C). This will give you that perfect golden crunch. Use a meat thermometer to ensure the oil is hot enough. If the oil is too cool, the katsu will soak up oil and become soggy.
Presentation Tips
For a stunning bowl, layer your ingredients. Start with a base of warm jasmine rice. Then, add the sliced katsu on top. Next, pile on the shredded cabbage for color and crunch. Drizzle on the tonkatsu sauce for rich flavor. You can also sprinkle sesame seeds for extra texture. Garnish with green onions and pickled ginger. These touches make your dish look beautiful and appealing.
Cooking Alternatives
You can use store-bought tonkatsu sauce for convenience. If you prefer, try making your own at home. Homemade sauce can have a fresher taste. Adjust the flavor based on your protein choice. For chicken, keep it simple with salt and pepper. If you use pork, you might want to add garlic powder or a touch of soy sauce for depth. This way, each bite is full of flavor! For the full recipe, check out the complete guide.
Variations
Vegetarian Options
You can easily make a vegetarian katsu bowl. Substitute chicken with eggplant or tofu. Eggplant gives a nice meaty texture. Tofu absorbs flavors well, making it a great choice. For the tonkatsu sauce, use a plant-based option. You can swap soy sauce for tamari. This will keep the sauce tasty and vegan-friendly.
Gluten-Free Options
If you’re gluten-sensitive, you have options too. Use gluten-free flour and breadcrumbs. Brown rice flour works great for coating. For cooking, try baking or air frying. These methods reduce oil use while keeping the katsu crispy.
Flavor Profiles
To change up the flavor, add spices to the panko. Try garlic powder or paprika for a twist. Seasonal veggies also work well. Carrots or bell peppers can add color and crunch. Unique garnishes like sesame seeds or chopped herbs can enhance the dish.
Storage Info
Storing Leftovers
To keep your katsu bowls fresh, place them in an airtight container. Refrigerate them right after they cool down to room temperature. This helps to keep the flavors intact. You can store katsu for up to three days. Make sure to check for any signs of spoilage before eating.
Reheating Instructions
When reheating katsu, I want to maintain its crispy texture. The oven works best for this. Preheat your oven to 375°F (190°C). Place the katsu on a baking sheet and heat for about 10-15 minutes. If you use a microwave, the katsu may get soggy. If you must, use a microwave-safe plate and heat for 1-2 minutes.
Freezing Katsu Bowls
You can freeze katsu bowls for longer storage. First, freeze the chicken and rice separately. Place them in freezer bags and remove as much air as possible. They can last up to three months in the freezer. When ready to eat, thaw them in the fridge overnight. Reheat the chicken in the oven and warm the rice in the microwave. Enjoy your delicious meal like it was fresh!
FAQs
How long does it take to prepare Japanese Katsu Bowls with Tonkatsu Sauce?
To make Japanese Katsu Bowls, you need about 20 minutes for prep and 20 minutes for cooking. In total, it takes around 40 minutes from start to finish. This quick time makes it perfect for a weeknight meal.
Can I make Katsu Bowls in advance?
Yes, you can prep Katsu Bowls ahead of time! You can cook the chicken and rice and store them separately in the fridge for up to three days. Just reheat them when you’re ready to eat. Keep the tonkatsu sauce and veggies fresh until serving to maintain their crunch.
What are some common mistakes when making Katsu?
Many people make a few common mistakes when making Katsu. Here are tips to avoid them:
– Skipping the seasoning: Always season the meat well. This step adds flavor.
– Not using enough oil: Make sure there’s enough oil in the pan. This helps fry the chicken evenly.
– Flipping too soon: Let the chicken cook fully before flipping it. This ensures a crispy crust.
– Overcrowding the pan: Cook in batches if needed. This helps keep the temperature steady and the katsu crispy.
These simple tips can help you make a perfect Katsu Bowl every time! For more details on making Katsu Bowls, check the Full Recipe.
You can create tasty Japanese Katsu Bowls with ease. Starting with chicken or pork, you coat it in panko and fry it to crispy perfection. Pair it with rice, cabbage, and tonkatsu sauce for a delicious meal.
With tips on frying, storage, and variations like vegetarian options, you can impress anyone. Don’t shy away from trying new flavors or adjusting the recipe to suit your taste. Enjoy your cooking, and remember, practice makes perfect!
