![- Whole grain crackers - Sliced turkey or chicken breast - Cheddar cheese cubes - Baby carrots - Cucumber slices - Grape tomatoes - Hummus and ranch dressing - Sliced apples - Grapes For my Make-Ahead Lunchables, I focus on simple yet tasty ingredients. Whole grain crackers are a must. They add crunch and are healthy too. Next, I like sliced turkey or chicken breast for protein. It keeps you full and satisfied. Cheddar cheese cubes are another key ingredient. They pair well with the crackers and meat. A balanced meal needs fresh veggies. Baby carrots, cucumber slices, and grape tomatoes give color and crunch. They also add nutrients. For dips, I use hummus and ranch dressing. These add flavor and make veggies fun to eat. If you want a sweet touch, add sliced apples or grapes. They bring a burst of freshness. Gather these ingredients for a quick meal prep. With these options, you can mix and match. Enjoy building your own tasty Lunchables! You can find the full recipe [here]. To start, pick the right lunchboxes. Choose ones with compartments. This makes it easy to keep foods separate. Using these boxes helps keep everything neat and tidy. Next, gather your tools and ingredients. You will need: - A cutting board - A knife - Measuring cups - Small, compartmentalized containers Make sure you have all your ingredients ready. This will save time as you assemble. Now it’s time to build your Lunchables! First, layer the crackers. Place 1/4 cup of whole grain crackers in each compartment. This forms a crunchy base. Next, add your protein. Place 1/4 cup of sliced turkey or chicken breast next to the crackers. This adds a filling option. Now, it’s time for cheese. Add about 1/4 cup of cubed cheddar cheese next to the meat. This pairing is tasty and satisfying. Fill the rest of the spaces with veggies. Use baby carrots, cucumber slices, and halved grape tomatoes. This adds color and crunch to your meal. For dips, include a small cup for each container. Fill one with hummus and another with ranch dressing. This makes dipping easy and fun. Finally, add some fruit if you like. Sliced apples or grapes make a sweet addition. They balance the savory flavors well. Once everything is in place, seal the containers tightly. This keeps your food fresh. Store them in the fridge. They will stay good for up to five days. Enjoy your easy lunches anytime! For the full recipe, check out the details above. To make your Make-Ahead Lunchables quick, follow these methods: - Efficient Assembly Line Method: Set up all your ingredients in a line. Start by adding crackers, then meat, cheese, and veggies. This keeps you organized. You can quickly fill each container without wasting time. - Best Practices for Portion Control: Use measuring cups. This helps you keep the same amount of food in each container. It prevents waste and keeps your meals balanced. Keeping your Lunchables fresh is key to enjoying them later: - Storage Tips to Keep Ingredients Crisp: Use airtight containers. They help keep air out and freshness in. Store your Lunchables in the fridge right after you prepare them. - How to Prevent Spoilage: Avoid mixing wet and dry foods. Keep dips in separate containers. This stops crackers from getting soggy and keeps veggies crisp. Make your Lunchables fun and appealing: - Creative Arrangements for Visual Appeal: Arrange colorful veggies and fruits in fun patterns. Try creating a rainbow effect or a smiley face. This makes lunch exciting for kids. - Using Fun Containers for Kids: Choose lunchboxes with bright colors or fun shapes. Kids love unique designs. It makes lunchtime a little more special and encourages them to eat healthy. {{image_4}} You can mix up the proteins in your Make-Ahead Lunchables. Try using ham or salami instead of turkey or chicken. These meats add a nice salty taste. For a vegetarian option, consider using hummus or roasted chickpeas. They pack protein and flavor too. Customizing for dietary needs is easy. If you have dietary restrictions, choose what fits your lifestyle. Cheese is a great way to add flavor to your Lunchables. You can use different types of cheese like mozzarella, gouda, or pepper jack. Each cheese brings a unique taste. Non-dairy cheese options are also available. Brands today offer good alternatives made from nuts or soy. These can work well for those avoiding dairy. Adding spices or seasonings can boost flavor. Try sprinkling garlic powder or paprika on your meats. A dash of black pepper can also make a big difference. Don’t forget about dips! Incorporating different dips can change the game. You can use ranch, guacamole, or salsa for variety. Each dip adds its own fun twist. Keep your Make-Ahead Lunchables in the fridge at 40°F or lower. This helps keep food fresh. They can last up to five days. After that, the taste and texture may change. Always check for off smells or colors before eating. For longer storage, you can freeze your Lunchables. First, assemble them in airtight containers. Leave some space for expansion. When ready to eat, take them out and thaw in the fridge overnight. This keeps the food safe and tasty. Use compartmentalized containers for best results. They keep each food item separate. Glass or BPA-free plastic are great choices. If you want to be eco-friendly, look for reusable silicone bags or containers. They are safe and help reduce waste. Yes, you can make Make-Ahead Lunchables up to five days in advance. This allows you to save time during busy weeks. Just seal them tightly in containers. Store them in the fridge to keep them fresh. I always prep mine on Sunday for the week ahead. It’s a great way to stay organized. Transport your Lunchables in insulated lunch bags. This helps keep the food fresh and cool. Use containers with tight lids to prevent spills. If you add ice packs, they can stay cold longer. I find that small, divided containers work best for easy packing. Yes! You can make nut-free Make-Ahead Lunchables easily. Use seeds like sunflower or pumpkin instead of nuts. You can also stick with fruits and veggies. Just be sure to check all labels. This keeps everyone safe from allergens. You can enjoy delicious lunches without worry. Mix up your proteins, cheeses, and spreads each week. Try different dips like guacamole or salsa. Swap out veggies for seasonal options like bell peppers or snap peas. You can also switch between crackers and pita bread. This keeps your Make-Ahead Lunchables exciting and fun to eat. Yes, using pre-packaged ingredients can save time. Just check the labels for freshness and expiration dates. Look for options without added sugars or preservatives. I like to choose items made from whole foods. This way, I know I’m serving healthy meals. Always rinse pre-packaged veggies to remove any surface dirt. Make-ahead Lunchables are fun and easy to prepare. You can tailor them to your taste and dietary needs. Remember to use whole grain crackers, proteins, cheese, veggies, and tasty dips. Store them properly to keep ingredients fresh. With a few meal prep tricks, you can create appealing and nutritious lunches that your kids will love. Try different flavors and presentations to keep things exciting. Enjoy the convenience and delight these meals bring to your day!](https://tossedtastes.com/wp-content/uploads/2025/07/241045ac-8a0d-4c42-8d7a-970bfc1c4d63.webp)
Looking for a quick, fun, and healthy lunch solution? Make-Ahead Lunchables are here to save your day! With easy ingredients and simple steps, you can prep tasty meals that kids and adults will love. Say goodbye to boring lunches and hello to creativity and flavor. In this guide, I’ll show you how to mix and match ingredients for perfect meal prep. Let’s dive in and make lunchtime exciting!
Ingredients
Essential Ingredients for Make-Ahead Lunchables
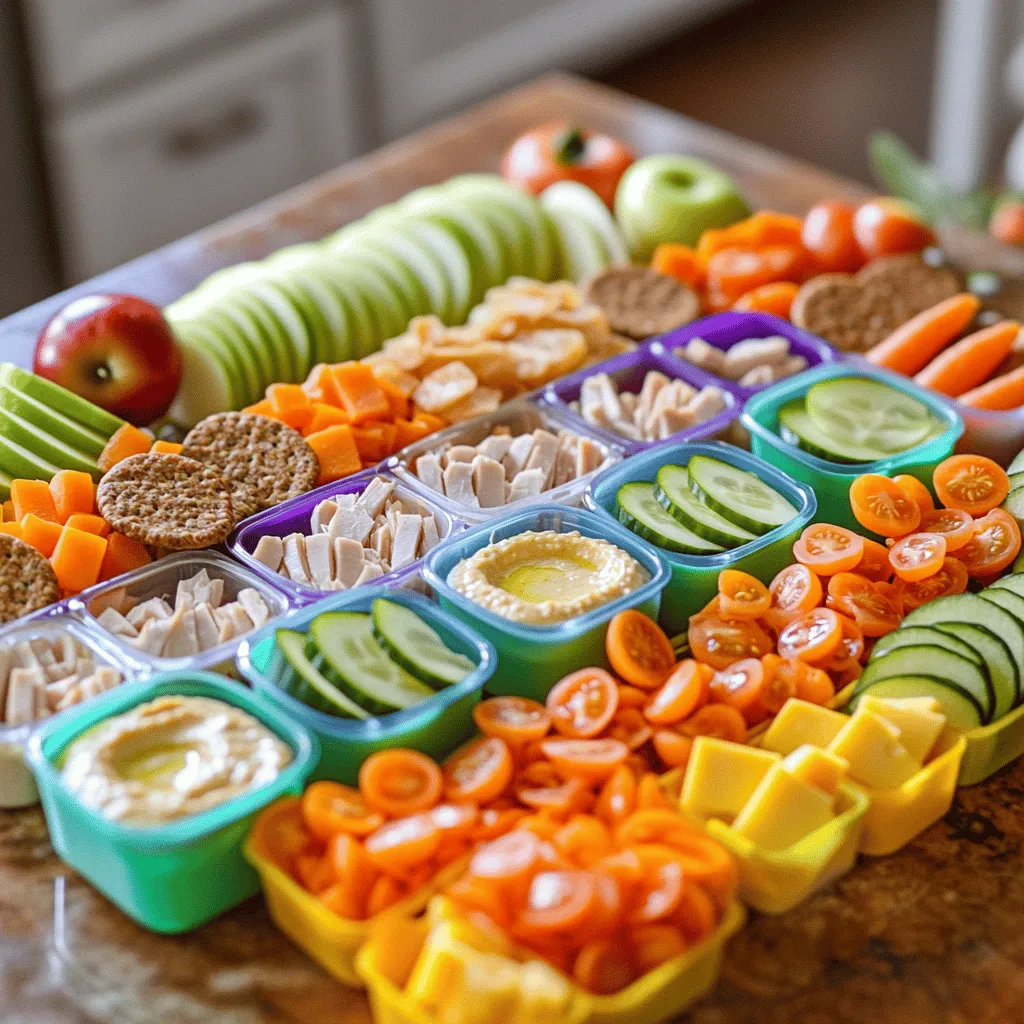
– Whole grain crackers
– Sliced turkey or chicken breast
– Cheddar cheese cubes
Fresh Veggie & Dip Options
– Baby carrots
– Cucumber slices
– Grape tomatoes
– Hummus and ranch dressing
Optional Sweet Additions
– Sliced apples
– Grapes
For my Make-Ahead Lunchables, I focus on simple yet tasty ingredients. Whole grain crackers are a must. They add crunch and are healthy too. Next, I like sliced turkey or chicken breast for protein. It keeps you full and satisfied.
Cheddar cheese cubes are another key ingredient. They pair well with the crackers and meat. A balanced meal needs fresh veggies. Baby carrots, cucumber slices, and grape tomatoes give color and crunch. They also add nutrients.
For dips, I use hummus and ranch dressing. These add flavor and make veggies fun to eat. If you want a sweet touch, add sliced apples or grapes. They bring a burst of freshness.
Gather these ingredients for a quick meal prep. With these options, you can mix and match. Enjoy building your own tasty Lunchables! You can find the full recipe [here].
Step-by-Step Instructions
Preparing the Containers
To start, pick the right lunchboxes. Choose ones with compartments. This makes it easy to keep foods separate. Using these boxes helps keep everything neat and tidy.
Next, gather your tools and ingredients. You will need:
– A cutting board
– A knife
– Measuring cups
– Small, compartmentalized containers
Make sure you have all your ingredients ready. This will save time as you assemble.
Assembling the Lunchables
Now it’s time to build your Lunchables! First, layer the crackers. Place 1/4 cup of whole grain crackers in each compartment. This forms a crunchy base.
Next, add your protein. Place 1/4 cup of sliced turkey or chicken breast next to the crackers. This adds a filling option.
Now, it’s time for cheese. Add about 1/4 cup of cubed cheddar cheese next to the meat. This pairing is tasty and satisfying.
Fill the rest of the spaces with veggies. Use baby carrots, cucumber slices, and halved grape tomatoes. This adds color and crunch to your meal.
For dips, include a small cup for each container. Fill one with hummus and another with ranch dressing. This makes dipping easy and fun.
Finally, add some fruit if you like. Sliced apples or grapes make a sweet addition. They balance the savory flavors well.
Final Touches
Once everything is in place, seal the containers tightly. This keeps your food fresh.
Store them in the fridge. They will stay good for up to five days. Enjoy your easy lunches anytime!
For the full recipe, check out the details above.
Tips & Tricks
Meal Prep Techniques
To make your Make-Ahead Lunchables quick, follow these methods:
– Efficient Assembly Line Method: Set up all your ingredients in a line. Start by adding crackers, then meat, cheese, and veggies. This keeps you organized. You can quickly fill each container without wasting time.
– Best Practices for Portion Control: Use measuring cups. This helps you keep the same amount of food in each container. It prevents waste and keeps your meals balanced.
Ensuring Freshness
Keeping your Lunchables fresh is key to enjoying them later:
– Storage Tips to Keep Ingredients Crisp: Use airtight containers. They help keep air out and freshness in. Store your Lunchables in the fridge right after you prepare them.
– How to Prevent Spoilage: Avoid mixing wet and dry foods. Keep dips in separate containers. This stops crackers from getting soggy and keeps veggies crisp.
Presentation Ideas
Make your Lunchables fun and appealing:
– Creative Arrangements for Visual Appeal: Arrange colorful veggies and fruits in fun patterns. Try creating a rainbow effect or a smiley face. This makes lunch exciting for kids.
– Using Fun Containers for Kids: Choose lunchboxes with bright colors or fun shapes. Kids love unique designs. It makes lunchtime a little more special and encourages them to eat healthy.
Variations
Different Protein Options
You can mix up the proteins in your Make-Ahead Lunchables. Try using ham or salami instead of turkey or chicken. These meats add a nice salty taste. For a vegetarian option, consider using hummus or roasted chickpeas. They pack protein and flavor too. Customizing for dietary needs is easy. If you have dietary restrictions, choose what fits your lifestyle.
Cheese Substitutions
Cheese is a great way to add flavor to your Lunchables. You can use different types of cheese like mozzarella, gouda, or pepper jack. Each cheese brings a unique taste. Non-dairy cheese options are also available. Brands today offer good alternatives made from nuts or soy. These can work well for those avoiding dairy.
Flavor Enhancements
Adding spices or seasonings can boost flavor. Try sprinkling garlic powder or paprika on your meats. A dash of black pepper can also make a big difference. Don’t forget about dips! Incorporating different dips can change the game. You can use ranch, guacamole, or salsa for variety. Each dip adds its own fun twist.
Storage Info
Best Practices for Refrigeration
Keep your Make-Ahead Lunchables in the fridge at 40°F or lower. This helps keep food fresh. They can last up to five days. After that, the taste and texture may change. Always check for off smells or colors before eating.
Freezing Options
For longer storage, you can freeze your Lunchables. First, assemble them in airtight containers. Leave some space for expansion. When ready to eat, take them out and thaw in the fridge overnight. This keeps the food safe and tasty.
Container Recommendations
Use compartmentalized containers for best results. They keep each food item separate. Glass or BPA-free plastic are great choices. If you want to be eco-friendly, look for reusable silicone bags or containers. They are safe and help reduce waste.
FAQs
Can Make-Ahead Lunchables be made a few days in advance?
Yes, you can make Make-Ahead Lunchables up to five days in advance. This allows you to save time during busy weeks. Just seal them tightly in containers. Store them in the fridge to keep them fresh. I always prep mine on Sunday for the week ahead. It’s a great way to stay organized.
What is the best way to transport Lunchables?
Transport your Lunchables in insulated lunch bags. This helps keep the food fresh and cool. Use containers with tight lids to prevent spills. If you add ice packs, they can stay cold longer. I find that small, divided containers work best for easy packing.
Are there any nut-free options for allergies?
Yes! You can make nut-free Make-Ahead Lunchables easily. Use seeds like sunflower or pumpkin instead of nuts. You can also stick with fruits and veggies. Just be sure to check all labels. This keeps everyone safe from allergens. You can enjoy delicious lunches without worry.
How to add variety without repetition?
Mix up your proteins, cheeses, and spreads each week. Try different dips like guacamole or salsa. Swap out veggies for seasonal options like bell peppers or snap peas. You can also switch between crackers and pita bread. This keeps your Make-Ahead Lunchables exciting and fun to eat.
Is it safe to use pre-packaged ingredients?
Yes, using pre-packaged ingredients can save time. Just check the labels for freshness and expiration dates. Look for options without added sugars or preservatives. I like to choose items made from whole foods. This way, I know I’m serving healthy meals. Always rinse pre-packaged veggies to remove any surface dirt.
Make-ahead Lunchables are fun and easy to prepare. You can tailor them to your taste and dietary needs. Remember to use whole grain crackers, proteins, cheese, veggies, and tasty dips. Store them properly to keep ingredients fresh. With a few meal prep tricks, you can create appealing and nutritious lunches that your kids will love. Try different flavors and presentations to keep things exciting. Enjoy the convenience and delight these meals bring to your day!
![- Whole grain crackers - Sliced turkey or chicken breast - Cheddar cheese cubes - Baby carrots - Cucumber slices - Grape tomatoes - Hummus and ranch dressing - Sliced apples - Grapes For my Make-Ahead Lunchables, I focus on simple yet tasty ingredients. Whole grain crackers are a must. They add crunch and are healthy too. Next, I like sliced turkey or chicken breast for protein. It keeps you full and satisfied. Cheddar cheese cubes are another key ingredient. They pair well with the crackers and meat. A balanced meal needs fresh veggies. Baby carrots, cucumber slices, and grape tomatoes give color and crunch. They also add nutrients. For dips, I use hummus and ranch dressing. These add flavor and make veggies fun to eat. If you want a sweet touch, add sliced apples or grapes. They bring a burst of freshness. Gather these ingredients for a quick meal prep. With these options, you can mix and match. Enjoy building your own tasty Lunchables! You can find the full recipe [here]. To start, pick the right lunchboxes. Choose ones with compartments. This makes it easy to keep foods separate. Using these boxes helps keep everything neat and tidy. Next, gather your tools and ingredients. You will need: - A cutting board - A knife - Measuring cups - Small, compartmentalized containers Make sure you have all your ingredients ready. This will save time as you assemble. Now it’s time to build your Lunchables! First, layer the crackers. Place 1/4 cup of whole grain crackers in each compartment. This forms a crunchy base. Next, add your protein. Place 1/4 cup of sliced turkey or chicken breast next to the crackers. This adds a filling option. Now, it’s time for cheese. Add about 1/4 cup of cubed cheddar cheese next to the meat. This pairing is tasty and satisfying. Fill the rest of the spaces with veggies. Use baby carrots, cucumber slices, and halved grape tomatoes. This adds color and crunch to your meal. For dips, include a small cup for each container. Fill one with hummus and another with ranch dressing. This makes dipping easy and fun. Finally, add some fruit if you like. Sliced apples or grapes make a sweet addition. They balance the savory flavors well. Once everything is in place, seal the containers tightly. This keeps your food fresh. Store them in the fridge. They will stay good for up to five days. Enjoy your easy lunches anytime! For the full recipe, check out the details above. To make your Make-Ahead Lunchables quick, follow these methods: - Efficient Assembly Line Method: Set up all your ingredients in a line. Start by adding crackers, then meat, cheese, and veggies. This keeps you organized. You can quickly fill each container without wasting time. - Best Practices for Portion Control: Use measuring cups. This helps you keep the same amount of food in each container. It prevents waste and keeps your meals balanced. Keeping your Lunchables fresh is key to enjoying them later: - Storage Tips to Keep Ingredients Crisp: Use airtight containers. They help keep air out and freshness in. Store your Lunchables in the fridge right after you prepare them. - How to Prevent Spoilage: Avoid mixing wet and dry foods. Keep dips in separate containers. This stops crackers from getting soggy and keeps veggies crisp. Make your Lunchables fun and appealing: - Creative Arrangements for Visual Appeal: Arrange colorful veggies and fruits in fun patterns. Try creating a rainbow effect or a smiley face. This makes lunch exciting for kids. - Using Fun Containers for Kids: Choose lunchboxes with bright colors or fun shapes. Kids love unique designs. It makes lunchtime a little more special and encourages them to eat healthy. {{image_4}} You can mix up the proteins in your Make-Ahead Lunchables. Try using ham or salami instead of turkey or chicken. These meats add a nice salty taste. For a vegetarian option, consider using hummus or roasted chickpeas. They pack protein and flavor too. Customizing for dietary needs is easy. If you have dietary restrictions, choose what fits your lifestyle. Cheese is a great way to add flavor to your Lunchables. You can use different types of cheese like mozzarella, gouda, or pepper jack. Each cheese brings a unique taste. Non-dairy cheese options are also available. Brands today offer good alternatives made from nuts or soy. These can work well for those avoiding dairy. Adding spices or seasonings can boost flavor. Try sprinkling garlic powder or paprika on your meats. A dash of black pepper can also make a big difference. Don’t forget about dips! Incorporating different dips can change the game. You can use ranch, guacamole, or salsa for variety. Each dip adds its own fun twist. Keep your Make-Ahead Lunchables in the fridge at 40°F or lower. This helps keep food fresh. They can last up to five days. After that, the taste and texture may change. Always check for off smells or colors before eating. For longer storage, you can freeze your Lunchables. First, assemble them in airtight containers. Leave some space for expansion. When ready to eat, take them out and thaw in the fridge overnight. This keeps the food safe and tasty. Use compartmentalized containers for best results. They keep each food item separate. Glass or BPA-free plastic are great choices. If you want to be eco-friendly, look for reusable silicone bags or containers. They are safe and help reduce waste. Yes, you can make Make-Ahead Lunchables up to five days in advance. This allows you to save time during busy weeks. Just seal them tightly in containers. Store them in the fridge to keep them fresh. I always prep mine on Sunday for the week ahead. It’s a great way to stay organized. Transport your Lunchables in insulated lunch bags. This helps keep the food fresh and cool. Use containers with tight lids to prevent spills. If you add ice packs, they can stay cold longer. I find that small, divided containers work best for easy packing. Yes! You can make nut-free Make-Ahead Lunchables easily. Use seeds like sunflower or pumpkin instead of nuts. You can also stick with fruits and veggies. Just be sure to check all labels. This keeps everyone safe from allergens. You can enjoy delicious lunches without worry. Mix up your proteins, cheeses, and spreads each week. Try different dips like guacamole or salsa. Swap out veggies for seasonal options like bell peppers or snap peas. You can also switch between crackers and pita bread. This keeps your Make-Ahead Lunchables exciting and fun to eat. Yes, using pre-packaged ingredients can save time. Just check the labels for freshness and expiration dates. Look for options without added sugars or preservatives. I like to choose items made from whole foods. This way, I know I’m serving healthy meals. Always rinse pre-packaged veggies to remove any surface dirt. Make-ahead Lunchables are fun and easy to prepare. You can tailor them to your taste and dietary needs. Remember to use whole grain crackers, proteins, cheese, veggies, and tasty dips. Store them properly to keep ingredients fresh. With a few meal prep tricks, you can create appealing and nutritious lunches that your kids will love. Try different flavors and presentations to keep things exciting. Enjoy the convenience and delight these meals bring to your day!](https://tossedtastes.com/wp-content/uploads/2025/07/241045ac-8a0d-4c42-8d7a-970bfc1c4d63-300x300.webp)