Maple Glazed Pumpkin Scones Irresistible Fall Treat

WANT TO SAVE THIS RECIPE?

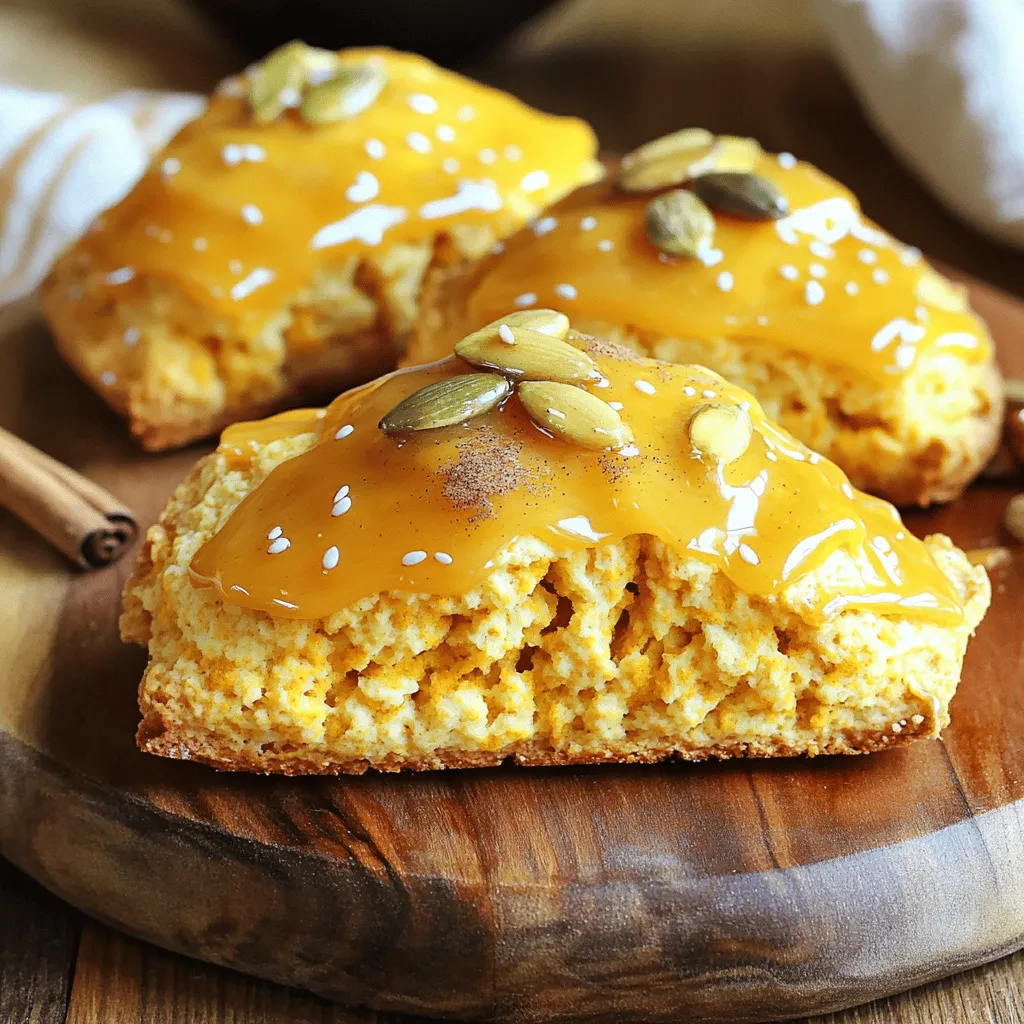
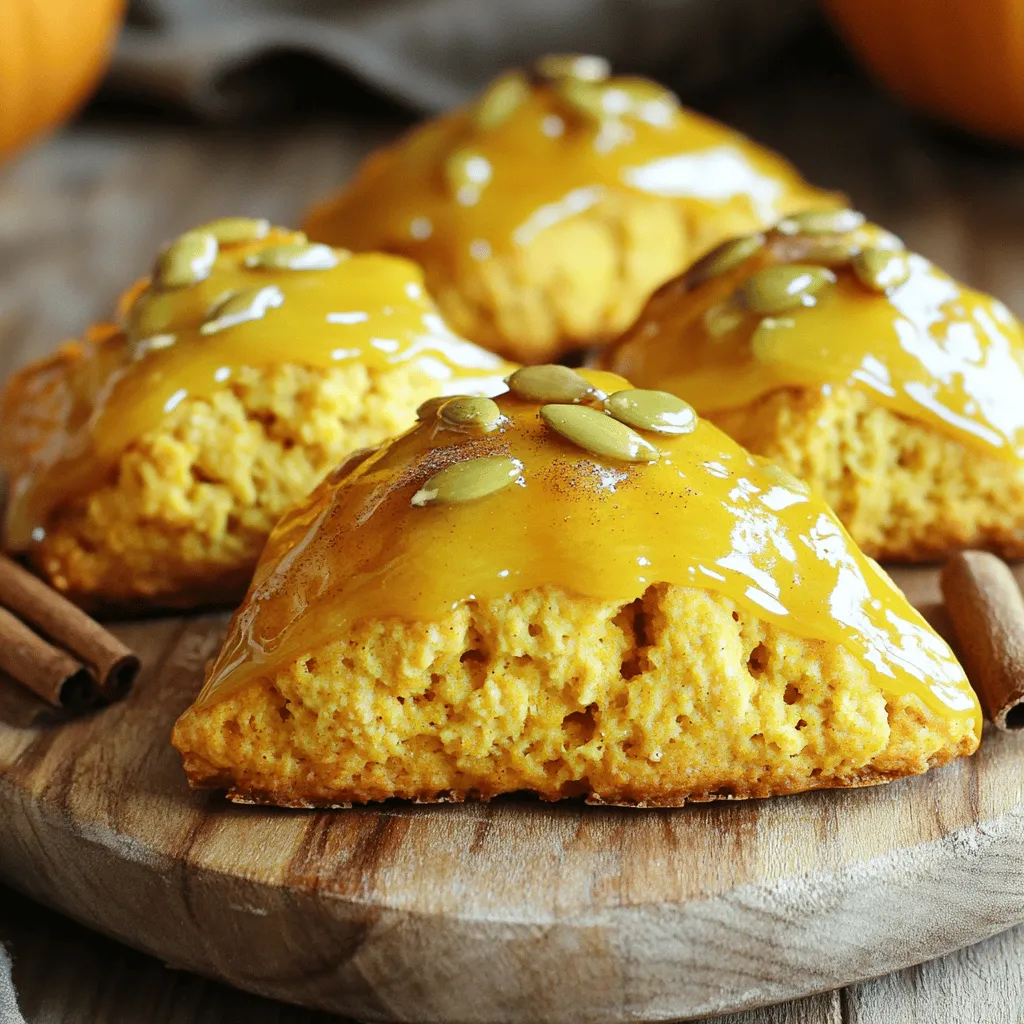
Fall is here, and that means it’s time for maple glazed pumpkin scones! These scones blend warm spices with a sweet maple glaze, creating a treat you can’t resist. In this article, I will guide you through the simple steps to make the perfect batch. Whether for a cozy breakfast or a snack, these scones will warm your heart and home. Let’s get baking!

Ingredients

Dry Ingredients

– 2 cups all-purpose flour

– 1/2 cup packed brown sugar

– 1 tablespoon baking powder

– 1/2 teaspoon baking soda

– 1/2 teaspoon salt

– 1 teaspoon pumpkin pie spice

Wet Ingredients

– 1/2 cup unsalted butter, cold and cut into cubes

– 1/2 cup pure pumpkin puree

– 1/4 cup heavy cream

– 1 large egg

– 1 teaspoon pure vanilla extract

Glaze Ingredients

– 1/2 cup powdered sugar

– 2 tablespoons pure maple syrup

The ingredients for maple glazed pumpkin scones bring warmth and joy. The dry ingredients mix flour and spices. They provide the base for our scones. The pumpkin pie spice adds a cozy flavor that reminds us of fall. The brown sugar brings sweetness and depth to the dough.

The wet ingredients are just as important. Cold butter creates a flaky texture in each bite. The pumpkin puree gives moisture and a lovely orange hue. Heavy cream adds richness, while the egg binds everything together. The vanilla extract adds a touch of warmth.

For the glaze, we combine powdered sugar and maple syrup. This sweet topping enhances the scones. It gives them a beautiful shine and a tasty finish. Together, these ingredients make every bite of the scone delightful.

Remember, using high-quality ingredients will boost the flavor. Enjoy the process of mixing and baking these treats. The smell of scones baking will make your kitchen feel like home.

Step-by-Step Instructions

Preparation Steps

1. Preheat oven and prepare baking sheet: Start by setting your oven to 400°F (200°C). Line a baking sheet with parchment paper for easy cleanup. This step is key for perfect baking.

2. Combine dry ingredients in a mixing bowl: Take a large bowl. Add 2 cups of all-purpose flour, 1/2 cup of packed brown sugar, 1 tablespoon of baking powder, 1/2 teaspoon of baking soda, 1/2 teaspoon of salt, and 1 teaspoon of pumpkin pie spice. Whisk it well to ensure no lumps remain.

3. Mix wet ingredients in a separate bowl: In another bowl, mix together 1/2 cup of pure pumpkin puree, 1/4 cup of heavy cream, 1 large egg, and 1 teaspoon of pure vanilla extract. Stir until everything blends smoothly.

Dough Assembly

1. Incorporate cold butter into dry ingredients: Add 1/2 cup of cold, cubed unsalted butter to the dry mix. Use a pastry cutter or your fingers to blend the butter until it looks like coarse crumbs. This adds a nice flakiness to your scones.

2. Combine wet and dry mixtures: Pour the wet ingredients into the dry mixture. Gently stir until just combined. Avoid over-mixing to keep the scones tender.

3. Shape and cut the dough into wedges: Transfer the dough to a floured surface. Knead it gently a few times until it forms a ball. Shape it into a circle about 1 inch thick. Slice the dough into 8 equal wedges with a sharp knife or pizza cutter. Place them on the prepared baking sheet, leaving space between each wedge.

Baking Instructions

1. Bake scones to golden perfection: Place the baking sheet in the oven. Bake the scones for 15-20 minutes. They should turn lightly golden on top. Use a toothpick to check if they are done; it should come out clean.

2. Cool and glaze the scones before serving: Let the scones cool on the baking sheet for a few minutes. While they cool, whisk together 1/2 cup of powdered sugar and 2 tablespoons of pure maple syrup in a small bowl until smooth. Drizzle this glaze over the warm scones for a sweet finish.

Tips & Tricks

Achieving the Perfect Texture

To get the best scones, cold butter is key. When you use cold butter, it stays firm in the dough. This helps create light and flaky layers during baking. Cut the butter into small cubes before adding it to the dry mix.

Next, avoid over-mixing the dough. Mix until the ingredients just come together. Over-mixing can make your scones tough. You want that soft and tender bite, so be gentle with the dough.

Flavor Enhancements

For extra flavor, consider adding spices. You can try cinnamon or nutmeg along with the pumpkin pie spice. These spices boost the warm taste of fall.

When it comes to sweetness, taste as you go. The brown sugar adds deep flavor. The maple glaze adds sweetness too. Adjust the glaze if you want it sweeter or less sweet.

Presentation Tips

Serve your scones on a nice wooden board. This gives them a cozy look. Drizzle extra maple glaze on top for a shiny finish.

For added flair, sprinkle some cinnamon or roasted pumpkin seeds on top. It adds color and a nice crunch. This makes your scones look as good as they taste!

Variations

Substitute Ingredients

You might want to switch up ingredients in your maple glazed pumpkin scones. Here are some easy swaps:

Alternatives for all-purpose flour: You can try using whole wheat flour or a gluten-free blend. Both can give your scones a nice texture. Whole wheat adds a nutty flavor, while gluten-free blends can keep it light.

Dairy-free options for heavy cream: If you need a dairy-free choice, use coconut cream or almond milk. Both will give moisture without losing taste.

Flavor Variations

Adding a twist to your scones can make them even better. Here are some fun ideas:

Adding nuts or chocolate chips: Chopped pecans or walnuts add crunch and flavor. You can also toss in dark chocolate chips for a sweet surprise.

Incorporating seasonal spices: Try adding nutmeg or ginger to your dough. These spices pair well with pumpkin and add warmth to the flavor.

Different Glazes

Glazing your scones can take them to the next level. Here are some fun ideas for glazes:

Options for glaze alternatives: Instead of maple glaze, you can use a simple vanilla or cream cheese glaze. These add sweetness without overpowering.

Creative toppings that complement the scones: Consider adding a sprinkle of cinnamon sugar or crushed nuts on top. These toppings can add texture and extra flavor.

Storage Info

Short-Term Storage

To keep your leftover maple glazed pumpkin scones fresh, store them in an airtight container. This will help retain their moisture and flavor. You can use a plastic container or a resealable bag. Make sure to let the scones cool completely before sealing them. This prevents condensation, which can make them soggy.

Long-Term Storage

If you want to save scones for later, freezing is a great option. Place the cooled scones in a single layer on a baking sheet. Freeze them for about one hour. After they are firm, transfer them to a freezer-safe bag or container. This method helps keep them fresh for up to three months.

To thaw, simply remove the scones from the freezer. You can leave them at room temperature for a few hours. If you’re in a hurry, use the microwave. Heat them in short bursts, checking often to avoid drying them out.

Reheating Tips

To reheat your scones, preheat your oven to 350°F (175°C). Place the scones on a baking sheet. Warm them for about 10 minutes. This method keeps them soft and flaky. You can also use a microwave. Heat for about 15-20 seconds. If they seem dry, add a small splash of water to keep them moist. Enjoy your warm scones with their delicious maple glaze!

FAQs

How do I make my scones rise?

To help scones rise, use cold butter and a leavening agent like baking powder. Cold butter creates steam during baking, adding height. You must also mix gently. Over-mixing can lead to dense scones. Make sure to shape your dough quickly and cut it into wedges. This keeps the texture light and fluffy.

Can I use fresh pumpkin instead of puree?

Yes, you can use fresh pumpkin. Start by roasting or steaming the pumpkin until soft. Then, mash it or blend it until smooth. Make sure to drain any excess moisture. This ensures the dough does not become too wet. Fresh pumpkin adds a richer flavor to your scones.

How long can I store maple glazed pumpkin scones?

You can store scones at room temperature for up to two days. Keep them in an airtight container to maintain freshness. For longer storage, place them in the fridge for up to a week. You can also freeze them for two months. Just make sure to wrap them well.

What’s the best way to serve these scones?

These scones pair well with warm beverages like coffee or tea. You can also serve them with butter or cream cheese for added richness. For a seasonal touch, try them with apple cider or spiced chai. Feel free to sprinkle some cinnamon or nuts on top for extra flavor.

This blog post covered all you need to know to bake perfect pumpkin scones. From the fresh ingredients to the step-by-step instructions, you have the tools to enjoy this treat. Remember to use cold butter for the best texture. Explore variations, and don’t hesitate to get creative with flavors. With proper storage and reheating tips, your scones can stay delicious for days. Enjoy your baking and savor each bite. Your kitchen will smell amazing, and your taste buds will thank you!

- 2 cups all-purpose flour - 1/2 cup packed brown sugar - 1 tablespoon baking powder - 1/2 teaspoon baking soda - 1/2 teaspoon salt - 1 teaspoon pumpkin pie spice - 1/2 cup unsalted butter, cold and cut into cubes - 1/2 cup pure pumpkin puree - 1/4 cup heavy cream - 1 large egg - 1 teaspoon pure vanilla extract - 1/2 cup powdered sugar - 2 tablespoons pure maple syrup The ingredients for maple glazed pumpkin scones bring warmth and joy. The dry ingredients mix flour and spices. They provide the base for our scones. The pumpkin pie spice adds a cozy flavor that reminds us of fall. The brown sugar brings sweetness and depth to the dough. The wet ingredients are just as important. Cold butter creates a flaky texture in each bite. The pumpkin puree gives moisture and a lovely orange hue. Heavy cream adds richness, while the egg binds everything together. The vanilla extract adds a touch of warmth. For the glaze, we combine powdered sugar and maple syrup. This sweet topping enhances the scones. It gives them a beautiful shine and a tasty finish. Together, these ingredients make every bite of the scone delightful. Remember, using high-quality ingredients will boost the flavor. Enjoy the process of mixing and baking these treats. The smell of scones baking will make your kitchen feel like home. 1. Preheat oven and prepare baking sheet: Start by setting your oven to 400°F (200°C). Line a baking sheet with parchment paper for easy cleanup. This step is key for perfect baking. 2. Combine dry ingredients in a mixing bowl: Take a large bowl. Add 2 cups of all-purpose flour, 1/2 cup of packed brown sugar, 1 tablespoon of baking powder, 1/2 teaspoon of baking soda, 1/2 teaspoon of salt, and 1 teaspoon of pumpkin pie spice. Whisk it well to ensure no lumps remain. 3. Mix wet ingredients in a separate bowl: In another bowl, mix together 1/2 cup of pure pumpkin puree, 1/4 cup of heavy cream, 1 large egg, and 1 teaspoon of pure vanilla extract. Stir until everything blends smoothly. 1. Incorporate cold butter into dry ingredients: Add 1/2 cup of cold, cubed unsalted butter to the dry mix. Use a pastry cutter or your fingers to blend the butter until it looks like coarse crumbs. This adds a nice flakiness to your scones. 2. Combine wet and dry mixtures: Pour the wet ingredients into the dry mixture. Gently stir until just combined. Avoid over-mixing to keep the scones tender. 3. Shape and cut the dough into wedges: Transfer the dough to a floured surface. Knead it gently a few times until it forms a ball. Shape it into a circle about 1 inch thick. Slice the dough into 8 equal wedges with a sharp knife or pizza cutter. Place them on the prepared baking sheet, leaving space between each wedge. 1. Bake scones to golden perfection: Place the baking sheet in the oven. Bake the scones for 15-20 minutes. They should turn lightly golden on top. Use a toothpick to check if they are done; it should come out clean. 2. Cool and glaze the scones before serving: Let the scones cool on the baking sheet for a few minutes. While they cool, whisk together 1/2 cup of powdered sugar and 2 tablespoons of pure maple syrup in a small bowl until smooth. Drizzle this glaze over the warm scones for a sweet finish. To get the best scones, cold butter is key. When you use cold butter, it stays firm in the dough. This helps create light and flaky layers during baking. Cut the butter into small cubes before adding it to the dry mix. Next, avoid over-mixing the dough. Mix until the ingredients just come together. Over-mixing can make your scones tough. You want that soft and tender bite, so be gentle with the dough. For extra flavor, consider adding spices. You can try cinnamon or nutmeg along with the pumpkin pie spice. These spices boost the warm taste of fall. When it comes to sweetness, taste as you go. The brown sugar adds deep flavor. The maple glaze adds sweetness too. Adjust the glaze if you want it sweeter or less sweet. Serve your scones on a nice wooden board. This gives them a cozy look. Drizzle extra maple glaze on top for a shiny finish. For added flair, sprinkle some cinnamon or roasted pumpkin seeds on top. It adds color and a nice crunch. This makes your scones look as good as they taste! {{image_4}} You might want to switch up ingredients in your maple glazed pumpkin scones. Here are some easy swaps: - Alternatives for all-purpose flour: You can try using whole wheat flour or a gluten-free blend. Both can give your scones a nice texture. Whole wheat adds a nutty flavor, while gluten-free blends can keep it light. - Dairy-free options for heavy cream: If you need a dairy-free choice, use coconut cream or almond milk. Both will give moisture without losing taste. Adding a twist to your scones can make them even better. Here are some fun ideas: - Adding nuts or chocolate chips: Chopped pecans or walnuts add crunch and flavor. You can also toss in dark chocolate chips for a sweet surprise. - Incorporating seasonal spices: Try adding nutmeg or ginger to your dough. These spices pair well with pumpkin and add warmth to the flavor. Glazing your scones can take them to the next level. Here are some fun ideas for glazes: - Options for glaze alternatives: Instead of maple glaze, you can use a simple vanilla or cream cheese glaze. These add sweetness without overpowering. - Creative toppings that complement the scones: Consider adding a sprinkle of cinnamon sugar or crushed nuts on top. These toppings can add texture and extra flavor. To keep your leftover maple glazed pumpkin scones fresh, store them in an airtight container. This will help retain their moisture and flavor. You can use a plastic container or a resealable bag. Make sure to let the scones cool completely before sealing them. This prevents condensation, which can make them soggy. If you want to save scones for later, freezing is a great option. Place the cooled scones in a single layer on a baking sheet. Freeze them for about one hour. After they are firm, transfer them to a freezer-safe bag or container. This method helps keep them fresh for up to three months. To thaw, simply remove the scones from the freezer. You can leave them at room temperature for a few hours. If you're in a hurry, use the microwave. Heat them in short bursts, checking often to avoid drying them out. To reheat your scones, preheat your oven to 350°F (175°C). Place the scones on a baking sheet. Warm them for about 10 minutes. This method keeps them soft and flaky. You can also use a microwave. Heat for about 15-20 seconds. If they seem dry, add a small splash of water to keep them moist. Enjoy your warm scones with their delicious maple glaze! To help scones rise, use cold butter and a leavening agent like baking powder. Cold butter creates steam during baking, adding height. You must also mix gently. Over-mixing can lead to dense scones. Make sure to shape your dough quickly and cut it into wedges. This keeps the texture light and fluffy. Yes, you can use fresh pumpkin. Start by roasting or steaming the pumpkin until soft. Then, mash it or blend it until smooth. Make sure to drain any excess moisture. This ensures the dough does not become too wet. Fresh pumpkin adds a richer flavor to your scones. You can store scones at room temperature for up to two days. Keep them in an airtight container to maintain freshness. For longer storage, place them in the fridge for up to a week. You can also freeze them for two months. Just make sure to wrap them well. These scones pair well with warm beverages like coffee or tea. You can also serve them with butter or cream cheese for added richness. For a seasonal touch, try them with apple cider or spiced chai. Feel free to sprinkle some cinnamon or nuts on top for extra flavor. This blog post covered all you need to know to bake perfect pumpkin scones. From the fresh ingredients to the step-by-step instructions, you have the tools to enjoy this treat. Remember to use cold butter for the best texture. Explore variations, and don't hesitate to get creative with flavors. With proper storage and reheating tips, your scones can stay delicious for days. Enjoy your baking and savor each bite. Your kitchen will smell amazing, and your taste buds will thank you!

Maple Glazed Pumpkin Scones

Indulge in the flavors of autumn with these delicious Maple Glazed Pumpkin Scones! Perfect for a cozy brunch or afternoon treat, this easy recipe combines pumpkin puree, warm spices, and a sweet maple glaze. Learn how to whip up these flakey delights in just 35 minutes and impress your guests. Click through to discover the full recipe and step-by-step instructions that will make your kitchen smell heavenly!

Ingredients
  

2 cups all-purpose flour

1/2 cup packed brown sugar

1 tablespoon baking powder

1/2 teaspoon baking soda

1/2 teaspoon salt

1 teaspoon pumpkin pie spice

1/2 cup unsalted butter, cold and cut into cubes

1/2 cup pure pumpkin puree

1/4 cup heavy cream

1 large egg

1 teaspoon pure vanilla extract

1/2 cup powdered sugar (for glaze)

2 tablespoons pure maple syrup (for glaze)

Instructions
 

Begin by preheating your oven to 400°F (200°C) and line a baking sheet with parchment paper for easy cleanup.

    In a large mixing bowl, use a whisk to thoroughly combine the all-purpose flour, packed brown sugar, baking powder, baking soda, salt, and pumpkin pie spice, ensuring there are no lumps.

      Add the cold, cubed butter to the dry ingredients. Using either a pastry cutter or your fingertips, work the butter into the mixture until it resembles coarse crumbs — this will add flakiness to your scones.

        In a separate bowl, mix together the pumpkin puree, heavy cream, egg, and pure vanilla extract until well blended.

          Carefully pour the wet ingredients into the dry mixture. Gently stir until just combined, making sure not to over-mix to preserve the scone's tender texture.

            Transfer the dough to a floured surface and knead it gently just a few times until it forms a cohesive ball. Shape the dough into a circle, approximately 1-inch thick.

              Using a sharp knife or a pizza cutter, slice the dough into 8 equal wedges. Place each wedge onto the prepared baking sheet, ensuring they are spaced about 2 inches apart for even baking.

                Bake in the preheated oven for 15-20 minutes, or until the scones are lightly golden on top and a toothpick inserted into the center comes out clean.

                  While the scones are baking, prepare the maple glaze by whisking together the powdered sugar and maple syrup in a small bowl until the mixture is smooth and free of lumps.

                    Once the scones are done baking, allow them to cool on the baking sheet for a few minutes, then drizzle the maple glaze generously over the warm scones.

                      Prep Time: 15 minutes | Total Time: 35 minutes | Servings: 8

                        - Presentation Tips: For an inviting presentation, serve the scones on a rustic wooden board. Drizzle them with extra maple glaze and consider garnishing with a light sprinkle of cinnamon or a handful of roasted pumpkin seeds for added texture and visual appeal.

                          WANT TO SAVE THIS RECIPE?