Craving a sweet treat that’s both fun and easy to make? Mini Apple Hand Pies are your answer! These delightful pastries let you enjoy the taste of fresh apples and warm spices in every bite. Whether you’re a beginner or a pro in the kitchen, you’ll find this recipe simple and rewarding. Let’s dive in and learn how to make these delicious mini pies that are sure to impress everyone!
Ingredients
Essential Ingredients for Mini Apple Hand Pies
To make the perfect mini apple hand pies, you need a few key items. Here’s your list:
– 2 cups all-purpose flour
– 1/2 teaspoon salt
– 1 tablespoon granulated sugar
– 1/2 cup unsalted butter, cold and cut into small cubes
– 6-8 tablespoons ice-cold water
– 3 medium apples (like Granny Smith or Honeycrisp), peeled, cored, and diced
– 1/4 cup packed brown sugar
– 1 teaspoon ground cinnamon
– 1/4 teaspoon ground nutmeg
– 1 tablespoon freshly squeezed lemon juice
– 1 egg, beaten (for egg wash)
These ingredients combine to create a sweet, flaky treat that everyone will love.
Optional Ingredients
You can add a few optional items to enhance your hand pies:
– Powdered sugar for a light dusting
– A pinch of salt in the filling for extra flavor
These choices allow you to make the treat your own.
Ingredient Substitutions
If you need to swap some ingredients, here are some good options:
– Use whole wheat flour instead of all-purpose flour for a healthier dough.
– Replace unsalted butter with coconut oil for a dairy-free option.
– For the apples, any sweet variety works well; try Fuji or Gala.
These substitutions keep the recipe flexible and fun.
Step-by-Step Instructions
Preparing the Dough
To start, gather your ingredients. You need flour, salt, sugar, butter, and cold water. In a large bowl, mix the flour, salt, and sugar. Stir well to blend them evenly. Next, add the cold butter. Use your fingers or a pastry cutter to mix until it looks like crumbs. Some pieces should be the size of peas for a flaky texture. Now, slowly add ice-cold water, one tablespoon at a time. Mix just until the dough forms. Avoid overworking it. Divide the dough into two discs, wrap them, and chill in the fridge for at least 30 minutes.
Making the Apple Filling
While the dough chills, you can make the filling. For this, peel, core, and dice your apples. I like using Granny Smith or Honeycrisp for their perfect balance of sweet and tart. In a medium bowl, combine the diced apples with brown sugar, cinnamon, nutmeg, and lemon juice. Mix until all the apples are coated well. This mixture will give your hand pies a warm, spiced flavor.
Assembling and Baking the Hand Pies
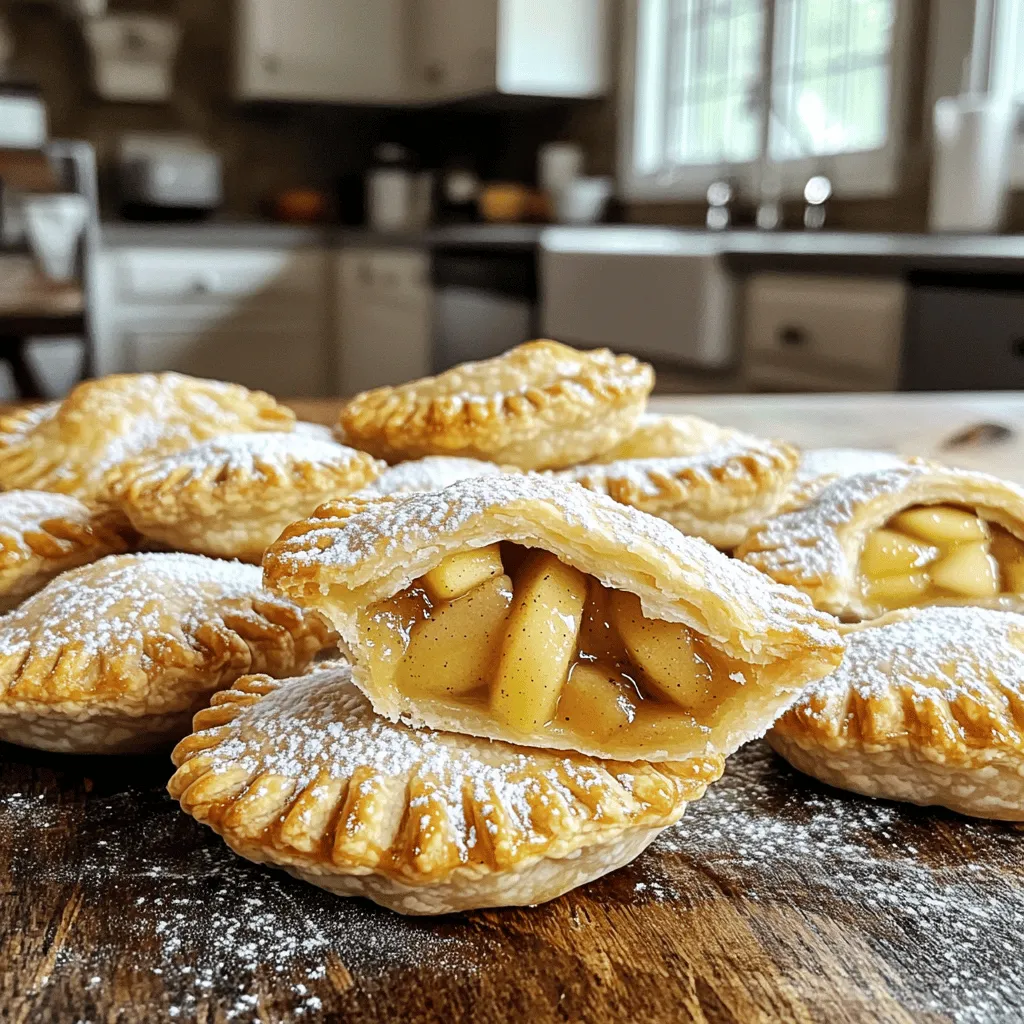
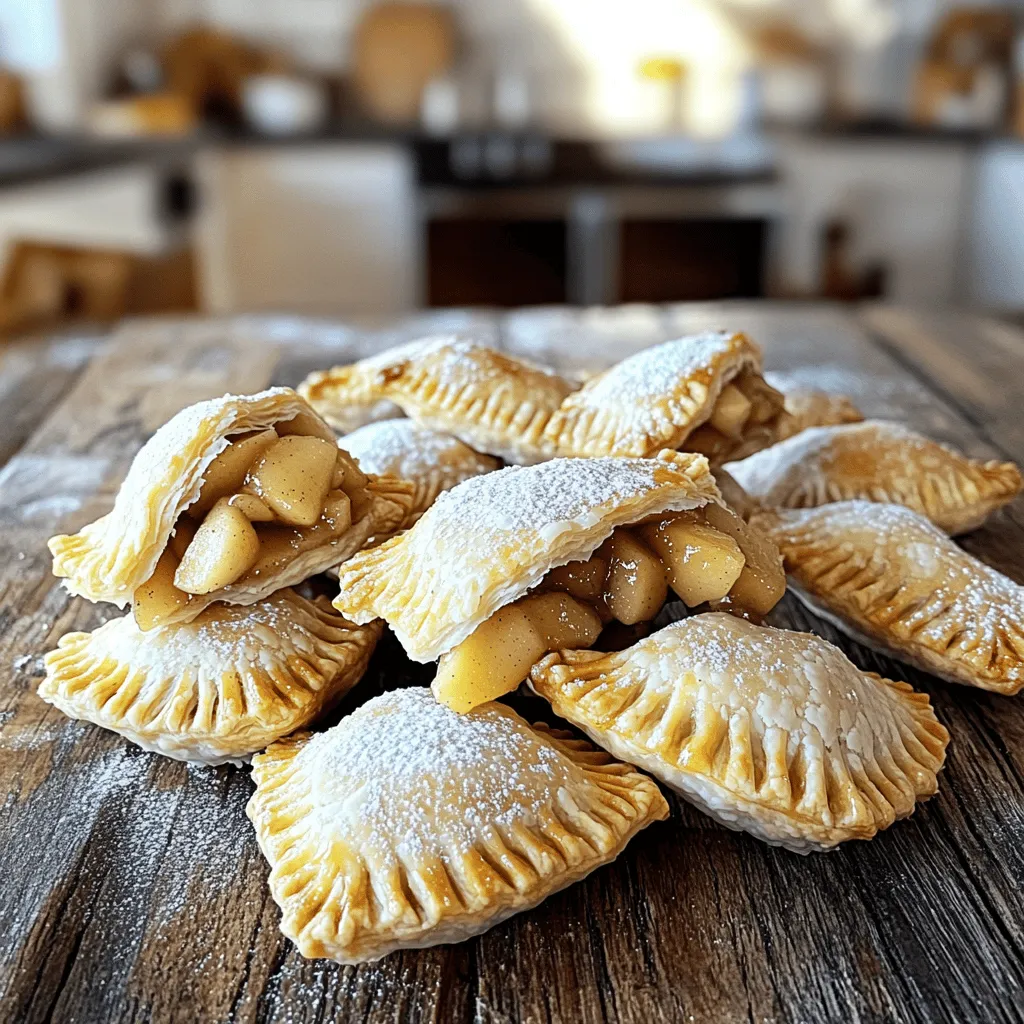
Preheat your oven to 400°F (200°C). Prepare a baking sheet by lining it with parchment paper. Roll out one chilled dough disc on a floured surface to about 1/8 inch thick. Use a round cutter to cut out 4-inch circles. Place about one tablespoon of apple filling in the center of each circle. Be careful not to overfill. Brush the edges with the beaten egg for a good seal. Fold the circle over the filling, press the edges, and crimp them with a fork. Repeat with the second disc. Arrange the pies on the baking sheet. Brush the tops with egg wash and make small slits for steam. Bake for 20-25 minutes. They should be golden brown and crispy when done. Let them cool on a wire rack, and enjoy!
Tips & Tricks
Tips for Flaky Pie Crust
To make a flaky crust, keep your butter cold. This helps create layers. Cut the butter into small cubes and mix it with the flour quickly. Use your fingers or a pastry cutter. Aim for pea-sized pieces in the mixture. This gives your crust that perfect, flaky texture. Remember to chill your dough after mixing. This relaxes the gluten and helps the crust stay tender.
Baking Tips for Perfect Hand Pies
Preheat your oven to 400°F (200°C) before baking. This helps your pies cook evenly. Line your baking sheet with parchment paper. This prevents sticking and makes for easy cleanup. Brush the tops of your hand pies with egg wash. This gives them a nice golden color. Make small slits in the tops for steam to escape. This keeps the pies from bursting open while baking. Bake for 20-25 minutes until golden brown.
Serving Suggestions
Serve your mini apple hand pies warm for the best taste. Arrange them on a rustic platter for a lovely display. Add a small bowl of caramel sauce or whipped cream for dipping. This adds fun and flavor. Dust with powdered sugar for a sweet touch right before serving. Enjoy these delightful treats with friends or family for a cozy gathering.
Variations
Alternative Filling Options
You can change the filling of mini apple hand pies to fit your taste. For a berry twist, use blueberries or raspberries. They add a nice tart flavor. If you prefer something sweeter, try a mix of strawberries and peaches. This blend brings bright colors and delicious tastes. You could even try a savory filling with cream cheese and spinach. The options are endless and fun!
Gluten-Free Mini Apple Hand Pies
If you need gluten-free options, use almond flour or a gluten-free blend. Mix it with a little xanthan gum for the best results. This will help the dough stay together. You may also need to adjust the liquid amount in your dough. Just remember to keep the cold butter and ice water to ensure flakiness. These gluten-free pies will still taste great!
Mini Hand Pies with Different Fruits
Don’t limit yourself to apples! You can use any fruit for these hand pies. Cherries and apricots work well. Just make sure to adjust the sugar based on the fruit’s sweetness. Peaches and pears also make for juicy fillings. Each fruit gives a unique flavor and texture. So feel free to experiment and have fun with your fillings!
Storage Info
How to Store Mini Apple Hand Pies
To keep your mini apple hand pies fresh, place them in an airtight container. Line the container with paper towels to absorb moisture. This method helps maintain their crispness. Store them at room temperature for up to two days. If you want to keep them longer, refrigeration is an option. Just know that the crust may lose some flakiness.
Reheating Instructions
When you’re ready to enjoy your hand pies again, preheat your oven to 350°F (175°C). Place the pies on a baking sheet lined with parchment paper. Heat them in the oven for about 10-15 minutes. This will restore their crispness and warmth. Avoid using the microwave, as it can make the crust soggy.
Freezing Mini Hand Pies
Freezing mini apple hand pies is a great way to save some for later. First, let the baked hand pies cool completely. Then, wrap each pie in plastic wrap. Place them in a freezer-safe bag or container. You can freeze them for up to three months. To reheat, bake from frozen at 350°F (175°C) for about 20-25 minutes. Enjoy your tasty treat anytime!
FAQs
Can I use store-bought pie crust?
Yes, you can use store-bought pie crust. It saves time and effort. Just roll it out and cut it into circles. Then, fill and seal as you would with homemade dough. It’s a great shortcut for busy cooks.
How do I make the filling less sweet?
To make the filling less sweet, reduce the brown sugar. You can also use tart apples, like Granny Smith. Adding more lemon juice can balance sweetness, too. Taste the filling before sealing the pies. Adjust as needed.
How long do mini apple hand pies last?
Mini apple hand pies last about 2 to 3 days at room temperature. Store them in an airtight container. If you want them to last longer, refrigerate them. They can stay good for up to a week when chilled.
Can I make these hand pies ahead of time?
Yes, you can make these hand pies ahead of time. Prepare the dough and filling a day early. Keep the dough in the fridge and the filling in a separate container. You can assemble and bake them when ready to enjoy.
In this article, we explored how to make mini apple hand pies. We covered the key ingredients and substitutions, and I walked you through step-by-step instructions for the dough and filling. You learned tips for a flaky crust, perfect baking, and serving ideas. We also discussed variations for different fruits and gluten-free options. Lastly, I shared storage and reheating tips.
Now, you’re ready to impress with your own tasty treats! Enjoy baking these mini pies and get creative with fillings.