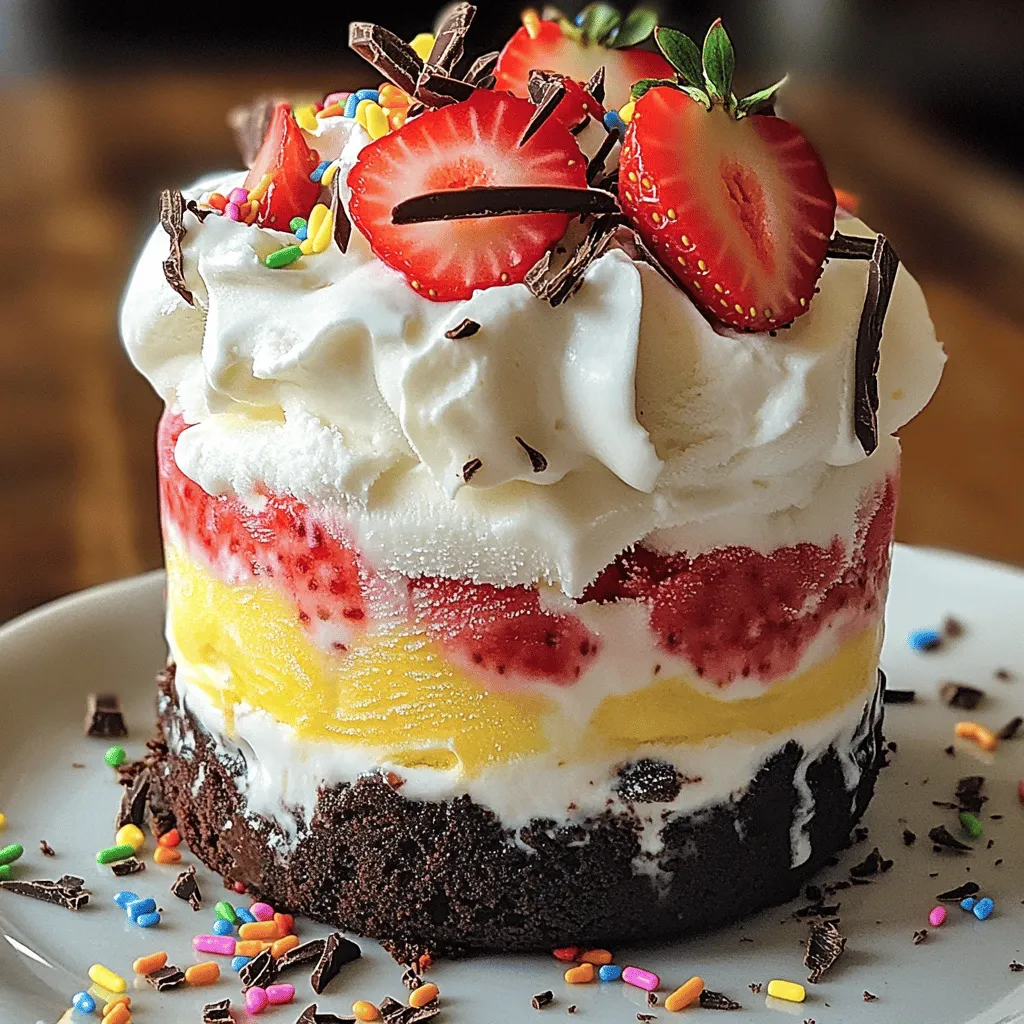
Are you ready to impress friends and family with a delightful dessert? This Mini Neapolitan Ice Cream Cake is simple to make and bursting with flavor. With layers of creamy vanilla, strawberry, and chocolate ice cream on a crunchy cookie crust, it’s a treat everyone will love. I’ll guide you through each step, from gathering the ingredients to adding the perfect toppings. Let’s dive into this easy and fun recipe!
Ingredients
Main Ingredients
– 1 cup chocolate sandwich cookies
– 2 cups vanilla ice cream
– 2 cups strawberry ice cream
– 2 cups chocolate ice cream
To make a great Mini Neapolitan Ice Cream Cake, you need a few key ingredients. First, use chocolate sandwich cookies for the crust. They provide a strong base and add flavor. Next, you will need three types of ice cream: vanilla, strawberry, and chocolate. Each layer brings its own taste and color, making the cake look fun and tasty.
Topping and Garnish
– 1 cup fresh whipped cream
– Fresh strawberries
– Chocolate shavings
– Rainbow sprinkles (optional)
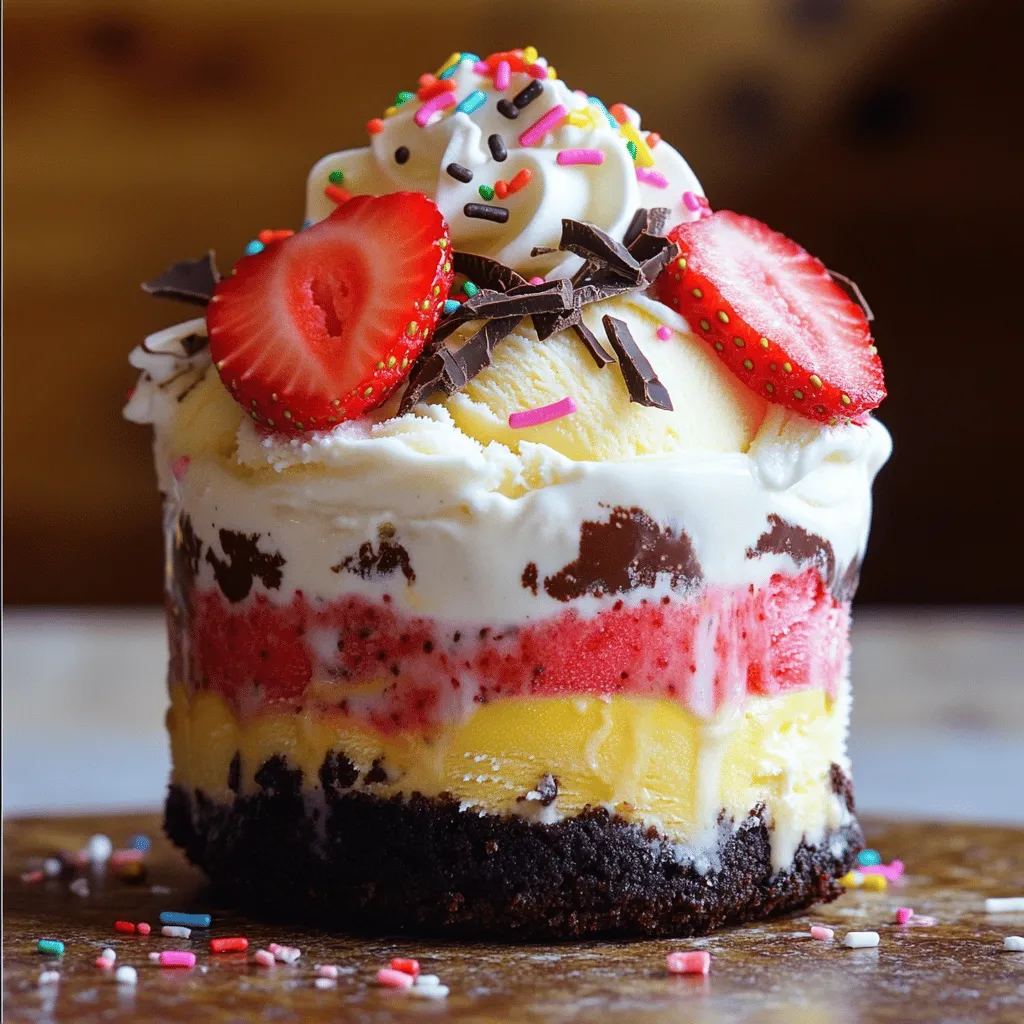
For a beautiful finish, add toppings. Fresh whipped cream gives a nice, fluffy layer on top. Sliced strawberries add a pop of color. Chocolate shavings add a rich touch. If you want more fun, sprinkle rainbow sprinkles on top. This makes the cake feel festive!
Equipment Needed
– 9-inch springform pan
– Mixing bowl
– Spatula
To create this cake, you need some basic tools. A 9-inch springform pan helps shape the cake. A mixing bowl is for combining your cookie crumbs and butter. A spatula is essential for spreading the ice cream layers evenly. With these items, you are ready to assemble your delightful cake! For the full recipe, check the details provided.
Step-by-Step Instructions
Prepare the Crust
First, gather your crushed chocolate sandwich cookies and melted butter. In a medium bowl, mix them well. Ensure all the crumbs are coated with butter. This step creates a rich and tasty crust. Next, take your mixture and press it firmly into a 9-inch springform pan. Use your fingers or a measuring cup for even pressure. This forms a solid base. Now, place the pan in the freezer for about 15 minutes. This helps the crust set perfectly.
Layer the Ice Creams
Once the crust is set, it’s time for the fun part: layering the ice creams. Start with the vanilla ice cream. Take it out of the freezer and let it soften a bit. Use a spatula to spread it evenly over the crust. Aim for a smooth layer. After that, return the pan to the freezer for 30 minutes to firm it up.
After 30 minutes, take the pan out again. Now, add the strawberry ice cream. Spread it evenly over the vanilla layer. Make sure it covers well. Once done, freeze it again for another 30 minutes.
Finally, it’s time for chocolate ice cream. Spread it over the strawberry layer smoothly. After this, freeze the entire cake for 2 hours. This helps all the layers set up nicely.
Add the Topping and Garnish
After the ice cream layers are firm, remove the cake from the freezer. Carefully unclip the springform pan. Now, it’s time to add the topping. Use a spatula to spread fresh whipped cream over the top. This gives a fluffy texture that everyone loves.
For the final touch, garnish the cake. Arrange fresh strawberries around the edge of the whipped cream. Then, sprinkle chocolate shavings on top. If you like color, add some rainbow sprinkles. This makes your cake look festive and fun. Now, you’re ready to slice and serve your delightful Mini Neapolitan Ice Cream Cake!
Tips & Tricks
Best Practices for Softening Ice Cream
To soften ice cream quickly, just leave it out at room temperature for about 10 minutes. If you’re in a hurry, you can place the ice cream in a microwave-safe bowl and microwave it for 10 seconds at a time. This helps it become scoopable without melting too much.
When spreading the ice cream, use a spatula. Make sure to press down firmly but gently. This helps create an even layer. You want each layer to be nice and smooth for a pretty cake.
Tools for Clean Cuts
To cut your cake cleanly, dip your knife in warm water. Wipe off the excess water before slicing. This technique helps the knife glide through the ice cream without making a mess.
You can also use a cake cutter or a serrated knife. These tools work well for getting neat slices. A warm knife makes all the difference for a perfect presentation.
Presentation Tips
For an eye-catching garnish, use fresh strawberry slices. Arrange them around the edge of the whipped cream. This adds a pop of color and freshness. You can also sprinkle chocolate shavings on top for a rich touch.
When serving at parties, slice the cake into small pieces. This makes it easy for guests to enjoy. You can also serve the cake on pretty plates for an extra special look. For added fun, include rainbow sprinkles for a festive vibe.
Don’t forget to check the Full Recipe for more details on making this delightful treat!
Variations
Alternative Ice Cream Flavors
You can switch up your cake with fun ice cream flavors. Mint chocolate chip adds a fresh twist. The mint flavor pairs well with chocolate. Coffee or caramel ice cream can also work wonders. These options can give your cake a richer taste. Feel free to mix and match to find your favorite combo!
Healthier Options
If you want a lighter cake, try low-sugar ice cream. Many brands offer great flavors with less sugar. You can also change the crust. Instead of cookies, use crushed nuts or granola. This adds a crunchy texture and more nutrition. It’s a simple way to enjoy a treat without the guilt.
Mini Versions
Making mini cakes is fun and easy. Use small springform pans or even cups. This way, everyone gets their own cake. You can layer the ice cream just like the big one. Serve them in jars for a cute look. Mini versions are perfect for parties or as a snack. You can enjoy the same delicious flavors in a fun new way.
For the full recipe, check out the Mini Neapolitan Ice Cream Cake recipe!
Storage Info
How to Store Leftovers
Store leftover Mini Neapolitan Ice Cream Cake in your freezer. Wrap it well in plastic wrap or foil. You can also place it in an airtight container. This keeps the cake fresh and prevents ice crystals. For best results, eat within a week for ideal taste.
Shelf Life
The cake can stay in the freezer for about two to three weeks. After that, it may lose flavor and texture. Look for signs of spoilage, like freezer burn or odd smells. If it looks dry or has ice crystals, it’s time to toss it.
Thawing Instructions
To serve the cake, thaw it in the fridge for about 30 minutes. This helps it soften without melting too much. Avoid leaving it out at room temperature. This can cause freezer burn and ruin the flavor. Enjoy it at its best!
FAQs
Can I use a different type of crust?
Yes, you can use different crusts! Here are some great options:
– Graham cracker crust: This is a classic choice. Just crush the crackers and mix with melted butter.
– Nut crust: Ground almonds or walnuts can add a nice crunch.
– Oreo crust: If you want to stick to cookies, use golden Oreos for a fun twist.
– Brownie base: A fudgy brownie can be a rich and tasty crust.
These alternatives let you customize the cake to your taste.
How do I make this cake dairy-free?
Making a dairy-free version is easy! Here are some ideas:
– Dairy-free ice cream: Look for brands made with almond, coconut, or cashew milk. They come in many flavors.
– Whipped topping: Use whipped coconut cream instead of regular whipped cream.
– Garnishes: Fresh fruit and nuts make great toppings and keep it dairy-free.
This way, everyone can enjoy your Mini Neapolitan Ice Cream Cake!
What’s the best way to slice the cake?
Slicing the cake can be tricky. Here are some tips for perfect slices:
– Use a warm knife: Dip your knife in warm water, then wipe it dry. This helps cut through the ice cream smoothly.
– Let it sit briefly: Allow the cake to sit at room temperature for a few minutes before slicing. This softens the edges.
– Cut straight down: Make clean, straight cuts to avoid mess.
Serve the slices on chilled plates for the best experience!
You learned how to make a delicious ice cream cake. We discussed key ingredients like chocolate cookies and three ice cream flavors. You also got tips for perfect layers and fun toppings. Remember to store leftovers right to keep them fresh.
Experiment with different flavors and crusts to make it your own. Enjoy creating and sharing this treat at parties or family gatherings! Your dessert game will reach new heights with this ice cream cake.
