No-Bake Biscoff Cheesecake Squares Simple Delight

WANT TO SAVE THIS RECIPE?

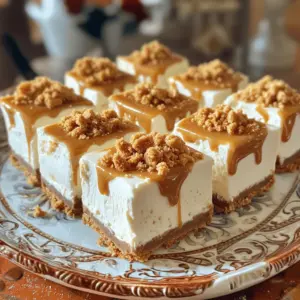
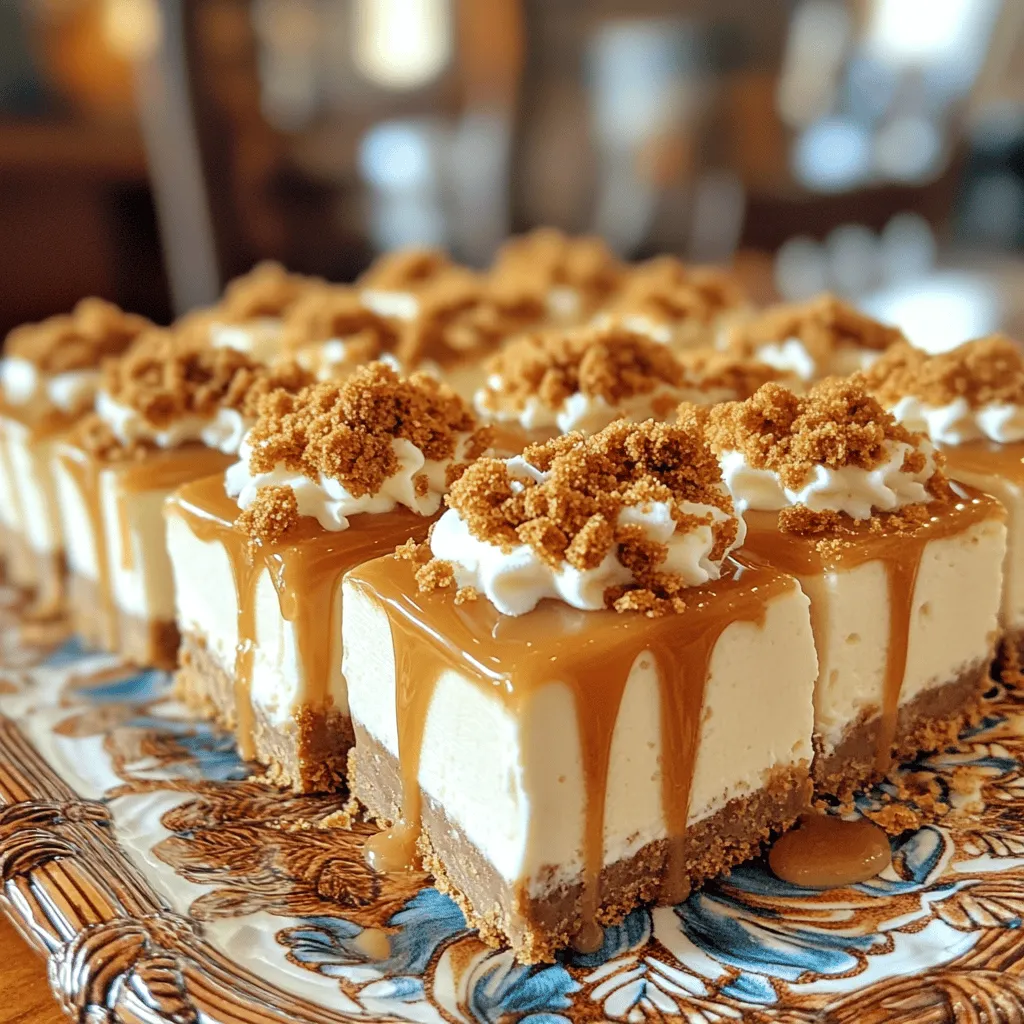
Craving something sweet without the hassle of baking? You’re in the right place! My No-Bake Biscoff Cheesecake Squares are simple to make and packed with flavor. With layers of creamy cheesecake and delicious Biscoff spread, this dessert will be a hit at any gathering. Let’s dive into the world of easy, no-bake desserts that will impress your friends and family!

Ingredients

To make the No-Bake Biscoff Cheesecake Squares, you need simple yet delicious ingredients. Here’s what you’ll need:

– 200g Biscoff cookies, finely crushed

– 100g unsalted butter, melted

– 400g cream cheese, softened at room temperature

– 200g Biscoff spread, plus extra for drizzling

– 100g powdered sugar

– 1 teaspoon pure vanilla extract

– 200ml heavy whipping cream

– Additional crushed Biscoff cookies for topping

Each ingredient plays a key role in bringing these squares to life. The Biscoff cookies provide a sweet, spiced flavor, while the cream cheese adds that creamy texture. The Biscoff spread enhances the taste, making it rich and indulgent.

Using unsalted butter helps bind the crust, giving it a nice crunch. Powdered sugar adds sweetness without grittiness. The heavy whipping cream is essential for that light and fluffy texture. Lastly, the vanilla extract brings warmth and depth to the flavor.

Gather these ingredients, and you’ll be ready to create a dessert that impresses everyone.

Step-by-Step Instructions

Preparing the Crust

Start by mixing the Biscoff cookie crumbs with melted butter. Use a spatula to combine them well. The mixture should feel crumbly but hold together. Next, transfer the crumb mixture into a 9×9-inch square baking dish. Press down firmly using a measuring cup or your fingers. Aim for a compact, even layer. Now, chill the crust in the fridge while you prepare the filling. This step helps the crust set up nicely.

Making the Cheesecake Filling

In a large mixing bowl, add softened cream cheese, Biscoff spread, powdered sugar, and vanilla extract. Use an electric mixer to beat the mixture on medium speed. Keep mixing until it is smooth and creamy. You want to avoid lumps in your filling. This creates a rich, velvety texture in your cheesecake squares.

Whipping Cream and Assembling

In a separate bowl, whip the heavy cream with an electric mixer or by hand. Keep whipping until stiff peaks form. This means the cream holds its shape well. Next, gently fold the whipped cream into the Biscoff mixture. Use a spatula to combine them carefully, keeping the air in the whipped cream. This makes your cheesecake light and fluffy. Pour the filling over the crust and spread it evenly with a spatula.

Chilling and Serving

Cover the baking dish with plastic wrap or a lid. Place the cheesecake in the fridge for at least 4 hours. For the best results, let it chill overnight. Once set, carefully lift the cheesecake out using the edges. Cut it into squares and place them on a serving plate. Drizzle with extra Biscoff spread and sprinkle crushed Biscoff cookies on top for a pretty finish.

Tips & Tricks

Common Mistakes to Avoid

Overmixing the cheesecake filling: This can make the filling too thin and airy. Beat just until smooth.

Not chilling long enough: A proper chill helps the squares set. I recommend at least 4 hours.

Perfecting the Texture

Recommendations for the cream cheese temperature: Use cream cheese at room temperature. This makes it easier to blend.

Importance of whipped cream consistency: Whip the cream until stiff peaks form. This helps keep the filling light and fluffy.

Serving Suggestions

Ideas for garnishing: Drizzle extra Biscoff spread on top. Sprinkle crushed Biscoff cookies for added crunch.

Pairing options for enhancing flavor: Serve with fresh berries or a scoop of vanilla ice cream. This adds a fresh touch to each bite.

Variations

Flavor Additions

You can make your No-Bake Biscoff Cheesecake Squares even more exciting. Try adding different extracts like almond or coconut. A dash of cinnamon or nutmeg can bring warmth. If you love chocolate, drizzle melted dark chocolate on top. You can also layer caramel sauce for a sweet surprise.

Dairy-Free or Vegan Alternatives

If you want a dairy-free treat, use vegan cream cheese. Coconut whipped cream works well instead of heavy cream. For the crust, swap regular butter with coconut oil. This keeps the same great taste while making it dairy-free.

Seasonal Twists

Make your cheesecake squares festive for any holiday. For Halloween, add orange food coloring to your filling. For Christmas, try gingerbread spices in the crust. You can top your squares with sprinkles for birthdays. Use themed cookie cutters to create fun shapes. These small changes will make your dessert special for any occasion.

Storage Info

Proper Storage Techniques

To keep your no-bake Biscoff cheesecake squares fresh, store them in the fridge. Use an airtight container to prevent them from drying out. Make sure the lid fits snugly. You can also cover the dish tightly with plastic wrap. This keeps moisture in and odors out. The cheesecake squares will stay fresh for up to five days in the fridge.

Freezing Instructions

You can freeze these cheesecake squares if you want to save some for later. First, cut them into squares. Place each square on a baking sheet lined with parchment paper. Freeze them for about two hours until firm. Then, transfer the squares to an airtight container or a freezer bag. Make sure to separate layers with parchment paper to avoid sticking. When you want to serve them, take them out and thaw in the fridge for a few hours. They taste great after thawing and are just as creamy and delicious!

FAQs

How long do No-Bake Biscoff Cheesecake Squares last?

No-Bake Biscoff Cheesecake Squares last about 5 to 7 days in the fridge. Store them in an airtight container to keep them fresh. This helps prevent them from absorbing strong smells from other foods. If you want to keep them longer, consider freezing them.

Can I use other cookies for the crust?

Yes, you can use other cookies for the crust. Graham crackers work well for a classic taste. Oreos or chocolate wafers can add a fun twist. Just crush them finely and mix with melted butter as you would with Biscoff cookies.

What can I substitute if I don’t have Biscoff spread?

If you don’t have Biscoff spread, try using Nutella or almond butter. Each spread will change the flavor slightly. Nutella will add a rich chocolate taste, while almond butter gives a nutty flavor. Adjust the sugar in the recipe to balance sweetness, if needed.

This blog post covered how to make No-Bake Biscoff Cheesecake Squares. We explored ingredients, step-by-step instructions, tips for success, variations for creativity, and storage methods.

Remember, using the right ingredients and chilling the cheesecake is key. Whether you stick to the recipe or try new flavors, these treats are sure to impress. Enjoy creating your delicious cheesecake squares, and share them with friends and family!

To make the No-Bake Biscoff Cheesecake Squares, you need simple yet delicious ingredients. Here’s what you’ll need: - 200g Biscoff cookies, finely crushed - 100g unsalted butter, melted - 400g cream cheese, softened at room temperature - 200g Biscoff spread, plus extra for drizzling - 100g powdered sugar - 1 teaspoon pure vanilla extract - 200ml heavy whipping cream - Additional crushed Biscoff cookies for topping Each ingredient plays a key role in bringing these squares to life. The Biscoff cookies provide a sweet, spiced flavor, while the cream cheese adds that creamy texture. The Biscoff spread enhances the taste, making it rich and indulgent. Using unsalted butter helps bind the crust, giving it a nice crunch. Powdered sugar adds sweetness without grittiness. The heavy whipping cream is essential for that light and fluffy texture. Lastly, the vanilla extract brings warmth and depth to the flavor. Gather these ingredients, and you’ll be ready to create a dessert that impresses everyone. Start by mixing the Biscoff cookie crumbs with melted butter. Use a spatula to combine them well. The mixture should feel crumbly but hold together. Next, transfer the crumb mixture into a 9x9-inch square baking dish. Press down firmly using a measuring cup or your fingers. Aim for a compact, even layer. Now, chill the crust in the fridge while you prepare the filling. This step helps the crust set up nicely. In a large mixing bowl, add softened cream cheese, Biscoff spread, powdered sugar, and vanilla extract. Use an electric mixer to beat the mixture on medium speed. Keep mixing until it is smooth and creamy. You want to avoid lumps in your filling. This creates a rich, velvety texture in your cheesecake squares. In a separate bowl, whip the heavy cream with an electric mixer or by hand. Keep whipping until stiff peaks form. This means the cream holds its shape well. Next, gently fold the whipped cream into the Biscoff mixture. Use a spatula to combine them carefully, keeping the air in the whipped cream. This makes your cheesecake light and fluffy. Pour the filling over the crust and spread it evenly with a spatula. Cover the baking dish with plastic wrap or a lid. Place the cheesecake in the fridge for at least 4 hours. For the best results, let it chill overnight. Once set, carefully lift the cheesecake out using the edges. Cut it into squares and place them on a serving plate. Drizzle with extra Biscoff spread and sprinkle crushed Biscoff cookies on top for a pretty finish. - Overmixing the cheesecake filling: This can make the filling too thin and airy. Beat just until smooth. - Not chilling long enough: A proper chill helps the squares set. I recommend at least 4 hours. - Recommendations for the cream cheese temperature: Use cream cheese at room temperature. This makes it easier to blend. - Importance of whipped cream consistency: Whip the cream until stiff peaks form. This helps keep the filling light and fluffy. - Ideas for garnishing: Drizzle extra Biscoff spread on top. Sprinkle crushed Biscoff cookies for added crunch. - Pairing options for enhancing flavor: Serve with fresh berries or a scoop of vanilla ice cream. This adds a fresh touch to each bite. {{image_4}} You can make your No-Bake Biscoff Cheesecake Squares even more exciting. Try adding different extracts like almond or coconut. A dash of cinnamon or nutmeg can bring warmth. If you love chocolate, drizzle melted dark chocolate on top. You can also layer caramel sauce for a sweet surprise. If you want a dairy-free treat, use vegan cream cheese. Coconut whipped cream works well instead of heavy cream. For the crust, swap regular butter with coconut oil. This keeps the same great taste while making it dairy-free. Make your cheesecake squares festive for any holiday. For Halloween, add orange food coloring to your filling. For Christmas, try gingerbread spices in the crust. You can top your squares with sprinkles for birthdays. Use themed cookie cutters to create fun shapes. These small changes will make your dessert special for any occasion. To keep your no-bake Biscoff cheesecake squares fresh, store them in the fridge. Use an airtight container to prevent them from drying out. Make sure the lid fits snugly. You can also cover the dish tightly with plastic wrap. This keeps moisture in and odors out. The cheesecake squares will stay fresh for up to five days in the fridge. You can freeze these cheesecake squares if you want to save some for later. First, cut them into squares. Place each square on a baking sheet lined with parchment paper. Freeze them for about two hours until firm. Then, transfer the squares to an airtight container or a freezer bag. Make sure to separate layers with parchment paper to avoid sticking. When you want to serve them, take them out and thaw in the fridge for a few hours. They taste great after thawing and are just as creamy and delicious! No-Bake Biscoff Cheesecake Squares last about 5 to 7 days in the fridge. Store them in an airtight container to keep them fresh. This helps prevent them from absorbing strong smells from other foods. If you want to keep them longer, consider freezing them. Yes, you can use other cookies for the crust. Graham crackers work well for a classic taste. Oreos or chocolate wafers can add a fun twist. Just crush them finely and mix with melted butter as you would with Biscoff cookies. If you don’t have Biscoff spread, try using Nutella or almond butter. Each spread will change the flavor slightly. Nutella will add a rich chocolate taste, while almond butter gives a nutty flavor. Adjust the sugar in the recipe to balance sweetness, if needed. This blog post covered how to make No-Bake Biscoff Cheesecake Squares. We explored ingredients, step-by-step instructions, tips for success, variations for creativity, and storage methods. Remember, using the right ingredients and chilling the cheesecake is key. Whether you stick to the recipe or try new flavors, these treats are sure to impress. Enjoy creating your delicious cheesecake squares, and share them with friends and family!

No-Bake Biscoff Cheesecake Squares

Indulge in the sweet delight of No-Bake Biscoff Cheesecake Squares! This easy recipe combines creamy cheesecake with the irresistible flavor of Biscoff cookies and spread, creating a dessert that's perfect for any occasion. With just a few simple steps, you can impress your friends and family. Ready to wow your taste buds? Click through to explore the full recipe and make your own delicious cheesecake squares today!

Ingredients
  

200g Biscoff cookies, finely crushed

100g unsalted butter, melted

400g cream cheese, softened at room temperature

200g Biscoff spread, plus extra for drizzling

100g powdered sugar

1 teaspoon pure vanilla extract

200ml heavy whipping cream

Additional crushed Biscoff cookies for topping

Instructions
 

Prepare the Crust: In a mixing bowl, combine the finely crushed Biscoff cookies with the melted butter. Use a spatula to mix until all crumbs are well coated and crumbly.

    Press the Crust: Transfer the cookie mixture into a 9x9-inch square baking dish. Using the back of a measuring cup or your fingers, press down firmly to form an even, compact layer. Place the dish in the refrigerator to chill while preparing the cheesecake filling.

      Make the Filling: In a large mixing bowl, add the softened cream cheese, Biscoff spread, powdered sugar, and vanilla extract. With an electric mixer, beat the mixture on medium speed until it turns smooth and creamy, ensuring there are no lumps.

        Whip the Cream: In a separate bowl, whip the heavy cream using an electric mixer or whisk until stiff peaks form. Carefully fold the whipped cream into the Biscoff mixture using a spatula, ensuring to maintain the volume of the whipped cream by gently folding until well incorporated.

          Assemble the Cheesecake: Pour the luscious Biscoff cheesecake filling over the prepared crust. Use a spatula to spread it evenly across the top, ensuring a nice, smooth layer.

            Chill: Cover the baking dish with plastic wrap or a lid. Refrigerate for a minimum of 4 hours, though letting it chill overnight will yield better set results.

              Serve: Once fully set, carefully lift the cheesecake out of the baking dish using the edges of the lining or the dish itself. Cut into squares and place them on a serving plate. Drizzle with additional Biscoff spread and generously sprinkle with crushed Biscoff cookies for an attractive finish.

                Prep Time: 20 minutes | Total Time: 4 hours 20 minutes (including chilling) | Servings: 12

                  - Presentation Tips: Serve the cheesecake squares on a decorative platter. For a delightful touch, add a dollop of whipped cream on top of each square, accompanied by a sprinkle of crushed Biscoff cookies for an appealing visual contrast.

                    WANT TO SAVE THIS RECIPE?