WANT TO SAVE THIS RECIPE?
Craving a sweet treat that’s quick and easy? Look no further! These No-Bake Chocolate Peanut Butter Bars are a game changer. With just a few ingredients, you can make a delicious dessert without turning on your oven. I’ll walk you through each simple step, share tips for the best texture, and offer tasty variations. Ready to satisfy your sweet tooth? Let’s dive into this yummy recipe!
Why I Love This Recipe
- Easy to Make: This no-bake recipe requires minimal effort and can be prepared in just 15 minutes, making it perfect for quick treats.
- Decadent Flavor: The combination of rich dark chocolate and creamy peanut butter creates a delightful indulgence that satisfies any sweet tooth.
- Healthy Ingredients: With wholesome oats, natural sweeteners, and no refined sugars, these bars are a guilt-free dessert option you can enjoy.
- Customizable: You can easily modify this recipe by adding your favorite mix-ins like nuts, seeds, or dried fruit for an extra twist.
Ingredients
Essential Ingredients for No-Bake Chocolate Peanut Butter Bars
To make these bars, you need a few key ingredients. Here is what you will need:
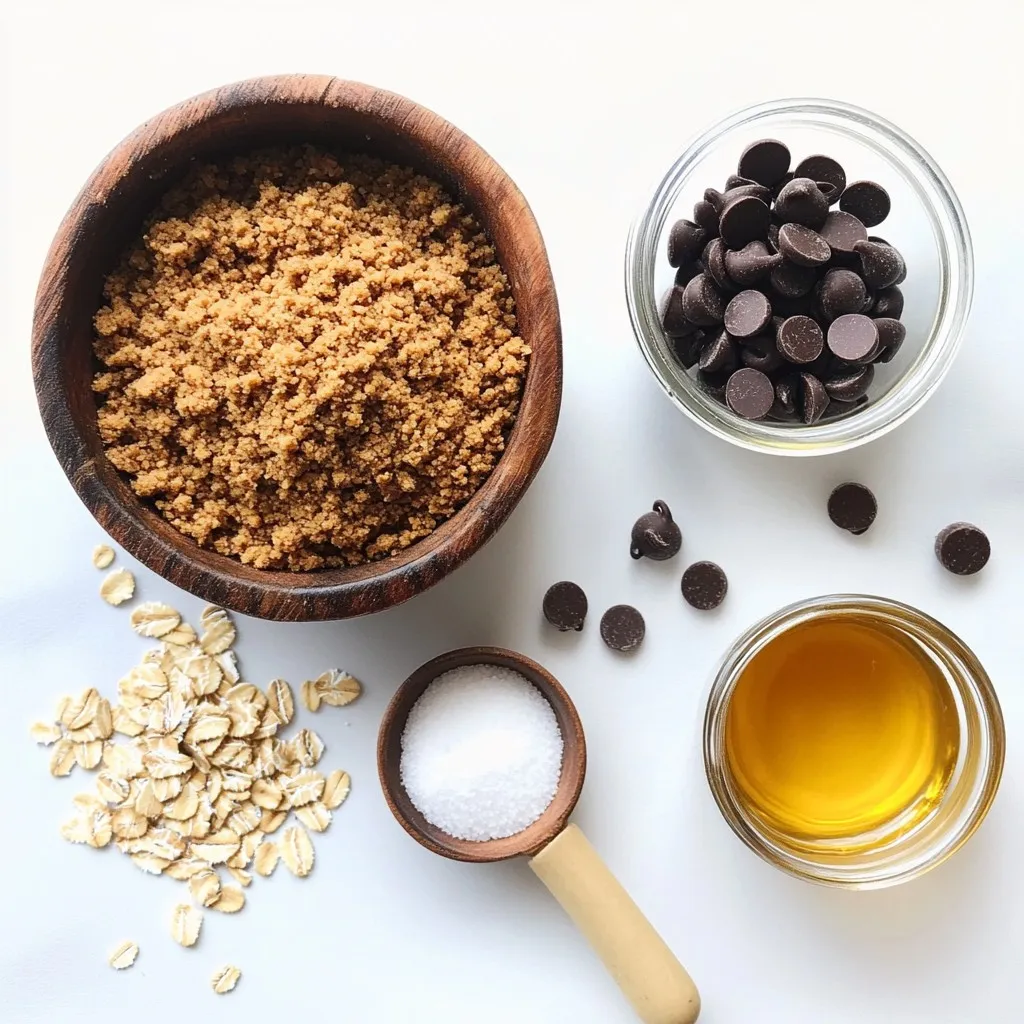
– 1 cup graham cracker crumbs
– 1 cup rolled oats
– 1/2 cup creamy peanut butter
– 1/3 cup honey or maple syrup
– 1/2 cup powdered sugar
– 1 cup dark chocolate chips
– 1 tablespoon coconut oil
– Pinch of salt
Each ingredient plays a role in flavor and texture. The graham cracker crumbs give a nice base. The rolled oats add chewiness, and the peanut butter brings creaminess and rich taste. Honey or maple syrup adds sweetness and helps bind everything. The powdered sugar helps to sweeten and firm up the bars. Dark chocolate chips provide a chocolatey finish, while coconut oil helps the chocolate melt smoothly.
Measuring Tips for Accurate Ingredient Proportions
Measuring your ingredients correctly matters for the best results. Here are some tips:
– Use dry measuring cups for solid ingredients like graham crackers and oats.
– For sticky ingredients like peanut butter and honey, spray your measuring cup with cooking oil first. This helps them slide out easily.
– Level off your dry ingredients with a flat edge for accuracy.
– Use a kitchen scale for precision if you have one. This ensures your bars turn out great every time.
Substitutions and Alternatives for Common Ingredients
You can swap some ingredients based on what you have. Here are some easy swaps:
– Use almond butter instead of peanut butter for a nutty twist.
– If you want a vegan option, use maple syrup instead of honey.
– For a lower sugar option, reduce the powdered sugar. You can also try using a sugar substitute.
– If you don’t have dark chocolate, milk chocolate works too, but it will be sweeter.
These swaps let you customize the recipe to your taste and needs. Enjoy making your no-bake chocolate peanut butter bars!
Step-by-Step Instructions
Preparation Steps for the Peanut Butter Base
Start by gathering your ingredients. You need graham cracker crumbs, rolled oats, peanut butter, honey or maple syrup, powdered sugar, and a pinch of salt. In a large bowl, mix the graham cracker crumbs, rolled oats, peanut butter, honey, powdered sugar, and salt. Stir until everything blends into a sticky mix. This step is key for a great base.
Melting and Spreading the Chocolate Topping
Next, get a microwave-safe bowl. Add dark chocolate chips and coconut oil. Heat in the microwave in 30-second bursts. Stir after each round until the chocolate is smooth. Be careful not to burn it! Once melted, pour the chocolate over your peanut butter base. Use a spatula to spread it evenly. This topping adds a rich flavor.
Chilling and Cutting the Bars
Now, it’s time for the bars to chill. Place your pan in the fridge for at least two hours. This helps the bars set up nicely. Once set, use the parchment paper to lift the bars out of the pan. Cut them into squares. You now have delicious no-bake chocolate peanut butter bars ready to enjoy!
Tips & Tricks
Best Practices for Achieving the Perfect Texture
To get the best texture, mix well. You want a sticky, yet firm base. If the mixture is too dry, add a bit more peanut butter or honey. For a smoother texture, consider using creamy peanut butter. Press the mixture firmly in the pan. This step helps the bars hold their shape.
How to Store No-Bake Chocolate Peanut Butter Bars
Store the bars in an airtight container. Keep them in the fridge for up to a week. For longer storage, freeze them. Wrap each bar in plastic wrap before freezing. This keeps them fresh and easy to grab later.
Presentation Tips for Serving
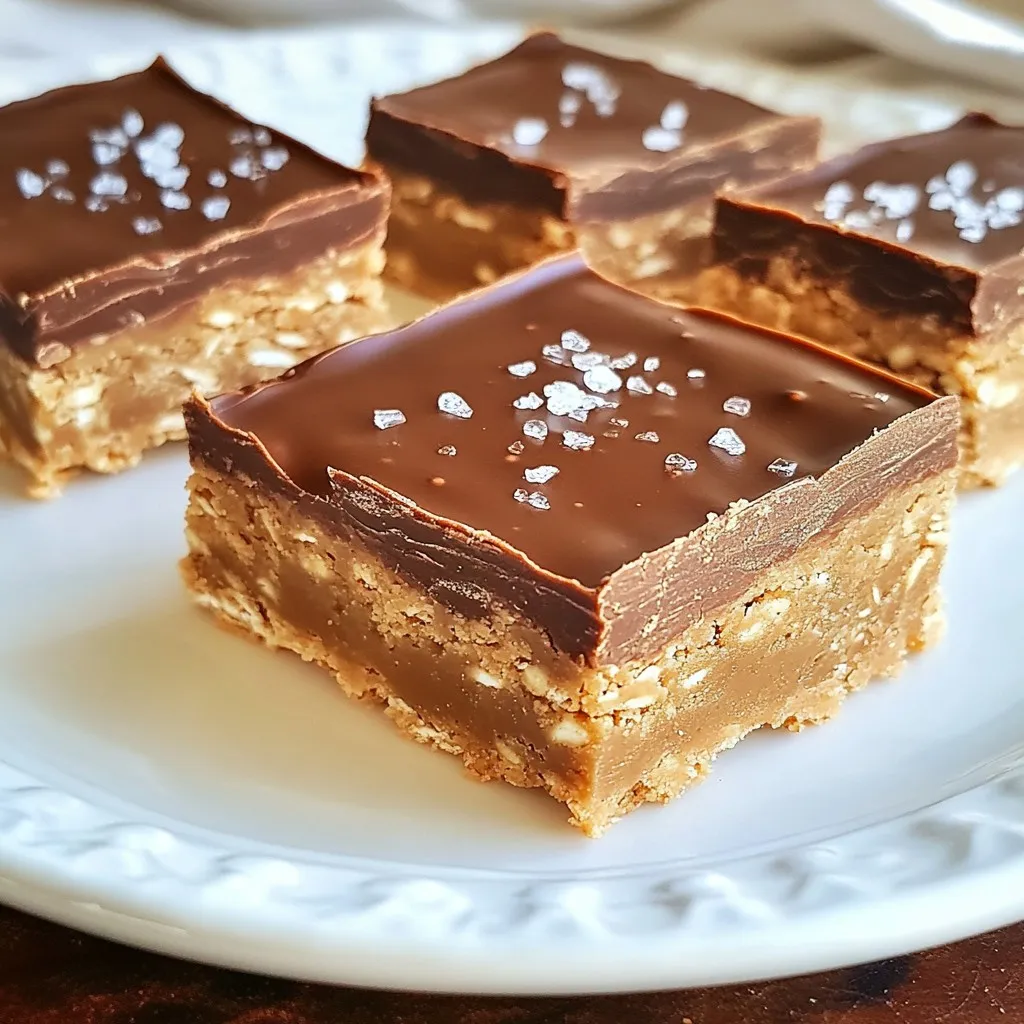
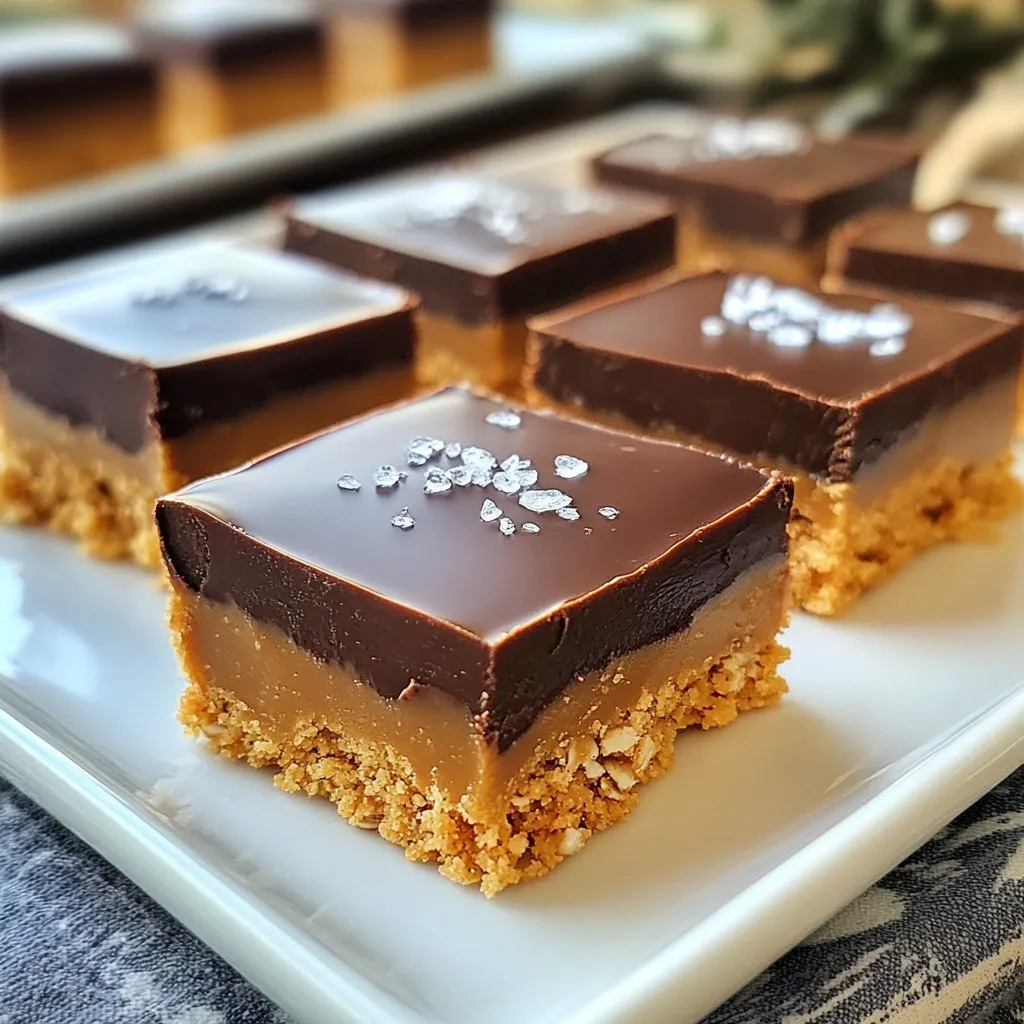
When ready to serve, cut the bars into neat squares. Place them on a colorful platter for a fun look. Sprinkle a bit of sea salt on top for flair. You can also drizzle extra melted chocolate over the bars. This adds a beautiful touch. Enjoy the great taste and eye-catching appeal!
Pro Tips
- Use Natural Peanut Butter: For a healthier option, choose natural peanut butter without added sugars or oils. It provides a rich flavor and is better for you!
- Chill for Optimal Texture: Ensure that you let the bars chill for the full 2 hours or longer. This helps them set properly and makes for cleaner cuts.
- Experiment with Add-ins: Feel free to customize your bars by adding ingredients like chopped nuts, dried fruit, or even a sprinkle of cinnamon for extra flavor.
- Storage Tips: Store the bars in an airtight container in the fridge for up to a week, or freeze them for longer-lasting treats!
Variations
Adding Flavor with Ingredients like Nuts and Dried Fruits
You can easily boost the flavor of your no-bake bars. Adding nuts can give them a nice crunch. Try chopped almonds, walnuts, or pecans. Dried fruits like cranberries or raisins also add sweetness. Mix in about 1/2 cup of your choice to the base for extra texture and taste. These additions can make your bars feel special and unique.
Gluten-Free Options Using Alternative Ingredients
If you need gluten-free bars, swap graham cracker crumbs for gluten-free options. You can use almond flour or gluten-free oat flour instead. Just make sure your oats are certified gluten-free. This small change keeps the flavor while making it safe for those with gluten sensitivities. Plus, it keeps the bars delicious and satisfying.
Vegan Substitutes for a Dairy-Free Version
To make these bars vegan, you can replace the honey with maple syrup. Use dairy-free chocolate chips instead of regular ones. This change makes the bars vegan-friendly while still keeping them tasty. You can enjoy these treats without any dairy products. They are perfect for anyone looking for a plant-based dessert option.
Storage Info
Recommended Storage Conditions for Freshness
To keep your no-bake chocolate peanut butter bars fresh, store them in an airtight container. Place parchment paper between layers to prevent sticking. Keep them in the fridge. This helps maintain their texture and flavor.
Freezing No-Bake Chocolate Peanut Butter Bars
You can freeze these bars for later enjoyment. Cut them into squares before freezing. Wrap each square in plastic wrap. Then, place them in a freezer-safe bag or container. This way, they stay fresh and tasty.
How Long Can You Store Them?
These bars can last about one week in the fridge. If frozen, they can stay good for up to three months. Just remember to thaw them in the fridge before eating. This ensures the best taste and texture.
FAQs
Can I use crunchy peanut butter instead of creamy?
Yes, you can use crunchy peanut butter. The bars will have a nice texture. The crunchy bits add a fun crunch. This change gives a new twist to the classic recipe. Just remember, it may change the smoothness a bit.
What can I substitute for honey or maple syrup?
You can use agave nectar or brown rice syrup. These options are sweet and work well. They keep the bars sticky and tasty. If you want, you can try using sugar. Just mix a bit of water to help it blend.
How do I make these bars healthier or low-calorie?
To make these bars healthier, consider using less sugar. You can cut the powdered sugar in half. Use natural sweeteners like stevia or monk fruit. You could also swap out some oats for chia seeds. This adds fiber and nutrients while lowering calories.
Is it necessary to chill the bars for 2 hours?
Chilling is important for the bars to set. If you skip this step, they may fall apart. Two hours helps the chocolate harden and flavors blend. If you’re short on time, try freezing them for about 30 minutes. This can speed up the process.
In this post, we covered the essential ingredients for tasty no-bake chocolate peanut butter bars. You learned how to measure ingredients accurately and explore substitutions. We shared step-by-step instructions, from preparing the base to chilling the bars. We also provided tips for great texture and storage. Lastly, we explored flavor variations and answered common questions.
These bars are simple to make and share. Enjoy experimenting with flavors while keeping your treats fresh and deliciou
Decadent No-Bake Chocolate Peanut Butter Bars
Delicious and easy no-bake bars made with chocolate and peanut butter.
Course Dessert
Cuisine American
Servings 16
Calories 200 kcal
- 1 cup graham cracker crumbs
- 1 cup rolled oats
- 1/2 cup creamy peanut butter
- 1/3 cup honey or maple syrup
- 1/2 cup powdered sugar
- 1 cup dark chocolate chips
- 1 tablespoon coconut oil
- 1 pinch salt
In a large mixing bowl, combine the graham cracker crumbs, rolled oats, peanut butter, honey (or maple syrup), powdered sugar, and a pinch of salt. Mix until all ingredients are thoroughly combined and the mixture is sticky.
Line an 8x8 inch square pan with parchment paper, allowing some overhang for easy removal later. Spread the mixture evenly in the pan, pressing it down firmly to create a compact layer.
In a microwave-safe bowl, combine the dark chocolate chips and coconut oil. Heat in 30-second intervals, stirring in between, until completely melted and smooth.
Pour the melted chocolate over the pressed peanut butter layer, spreading it evenly with a spatula.
Place the bars in the refrigerator and let them chill for at least 2 hours, or until completely set.
Once set, remove the bars from the pan using the parchment paper overhang and cut into squares.
Serve on a colorful platter with a sprinkle of sea salt on top for garnish, or drizzle additional melted chocolate over the squares for an extra touch. Enjoy!
Keyword bars, chocolate, no-bake, peanut butter
WANT TO SAVE THIS RECIPE?