No Bake Oreo Cheesecake Dream Bars Simple Delight

WANT TO SAVE THIS RECIPE?

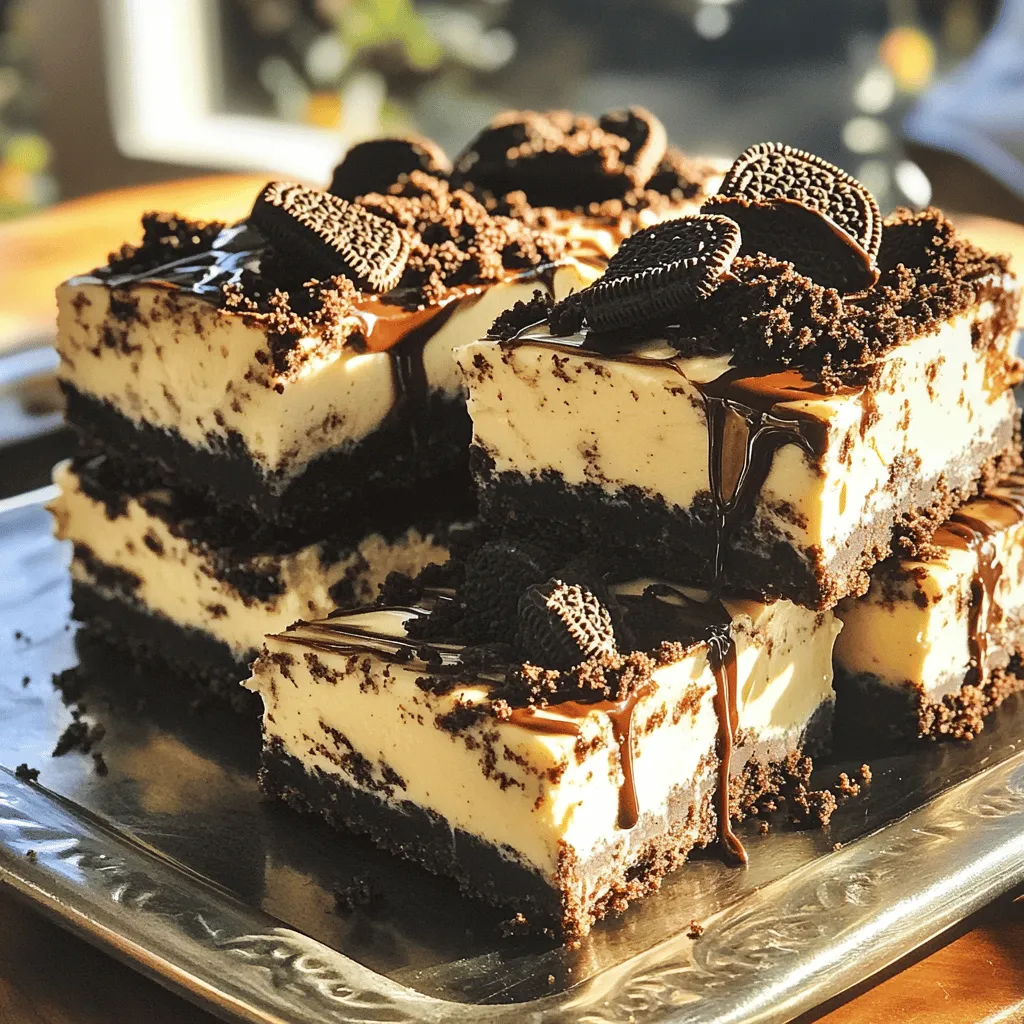
Are you ready to satisfy your sweet tooth with a simple delight? These No Bake Oreo Cheesecake Dream Bars are rich, creamy, and oh-so-easy to make. With just a few ingredients, you’ll whip up a dessert that will impress everyone. I’ll guide you through each step, from creating the perfect Oreo crust to chilling your creamy filling. Let’s dive into this delicious treat that’s sure to be a hit!

Ingredients

Main Ingredients

– 24 Oreo cookies

– 1/4 cup unsalted butter

– 1 (8 oz) package cream cheese

– 1/2 cup granulated sugar

– 1 teaspoon pure vanilla extract

– 1 (8 oz) tub of whipped topping

– 1/2 cup chocolate sauce

When making No Bake Oreo Cheesecake Dream Bars, the ingredients are key. The 24 Oreo cookies form the base and add rich flavor. You need 1/4 cup of unsalted butter to bind the crust together. For the filling, use 1 (8 oz) package of softened cream cheese for a creamy texture.

Add 1/2 cup of granulated sugar to sweeten the cheesecake. The 1 teaspoon of pure vanilla extract brings warmth to the mix. Fold in 1 (8 oz) tub of whipped topping for lightness. Lastly, the 1/2 cup of chocolate sauce gives a sweet finish.

Optional Garnishes

– Extra Oreo cookies for garnish

– 2 tablespoons Oreo crumbs

Garnishes can enhance your bars. Extra Oreo cookies on top make them look pretty. The 2 tablespoons of Oreo crumbs add texture and flavor.

Serving Size

– Servings: 9 bars

This recipe yields 9 bars. Each bar is a perfect treat for sharing. Enjoy them at a party or as a sweet snack at home.

Step-by-Step Instructions

Crust Preparation

To start, you need to crush 24 Oreo cookies into fine crumbs. I love using a food processor for this; it makes the task quick and easy. If you don’t have one, you can place the cookies in a bag and crush them with a rolling pin.

Once you have your crumbs, mix them with 1/4 cup of melted unsalted butter. Stir until all the crumbs feel moist. This mixture will become your crust.

Cheesecake Filling

Next, take an 8 oz package of cream cheese. Make sure it’s softened at room temperature. In a large bowl, beat the cream cheese until it’s smooth and creamy.

Then, add in 1/2 cup of granulated sugar and 1 teaspoon of pure vanilla extract. Mix these ingredients well until they are fully combined. The filling should taste sweet and rich.

Combine and Chill

Now comes the fun part! Gently fold in an 8 oz tub of whipped topping. Use a spatula to keep the mixture light and fluffy. This is key to a creamy texture.

Next, add in 1/2 cup of crushed Oreo cookies to the filling. Stir just enough to mix it in, then spread the cheesecake filling over your chilled crust. Use a spatula to smooth out the top.

Cover the dish tightly with plastic wrap and refrigerate for at least 4 hours. This chilling time allows the filling to set. Once it’s firm, you can cut it into bars. Enjoy your delicious No Bake Oreo Cheesecake Dream Bars!

Tips & Tricks

Achieving the Perfect Crust

To make a great crust, press the mixture firmly into the dish. This gives it the strength it needs. A good crust keeps the filling from leaking. Make sure to chill it for at least 15 minutes. This helps it set and hold its shape.

Creamy Cheesecake Filling

Use cream cheese that is at room temperature. This makes it easier to mix. Beat it until it’s smooth and creamy. When you add sugar and vanilla, mix well until combined. Fold in the whipped topping slowly. This keeps the filling light and fluffy, which is key to a good texture.

Serving Suggestions

For an extra touch, garnish with more Oreos on top. Drizzle chocolate sauce over each bar for added sweetness. These bars taste best when served cold. The chill makes them refreshing and perfect for any occasion.

Variations

Flavor Additions

You can change the flavor of your cheesecake bars. Try making peanut butter Oreo cheesecake bars. Just add 1/2 cup of creamy peanut butter to the cream cheese filling. This twist adds a rich, nutty taste. You can also make mint Oreo cheesecake bars. Use mint-flavored Oreo cookies in the crust. Add a few drops of mint extract to the filling. Both flavors give a fun new spin.

Alternative Toppings

Toppings can make your bars even better. You can add whipped cream or chocolate shavings on top. This gives a nice, creamy contrast. Fresh fruit like strawberries or blueberries can add color and taste. These fruits also add a healthy touch. You can get creative with toppings to match your mood.

Different Serving Options

You can serve these bars in different ways. Instead of cutting them into bars, try using individual cups. Just layer the crust and filling in small cups for a cute dessert. Another fun option is to layer the cheesecake in a trifle dish. This creates a beautiful dessert display. It’s perfect for parties or special occasions.

Storage Info

How to Store Leftovers

To keep your No Bake Oreo Cheesecake Dream Bars fresh, store them in an airtight container. This keeps the bars moist and tasty. They can last up to five days in the fridge. Be sure to check for any signs of spoilage before serving. If they smell off or look different, it’s best to toss them.

Freezing Options

You can freeze these cheesecake bars for longer storage. To do this, cut the bars into pieces and wrap each piece tightly in plastic wrap. Then, place them in a freezer-safe container or bag. They can last up to three months in the freezer. When you’re ready to enjoy, take them out and let them sit at room temperature for about 30 minutes before serving. This will help them soften up nicely.

Tips for Serving After Storage

After refrigeration or freezing, serve the bars chilled for the best taste. If they look a bit flat, simply re-garnish them. Add extra Oreo crumbs or a drizzle of chocolate sauce on top. This makes them look fresh and fancy again. You can also use a chilled platter to enhance their appeal. Enjoy your delightful treat!

FAQs

Can I use reduced-fat cream cheese?

Yes, you can use reduced-fat cream cheese. However, it may change the texture and taste. The bars may be less creamy and a bit denser. Full-fat cream cheese gives a richer flavor and creamier feel. If you prefer lighter options, reduced-fat works but expect a different treat.

How long will these bars last in the fridge?

These bars will last about 5 days in the fridge. Make sure to cover them well. Use plastic wrap or an airtight container to keep them fresh. After a few days, the texture may change slightly, but they will still taste great!

Can I make these bars ahead of time?

You can make these bars a day or two ahead of time. This makes them perfect for parties or gatherings. Just prepare them, chill them, and serve when needed. They need at least 4 hours to set in the fridge, so plan accordingly. Enjoy the ease of making them ahead!

This blog post covered making delicious Oreo cheesecake bars. We discussed the key ingredients, including Oreo cookies, cream cheese, and whipped topping. You learned how to prepare the crust and creamy filling, along with tips to achieve the perfect texture. Variations, storage tips, and FAQs provided extra insight.

These bars are not just tasty but also easy to customize. Enjoy experimenting with flavors and garnishes. For a fun treat, try these out at your next gathering!

- 24 Oreo cookies - 1/4 cup unsalted butter - 1 (8 oz) package cream cheese - 1/2 cup granulated sugar - 1 teaspoon pure vanilla extract - 1 (8 oz) tub of whipped topping - 1/2 cup chocolate sauce When making No Bake Oreo Cheesecake Dream Bars, the ingredients are key. The 24 Oreo cookies form the base and add rich flavor. You need 1/4 cup of unsalted butter to bind the crust together. For the filling, use 1 (8 oz) package of softened cream cheese for a creamy texture. Add 1/2 cup of granulated sugar to sweeten the cheesecake. The 1 teaspoon of pure vanilla extract brings warmth to the mix. Fold in 1 (8 oz) tub of whipped topping for lightness. Lastly, the 1/2 cup of chocolate sauce gives a sweet finish. - Extra Oreo cookies for garnish - 2 tablespoons Oreo crumbs Garnishes can enhance your bars. Extra Oreo cookies on top make them look pretty. The 2 tablespoons of Oreo crumbs add texture and flavor. - Servings: 9 bars This recipe yields 9 bars. Each bar is a perfect treat for sharing. Enjoy them at a party or as a sweet snack at home. To start, you need to crush 24 Oreo cookies into fine crumbs. I love using a food processor for this; it makes the task quick and easy. If you don’t have one, you can place the cookies in a bag and crush them with a rolling pin. Once you have your crumbs, mix them with 1/4 cup of melted unsalted butter. Stir until all the crumbs feel moist. This mixture will become your crust. Next, take an 8 oz package of cream cheese. Make sure it’s softened at room temperature. In a large bowl, beat the cream cheese until it’s smooth and creamy. Then, add in 1/2 cup of granulated sugar and 1 teaspoon of pure vanilla extract. Mix these ingredients well until they are fully combined. The filling should taste sweet and rich. Now comes the fun part! Gently fold in an 8 oz tub of whipped topping. Use a spatula to keep the mixture light and fluffy. This is key to a creamy texture. Next, add in 1/2 cup of crushed Oreo cookies to the filling. Stir just enough to mix it in, then spread the cheesecake filling over your chilled crust. Use a spatula to smooth out the top. Cover the dish tightly with plastic wrap and refrigerate for at least 4 hours. This chilling time allows the filling to set. Once it's firm, you can cut it into bars. Enjoy your delicious No Bake Oreo Cheesecake Dream Bars! To make a great crust, press the mixture firmly into the dish. This gives it the strength it needs. A good crust keeps the filling from leaking. Make sure to chill it for at least 15 minutes. This helps it set and hold its shape. Use cream cheese that is at room temperature. This makes it easier to mix. Beat it until it's smooth and creamy. When you add sugar and vanilla, mix well until combined. Fold in the whipped topping slowly. This keeps the filling light and fluffy, which is key to a good texture. For an extra touch, garnish with more Oreos on top. Drizzle chocolate sauce over each bar for added sweetness. These bars taste best when served cold. The chill makes them refreshing and perfect for any occasion. {{image_4}} You can change the flavor of your cheesecake bars. Try making peanut butter Oreo cheesecake bars. Just add 1/2 cup of creamy peanut butter to the cream cheese filling. This twist adds a rich, nutty taste. You can also make mint Oreo cheesecake bars. Use mint-flavored Oreo cookies in the crust. Add a few drops of mint extract to the filling. Both flavors give a fun new spin. Toppings can make your bars even better. You can add whipped cream or chocolate shavings on top. This gives a nice, creamy contrast. Fresh fruit like strawberries or blueberries can add color and taste. These fruits also add a healthy touch. You can get creative with toppings to match your mood. You can serve these bars in different ways. Instead of cutting them into bars, try using individual cups. Just layer the crust and filling in small cups for a cute dessert. Another fun option is to layer the cheesecake in a trifle dish. This creates a beautiful dessert display. It’s perfect for parties or special occasions. To keep your No Bake Oreo Cheesecake Dream Bars fresh, store them in an airtight container. This keeps the bars moist and tasty. They can last up to five days in the fridge. Be sure to check for any signs of spoilage before serving. If they smell off or look different, it’s best to toss them. You can freeze these cheesecake bars for longer storage. To do this, cut the bars into pieces and wrap each piece tightly in plastic wrap. Then, place them in a freezer-safe container or bag. They can last up to three months in the freezer. When you're ready to enjoy, take them out and let them sit at room temperature for about 30 minutes before serving. This will help them soften up nicely. After refrigeration or freezing, serve the bars chilled for the best taste. If they look a bit flat, simply re-garnish them. Add extra Oreo crumbs or a drizzle of chocolate sauce on top. This makes them look fresh and fancy again. You can also use a chilled platter to enhance their appeal. Enjoy your delightful treat! Yes, you can use reduced-fat cream cheese. However, it may change the texture and taste. The bars may be less creamy and a bit denser. Full-fat cream cheese gives a richer flavor and creamier feel. If you prefer lighter options, reduced-fat works but expect a different treat. These bars will last about 5 days in the fridge. Make sure to cover them well. Use plastic wrap or an airtight container to keep them fresh. After a few days, the texture may change slightly, but they will still taste great! You can make these bars a day or two ahead of time. This makes them perfect for parties or gatherings. Just prepare them, chill them, and serve when needed. They need at least 4 hours to set in the fridge, so plan accordingly. Enjoy the ease of making them ahead! This blog post covered making delicious Oreo cheesecake bars. We discussed the key ingredients, including Oreo cookies, cream cheese, and whipped topping. You learned how to prepare the crust and creamy filling, along with tips to achieve the perfect texture. Variations, storage tips, and FAQs provided extra insight. These bars are not just tasty but also easy to customize. Enjoy experimenting with flavors and garnishes. For a fun treat, try these out at your next gathering!

No Bake Oreo Cheesecake Dream Bars

Indulge in the deliciousness of No Bake Oreo Cheesecake Dream Bars that are simple to make and absolutely delightful! With a buttery Oreo crust, creamy filling, and chocolate drizzle, these bars are perfect for any occasion. In just 20 minutes of prep, you can create a creamy dessert that will impress your friends and family. Click through to discover the full recipe and treat yourself to this sweet sensation!

Ingredients
  

24 Oreo cookies (plus extra for garnish)

1/4 cup unsalted butter, melted

1 (8 oz) package cream cheese, softened at room temperature

1/2 cup granulated sugar

1 teaspoon pure vanilla extract

1 (8 oz) tub of whipped topping (like Cool Whip)

2 tablespoons Oreo crumbs (set aside for garnish)

1/2 cup chocolate sauce (for drizzling)

Instructions
 

Prepare the Crust: Using a food processor, finely crush the 24 Oreo cookies into crumbs. In a mixing bowl, combine the Oreo crumbs with the melted butter until completely mixed and moist.

    Press the Mixture: Firmly press the crumbly mixture into the bottom of an 8x8 inch baking dish to form an even, solid crust. Transfer to the freezer and chill for approximately 15 minutes to allow it to set.

      Make the Cheesecake Filling: In a large mixing bowl, beat the softened cream cheese with an electric mixer until it becomes smooth and creamy. Gradually add the granulated sugar and vanilla extract, continuing to mix until thoroughly blended.

        Fold in Whipped Topping: Carefully fold the whipped topping into the cream cheese mixture using a spatula. Make sure to combine until the mixture remains light and fluffy.

          Add Cookie Crumbles: Gently fold in 1/2 cup of crushed Oreo cookies into the cheesecake filling to create added texture and Oreo goodness.

            Fill the Crust: Spread the cheesecake filling evenly over the chilled Oreo crust. Use a spatula to smooth the top for a polished finish.

              Chill and Set: Cover the baking dish tightly with plastic wrap and refrigerate for at least 4 hours, or until the cheesecake filling is set and firm to the touch.

                Serve: Once chilled and set, carefully cut the cheesecake into bars. Top each bar with the reserved Oreo crumbs, drizzle with chocolate sauce, and serve chilled for a delightful treat.

                  Prep Time: 20 minutes | Total Time: 4 hours 20 minutes | Servings: 9 bars

                    - Presentation Tips: For an elegant touch, serve the bars on a chilled serving platter. Garnish each bar with additional Oreo halves on top and drizzle the chocolate sauce artfully over them, making for a visually indulgent experience.

                      WANT TO SAVE THIS RECIPE?