WANT TO SAVE THIS RECIPE?
Craving something sweet but don’t want to turn on the oven? You’re in luck! My No-Bake Strawberry Cheesecake Cups are the perfect solution. They are easy to make and super delicious, ideal for busy days or gathering with friends. In this post, I’ll guide you through every step, from the crust to the creamy filling. Let’s dive in and create a tasty treat that everyone will love!
Why I Love This Recipe
- Easy to Make: This no-bake recipe requires minimal effort, making it perfect for busy days or last-minute gatherings.
- Fresh Flavors: The combination of creamy cheesecake and fresh strawberries creates a delightful balance of flavors.
- Perfect for Summer: These cheesecake cups are a refreshing dessert option, ideal for warm weather and outdoor events.
- Customizable: You can easily swap out strawberries for your favorite fruits to create a personalized dessert experience.
Ingredients
Complete list of ingredients for No-Bake Strawberry Cheesecake Cups
To make these tasty No-Bake Strawberry Cheesecake Cups, you need:
– 1 cup graham cracker crumbs
– 4 tablespoons unsalted butter, melted
– 2 cups cream cheese, softened
– 1/2 cup powdered sugar
– 1 teaspoon vanilla extract
– 1 cup heavy whipping cream
– 1 cup fresh strawberries, hulled and sliced
– 2 tablespoons sugar (for strawberries)
– Fresh mint leaves for garnish (optional)
These ingredients work well together. The graham crackers give a nice crunch. The cream cheese makes it rich and creamy. Fresh strawberries add a burst of flavor. This mix creates a perfect dessert.
Ingredient substitutions and alternatives
If you want to switch things up, here are some ideas:
– Use digestive biscuits instead of graham crackers for a different crust.
– Swap cream cheese with mascarpone cheese for a lighter taste.
– Try maple syrup instead of powdered sugar for a natural sweetener.
– Use coconut cream in place of heavy whipping cream for a dairy-free option.
These swaps can help fit your taste and needs while still keeping the dessert delicious.
Optional garnishes and additions
Garnishes can make your dessert look even better. Here are some fun options:
– Add fresh mint leaves on top for a pop of color.
– Drizzle chocolate sauce over the cups for extra sweetness.
– Use whipped cream to add a fluffy layer.
– Top with crushed nuts for added texture.
Feel free to get creative with your garnishes. Each addition can change the look and taste of your No-Bake Strawberry Cheesecake Cups. Enjoy making it your own!

Step-by-Step Instructions
Prep: Preparing the crust layer
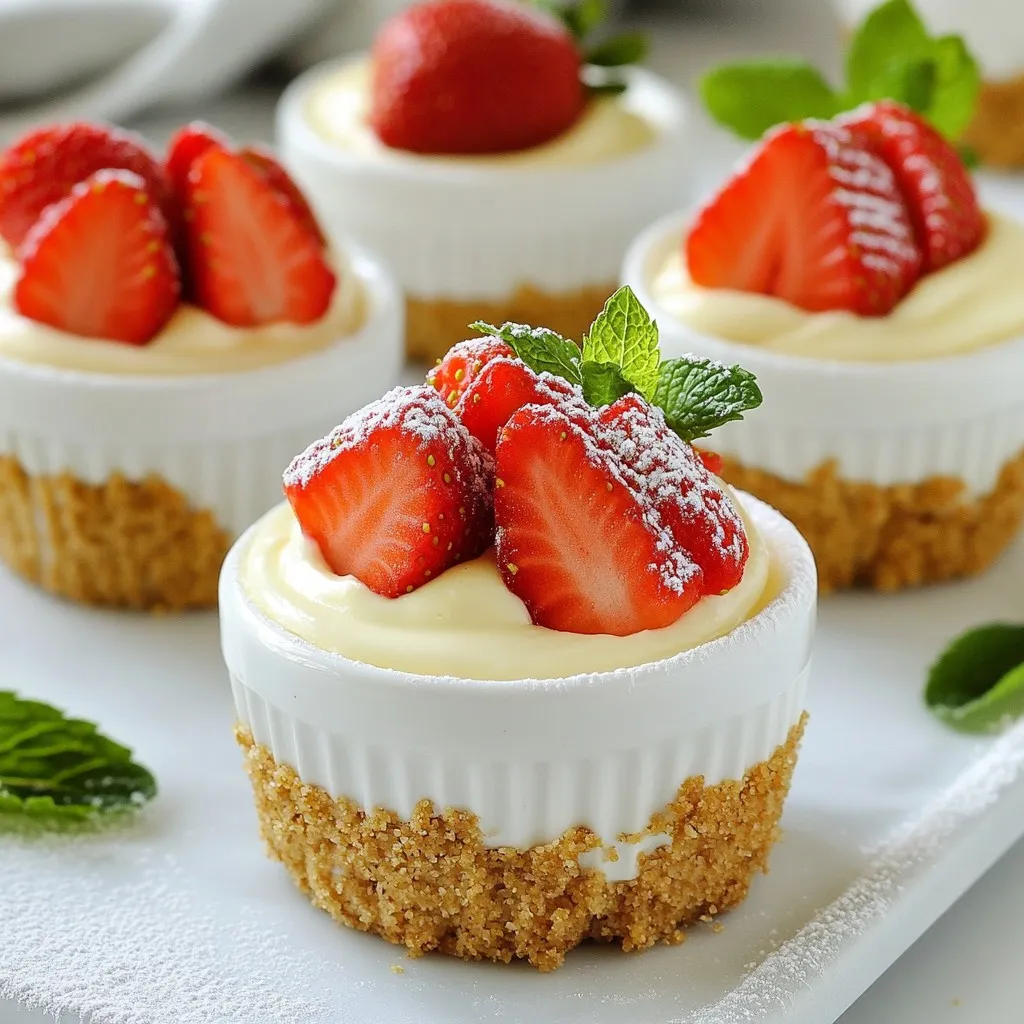
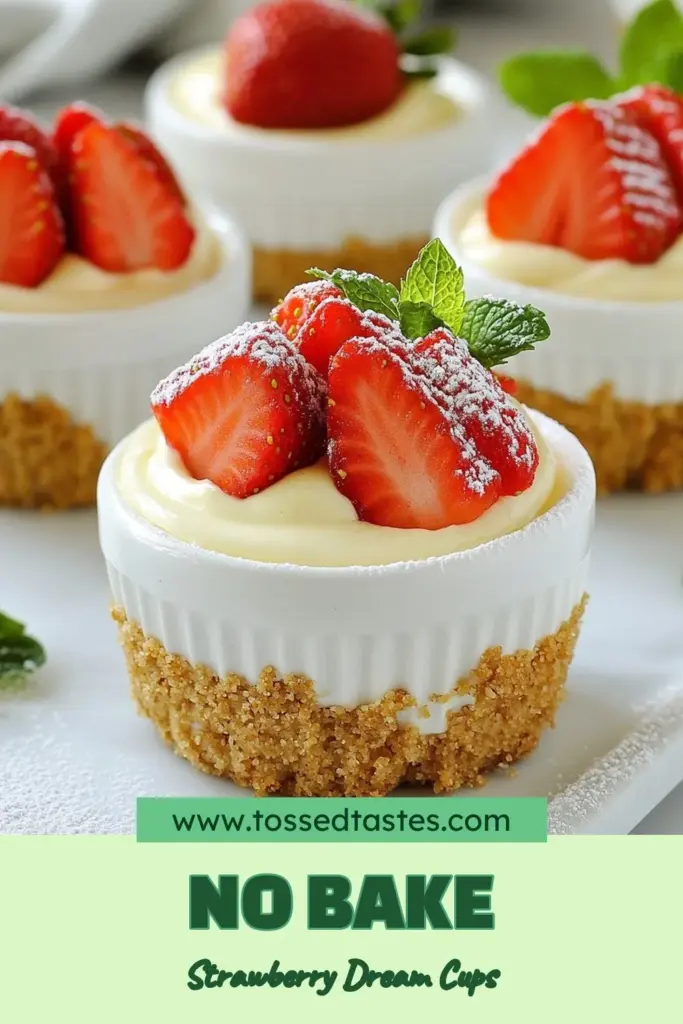
Start by mixing the graham cracker crumbs and melted butter in a medium bowl. You want to combine them until they look like wet sand. This mix forms the base of your cups. Next, take your serving cups and divide the crumb mix evenly among them. Press it down with your fingers or a spoon to form a solid crust. Make sure it’s packed well so it holds its shape.
Making the cheesecake filling
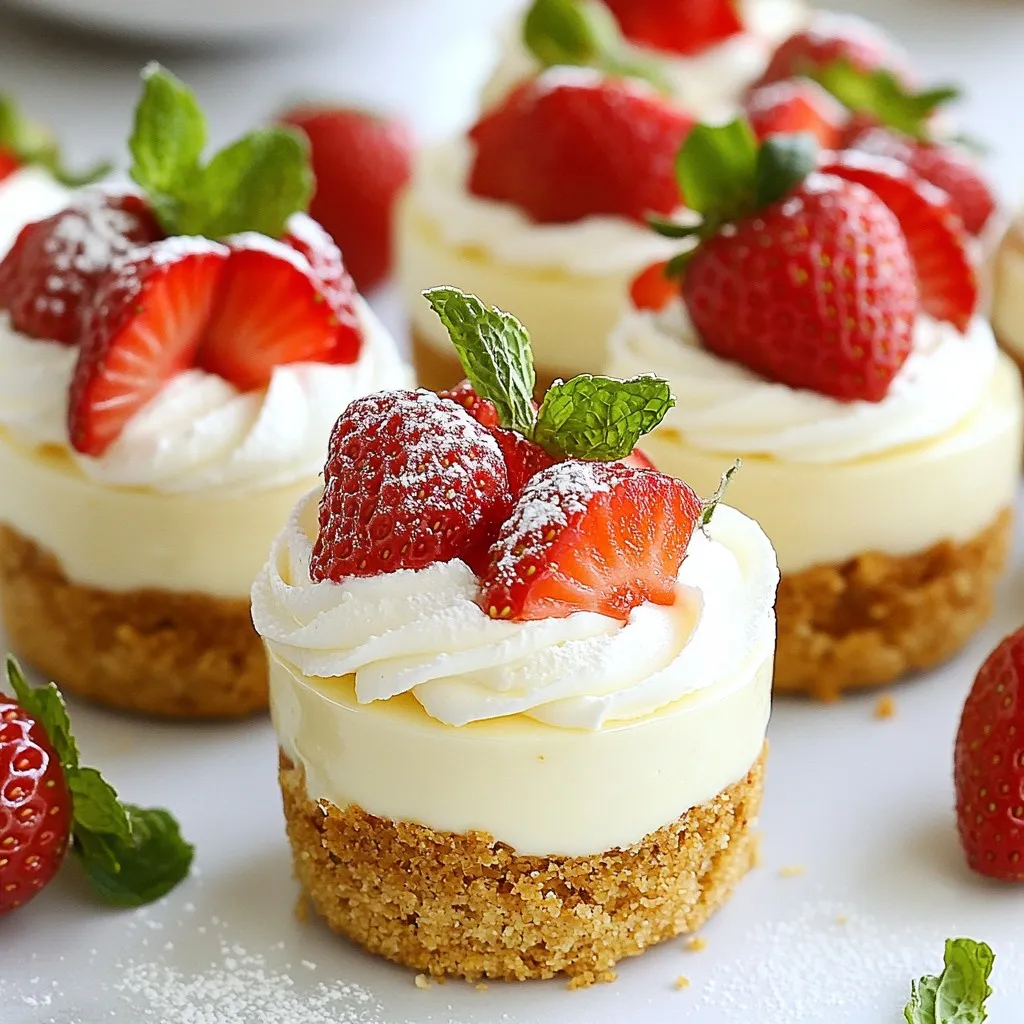
In a large bowl, beat the softened cream cheese with an electric mixer until it’s smooth and creamy. This step is key for a silky filling. Gradually add the powdered sugar and the vanilla extract. Keep mixing until everything is well blended. In a separate bowl, whip the heavy cream until you see stiff peaks. This whipped cream adds lightness to the filling. Gently fold the whipped cream into the cream cheese mix. Be careful not to lose the airiness of the whipped cream. Your cheesecake filling should look smooth and fluffy.
Assembling the cups
Now it’s time to layer everything in the cups. Spoon the cheesecake filling over the graham cracker crust in each cup. Spread it evenly to cover the crust well. Next, prepare the strawberries by tossing the sliced fruit with sugar. Let them sit for about 10 minutes. This step helps the strawberries release their juices. Spoon the macerated strawberries over the cheesecake layer. Refrigerate the cups for at least 2 hours to set. If you can wait overnight, you’ll get even better flavor. Before serving, you can add fresh mint leaves and any leftover strawberries on top for a touch of color. Enjoy your delicious no-bake treat!
Tips & Tricks
How to achieve the perfect texture for cheesecake filling
To get a smooth filling, start with room temperature cream cheese. Cold cream cheese makes lumps. Beat it well until creamy. Slowly mix in the powdered sugar and vanilla. This helps blend flavors without air bubbles. When you whip the cream, go for stiff peaks. Gently fold this whipped cream into the cheese mix. This keeps it light and fluffy. Do not stir too hard; use a spatula to keep air in.
Best practices for layering
When layering, make sure your crust is firm. Press the graham cracker mix down well. This helps it hold together. Add the cheesecake filling next. Spoon it carefully to cover the crust. Smooth it out, but don’t worry about being perfect. Then, top with macerated strawberries. They add sweetness and juice, so layer them evenly. This makes each bite delicious. Chill the cups well in the fridge. This helps the layers set nicely.
Common mistakes to avoid
Avoid using cold cream cheese; it leads to lumps. Don’t rush the mixing process either. If you add the whipped cream too fast, it can deflate. Another mistake is not chilling long enough. If you skip the fridge time, the cups won’t set properly. Lastly, don’t overload on strawberries before chilling. They can make the filling too runny. Keep these tips in mind for a perfect dessert!
Pro Tips
- Chill Your Ingredients: For a creamier texture, ensure your cream cheese is well-softened and your heavy cream is chilled before whipping. This helps achieve the perfect consistency.
- Customize the Fruit: Feel free to substitute strawberries with other berries such as blueberries or raspberries for a different flavor profile.
- Layering Technique: To create a beautiful presentation, layer the cream cheese mixture and strawberries in the cups. Start with the cheesecake, then add strawberries, and repeat.
- Make Ahead: These cheesecake cups can be made a day in advance. Just add the fresh strawberries right before serving to keep them vibrant and fresh.
Variations
Flavor variations (e.g., chocolate, lemon)
You can change the flavor of your cheesecake cups easily. To make chocolate cheesecake cups, add cocoa powder to the cream cheese mixture. Start with 1/4 cup and adjust to taste. For lemon-flavored cups, stir in fresh lemon juice and zest. This gives a bright, fresh taste. These swaps keep the recipe fun and exciting.
Seasonal fruit substitutes
Using different fruits can add a new twist. In summer, try peaches or blueberries. In fall, use apples or pears. You can mash these fruits with sugar, just like strawberries. Each fruit brings its own flavor and charm to the cups. Let your taste guide you!
Gluten-free and dairy-free adaptations
If you need gluten-free options, use gluten-free graham crackers. For a dairy-free version, swap cream cheese with a dairy-free spread. Use coconut cream instead of heavy cream for richness. These small changes help everyone enjoy the dessert. Making these adaptations allows everyone to share in the fun.
Storage Info
How to store No-Bake Strawberry Cheesecake Cups
You need to keep your cheesecake cups in the fridge. Use an airtight container to prevent them from drying out. Place parchment paper between layers if you stack them. This keeps the layers looking nice.
Shelf life and freezing options
These cups last about four days in the fridge. If you want to freeze them, do so before adding the strawberries. Wrap each cup tightly in plastic wrap. They can stay in the freezer for up to two months. Just remember, the texture might change when thawed.
Tips for serving after storage
When you serve them after storage, let them sit at room temperature for a few minutes. This helps soften the cheesecake a bit. Add fresh strawberries and mint leaves just before serving. This keeps everything looking bright and fresh. Enjoy your tasty treat!
FAQs
Can I make these cheesecake cups ahead of time?
Yes, you can make these cheesecake cups ahead of time. In fact, they taste better after chilling. This allows the flavors to blend. I recommend making them a day in advance. Just store them in the fridge until you are ready to serve. This way, you can enjoy more time with your guests.
How long do No-Bake Strawberry Cheesecake Cups last in the fridge?
These cheesecake cups last about 3 to 5 days in the fridge. Keep them covered to prevent drying out. If you notice any change in color or smell, it is best to throw them away. They are a great dessert to prepare for parties or gatherings.
Can I use other types of berries instead of strawberries?
Yes, you can use other types of berries. Blueberries, raspberries, or blackberries are great options. Each berry will add its own flavor. Adjust the sugar based on the sweetness of the berries. You can mix different berries for a fun twist too!
You learned how to make No-Bake Strawberry Cheesecake Cups step by step. I shared ingredient lists, substitutes, and tips for perfect texture. Variations let you mix flavors, fruits, and even make it gluten or dairy-free. Store them well for freshness and enjoy their easy appeal. No matter how you choose to make them, these cups are a treat you can savor anytime. Now, grab your ingredients and start creating your own delicious desser
No-Bake Strawberry Cheesecake Cups
A delicious and easy dessert made with a creamy cheesecake filling and fresh strawberries, served in individual cups.
Course Dessert
Cuisine American
Servings 6
Calories 300 kcal
- 1 cup graham cracker crumbs
- 4 tablespoons unsalted butter, melted
- 2 cups cream cheese, softened
- 1/2 cup powdered sugar
- 1 teaspoon vanilla extract
- 1 cup heavy whipping cream
- 1 cup fresh strawberries, hulled and sliced
- 2 tablespoons sugar (for strawberries)
- to taste fresh mint leaves for garnish (optional)
In a medium bowl, combine the graham cracker crumbs and melted butter. Mix until the crumbs are evenly coated and resemble wet sand.
Divide the graham cracker mixture evenly among serving cups, pressing it down into the bottom to create a crust layer. Set aside.
In a large mixing bowl, beat the softened cream cheese with an electric mixer until smooth and creamy.
Gradually add the powdered sugar and vanilla extract, mixing until well combined.
In a separate bowl, whip the heavy cream until stiff peaks form.
Fold the whipped cream into the cream cheese mixture gently, being careful not to deflate the whipped cream. Mix until fully incorporated and smooth.
In another bowl, toss the sliced strawberries with 2 tablespoons of sugar and let them sit for about 10 minutes to macerate and release juice.
Spoon the cream cheese mixture into the prepared cups on top of the graham cracker crust.
Spoon some of the macerated strawberries over the cheesecake layer in each cup.
Refrigerate the cups for at least 2 hours, or overnight for best results.
Before serving, garnish with fresh mint leaves if desired and any remaining strawberries on top.
Chill overnight for best results.
Keyword cheesecake, dessert, easy, no-bake, strawberry
WANT TO SAVE THIS RECIPE?