![- 1 cup pumpkin puree - 1 1/2 cups all-purpose flour - 1 cup granulated sugar - 1/2 cup brown sugar Pumpkin puree adds moisture and rich flavor. It makes the cake soft and tasty. All-purpose flour gives the cake structure. The sugars create sweetness and help with browning. - 3 large eggs - 8 oz cream cheese, softened - 2 cups white chocolate chips Eggs bind the mixture and add fluffiness. Cream cheese brings a creamy texture and tangy flavor. White chocolate chips coat the cake pops and add sweetness. - 1 teaspoon ground cinnamon - 1/2 teaspoon ground nutmeg - 1/4 teaspoon ground cloves Cinnamon gives warmth and depth. Nutmeg adds a hint of sweetness. Cloves provide a unique, aromatic touch. These spices make the cake pops taste like fall. For the full recipe, check out the Full Recipe section. 1. Preheat your oven to 350°F (175°C). Prepare a 9x13 inch baking pan by greasing it well. 2. In a large bowl, mix together 1 cup of pumpkin puree, 1 cup of granulated sugar, 1/2 cup of brown sugar, 1/2 cup of vegetable oil, 3 large eggs, and 1 teaspoon of vanilla extract. Whisk until smooth. 3. In another bowl, whisk together 1 1/2 cups of all-purpose flour, 1 teaspoon of baking powder, 1/2 teaspoon of baking soda, 1 teaspoon of ground cinnamon, 1/2 teaspoon of ground nutmeg, 1/4 teaspoon of ground cloves, and 1/2 teaspoon of salt. This helps to mix the dry ingredients evenly. 1. Gradually add the dry mixture to the wet mixture. Stir gently until just combined. Do not overmix, as it can change the cake's texture. 2. Pour the batter into your prepared baking pan. Spread it evenly with a spatula. 3. Bake for 30-35 minutes. Check with a toothpick; it should come out clean. Remove the cake from the oven and let it cool completely in the pan. 1. Once the cake is cool, crumble it into a large bowl using your hands or a fork. Aim for fine crumbs. 2. Mix in 8 oz of softened cream cheese. Blend until smooth with no lumps. 3. Take small portions and roll them into 1-inch balls. Place the balls on a parchment-lined baking sheet. Refrigerate for at least 1 hour to firm them up. 1. Melt 2 cups of white chocolate chips in a microwave-safe bowl. Heat in 30-second bursts, stirring until smooth. 2. Dip the tip of each lollipop stick into the melted chocolate. Then, insert the stick into the center of each chilled cake ball. Next, dip each cake pop into the melted chocolate, letting excess chocolate drip off. 3. Before the chocolate hardens, sprinkle each pop with your choice of decorative sprinkles or crushed pecans. 4. Stand the cake pops upright in a foam block or a cup filled with rice. This helps the chocolate set completely. Enjoy making these delightful pumpkin cake pops! For the full recipe, refer back to the earlier section. To make the best pumpkin cake pops, you must avoid overmixing the batter. When you combine the wet and dry ingredients, mix gently. Overmixing will lead to a tough texture. Cooling is also key. After baking, let the cake cool in the pan for about 10 minutes. Then, transfer it to a wire rack to cool completely. This helps maintain a moist texture. For a smooth coat of chocolate on your cake pops, use melted chocolate chips. Melt them in a microwave-safe bowl, stirring every 30 seconds. This keeps the chocolate from burning. When using lollipop sticks, dip the tip in melted chocolate before inserting it into the cake ball. This helps hold the stick in place. After dipping, let any extra chocolate drip off before setting it down. Get creative with your toppings! You can use colorful sprinkles, crushed pecans, or even edible glitter. These fun additions make each cake pop unique and festive. For presentation, arrange the cake pops on a decorative platter. You can also wrap them in cellophane and tie with ribbon. This makes for great party favors and adds a special touch! {{image_4}} You can change the taste of pumpkin cake pops with spices. Try adding ginger or allspice for a warm kick. You can also use pumpkin spice mix if you want a quick fix. This mix adds a blend of flavors that make the cake pops even more festive. For the coating, you can choose dark chocolate or white chocolate. Dark chocolate gives a rich taste, while white chocolate adds sweetness. Both options look great on cake pops. You can also use candy melts, which come in many colors. They melt smoothly and are easy to work with. Want gluten-free cake pops? Use gluten-free flour! This keeps the texture light and fluffy. For vegan cake pops, substitute eggs with flaxseed meal. You can also use vegan cream cheese and dairy-free chocolate. These adaptations make the cake pops friendly for different diets. For the complete recipe, check the [Full Recipe]. Store your pumpkin cake pops in an airtight container. This keeps them fresh and moist. They last up to one week at room temperature. If you want them to last longer, keep them in the fridge. In the fridge, they can stay good for up to two weeks. It's best to keep them separated with parchment paper to avoid sticking. To freeze cake pops, first place them in a single layer on a baking sheet. Make sure they don't touch each other. Freeze them for about two hours until they are solid. Then, wrap each pop in plastic wrap. You can also place them in a freezer-safe bag. They can last for up to three months in the freezer. When you're ready to eat them, take the cake pops out of the freezer. Let them thaw in the fridge for a few hours. This helps keep the texture nice. Avoid microwaving them, as that can change how they feel. Now you can enjoy this tasty fall treat any time! You can use Greek yogurt or apple sauce as a substitute. Both add moisture and flavor. If you want a richer taste, try using buttercream frosting. Combine it with the cake crumbs just like you would with cream cheese. This will keep your cake pops moist and tasty. Yes, using a cake mix is a great shortcut. Choose a spice or vanilla cake mix for the best flavor. Add 1 cup of pumpkin puree to the mix. This will give your cake pops a nice pumpkin taste. Just follow the package instructions and then crumble the cake as you would with homemade. I love to arrange cake pops on a nice platter. You can also use a cake stand for a fun display. Wrap each pop in clear cellophane and tie with a ribbon for gifts. This makes them look special and keeps them fresh. You can find pumpkin cake pops at many local bakeries in fall. Check farmers' markets too, as they often have seasonal treats. If you prefer online shopping, try dessert delivery services. Many websites sell homemade cake pops and ship them right to your door. Yes, you can make them a few days in advance. Just store them in an airtight container in the fridge. If you want to keep them longer, freeze the cake pops before dipping them in chocolate. They will last for about a month. When ready, just thaw and dip as usual. For the full recipe, check above. You now know how to make delicious pumpkin cake pops. We covered the key ingredients, from pumpkin puree to spices. I shared step-by-step instructions to guide you in baking and forming your cake pops. I also gave tips for perfect texture and creative decorations. Remember to explore variations and storage tips for long-lasting treats. Enjoy making these treats for any occasion, or just because! Happy baking!](https://tossedtastes.com/wp-content/uploads/2025/07/a8c7080e-92cd-45b9-b3a8-b86c1fdc4902.webp)
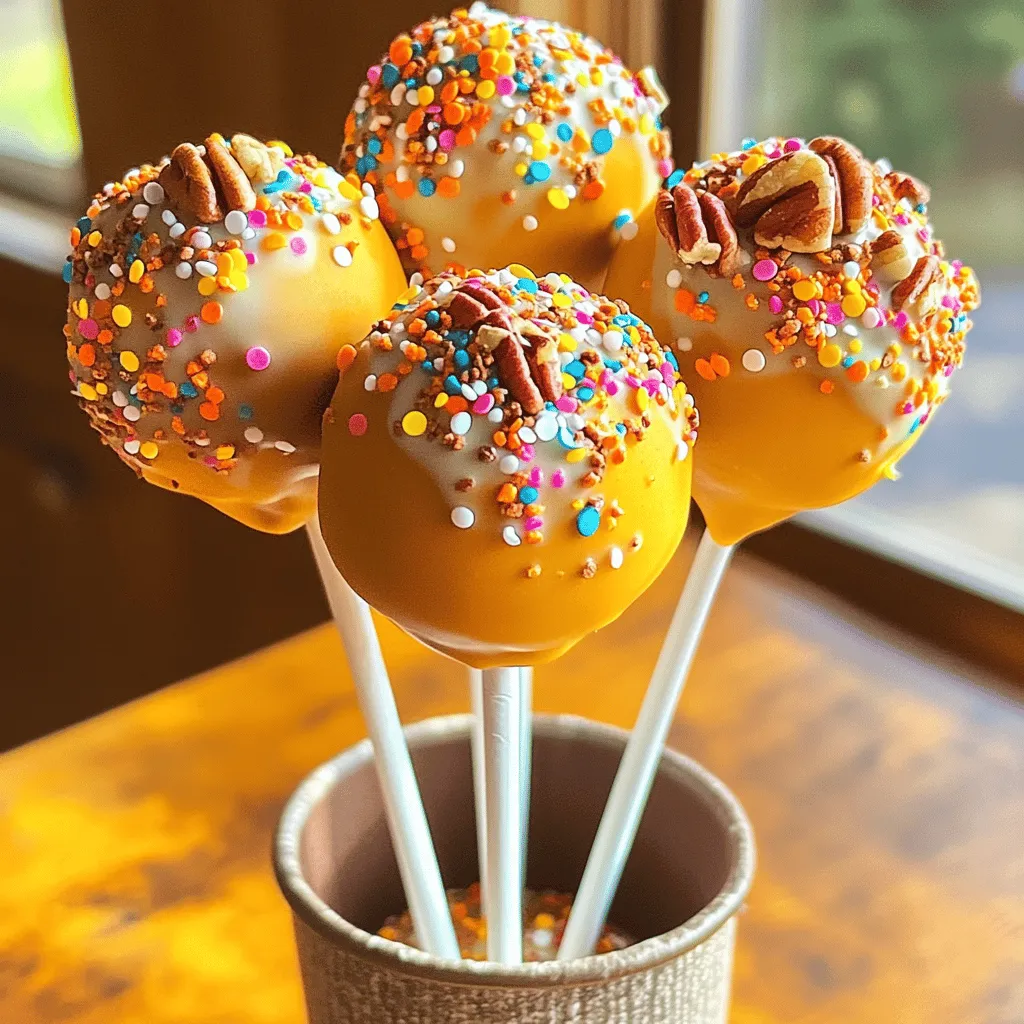
Fall is here, and it’s the perfect time for pumpkin treats! If you love pumpkin as much as I do, you’ll be excited to learn how to make Pumpkin Cake Pops. These sweet bites combine the softness of cake and the rich flavor of pumpkin, making them an irresistible treat for any gathering. Let’s dive into the simple ingredients and steps to create these delightful pops that will have everyone asking for more!
Ingredients
Main Ingredients
– 1 cup pumpkin puree
– 1 1/2 cups all-purpose flour
– 1 cup granulated sugar
– 1/2 cup brown sugar
Pumpkin puree adds moisture and rich flavor. It makes the cake soft and tasty. All-purpose flour gives the cake structure. The sugars create sweetness and help with browning.
Additional Ingredients
– 3 large eggs
– 8 oz cream cheese, softened
– 2 cups white chocolate chips
Eggs bind the mixture and add fluffiness. Cream cheese brings a creamy texture and tangy flavor. White chocolate chips coat the cake pops and add sweetness.
Spices and Seasoning
– 1 teaspoon ground cinnamon
– 1/2 teaspoon ground nutmeg
– 1/4 teaspoon ground cloves
Cinnamon gives warmth and depth. Nutmeg adds a hint of sweetness. Cloves provide a unique, aromatic touch. These spices make the cake pops taste like fall.
For the full recipe, check out the Full Recipe section.
Step-by-Step Instructions
Preparation Steps
1. Preheat your oven to 350°F (175°C). Prepare a 9×13 inch baking pan by greasing it well.
2. In a large bowl, mix together 1 cup of pumpkin puree, 1 cup of granulated sugar, 1/2 cup of brown sugar, 1/2 cup of vegetable oil, 3 large eggs, and 1 teaspoon of vanilla extract. Whisk until smooth.
3. In another bowl, whisk together 1 1/2 cups of all-purpose flour, 1 teaspoon of baking powder, 1/2 teaspoon of baking soda, 1 teaspoon of ground cinnamon, 1/2 teaspoon of ground nutmeg, 1/4 teaspoon of ground cloves, and 1/2 teaspoon of salt. This helps to mix the dry ingredients evenly.
Baking Process
1. Gradually add the dry mixture to the wet mixture. Stir gently until just combined. Do not overmix, as it can change the cake’s texture.
2. Pour the batter into your prepared baking pan. Spread it evenly with a spatula.
3. Bake for 30-35 minutes. Check with a toothpick; it should come out clean. Remove the cake from the oven and let it cool completely in the pan.
Forming Cake Pops
1. Once the cake is cool, crumble it into a large bowl using your hands or a fork. Aim for fine crumbs.
2. Mix in 8 oz of softened cream cheese. Blend until smooth with no lumps.
3. Take small portions and roll them into 1-inch balls. Place the balls on a parchment-lined baking sheet. Refrigerate for at least 1 hour to firm them up.
Coating and Decorating
1. Melt 2 cups of white chocolate chips in a microwave-safe bowl. Heat in 30-second bursts, stirring until smooth.
2. Dip the tip of each lollipop stick into the melted chocolate. Then, insert the stick into the center of each chilled cake ball. Next, dip each cake pop into the melted chocolate, letting excess chocolate drip off.
3. Before the chocolate hardens, sprinkle each pop with your choice of decorative sprinkles or crushed pecans.
4. Stand the cake pops upright in a foam block or a cup filled with rice. This helps the chocolate set completely.
Enjoy making these delightful pumpkin cake pops! For the full recipe, refer back to the earlier section.
Tips & Tricks
Perfecting the Cake Texture
To make the best pumpkin cake pops, you must avoid overmixing the batter. When you combine the wet and dry ingredients, mix gently. Overmixing will lead to a tough texture.
Cooling is also key. After baking, let the cake cool in the pan for about 10 minutes. Then, transfer it to a wire rack to cool completely. This helps maintain a moist texture.
Chocolate Dipping Techniques
For a smooth coat of chocolate on your cake pops, use melted chocolate chips. Melt them in a microwave-safe bowl, stirring every 30 seconds. This keeps the chocolate from burning.
When using lollipop sticks, dip the tip in melted chocolate before inserting it into the cake ball. This helps hold the stick in place. After dipping, let any extra chocolate drip off before setting it down.
Decoration Ideas
Get creative with your toppings! You can use colorful sprinkles, crushed pecans, or even edible glitter. These fun additions make each cake pop unique and festive.
For presentation, arrange the cake pops on a decorative platter. You can also wrap them in cellophane and tie with ribbon. This makes for great party favors and adds a special touch!
Variations
Flavor Variations
You can change the taste of pumpkin cake pops with spices. Try adding ginger or allspice for a warm kick. You can also use pumpkin spice mix if you want a quick fix. This mix adds a blend of flavors that make the cake pops even more festive.
Alternative Coatings
For the coating, you can choose dark chocolate or white chocolate. Dark chocolate gives a rich taste, while white chocolate adds sweetness. Both options look great on cake pops. You can also use candy melts, which come in many colors. They melt smoothly and are easy to work with.
Dietary Modifications
Want gluten-free cake pops? Use gluten-free flour! This keeps the texture light and fluffy. For vegan cake pops, substitute eggs with flaxseed meal. You can also use vegan cream cheese and dairy-free chocolate. These adaptations make the cake pops friendly for different diets.
For the complete recipe, check the [Full Recipe].
Storage Info
Storing Cake Pops
Store your pumpkin cake pops in an airtight container. This keeps them fresh and moist. They last up to one week at room temperature. If you want them to last longer, keep them in the fridge. In the fridge, they can stay good for up to two weeks. It’s best to keep them separated with parchment paper to avoid sticking.
Freezing Instructions
To freeze cake pops, first place them in a single layer on a baking sheet. Make sure they don’t touch each other. Freeze them for about two hours until they are solid. Then, wrap each pop in plastic wrap. You can also place them in a freezer-safe bag. They can last for up to three months in the freezer.
When you’re ready to eat them, take the cake pops out of the freezer. Let them thaw in the fridge for a few hours. This helps keep the texture nice. Avoid microwaving them, as that can change how they feel. Now you can enjoy this tasty fall treat any time!
FAQs
How do I make pumpkin cake pops without cream cheese?
You can use Greek yogurt or apple sauce as a substitute. Both add moisture and flavor. If you want a richer taste, try using buttercream frosting. Combine it with the cake crumbs just like you would with cream cheese. This will keep your cake pops moist and tasty.
Can I use a cake mix for pumpkin cake pops?
Yes, using a cake mix is a great shortcut. Choose a spice or vanilla cake mix for the best flavor. Add 1 cup of pumpkin puree to the mix. This will give your cake pops a nice pumpkin taste. Just follow the package instructions and then crumble the cake as you would with homemade.
What is the best way to serve pumpkin cake pops?
I love to arrange cake pops on a nice platter. You can also use a cake stand for a fun display. Wrap each pop in clear cellophane and tie with a ribbon for gifts. This makes them look special and keeps them fresh.
Where can I buy pumpkin cake pops?
You can find pumpkin cake pops at many local bakeries in fall. Check farmers’ markets too, as they often have seasonal treats. If you prefer online shopping, try dessert delivery services. Many websites sell homemade cake pops and ship them right to your door.
Can I make pumpkin cake pops ahead of time?
Yes, you can make them a few days in advance. Just store them in an airtight container in the fridge. If you want to keep them longer, freeze the cake pops before dipping them in chocolate. They will last for about a month. When ready, just thaw and dip as usual. For the full recipe, check above.
You now know how to make delicious pumpkin cake pops. We covered the key ingredients, from pumpkin puree to spices. I shared step-by-step instructions to guide you in baking and forming your cake pops. I also gave tips for perfect texture and creative decorations. Remember to explore variations and storage tips for long-lasting treats. Enjoy making these treats for any occasion, or just because! Happy baking!
![- 1 cup pumpkin puree - 1 1/2 cups all-purpose flour - 1 cup granulated sugar - 1/2 cup brown sugar Pumpkin puree adds moisture and rich flavor. It makes the cake soft and tasty. All-purpose flour gives the cake structure. The sugars create sweetness and help with browning. - 3 large eggs - 8 oz cream cheese, softened - 2 cups white chocolate chips Eggs bind the mixture and add fluffiness. Cream cheese brings a creamy texture and tangy flavor. White chocolate chips coat the cake pops and add sweetness. - 1 teaspoon ground cinnamon - 1/2 teaspoon ground nutmeg - 1/4 teaspoon ground cloves Cinnamon gives warmth and depth. Nutmeg adds a hint of sweetness. Cloves provide a unique, aromatic touch. These spices make the cake pops taste like fall. For the full recipe, check out the Full Recipe section. 1. Preheat your oven to 350°F (175°C). Prepare a 9x13 inch baking pan by greasing it well. 2. In a large bowl, mix together 1 cup of pumpkin puree, 1 cup of granulated sugar, 1/2 cup of brown sugar, 1/2 cup of vegetable oil, 3 large eggs, and 1 teaspoon of vanilla extract. Whisk until smooth. 3. In another bowl, whisk together 1 1/2 cups of all-purpose flour, 1 teaspoon of baking powder, 1/2 teaspoon of baking soda, 1 teaspoon of ground cinnamon, 1/2 teaspoon of ground nutmeg, 1/4 teaspoon of ground cloves, and 1/2 teaspoon of salt. This helps to mix the dry ingredients evenly. 1. Gradually add the dry mixture to the wet mixture. Stir gently until just combined. Do not overmix, as it can change the cake's texture. 2. Pour the batter into your prepared baking pan. Spread it evenly with a spatula. 3. Bake for 30-35 minutes. Check with a toothpick; it should come out clean. Remove the cake from the oven and let it cool completely in the pan. 1. Once the cake is cool, crumble it into a large bowl using your hands or a fork. Aim for fine crumbs. 2. Mix in 8 oz of softened cream cheese. Blend until smooth with no lumps. 3. Take small portions and roll them into 1-inch balls. Place the balls on a parchment-lined baking sheet. Refrigerate for at least 1 hour to firm them up. 1. Melt 2 cups of white chocolate chips in a microwave-safe bowl. Heat in 30-second bursts, stirring until smooth. 2. Dip the tip of each lollipop stick into the melted chocolate. Then, insert the stick into the center of each chilled cake ball. Next, dip each cake pop into the melted chocolate, letting excess chocolate drip off. 3. Before the chocolate hardens, sprinkle each pop with your choice of decorative sprinkles or crushed pecans. 4. Stand the cake pops upright in a foam block or a cup filled with rice. This helps the chocolate set completely. Enjoy making these delightful pumpkin cake pops! For the full recipe, refer back to the earlier section. To make the best pumpkin cake pops, you must avoid overmixing the batter. When you combine the wet and dry ingredients, mix gently. Overmixing will lead to a tough texture. Cooling is also key. After baking, let the cake cool in the pan for about 10 minutes. Then, transfer it to a wire rack to cool completely. This helps maintain a moist texture. For a smooth coat of chocolate on your cake pops, use melted chocolate chips. Melt them in a microwave-safe bowl, stirring every 30 seconds. This keeps the chocolate from burning. When using lollipop sticks, dip the tip in melted chocolate before inserting it into the cake ball. This helps hold the stick in place. After dipping, let any extra chocolate drip off before setting it down. Get creative with your toppings! You can use colorful sprinkles, crushed pecans, or even edible glitter. These fun additions make each cake pop unique and festive. For presentation, arrange the cake pops on a decorative platter. You can also wrap them in cellophane and tie with ribbon. This makes for great party favors and adds a special touch! {{image_4}} You can change the taste of pumpkin cake pops with spices. Try adding ginger or allspice for a warm kick. You can also use pumpkin spice mix if you want a quick fix. This mix adds a blend of flavors that make the cake pops even more festive. For the coating, you can choose dark chocolate or white chocolate. Dark chocolate gives a rich taste, while white chocolate adds sweetness. Both options look great on cake pops. You can also use candy melts, which come in many colors. They melt smoothly and are easy to work with. Want gluten-free cake pops? Use gluten-free flour! This keeps the texture light and fluffy. For vegan cake pops, substitute eggs with flaxseed meal. You can also use vegan cream cheese and dairy-free chocolate. These adaptations make the cake pops friendly for different diets. For the complete recipe, check the [Full Recipe]. Store your pumpkin cake pops in an airtight container. This keeps them fresh and moist. They last up to one week at room temperature. If you want them to last longer, keep them in the fridge. In the fridge, they can stay good for up to two weeks. It's best to keep them separated with parchment paper to avoid sticking. To freeze cake pops, first place them in a single layer on a baking sheet. Make sure they don't touch each other. Freeze them for about two hours until they are solid. Then, wrap each pop in plastic wrap. You can also place them in a freezer-safe bag. They can last for up to three months in the freezer. When you're ready to eat them, take the cake pops out of the freezer. Let them thaw in the fridge for a few hours. This helps keep the texture nice. Avoid microwaving them, as that can change how they feel. Now you can enjoy this tasty fall treat any time! You can use Greek yogurt or apple sauce as a substitute. Both add moisture and flavor. If you want a richer taste, try using buttercream frosting. Combine it with the cake crumbs just like you would with cream cheese. This will keep your cake pops moist and tasty. Yes, using a cake mix is a great shortcut. Choose a spice or vanilla cake mix for the best flavor. Add 1 cup of pumpkin puree to the mix. This will give your cake pops a nice pumpkin taste. Just follow the package instructions and then crumble the cake as you would with homemade. I love to arrange cake pops on a nice platter. You can also use a cake stand for a fun display. Wrap each pop in clear cellophane and tie with a ribbon for gifts. This makes them look special and keeps them fresh. You can find pumpkin cake pops at many local bakeries in fall. Check farmers' markets too, as they often have seasonal treats. If you prefer online shopping, try dessert delivery services. Many websites sell homemade cake pops and ship them right to your door. Yes, you can make them a few days in advance. Just store them in an airtight container in the fridge. If you want to keep them longer, freeze the cake pops before dipping them in chocolate. They will last for about a month. When ready, just thaw and dip as usual. For the full recipe, check above. You now know how to make delicious pumpkin cake pops. We covered the key ingredients, from pumpkin puree to spices. I shared step-by-step instructions to guide you in baking and forming your cake pops. I also gave tips for perfect texture and creative decorations. Remember to explore variations and storage tips for long-lasting treats. Enjoy making these treats for any occasion, or just because! Happy baking!](https://tossedtastes.com/wp-content/uploads/2025/07/a8c7080e-92cd-45b9-b3a8-b86c1fdc4902-300x300.webp)