
Imagine biting into a warm, fluffy roll, bursting with the rich flavors of garlic and fresh herbs. These Herb and Garlic Swirl Rolls are the perfect snack for any occasion. I’ll guide you through creating this delicious treat step by step. Whether you’re a baking novice or a pro, you’ll find helpful tips and tricks to ensure your rolls are perfect every time. Let’s get started on this flavorful journey!
Ingredients
To make delicious Herb and Garlic Swirl Rolls, you need the right ingredients. Here’s what you’ll need:
– 4 cups all-purpose flour
– 1 packet (2 ¼ teaspoons) instant yeast
– 1 tablespoon granulated sugar
– 1 teaspoon fine sea salt
– 1 cup warm water (about 110°F)
– ¼ cup extra virgin olive oil
– 4 cloves garlic, finely minced
– 2 tablespoons fresh parsley, finely chopped
– 2 tablespoons fresh rosemary, finely chopped
– 1 tablespoon fresh thyme, finely chopped
– ½ cup unsalted butter, softened to room temperature
– 1 teaspoon garlic powder
– Freshly cracked black pepper, to taste
These ingredients create a soft and flavorful roll. The fresh herbs add a burst of taste. Garlic gives a warm aroma that fills your kitchen. The butter makes the filling creamy. Using extra virgin olive oil boosts flavor and health.
When you gather these items, feel free to adjust based on your taste. If you like more garlic, add an extra clove. You can mix in other herbs too. This recipe is flexible and fun to make!
Step-by-Step Instructions
Preparing the Dough
Activate the Yeast
Start by mixing warm water, sugar, and instant yeast in a bowl. Wait five minutes until it bubbles. This shows the yeast is alive and ready.
Combine Wet and Dry Ingredients
Add olive oil and salt to the yeast mix. Slowly mix in the flour. Stir until a rough dough forms.
Kneading the Dough
Transfer the dough to a floured surface. Knead the dough for eight to ten minutes. You want it smooth and elastic. This helps the rolls rise well.
Letting the Dough Rise
First Rise Instructions
Place the kneaded dough in a greased bowl. Cover it with a clean towel. Let it rise in a warm spot for about one hour. The dough should double in size.
Preparing the Herb Filling
Mixing the Ingredients for the Filling
In a bowl, blend softened butter, minced garlic, parsley, rosemary, thyme, garlic powder, and black pepper. Mix until it’s creamy and well combined. This filling is key for flavor.
Tips for Achieving Creamy Texture
Ensure your butter is at room temperature. This helps mix well with herbs and garlic. It will spread easily on the dough.
Rolling and Shaping the Rolls
Rolling Out the Dough
After the dough has risen, punch it down gently. Roll it out on a floured surface into a rectangle. Aim for about 1/4 inch thickness.
Spreading the Filling Evenly
Spread the herb filling on the dough. Cover all edges to make sure every bite is tasty. This is where the magic begins!
Cutting the Rolls
Starting from one long side, roll the dough tightly into a log. Pinch the seam and ends to seal. Use a sharp knife to cut the log into about 12 equal sections.
Final Rising and Baking
Second Rise Instructions
Place the cut rolls in a greased baking dish with cut sides up. Cover them again with a towel. Allow them to rise for 30 to 40 minutes. They should puff up nicely.
Baking Instructions and Temperature
Preheat your oven to 375°F (190°C). Bake the rolls for 20 to 25 minutes. They should turn golden brown on top. Let them cool slightly on a wire rack before serving warm.
Tips & Tricks
Perfecting the Texture
Ensuring Proper Dough Consistency
The dough should feel soft yet hold its shape. If it’s too sticky, add a bit more flour. If it feels dry, add a splash of warm water. Your goal is a smooth, elastic dough that springs back when poked.
Kneading Techniques
Kneading is key! Use the heel of your hand to push the dough away. Fold it back, give it a turn, and repeat. Knead for about 8-10 minutes. This helps develop gluten, giving your rolls that perfect chewy texture.
Flavor Enhancements
Additional Herbs and Seasonings
Get creative! You can add herbs like basil or dill for a twist. A pinch of red pepper flakes can give your rolls a nice kick. Each herb adds a layer of flavor that makes every bite special.
Pairing Suggestions for Extra Flavor
Try pairing these rolls with a rich olive oil dip or a herb-infused butter. A side of marinara also works well. These dips complement the garlic and herbs, making your snack even more delicious.
Presentation Tips
Serving Suggestions and Garnishing
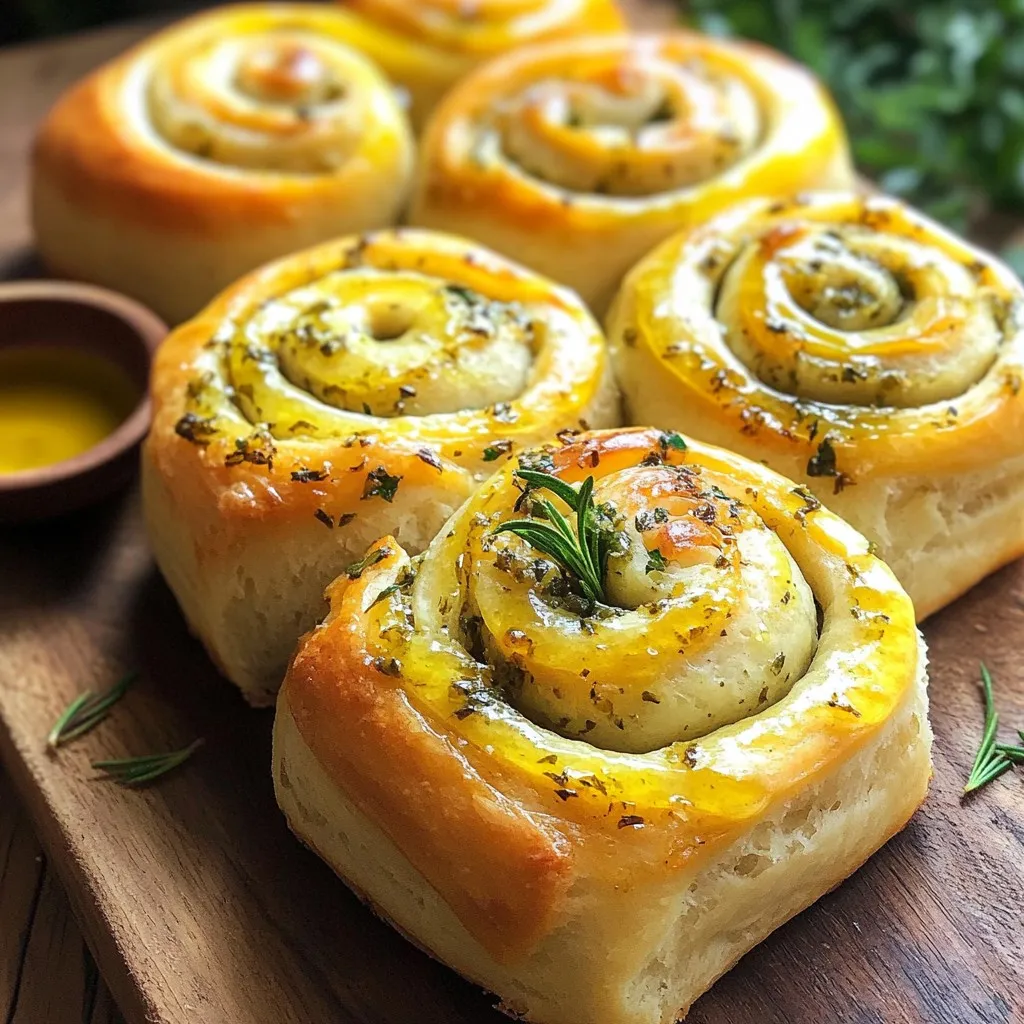
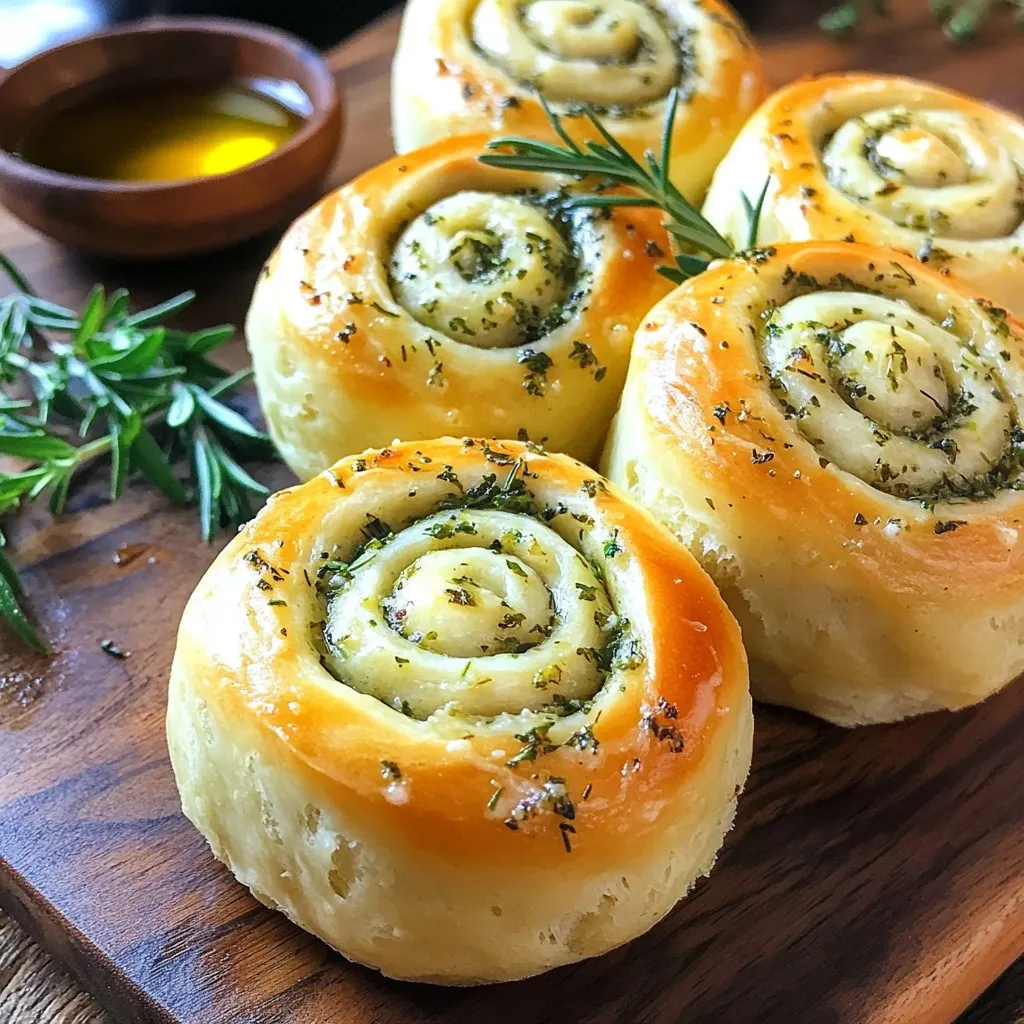
Serve the rolls warm on a rustic wooden board. Scatter some fresh herbs on top for color. You can even add a few garlic cloves roasted until soft for a charming touch.
Creating an Inviting Serving Setup
Add a small bowl of extra virgin olive oil for dipping. This not only looks nice but also invites guests to dig in. A few slices of cheese or olives on the side can make your setup even more appealing.
Variations
Ingredient Substitutions
Gluten-Free Options
If you need gluten-free rolls, you can use gluten-free all-purpose flour. Make sure it has xanthan gum. This helps the dough hold together. Follow the same steps in the recipe. The rolls may have a different texture but will still taste great.
Vegan Alternatives
To make these rolls vegan, replace butter with a plant-based spread. Use a non-dairy milk instead of the warm water. You can also skip the egg if you see it in other recipes. This keeps the rolls soft and tasty without any animal products.
Flavor Infusions
Cheese-Stuffed Swirl Rolls
Add a cheesy twist by mixing shredded cheese into the filling. Use mozzarella or cheddar for a gooey texture. Spread the cheese along with the garlic herb filling before rolling. This extra step gives you a rich and savory flavor.
Sun-Dried Tomato Additions
For a Mediterranean vibe, chop sun-dried tomatoes and mix them into the herb filling. They add a sweet and tangy taste to the rolls. Spread them evenly with the garlic mix. This can elevate the flavor and make them even more delicious.
Seasonal Variations
Using Seasonal Herbs
In spring, use fresh basil or dill. In fall, try sage or oregano. These seasonal herbs add unique flavors to the rolls. Simply replace the parsley, rosemary, or thyme in the filling. This keeps your rolls fresh and exciting all year.
Holiday-Themed Twists
During the holidays, you can add festive spices like nutmeg or cinnamon. These spices can blend well with the garlic and herbs. They give a warm and cozy feeling. You can shape the rolls into festive forms, like wreaths, for special occasions.
Storage Info
Storing Leftover Rolls
– Best Practices for Refrigeration
To keep your herb and garlic swirl rolls fresh, wrap them in plastic wrap. Place them in an airtight container. This method helps retain moisture while keeping them flavorful. Store the rolls in the fridge for up to 3 days.
– Freezing Instructions for Long-Term Storage
For longer storage, freeze the rolls. First, let them cool completely. Then, wrap each roll tightly in plastic wrap. Place the wrapped rolls in a freezer-safe bag or container. They will last for about 2 months in the freezer. To enjoy later, thaw them in the fridge overnight before reheating.
Reheating Guidelines
– Optimal Methods to Restore Freshness
To reheat the rolls, preheat your oven to 350°F (175°C). Unwrap the rolls and place them on a baking sheet. Bake for about 10-15 minutes. This restores their warm, soft texture. You can also microwave a single roll for 15-20 seconds, but the oven method keeps them crispier.
– Tips for Maintaining Flavor and Texture
To keep the flavor strong, brush the rolls with a bit of olive oil or melted butter before reheating. This adds richness and enhances the taste. Serve them warm for the best experience.
FAQs
How do I know when the dough has risen enough?
You know the dough has risen enough when it doubles in size. After one hour, check the dough. It should feel puffy and airy when you touch it. If it springs back slowly, it is ready to use.
Can I use active dry yeast instead of instant yeast?
Yes, you can use active dry yeast. Just remember to activate it first. Mix it with warm water and sugar. Let it sit for about 5-10 minutes until frothy. Then, mix it into your dough as you would with instant yeast.
What can I serve with herb and garlic swirl rolls?
These rolls pair well with many dishes. Serve them with a bowl of extra virgin olive oil for dipping. They also go great with soups, salads, or as a side for pasta. Try them with your favorite herb butter for extra flavor.
How long do these rolls stay fresh?
Herb and garlic swirl rolls stay fresh for about two days at room temperature. Store them in a paper bag to keep them soft. For longer storage, freeze the rolls in an airtight container for up to three months.
Can I make the dough in advance?
Yes, you can make the dough in advance. After kneading, let it rise for the first time. Then, punch it down and wrap it tightly. Place it in the fridge for up to 24 hours. When ready, let it come to room temperature before rolling out.
You now have everything you need to make delicious herb and garlic swirl rolls. We covered the key ingredients, step-by-step instructions, and tips for perfecting the rolls. You learned about variations and how to store and reheat them. Try these rolls for your next meal or gathering. They will impress everyone with their taste and texture. So, grab your ingredients and start baking. Enjoy the process and the wonderful aroma that fills your kitchen!
