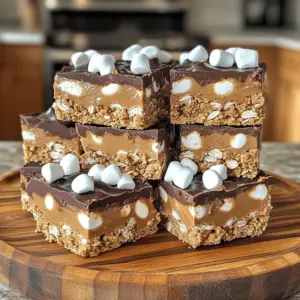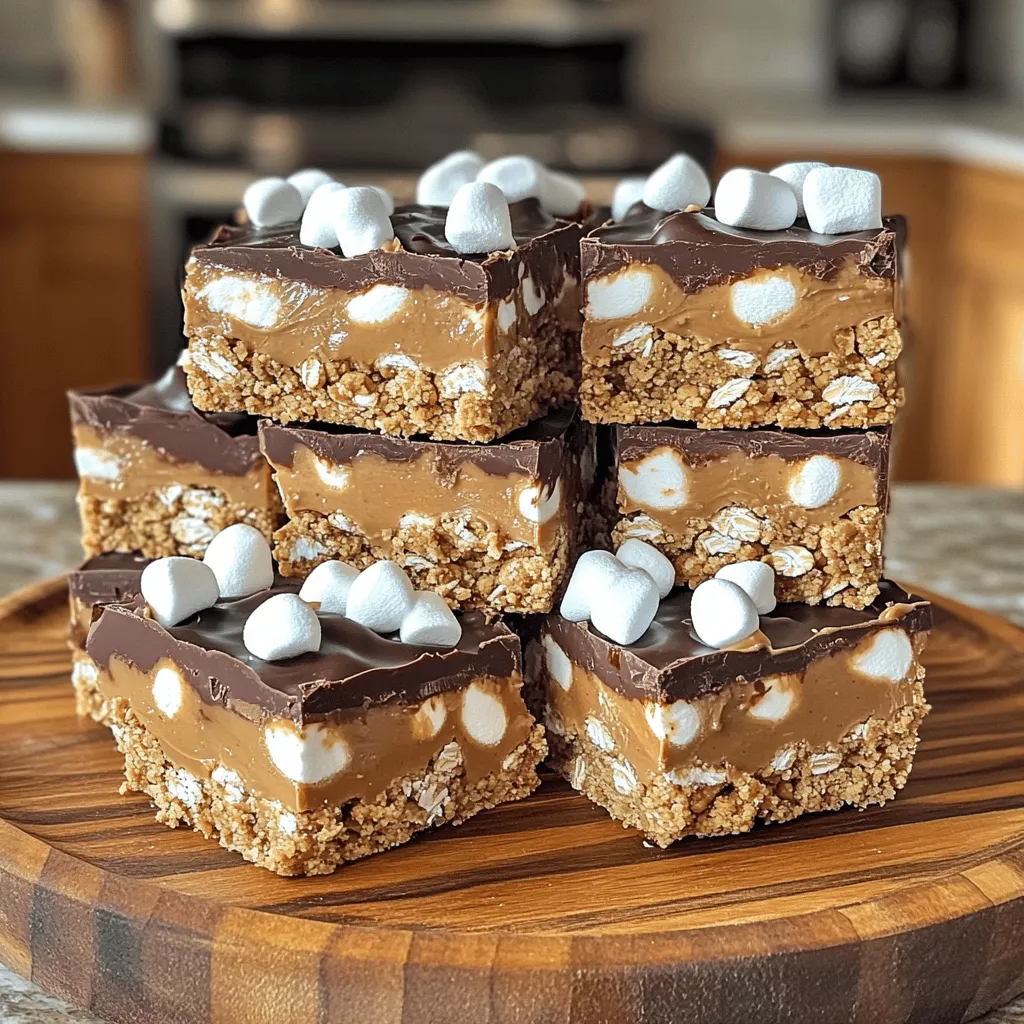
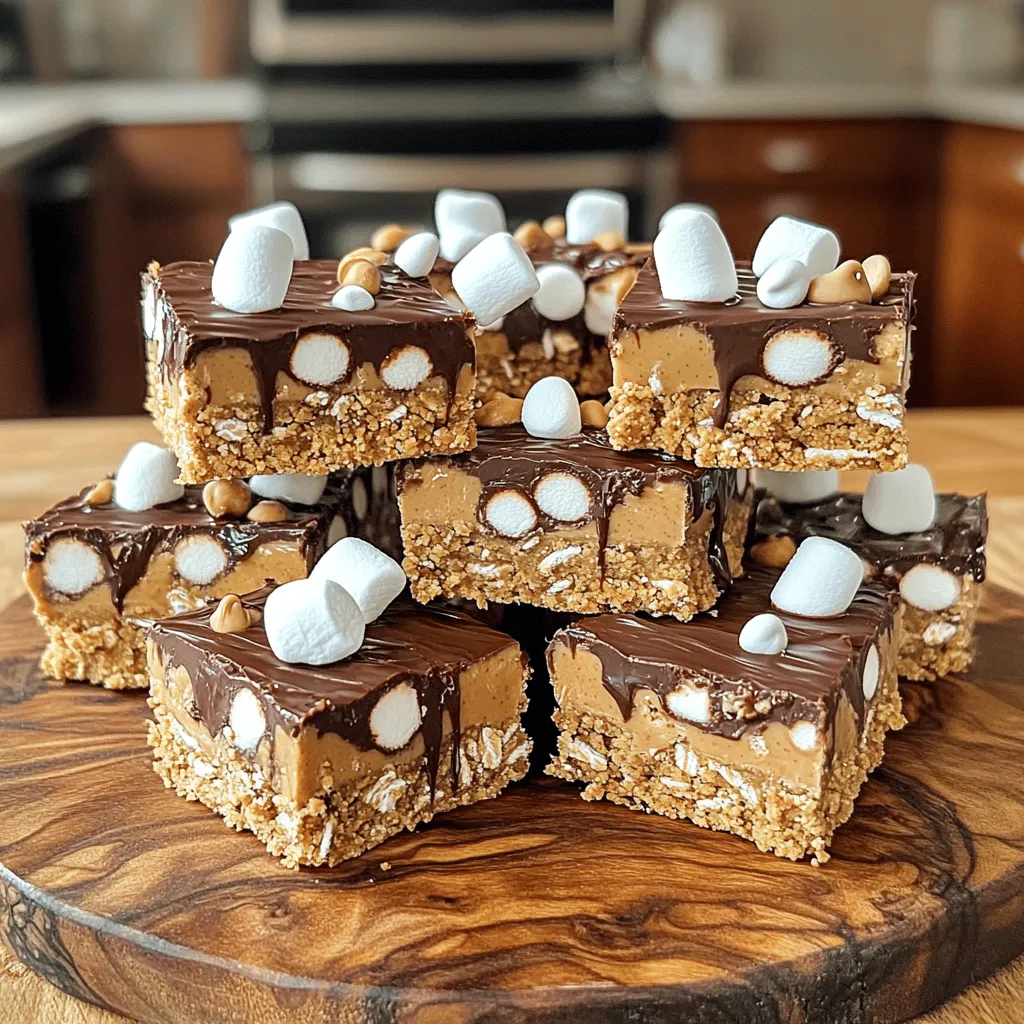
Are you ready to create a sweet treat that requires no baking? With my No Bake S’mores Peanut Butter Bars, you can enjoy all the classic flavors of s’mores with a twist of peanut butter. This simple recipe is perfect for kids and adults alike, and you’ll love how easy it is to whip up in just a few steps. Let’s dive into the ingredients and get started on this delightful dessert!
Ingredients
Main Ingredients
To make these No Bake S’mores Peanut Butter Bars, you’ll need:
– 1 cup graham cracker crumbs
– 1 cup rolled oats
– 1/2 cup creamy peanut butter
– 1/2 cup honey or pure maple syrup
– 1/2 cup mini chocolate chips
– 1/2 cup mini marshmallows
– 1/4 cup unsweetened cocoa powder
– 1/4 teaspoon salt
– 1 teaspoon vanilla extract
Each of these ingredients brings a unique flavor and texture to the bars. The graham cracker crumbs give a nice base, while the oats add a hearty bite. Peanut butter binds everything together and gives a rich taste. Honey or maple syrup sweetens the bars naturally, and chocolate chips and marshmallows add that classic s’mores flair.
Optional Ingredients
You can also add fun extras to switch things up. Some ideas include:
– Chopped nuts for crunch
– Dried fruit for a chewy texture
– Coconut flakes for a tropical twist
These optional ingredients can enhance the flavor and make the bars your own.
Equipment Needed
To whip up these tasty bars, you’ll need a few basic kitchen tools:
– Large mixing bowl
– Smaller mixing bowl
– Spatula or wooden spoon
– 8×8 inch baking pan
– Parchment paper
These items make it easy to mix, pack, and cut the bars. Make sure to have everything ready before you start!
Step-by-Step Instructions
Preparing the Dry Ingredients
Start by gathering your dry ingredients. In a large bowl, mix together:
– 1 cup graham cracker crumbs
– 1 cup rolled oats
– 1/4 cup unsweetened cocoa powder
– 1/4 teaspoon salt
Stir these together well. Make sure there are no clumps. An even mix helps the bars hold together.
Mixing the Wet Ingredients
Next, you’ll want to prepare the wet ingredients. In another bowl, combine:
– 1/2 cup creamy peanut butter
– 1/2 cup honey or pure maple syrup
– 1 teaspoon vanilla extract
Blend these until smooth. Aim for a homogenous mixture without lumps. This creates a tasty base for your bars.
Combining and Packing the Mixture
Now, pour the wet mix into the dry ingredients. Use a spatula or wooden spoon to mix. Keep stirring until a thick dough forms. Make sure there are no dry patches left. Then, gently fold in:
– 1/2 cup mini chocolate chips
– 1/2 cup mini marshmallows
These add sweetness and fun texture to your bars.
Chilling and Cutting the Bars
Prepare an 8×8 inch baking pan by lining it with parchment paper. This helps with easy removal later. Transfer the mixture into the pan. Press it down firmly and smooth the top.
Now, place the pan in your fridge for at least 2 hours. This chilling time helps the bars set up well. When ready, remove the bars using the parchment overhang. Cut them into squares or bars. Enjoy your sweet treat!
Tips & Tricks
Perfecting the Texture
To get the best texture, use creamy peanut butter. This helps bind the bars well. If you want a nutty crunch, try crunchy peanut butter. Always mix dry ingredients until smooth. This avoids clumps that can ruin your bars. Press the mixture tightly in the pan. It will hold together better once chilled.
Serving Suggestions
Cut your bars into squares or rectangles. They make great snacks for kids and adults. Pair them with a glass of cold milk or hot cocoa. For a fun twist, serve them with fresh fruit. Strawberries or bananas add a fresh taste. You can also add a scoop of ice cream for a treat!
Presentation Ideas
Presentation matters, even for no-bake bars. Place the bars on a rustic wooden platter. Drizzle melted chocolate over the top for flair. Sprinkle extra mini marshmallows on top for fun. You can even add some crushed graham crackers for crunch. This adds color and texture to your dessert table!
Variations
Add-ins and Substitutions
You can change up the bars easily. Try adding nuts like almonds or walnuts. Dried fruits like cranberries or raisins work too. Instead of honey, use agave syrup for a different sweetness. You can also switch mini chocolate chips for dark chocolate chunks. If you want a crunch, toss in some rice cereal. This will give the bars a fun texture.
Different Flavor Combinations
Feel free to experiment with flavors! Try using almond butter instead of peanut butter for a nutty twist. You can also add a bit of cinnamon for warmth. For a tropical flair, mix in some shredded coconut. Want a minty fresh taste? Add a few drops of mint extract. The options are endless!
Gluten-Free and Vegan Options
To make these bars gluten-free, use certified gluten-free graham cracker crumbs and oats. For a vegan version, swap honey for maple syrup. Ensure all ingredients, like chocolate chips and graham crackers, are vegan-friendly. This way, everyone can enjoy these tasty treats without worry. Adjust the recipe to fit your needs and enjoy!
Storage Info
Best Storage Practices
To keep your No Bake S’mores Peanut Butter Bars fresh, store them in an airtight container. You can layer the bars with parchment paper to prevent sticking. Place the container in the fridge for best results. This keeps the bars cool and helps maintain their shape.
Freezing Instructions
You can also freeze these bars for long-term storage. Wrap each bar in plastic wrap, then place them in a freezer-safe bag. Make sure to remove as much air as possible. The bars can last up to three months in the freezer. When ready to enjoy, simply thaw them in the fridge for a few hours.
Shelf Life
When stored properly in the fridge, the bars last about one week. If you freeze them, they stay good for about three months. Make sure to check for any signs of spoilage before eating. Enjoy your tasty treats!
FAQs
Can I make these bars ahead of time?
Yes, you can make these bars ahead of time. They store well in the fridge. I often make them a day before a party. This way, they are ready to serve. Just keep them in an airtight container.
How do I get the bars to stay together?
To help the bars stay together, press the mixture firmly in the pan. Use your hands or a spatula to pack it tightly. This step is key to avoid crumbling. Chilling them in the fridge for two hours also helps them firm up nicely.
Can I use other nut butters instead of peanut butter?
Yes, you can switch peanut butter for other nut butters. Almond butter or cashew butter work well too. Just make sure the nut butter is smooth. The taste will change a bit, but it will still be yummy!
What is the best way to cut these bars?
To cut the bars, lift them out of the pan using the parchment paper. Use a sharp knife for clean cuts. If the bars are too soft, let them chill longer. This will make cutting easier and cleaner.
You learned about the key ingredients and tools needed to make delicious bars. The step-by-step guide showed how to mix and prepare your bars, ensuring great texture. We shared tips for serving and presenting them well. You can also explore fun variations and important storage tips.
Making these bars can be simple and fun. With the right methods, you’ll create tasty treats for everyone to enjoy. Happy baking!