Craving something sweet and easy? Look no further! My No-Bake Oreo Cheesecake Bars are here to satisfy your dessert dreams. With just a few simple ingredients, you can whip up a scrumptious treat that no one can resist. Perfect for gatherings or a cozy night in, these bars are creamy, crunchy, and oh-so-delicious. Ready to impress your taste buds? Let’s dive into this simple recipe together!
Ingredients
Required Ingredients for No-Bake Oreo Cheesecake Bars
To make these tasty bars, you need:
– 24 Oreo cookies, finely crushed
– 4 tablespoons unsalted butter, melted
– 16 oz cream cheese, brought to room temperature
– 1 cup powdered sugar, sifted
– 1 teaspoon pure vanilla extract
– 1 cup heavy whipping cream, chilled
– 12 Oreo cookies, roughly chopped for the filling
– Additional Oreo cookies, crushed, for garnish
These ingredients create a rich, creamy treat that everyone will love.
Optional Decoration Ingredients
You can add extra flair with these optional items:
– Mini Oreo cookies for garnish
– Chocolate shavings for a fancy touch
– Whipped cream for added creaminess
These additions can elevate the look and taste of your cheesecake bars.
Ingredient Substitutions
If you need alternatives, consider these options:
– Use gluten-free cookies for a gluten-free version.
– Swap cream cheese with Greek yogurt for a lighter option.
– Try coconut cream instead of heavy whipping cream for a dairy-free version.
These substitutions allow you to customize your bars to fit your dietary needs while still keeping them delicious.
Step-by-Step Instructions
Preparing the Oreo Crust
To start, gather your ingredients. You need 24 Oreo cookies and 4 tablespoons of melted unsalted butter. In a medium bowl, crush the Oreo cookies finely. You want them to look like sand. Next, mix the crushed cookies with the melted butter. Stir well until it combines. The mixture should feel damp. Press this mixture firmly into the bottom of a 9×9 inch baking dish. Make sure it is even and compact. Place the dish in the fridge to chill while you make the filling.
Making the Cream Cheese Filling
Now, take 16 ounces of cream cheese and let it sit at room temperature. In a large mixing bowl, beat the cream cheese with an electric mixer. Whip until it’s light and fluffy. This will take about 2-3 minutes. Gradually add 1 cup of sifted powdered sugar and 1 teaspoon of pure vanilla extract. Keep mixing until the filling is smooth and creamy. Make sure there are no lumps left in the mixture.
Whipping the Heavy Cream
In a separate bowl, pour 1 cup of chilled heavy whipping cream. Use a handheld mixer to whip it until you see stiff peaks. This should only take about 3-4 minutes. Once it’s ready, gently fold the whipped cream into the cream cheese mixture. Use a spatula and be careful not to deflate the whipped cream too much. This step makes the filling light and airy.
Incorporating Oreos into the Filling
Next, take 12 roughly chopped Oreo cookies. Add these to the cream cheese and whipped cream mixture. Gently fold them in with a spatula. You want to see the Oreo pieces spread throughout the filling but not crushed. This adds texture and flavor to the cheesecake bars.
Setting and Serving the Cheesecake Bars
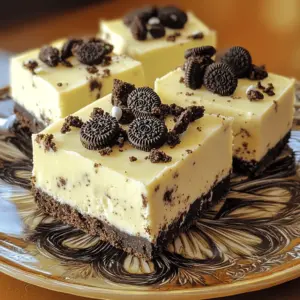
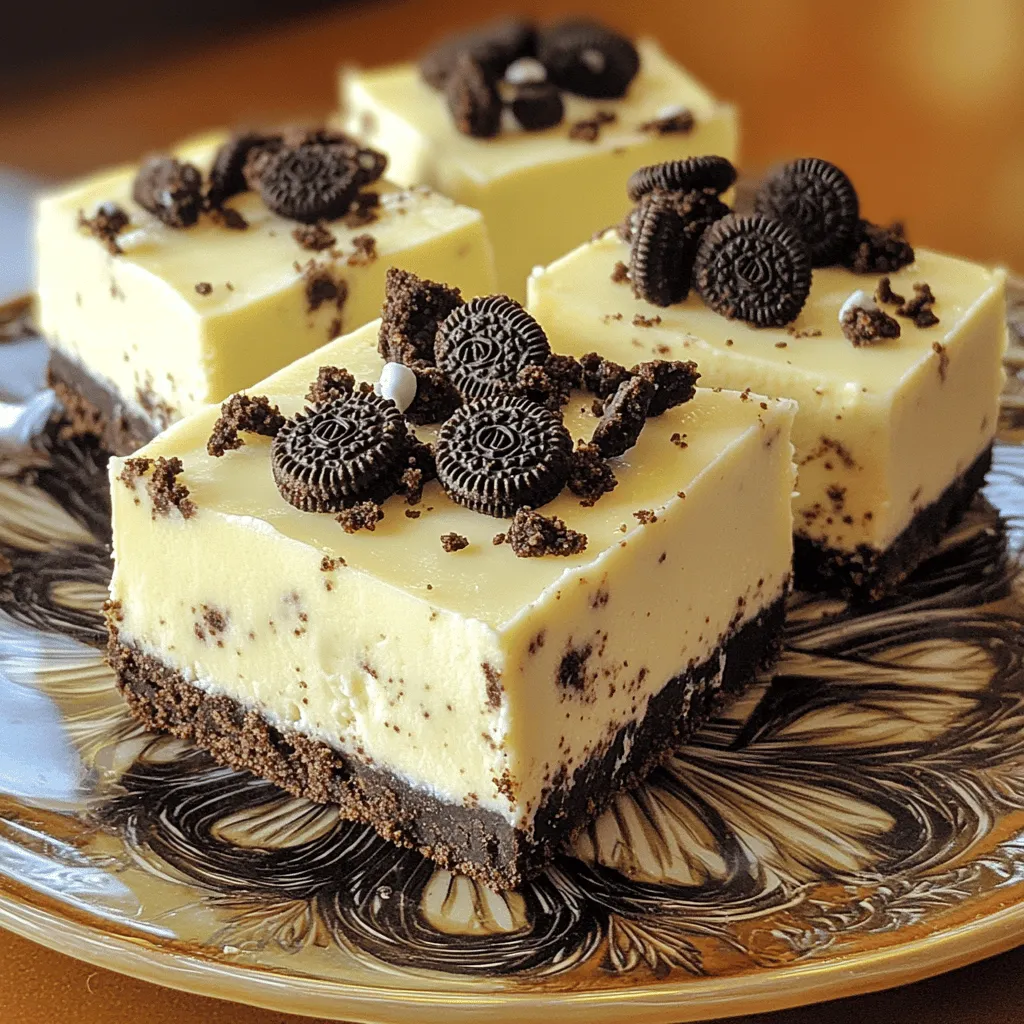
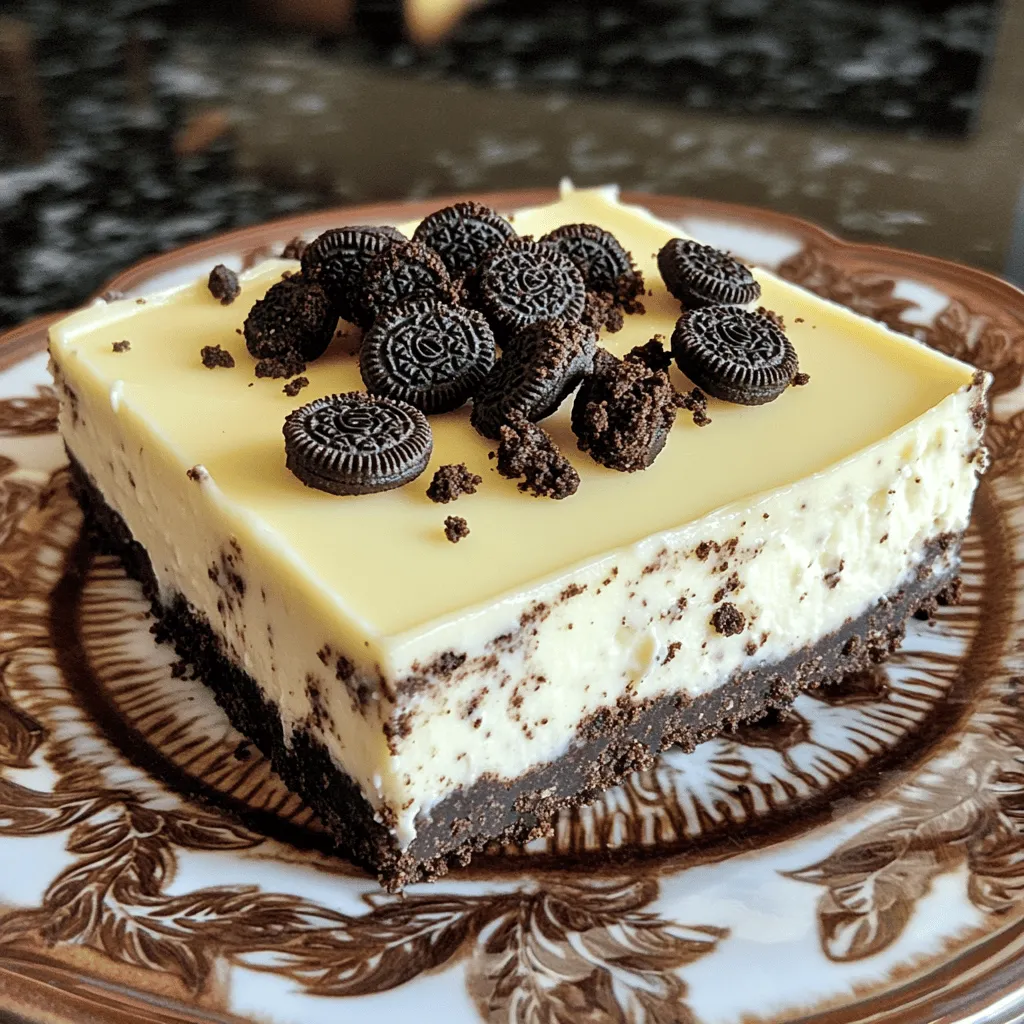
Now it’s time to combine everything. Pour the creamy cheesecake filling over the chilled crust in your baking dish. Use a spatula to spread it evenly. Make sure it’s smooth on top. Cover the baking dish tightly with plastic wrap. Refrigerate for at least 4 hours, or overnight if you can wait. Once it’s set, slice into bars. For serving, sprinkle the tops with crushed Oreo cookies for extra crunch. Enjoy your delicious no-bake Oreo cheesecake bars!
Tips & Tricks
Tips for Perfecting the Crust
To make the best crust, use fresh Oreo cookies. Crush them finely for a smooth base. Mix the crushed cookies with melted butter until it looks like wet sand. Press it tightly into your baking dish. This helps it hold together well. Refrigerate the crust for at least 30 minutes. This makes it firm and ready for the filling.
How to Achieve the Right Creamy Texture
For a creamy filling, start with room temperature cream cheese. This helps it blend smoothly. Use an electric mixer to whip the cream cheese until fluffy. Gradually add sifted powdered sugar and vanilla extract. Mix until it is smooth with no lumps. When whipping the heavy cream, stop when stiff peaks form. Fold it gently into the cream cheese mix. This keeps the filling light and airy.
Serving and Presentation Tips
Cut the cheesecake into neat squares for serving. For a nice touch, place each square on a decorative plate. You can garnish with mini Oreo cookies or chocolate shavings. This adds a tasty and pretty detail. Consider serving with fresh berries or a drizzle of chocolate sauce for extra flair.
Variations
Different Flavor Options (e.g., Mint, Peanut Butter)
You can easily change the flavor of your Oreo cheesecake bars. For mint lovers, add 1 teaspoon of mint extract to the cream cheese mix. This gives a fresh taste that pairs well with Oreos. If you like peanut butter, mix in 1/2 cup of creamy peanut butter. This adds richness and a nutty flavor that is hard to resist.
Adding Additional Toppings or Layers
Toppings can take your cheesecake bars to the next level. Consider adding a layer of chocolate ganache on top. Just melt 1 cup of chocolate chips with 1/2 cup of heavy cream. Pour it over the cheesecake layer before chilling. You can also sprinkle crushed nuts, or drizzle caramel sauce for added texture and taste.
Gluten-Free or Dairy-Free Adaptations
Making these bars gluten-free is simple! Use gluten-free Oreo cookies for the crust and filling. For a dairy-free version, swap the cream cheese with a dairy-free cream cheese alternative. Also, use coconut cream instead of heavy cream. These swaps let everyone enjoy this treat without worry.
Storage Information
Best Practices for Storing Leftovers
To keep your No-Bake Oreo Cheesecake Bars fresh, you need to store them right. First, let the bars chill completely in the fridge. Once they are firm, cover them tightly with plastic wrap or foil. This will help prevent them from drying out and absorbing other smells in the fridge. If you have a container with a lid, that works great too!
Freezing Instructions for Cheesecake Bars
If you want to save some for later, freezing is a great option. Cut the cheesecake bars into squares, but do not add toppings yet. Place each square on a baking sheet lined with parchment paper. Freeze them for about two hours until firm. Then, transfer the squares to a freezer-safe container or a heavy-duty freezer bag. Make sure to label them with the date. They will stay good for up to three months in the freezer. When ready to eat, let them thaw in the fridge overnight.
Shelf Life of No-Bake Oreo Cheesecake Bars
These cheesecake bars can last in the fridge for about five to seven days. After that, they may start to lose their taste and texture. If you freeze them, remember to enjoy them within three months for the best flavor. Always check for any signs of spoilage before eating. Enjoy your delicious treats!
FAQs
How long do No-Bake Oreo Cheesecake Bars need to set?
These cheesecake bars need to set for at least 4 hours. For the best taste, chill them overnight. This allows the filling to firm up and makes cutting easier.
Can I use other cookies for the crust?
Yes, you can use other cookies. Try chocolate sandwich cookies or graham crackers. Just make sure they are finely crushed, so they hold together well.
What is the best way to cut the cheesecake bars?
To cut the bars, use a sharp knife. Dip the knife in hot water and wipe it dry before each cut. This keeps the edges clean and neat.
Can I make these cheesecake bars ahead of time?
Absolutely! You can make them a day or two in advance. Just keep them covered in the fridge until you are ready to serve. This makes them great for parties or gatherings.
You now know how to make No-Bake Oreo Cheesecake Bars from start to finish. We covered all the necessary ingredients, plus some fun variations. You learned tips for the best crust and creamy filling. I shared how to store them and answered common questions.
These bars are not just easy to make; they are tasty and fun. Enjoy making them for any occasion. You’ll impress family and friends with your dessert skills!