Are you ready for a delicious treat that’s easy to make and perfect for any occasion? Today, I’ll show you how to whip up No-Bake Oreo Cheesecake Bars that everyone will love. These creamy, dreamy bars are packed with cookie flavor and require no oven time. Stick around to discover simple steps, tips, and even fun variations that will make you the star at your next gathering!
Ingredients
List of Ingredients
– 24 Oreo cookies, finely crushed
– 1/4 cup unsalted butter, melted
– 16 oz cream cheese, at room temperature
– 1/2 cup powdered sugar
– 1 teaspoon pure vanilla extract
– 1 cup heavy whipping cream
– 8 Oreo cookies, roughly chopped (for filling)
– Extra Oreo cookies, crushed, for garnish
Key Ingredient Descriptions
Oreo cookies give this dessert its classic flavor and crunch. They form both the crust and add texture inside. Cream cheese creates the rich and creamy filling. Make sure it is at room temperature for easy mixing. Powdered sugar sweetens the filling without leaving graininess. Heavy whipping cream provides a light and fluffy texture. It must be whipped to stiff peaks for the best results. Vanilla extract adds a warm, inviting flavor that blends well with the other ingredients.
Suggested Ingredient Substitutions
If you want a different crust, use chocolate graham crackers instead of Oreos. For a lighter filling, try Neufchâtel cheese instead of cream cheese. This will cut some fat but keep the taste. You can also swap the heavy whipping cream for coconut cream for a dairy-free option. Add a splash of almond or mint extract if you want a twist on the classic flavor.
Step-by-Step Instructions
Preparation of the Crust
To start, you will need to make the crust. In a medium bowl, mix 24 finely crushed Oreo cookies with 1/4 cup of melted unsalted butter. Stir until the crumbs are all wet, like wet sand. Next, take this mix and press it into a 9×9-inch baking dish. Use the back of a measuring cup or your fingers to make it even. Make sure it is firm and level. Set this aside while you prepare the filling.
Making the Cream Cheese Filling
Now, let’s make the creamy filling. In a large mixing bowl, beat 16 oz of softened cream cheese with an electric mixer. Mix it until it is smooth and free of lumps. Then, slowly add in 1/2 cup of powdered sugar and 1 teaspoon of pure vanilla extract. Keep mixing until it becomes light and fluffy. In another bowl, whip 1 cup of heavy whipping cream until stiff peaks form. This may take a few minutes. Once it holds its shape, gently fold it into the cream cheese mix. Be careful not to deflate the whipped cream; you want it light and airy. Finally, fold in 8 roughly chopped Oreo cookies for a tasty surprise in every bite.
Final Assembly and Chilling
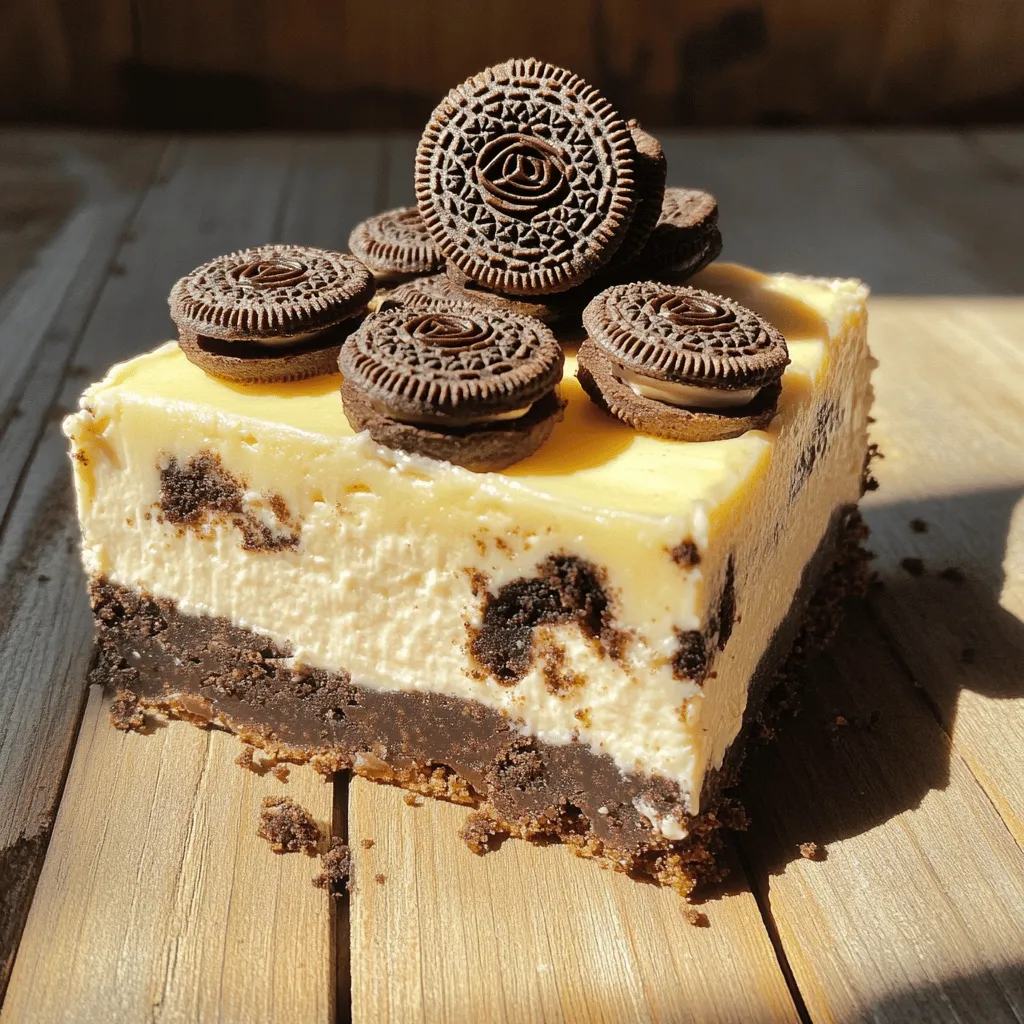
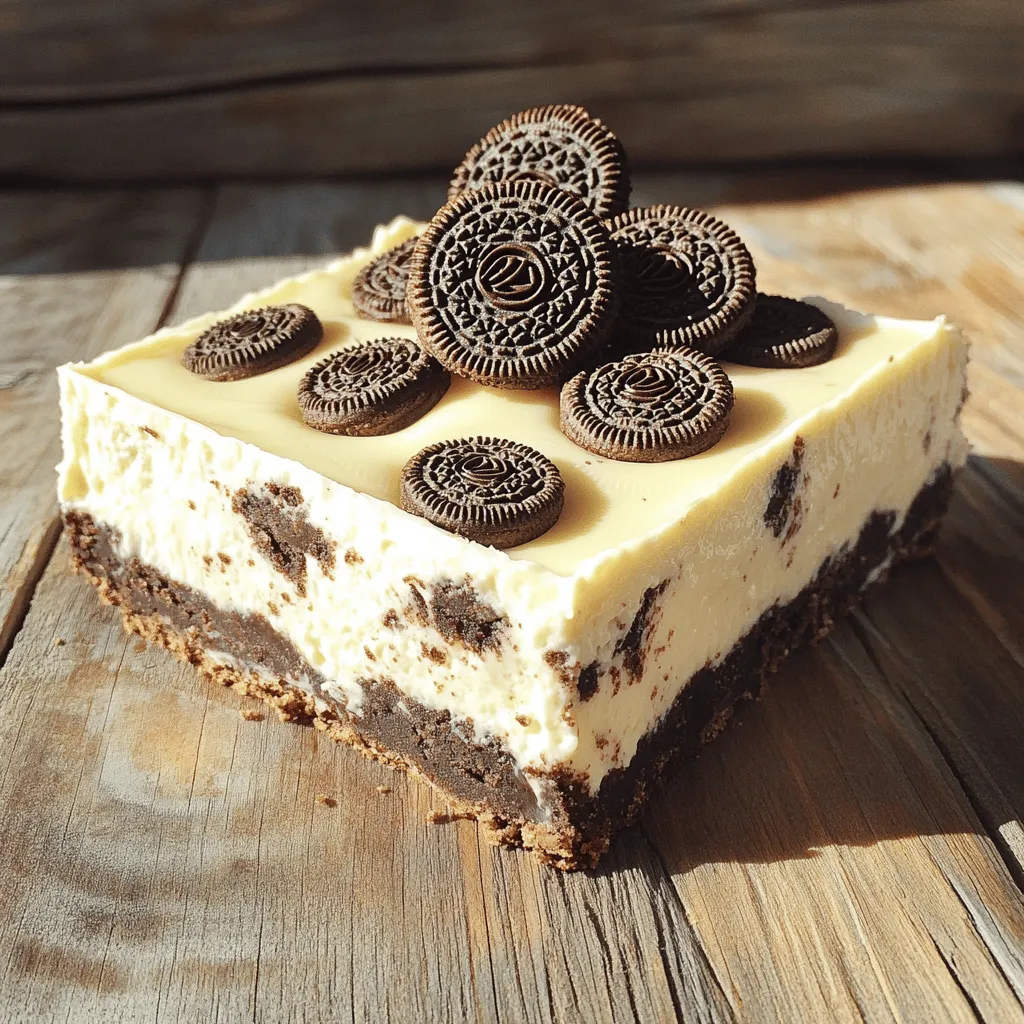
Now, it’s time to assemble. Carefully spread the cream cheese filling over the crust. Use a spatula to smooth the top evenly. Once done, cover the dish with plastic wrap and put it in the fridge. Let it chill for at least 4 hours, or until it is set and firm. After it has chilled, slice it into bars. For a fun touch, sprinkle extra crushed Oreo cookies on top of each slice before serving. Enjoy your delicious no-bake Oreo cheesecake bars!
Tips & Tricks
How to Ensure a Smooth Filling
To make a smooth filling, start with room temperature cream cheese. Cold cream cheese can create lumps. Use an electric mixer to beat it well. Mix until it looks creamy and fluffy. Gradually add powdered sugar and vanilla extract. This keeps the mixture light. When you fold in the whipped cream, go slow. Gently mix so you keep that airy texture.
Best Practices for Whipping Cream
For the best whipped cream, chill your bowl and beaters first. This helps the cream whip faster. Pour the heavy whipping cream into the cold bowl. Beat on medium speed until soft peaks form. Then, increase the speed to high. Stop when you see stiff peaks. This means it holds its shape well. Over-whipping can turn it into butter, so watch closely.
Tips for the Perfect Crust
For a great crust, crush the Oreo cookies finely. Use a food processor for even crumbs. Mix the crushed Oreos with melted butter until it feels like wet sand. Press the mixture firmly into your baking dish. Make sure it’s even and level. This helps the crust hold together when you cut the bars. Let it chill a bit before adding the filling.
Variations
Flavor Variations (e.g., Mint, Peanut Butter)
You can change the flavor of your cheesecake bars easily. For a mint version, add mint extract to the cream cheese mix. Just a teaspoon will do. For a peanut butter twist, mix in 1/2 cup of creamy peanut butter. This gives a rich taste. You can even swirl in some chocolate or caramel sauce for fun. Experiment with flavors to find your favorite!
Healthier Substitutions
If you want a lighter dessert, swap some ingredients. Use low-fat cream cheese instead of regular cream cheese. You can also try Greek yogurt for a tangy kick. Replace the heavy cream with a lighter whipped topping. For the crust, use whole grain cookies for added fiber. These changes can still keep your bars tasty and enjoyable.
Different Toppings and Garnishes
Toppings can make your cheesecake bars pop! Crushed Oreo cookies are classic. You can also use fresh berries like strawberries or raspberries for color. Drizzle chocolate or caramel sauce on top for sweetness. For a crunch, sprinkle some chopped nuts. These easy toppings can turn a simple dessert into a showstopper. Enjoy trying different combinations!
Storage Info
How to Store Leftover Bars
To keep your bars fresh, place them in an airtight container. Use a container that fits the bars snugly to avoid movement. If you cannot find one, cover the dish tightly with plastic wrap. Store them in the fridge for up to five days. The bars stay firm and tasty while chilled.
Freezing Instructions
If you want to keep them longer, freezing is a great option. Cut the bars into portions first. Wrap each piece in plastic wrap, then place them in a freezer-safe bag. Make sure to remove as much air as possible. You can freeze them for up to three months. When you want to eat them, thaw in the fridge overnight.
Shelf Life and Best Practices
These bars have a shelf life of about five days in the fridge and three months in the freezer. To enjoy the best flavor and texture, eat them within this time. Always check for any signs of spoilage, like off smells or changes in texture. For the best experience, let them chill properly before serving.
FAQs
Can I use different types of cookies for the crust?
Yes, you can. While Oreos add great flavor, any cookie works. Try chocolate chip cookies for a sweeter taste or graham crackers for a lighter crunch. Just crush them finely and mix with melted butter. The key is to make a crust that holds together well.
How do I know when the cheesecake is set?
You can tell the cheesecake is set when it feels firm to the touch. After chilling, gently press your finger on the top. If it springs back, it’s ready. You can also check the edges; they should look firm. The center may be slightly soft but will firm up as it chills.
Is it possible to make these bars dairy-free?
Yes, you can make these bars dairy-free! Use dairy-free cream cheese and a plant-based whipping cream. Look for brands that match the taste of regular products. Make sure all cookies are dairy-free as well. This way, everyone can enjoy this treat!
This blog post covered all the key steps to make delicious cheesecake bars. We started with the list of ingredients and discussed their details. I provided tips for a smooth filling and a perfect crust. I also shared flavor variations and how to store leftovers.
These cheesecake bars are easy to make and fun to enjoy. You can adapt the recipe to fit your taste and preferences. Now, you’re ready to impress your family and friends with these tasty treats. Enjoy baking!
