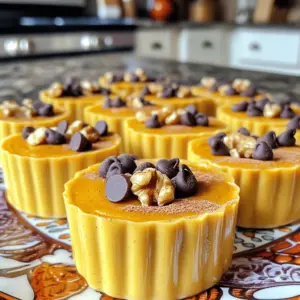
No-Bake Pumpkin Spice Protein Cups
Satisfy your sweet tooth and fuel your day with these No-Bake Pumpkin Spice Protein Cups! Perfect for a quick energy boost, these delicious treats combine pumpkin puree, nut butter, oats, and protein for a healthy snack. Easy to make, no baking required, and they are customizable with chocolate chips or nuts. Ready in just 15 minutes (plus chill time), click through to explore this fun and nutritious recipe today!